Tile contractor Tom Boucher of Integrity Tile, based in Kennebunk, Maine, applies latex-modified Bostik Ditra-Set mortar to an Advantech subfloor to make a mortar bed for adhering Schluter Ditra decoupling underlayment membrane for a custom marble tile floor in a bathroom for a new house under construction next to the ocean south of Portland, Maine.
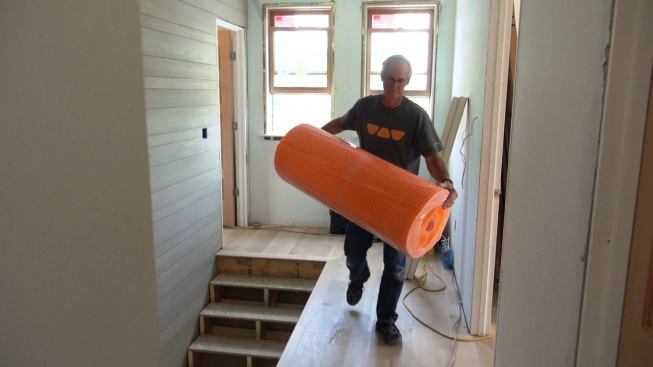
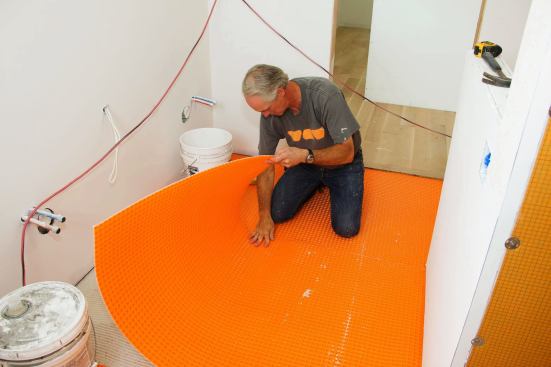
Tile contractor Tom Boucher carries a roll of Schluter Ditra pol…
Tile contractor Tom Boucher carries a roll of Schluter Ditra polyethylene floor underlayment to the work area. Easy to carry and store, the roll has more than enough material for the master bath floor.
Ted Cushman/JLC
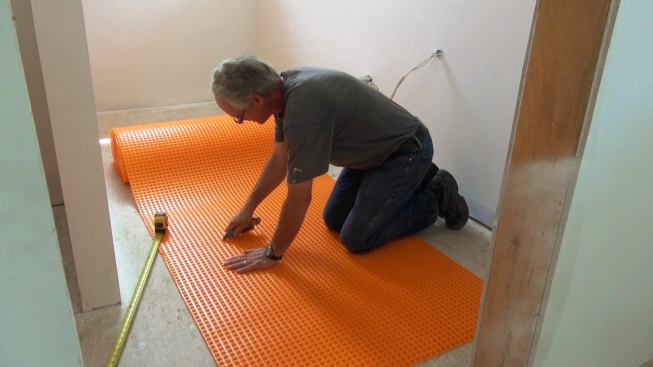
Boucher cuts a piece of Ditra to length with a utility knife.
Ted Cushman/JLC
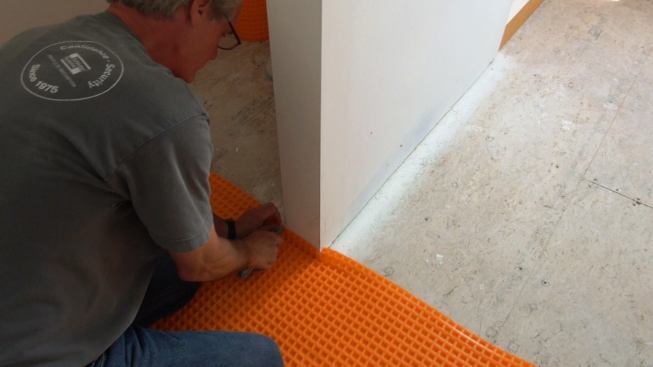
Boucher trims a piece of Ditra to fit around the base of a half-…
Boucher trims a piece of Ditra to fit around the base of a half-wall partition between the toilet and the main bathroom.
Ted Cushman/JLC
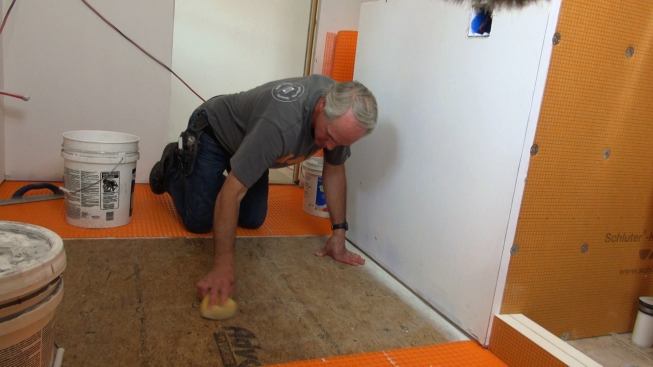
Step one for applying the underlayment is to thoroughly scrub th…
Step one for applying the underlayment is to thoroughly scrub the Advantech subfloor with a heavy-duty sponge. Otherwise, drywall dust and other dirt could interfere with the mortar bond between the Ditra and the subfloor.
Ted Cushman/JLC
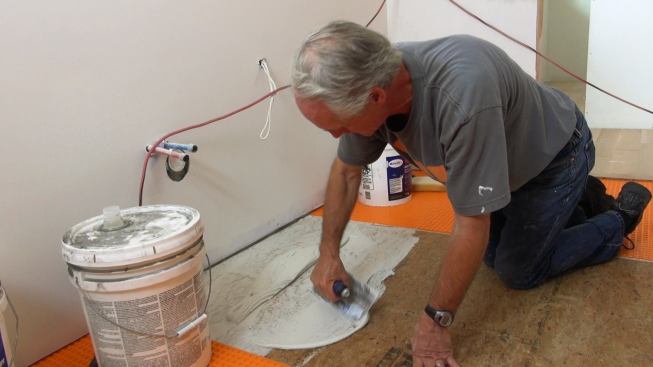
Boucher works a slurry of latex-modified mortar into the Advante…
Boucher works a slurry of latex-modified mortar into the Advantech subfloor, to ensure a good bond between the mortar and the wood structural panel.
Ted Cushman/JLC
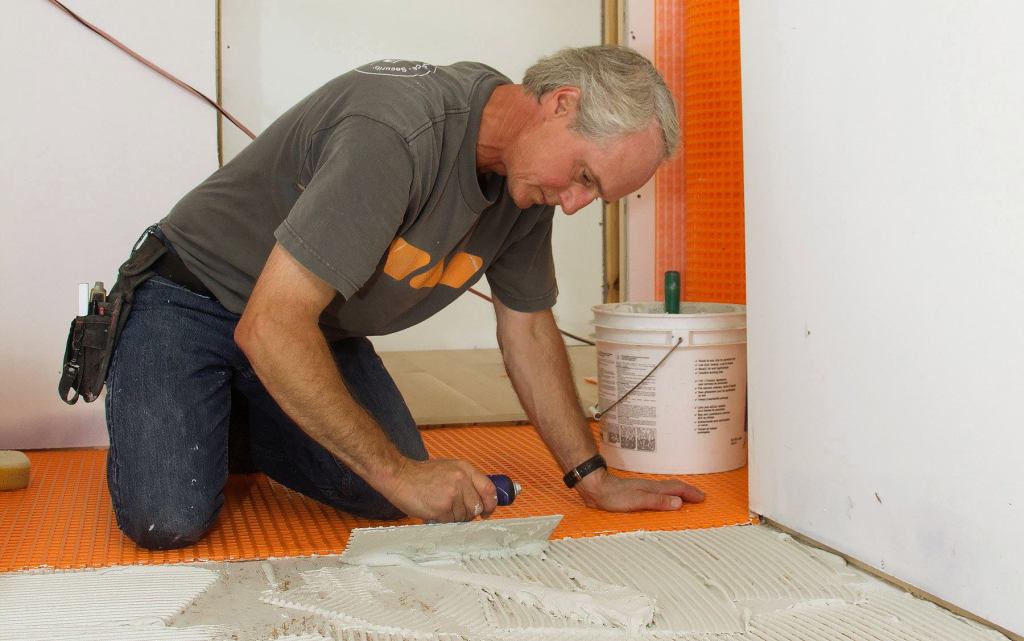
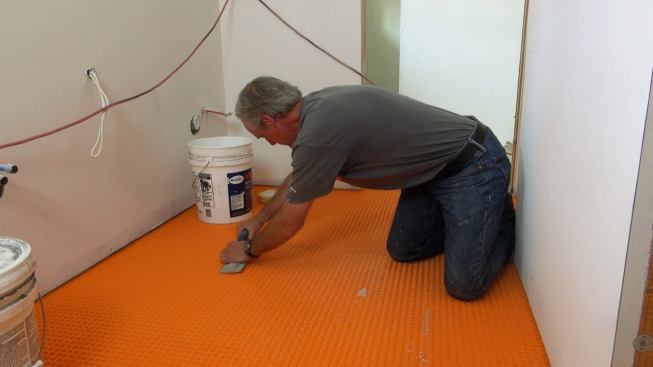
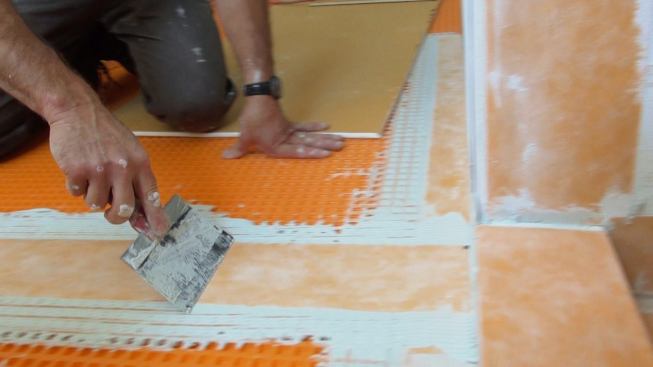
Boucher applies a measured amount of latex-modified mortar to th…
Boucher applies a measured amount of latex-modified mortar to the prepared subfloor using a three-eighths-inch toothed trowel.
Ted Cushman/JLC
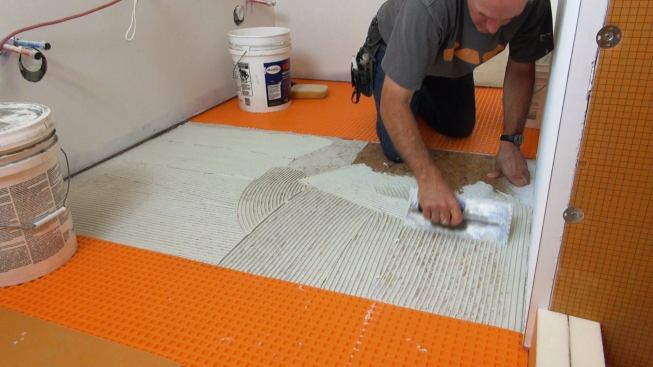
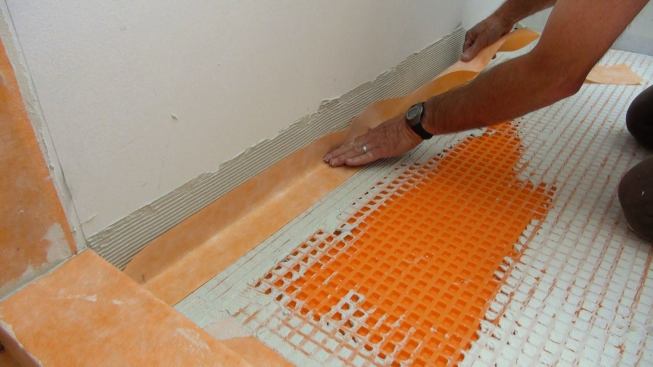
Boucher lays the Ditra decoupling membrane onto the wet mortar. …
Boucher lays the Ditra decoupling membrane onto the wet mortar. The mortar will work its way into the keyed polyethylene sheet, and also lock into the fleece underside of the material for a mechanical bond. In service, the Ditra's pliability and flexibility will prevent normal expansion or contraction of the subflooring from applying excessive stress to the relatively brittle tile and grout.
Ted Cushman/JLC
To ensure a good bond, Boucher presses the Ditra membrane onto t…
To ensure a good bond, Boucher presses the Ditra membrane onto the mortar bed using an 18-inch float.
Ted Cushman/JLC
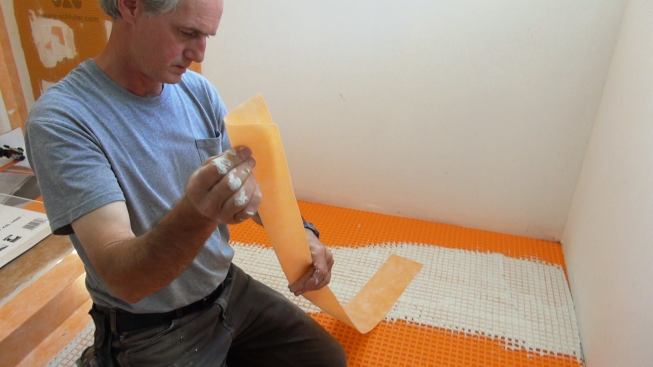
Boucher pre-creases a strip of Kerdi membrane, before mortaring …
Boucher pre-creases a strip of Kerdi membrane, before mortaring the Kerdi into the corner joint where the Ditra underlayment meets the wall.
Ted Cushman/JLC
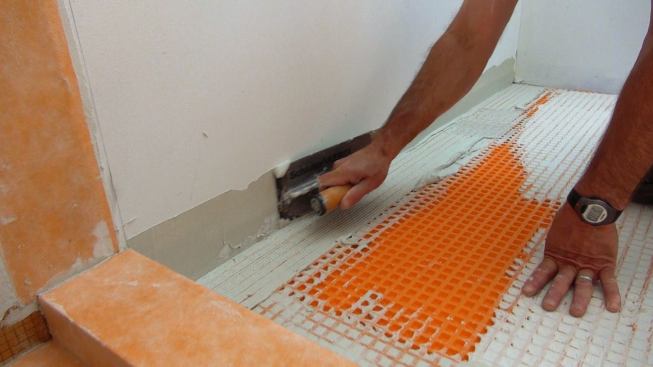
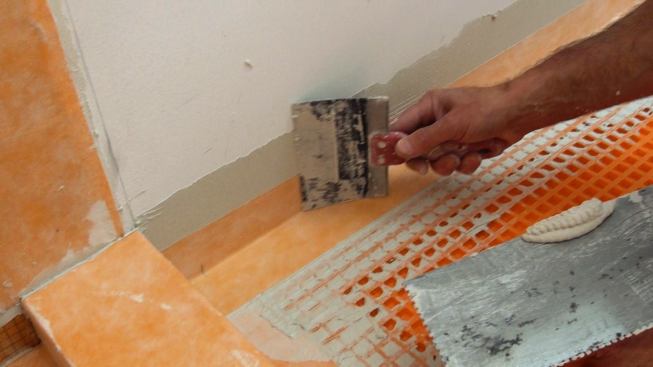
Boucher works mortar into the drywall and into the Ditra membran…
Boucher works mortar into the drywall and into the Ditra membrane at the floor-to-wall intersection.
Ted Cushman/JLC
Boucher applies a measured mortar bed to the drywall using a Ker…
Boucher applies a measured mortar bed to the drywall using a Kerdi trowel with one-eighth-inch notches.
Ted Cushman/JLC
Boucher gently presses the strip of Kerdi membrane into the prep…
Boucher gently presses the strip of Kerdi membrane into the prepared mortar bed at the wall joint.
Ted Cushman/JLC
Boucher works the membrane into the mortar using a five-inch kni…
Boucher works the membrane into the mortar using a five-inch knife. He has filed the corners off the knife so that it won't gouge or tear the membrane.
Ted Cushman/JLC
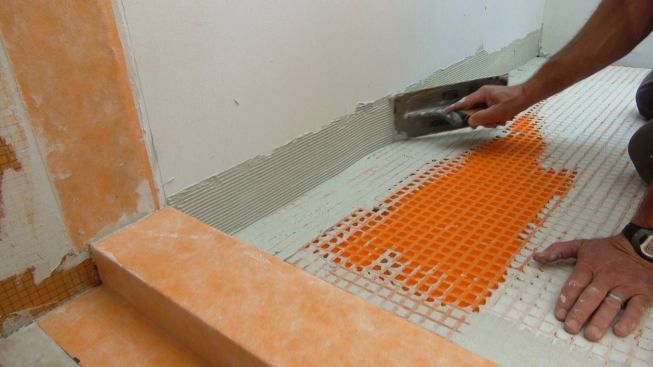
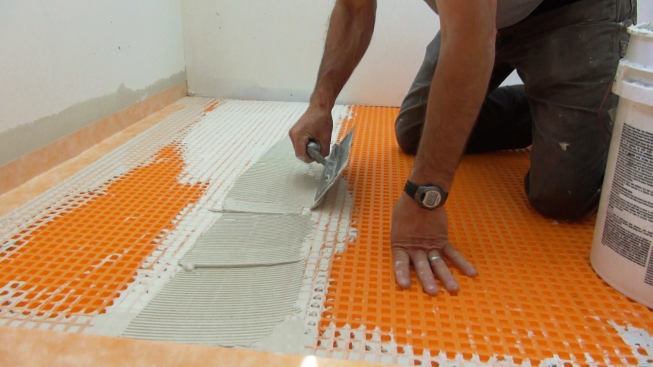
Boucher applies a mortar setting bed at the joint between two sh…
Boucher applies a mortar setting bed at the joint between two sheets of Ditra underlayment. Note: the white mortar already in place at the joint was placed the day before and has hardened overnight. This is a way to use up small quantities of extra mortar so the material won't be wasted, Boucher explains. The fresh mortar will still bond strongly to the previously placed and hardened material.
Ted Cushman/JLC
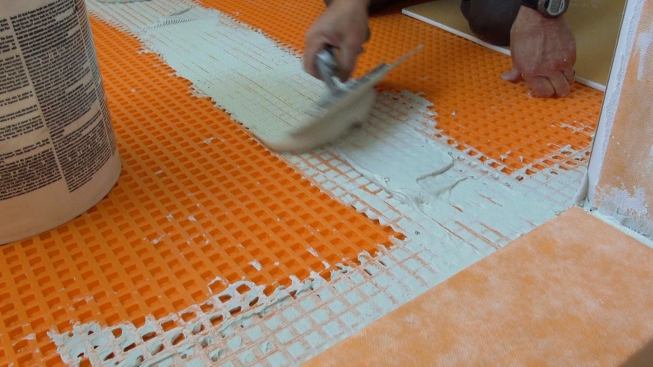
Boucher uses the notched trowel to calibrate the depth of the fr…
Boucher uses the notched trowel to calibrate the depth of the fresh mortar bed at a joint between two pieces of Ditra underlayment.
Ted Cushman/JLC
Boucher presses a strip of Kerdi membrane into the freshly appli…
Boucher presses a strip of Kerdi membrane into the freshly applied mortar.
Ted Cushman/JLC
Boucher presses the Kerdi membrane into the mortar bed with his …
Boucher presses the Kerdi membrane into the mortar bed with his customized drywall knife.
This summer, JLC has been following the progress as tile contractor Tom Boucher and his colleague Bob Vedder prep and tile the floors and showers in two bathrooms for a custom house on the coast of Maine, under construction by architect/builder Caleb Johnson. This week, we take a look at the process of prepping the bathroom floor for marble tile (see slideshow).
“The first time I used this system,” says Boucher, “I went home that night and I couldn’t sleep. I kept thinking, ‘How could it be that easy?’” That was in 2005. In the ten years since, Boucher has done about 20 tile floors a year using the same system — hundreds of floors in total, with only one (minor) callback.
The process is straightforward: Boucher cuts Schluter Ditra underlayment to size and dry-fits it to the floor. Then, he mortars the membrane to the plywood subfloor using latex-modified mortar (“Ditra-Set,” manufactured by Bostik, mixed with Bostik’s 425™ Multi-Purpose Acrylic Latex Admixture instead of water). He seals joints between sheets of the Ditra using unmodified mortar and strips of Schluter Kerdi membrane, and he applies Kerdi at wall corners the same way. When he’s done, Boucher says, “You could fill this bathroom with three inches of water and it wouldn’t leak — except that the water would run out the door.”
“I buy the mortar and the admixture by the pallet,” says Boucher. “I don’t have to keep a lot of stock, because it’s all the same stuff.” He mixes the powder with the latex admixture when he’s applying Ditra membrane to plywood, and he mixes it with straight water when he’s sealing joints with Kerdi membrane, or setting tile onto Kerdi or Ditra substrates. Used over plywood, the latex admixture helps the mortar bond to the wood, and the wood soaks up moisture and gives the latex-modified mortar a way to dry. But if he were to use latex-modified mortar between two vapor-tight materials — such as between Kerdi membrane and Kerdi-Board, or between tile and Ditra — “it would take forever to dry,” Boucher explains. Unmodified mortar, by contrast, sets up and cures hard even when there’s no way for water to evaporate out of it.
For this step in the job, Boucher is applying Ditra membrane to the Advantech subfloor, mixing the mortar with latex admixture. Schluter’s website describes Ditra this way: “Schluter-DITRA is a polyethylene membrane with a grid structure of square cavities, each cut back in a dovetail configuration, and an anchoring fleece laminated to its underside. Schluter-DITRA is bonded to the substrate using thin-set mortar. The anchoring fleece on the underside of Schluter-DITRA is fully engaged in the mortar to provide a mechanical bond to the substrate. Tile is installed over Schluter-DITRA using the thin-bed method in such a way that the mortar becomes mechanically anchored in the square, cutback cavities of the Schluter-DITRA matting.”
The Ditra performs four key functions in the assembly, Schluter’s literature explains: uncoupling the mortar bed and tile from the wood or concrete subfloor; waterproofing the floor to protect the underlying structure from any spills in the bathroom; vapor management for moisture in the substrate (moisture in the framing or subflooring can diffuse through the voids on the underside of the membrane); and support and load distribution for the tile and mortar floor.
Compared to his old methods, says Boucher, the Schluter system is quicker, simpler, and less fatiguing. “Before this, I would have used cement board on this floor,” he says. “It’s much harder to cut, much heavier to carry, and then you have to screw it down.” Laying Ditra on the bathroom floor shown in this story took Boucher less than an hour. The old way, he said, might have taken him half a day. The materials for the Schluter system do cost more, he says, but the labor savings makes that worth it.