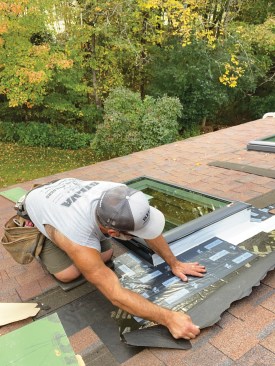
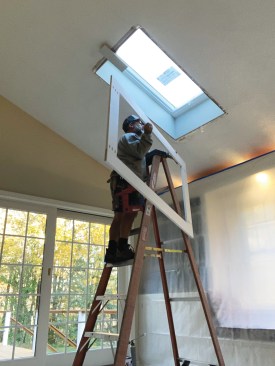
Timing and prepping materials in advance are important when you replace a skylight; you don't want a big hole in the roof with rain in the forecast. It took about three hours to remove the old skylight and install the new one so that it was weatherproof. Lifting a skylight up onto a roof is a two-person job. In this case, the homeowner helped.
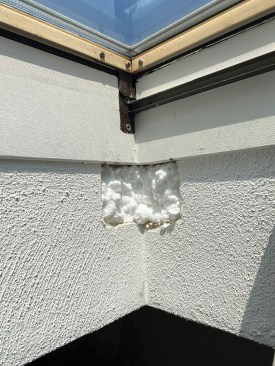
When a homeowner reports a leaky skylight, the problem could be the skylight itself, the flashing around the skylight, or simply excessive condensation on the glass. In the case of replacing the two 25+ year-old roof windows described in this article, the main problem was that the insulating glass had failed, though some water staining was present. Using that project as an example, I describe the belt-and-suspenders approach I used to install a pair of new Velux VS M06 manual “Fresh Air” skylights to replace the failing units. As you click through the slideshows below, you’ll see that I pay a lot of attention to flashing the new unit to the roof deck, because that is where most leaks occur, regardless of why the existing unit failed.
Removing the Existing Skylights
1
of 6
Emanuel Silva
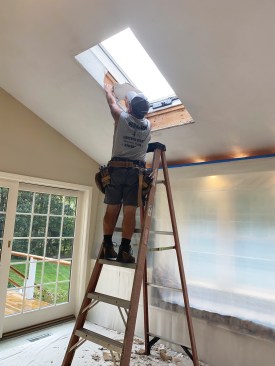
I cut inspection holes in the drywall in the existing skylight s…
I cut inspection holes in the drywall in the existing skylight shafts so I could accurately measure the rough openings for new skylights. Then I temporarily sealed the holes with spray foam.
Emanuel Silva
Before removing the drywall around the rough openings, I sealed …
Before removing the drywall around the rough openings, I sealed off the wall and floor with plastic to catch the dust and debris.
Emanuel Silva
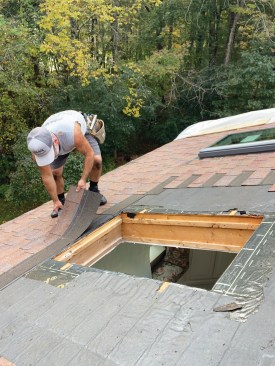
I carefully removed the existing roof shingles around the skylig…
I carefully removed the existing roof shingles around the skylights. I planned to reinstall them later.
Emanuel Silva
The roof had a relatively shallow, 5/12 pitch, so traction was g…
The roof had a relatively shallow, 5/12 pitch, so traction was good.
Emanuel Silva
I had set up staging below the eaves for fall protection, though…
I had set up staging below the eaves for fall protection, though it is not visible in the photo.
Emanuel Silva
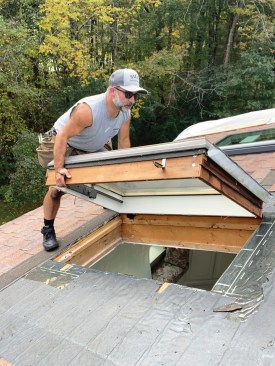
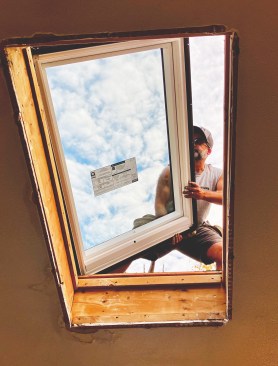
Because the new units were slightly shorter than the existing on…
Because the new units were slightly shorter than the existing ones, I installed 2×10 fillers at the tops of the rough openings.
Prepping the Roof and Installing the Skylight
1
of 6
Emanuel Silva
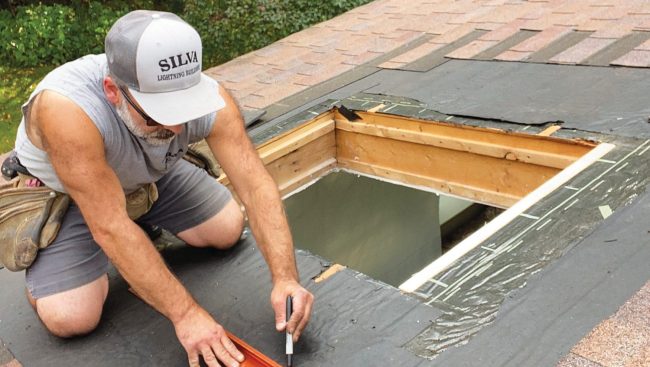
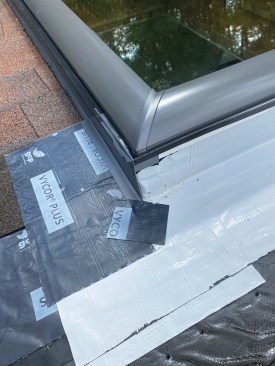
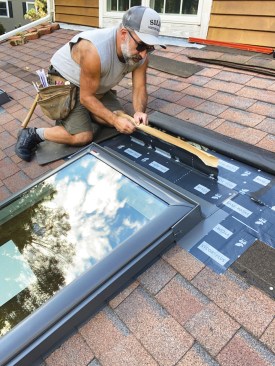
I drew lines with a Sharpie on the underlayment to help me place…
I drew lines with a Sharpie on the underlayment to help me place the flashing.
Emanuel Silva
I sealed the opening in the roof deck to the roofing underlaymen…
I sealed the opening in the roof deck to the roofing underlayment with 12-inch-wide strips of Vycor Plus self-adhering flashing membrane.
Emanuel Silva
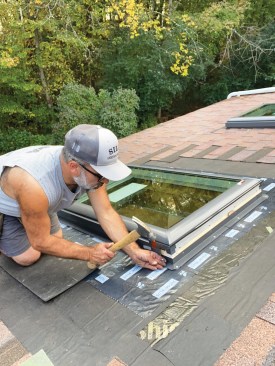
Timing and prepping materials in advance are important when you …
Timing and prepping materials in advance are important when you replace a skylight; you don't want a big hole in the roof with rain in the forecast. It took about three hours to remove the old skylight and install the new one so that it was weatherproof. Lifting a skylight up onto a roof is a two-person job. In this case, the homeowner helped.
Emanuel Silva
The Roto windows had been fastened to the roof with a few screws…
The Roto windows had been fastened to the roof with a few screws driven through angle brackets; the new, Velux skylights are fastened to the roof sheathing with 1 1/4‑inch roofing nails (included with the installation kit) driven through pre-punched holes in the units’ aluminum mounting flanges.
Emanuel Silva
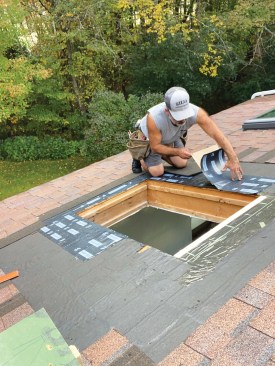
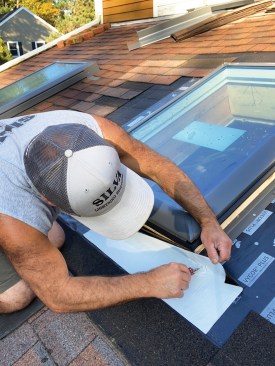
After the new skylight was in place, I laid out the position of …
After the new skylight was in place, I laid out the position of the flexible flashing (supplied as part of the Velux installation kit) used to seal the skylight frame to the flashing-covered roof deck, to ensure that it wouldn’t interfere with the manufacturer’s metal flashing.
Emanuel Silva
The roll of flexible flashing was backed with release paper, so …
The roll of flexible flashing was backed with release paper, so I cut the flashing into 2-foot-long strips to make the pieces easier to handle. After installing the bottom piece of flashing, I made diagonal cuts at the corners with a sharp utility knife so that the flashing could wrap up the sides of the curb.
Installing Flashing
1
of 6
Emanuel Silva
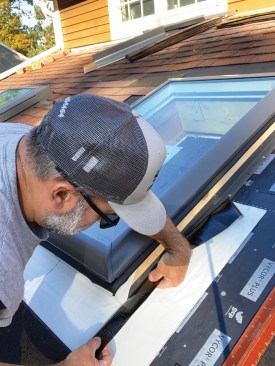
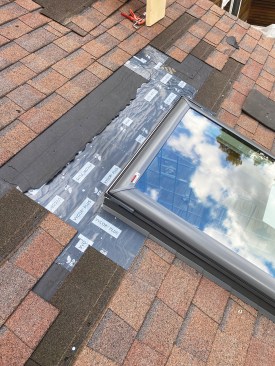
I carefully followed the layout lines that I marked on the roof-…
I carefully followed the layout lines that I marked on the roof-deck flashing as I installed the white flexible flashing, folding it at a 90-degree angle so that it would adhere tightly both to the side of the skylight and to the roof-deck flashing.
Emanuel Silva
Another diagonal cut allowed the flashing to wrap around the cor…
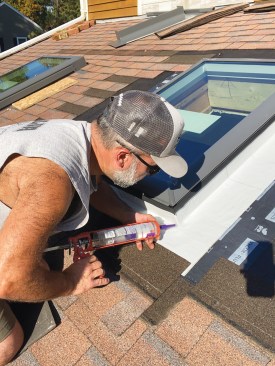
Another diagonal cut allowed the flashing to wrap around the corner. I used a similar detail at the top corners of the unit. After the remaining pieces of flashing were installed up the sides and over the top of the unit with a 6-inch overlap, I filled the small gaps at each of the four corners with clear, flashing-compatible Geocel sealant.
Emanuel Silva
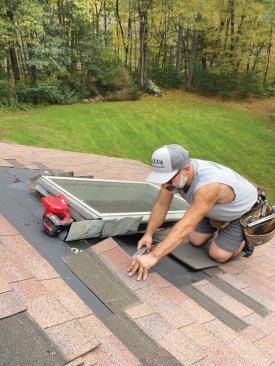
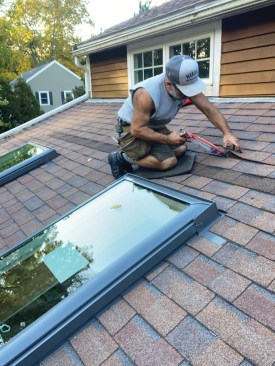
When I reinstalled the lowest shingle course, I used the shingle…
When I reinstalled the lowest shingle course, I used the shingles that I had carefully removed previously, because they hadn’t been cut or damaged.
Emanuel Silva
Then I installed the bottom section of the manufacturer’s meta…
Then I installed the bottom section of the manufacturer’s metal curb-flashing kit, which is designed to slip underneath a rubber flange that wraps around the curb of the unit.
Emanuel Silva
A couple of roofing nails, located according to the manufacturer…
A couple of roofing nails, located according to the manufacturer’s installation instructions so that they will be covered by step flashing, hold the first section of curb flashing in place. When reinstalling shingles, I first fill any holes in the roofing underlayment with sealant and avoid driving nails through the old holes in the shingles, filling them with sealant instead.
Emanuel Silva
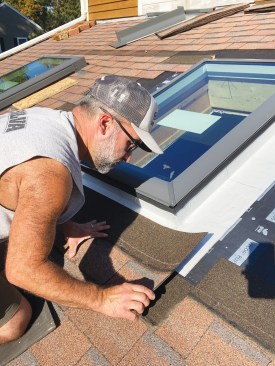
Metal step flashing that’s supplied with the skylight manufact…
Metal step flashing that’s supplied with the skylight manufacturer’s installation kit is installed along with each shingle course. To provide for good drainage, I cut the shingles short to leave a 1/2-inch gap between them and the step flashing around the skylight curb. At the top corners, I seal the last step flashings to the shingles beneath with Vycor.
Installing the Metal Flashing Kit
1
of 6
Emanuel Silva
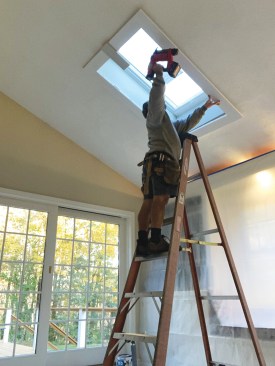
Before installing the metal head flashing, I pulled back the roo…
Before installing the metal head flashing, I pulled back the roofing underlayment so that I could first slide a length of 12-inch-wide Vycor underneath and lap it shingle-style over the white flexible flashing that seals the skylight to the roof deck.
Emanuel Silva
This extra layer of self-adhered flashing offers additional prot…
This extra layer of self-adhered flashing offers additional protection against snow that might pile up against the curb or water that might be blown underneath the shingles by the wind.
Emanuel Silva
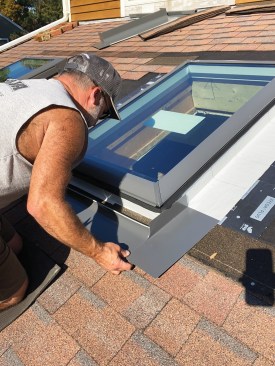
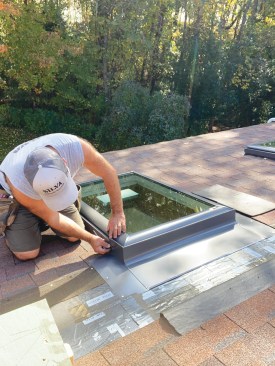
A U-shaped metal counterflashing covered the bottom and sides of…
A U-shaped metal counterflashing covered the bottom and sides of the curb.
Emanuel Silva
Next, the metal head flashing was fastened to the lower piece wi…
Next, the metal head flashing was fastened to the lower piece with clips. A couple of roofing nails on either side of the flashing fastened it to the roof deck and would later be covered with shingles.
Next, I applied another layer of Vycor to seal the metal head fl…
Next, I applied another layer of Vycor to seal the metal head flashing to the roof deck, again making sure that the Vycor was overlapped by the roofing underlayment above.
Emanuel Silva
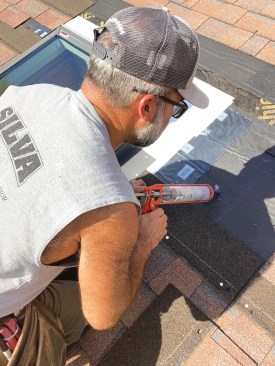
Whenever I reinstall shingles, I always apply dabs of sealant to…
Whenever I reinstall shingles, I always apply dabs of sealant to the tabs to ensure that the overlapping shingles will adhere to the ones underneath. Note the foam rubber pad that I’m kneeling on in many of the photos; years ago, I cut a number of pads from 24-by-24‑inch interlocking floor tiles and have used them on an almost daily basis ever since to protect my knees from stones, splinters, nail heads, and—in this case—the coarse granules of the asphalt shingles.
Making an MDO Skylight Shaft
1
of 6
Emanuel Silva
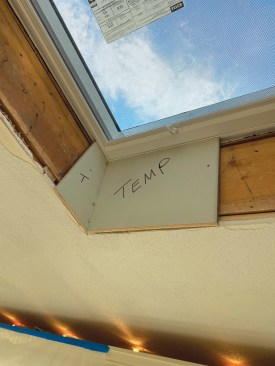
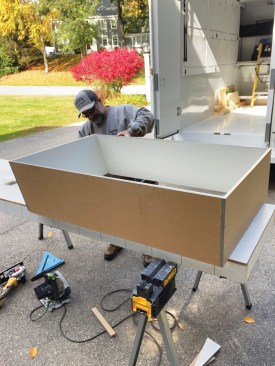
I prefer to use 1/2-inch medium density overlay (or MDO) panels …
I prefer to use 1/2-inch medium density overlay (or MDO) panels instead of drywall to cover the rough framing of a skylight shaft, partly because MDO is tougher and more moisture-resistant, but mainly because this allows me to prefabricate the shaft and install it as a single unit. I start by making a trim template to find the angle and check the fit of the MDO within the slots of the skylight jambs.
Emanuel Silva
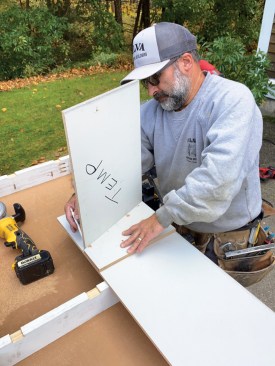
Then I rip the MDO to width with a track saw, using the template…
Then I rip the MDO to width with a track saw, using the template to mark the angles, which I also cut with a track saw.
Emanuel Silva
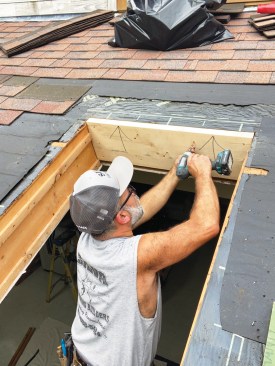
I nail together the sides of the shaft with 18-gauge brads, then…
I nail together the sides of the shaft with 18-gauge brads, then reinforce the joints with 1 1/4-inch trim screws.
Emanuel Silva
Centering the trim screws in the middle of the 1/2-inch-thick pa…
Centering the trim screws in the middle of the 1/2-inch-thick panels without blowing out one of the sides is tricky, so I carefully lay out and drill pilot holes for the screws. Before lifting the shaft assembly for this project into position and fastening it to the framing with a few trim screws, I took measurements for the trim kit that I would use to finish the installation.
Emanuel Silva
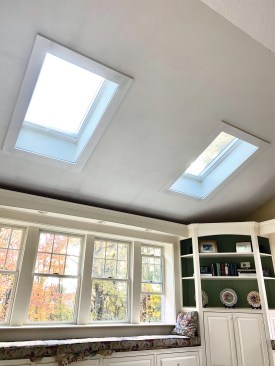
The stiles and rails were made from primed 1×5 WindsorOne trim a…
The stiles and rails were made from primed 1×5 WindsorOne trim and joined together with pocket screws and glue. I sealed the gaps around each shaft to the opening with spray foam insulation, then fastened a simple T-jig above the window to act as a third hand, allowing for enough room between the leg of the T-jig and the ceiling drywall for the trim kit to slide into position.
Emanuel Silva
Once I was satisfied that the reveals were even, I nailed the tr…
Once I was satisfied that the reveals were even, I nailed the trim kit to the ceiling framing with 2-inch-long 18-gauge nails.
Emanuel Silva, a contributing editor to JLC, owns Silva Lightning Builders in North Andover, Mass. He can be reached at silvalightningbuilders@gmail.com.