
Tom Dugan
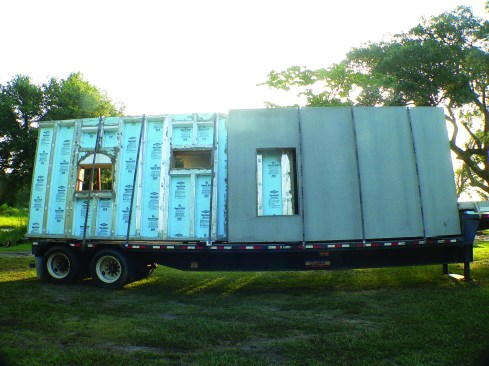
Superior Walls concrete panels arrive on site with door and wind…
I am a builder in coastal North Carolina. I started my company more than 20 years ago, doing renovations, additions, and remodeling projects. Over the years, I’ve had to tear out and replace lots of work in existing stick-built homes because of issues involving the various layers and pieces needed to “tighten up” an enclosure against air and water intrusion.
I started to learn about precast concrete in 2010, when a client asked me to design and build his retirement home on a small, steep slope overlooking a beautiful creek near Wilmington, N.C. The house was to have two stories of living space, above a concrete basement.
After considering various basement options, including cast-in-place concrete and filled masonry block, we looked at the precast insulated concrete panel system from Superior Walls of America. When I met with Charles Hunter, the Superior Walls rep for our area, he proposed building all three stories of the building with Superior Walls. My client (an industrial builder himself) liked the idea of a concrete home because of the ever-present threat of hurricanes in our area. He opted to follow this path, and the resulting home, with its impact-resistant windows and standing-seam metal roofing, was the first home in our state to earn a Gold rating from the Insurance Institute for Business and Home Safety (IBHS) for hurricane-resistant construction.
The more I learned, the more advantages I saw. Reducing the size and number of the joints and cracks in the exterior walls simplified the building process and resulted in much stronger, more airtight, and more watertight homes. And as a bonus, the resulting houses turned out to be extremely energy-efficient. The example shown in this story is my own personal home and my third Superior Walls project, and I have two more in the planning stages. I continue to be more than satisfied with the system.
PLANNING AND COORDINATION
You need to plan carefully before you place an order with Superior Walls. Your plans have to be accurate, because when those trucks roll in with your concrete panels on board the openings for windows and doors must be correct—you won’t be able to easily make changes on the fly by simply ripping out some studs and moving them around during construction. A Superior Walls rep sits down with me to go over every detail of the plans. He helps me to not overlook important details, such as widths of openings, heights of door thresholds, and columns in the walls to support floor beams.
Building multistory homes also requires attention to ceiling heights and depths of the floors, because these combine with roof pitch to determine the total building height. Most jurisdictions around here have height limitations that can affect the design (a maximum height to the roof ridge of 35 feet is typical). With 9-foot ceilings being so popular these days, that can create a challenge.
Superior Walls panels come in standard heights of 4, 8, 9, 10, and 12 feet. Custom heights are a special order at an added cost (I have never needed to order a custom-height wall panel). Floor systems, as I’ll explain later, sit on precast support shelves inboard of the continuous panel skins.
FOOTINGS AND FOUNDATION
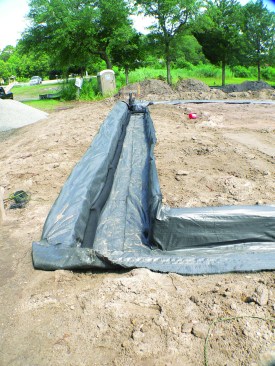
Superior Walls delivers and places foundation and upper-story walls as a turnkey operation. But the builder is responsible for site work and for providing the footing. In most cases, we use a gravel footing: a trench lined with drainable geotextile filter fabric, filled with crushed stone, and roughly leveled, with a perforated perimeter drainage pipe in a filter sock. If we build in a coastal V zone (“velocity zone”), where a hurricane storm surge might scour the soil and undermine the footing, we use deep-driven pilings and a grade beam foundation. But this house was only in the A zone, so a gravel footing was fine.
If I’m building in an area that is known to have soils with a bearing capacity greater than 2,500 pounds per square foot (psf), I can size my stone footing to a standard dimension from the code. But for this house, we were building near a river on silty sand with bearing strength of about 1,500 psf, so I had an engineer test the soil and specify the footing size.
The concrete base of a Superior Walls panel is 10 inches wide. With a gravel footing, the load-bearing capacity of the stone spreads outward and downward from the wall base at a 60-degree angle. The engineer specifies a footing depth that is sufficient to reach adequate bearing width for the soil conditions on the site. As the builder, I place the gravel according to the engineer’s drawing and roughly grade it.
We use 1/2-inch crushed stone, called “78 stone,” for our footings. Occasionally I’ve used 3/4-inch “58 stone,” but it’s harder to spread and compact, and it doesn’t add any significant strength.
When the Superior Walls crew arrive, they compact and level the stone bed to their satisfaction using a laser, grade stakes, and an aluminum straightedge.
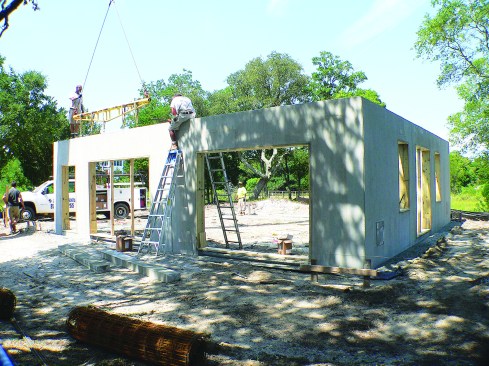
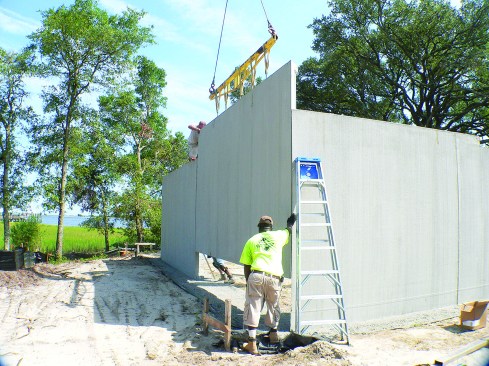
SETTING WALLS
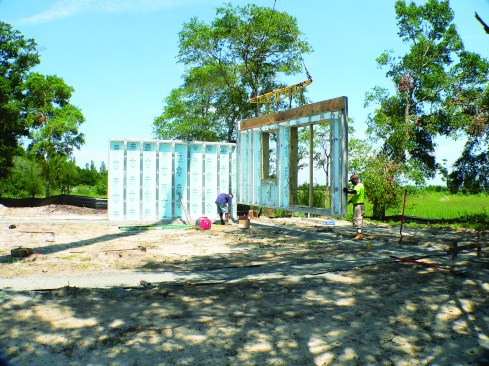
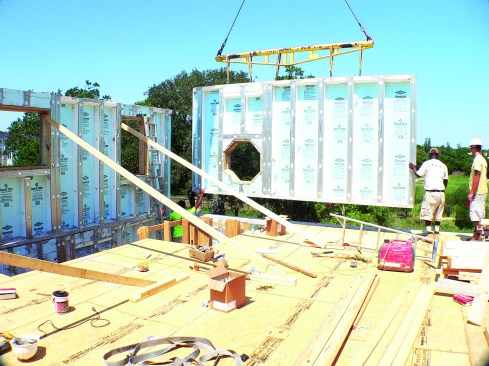
When they’re happy with the footings, the Superior Walls crew start to lift panels off the trailer with the crane and swing them into place. I provide batter boards and strings to guide the placement. I’m always on site for the set, and it’s impressive to see the crew swing those 8,000-pound panels down and just kiss that string with so much precision you’d think they were doing surgery.
They start by establishing one corner and making sure it’s perfectly plumb. That first corner pretty much determines the rest of the panel positions.
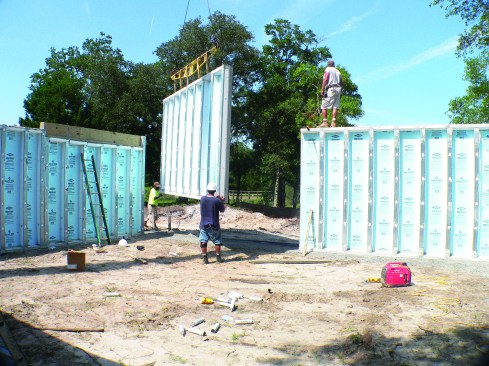
The joints between the panels are sealed with an industrial-grade urethane-based sealant. At wall corners, the panels are bolted together with through-bolts. At in-line connections, the panels connect with a preformed lap joint, which is fastened using a bolt and a steel fitting.
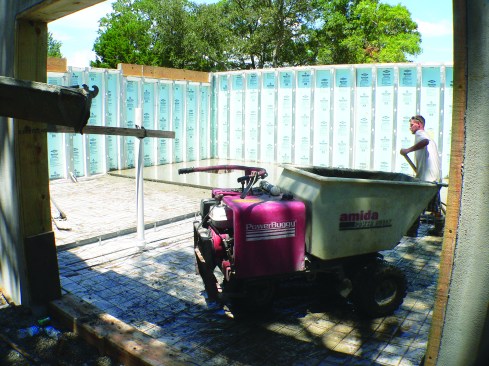
Setting the walls for one story typically takes about half a day. The next step is to finish prepping the ground inside the wall system for the poured slab. This slab is a key component: The concrete flows inside the wall cavities and locks the whole assembly together. All of the usual components—including the ground vapor barrier, steel reinforcement for the slab, interior footings, plumbing, and electrical—are required, just as with any other slab on grade.
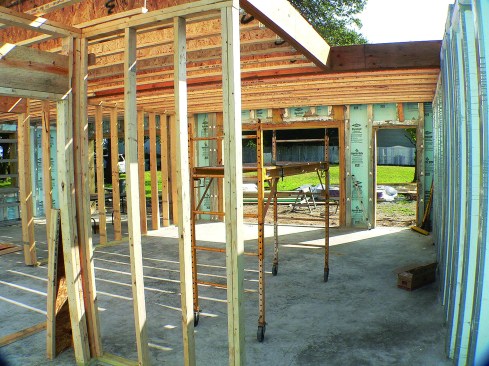
Once the slab is poured, framers can then construct any load-bearing interior walls and columns, and frame the first-floor platform within the Superior Walls perimeter. This should take only a day or two. Meanwhile, the next level of walls that have been cast at the Superior Walls plant is en route to the site.
Upper-story walls require less preparation, since there isn’t any groundwork involved. Three to four hours on site with the crane, and the Superior Walls crew is gone again. My framers are immediately back at work building the next level of interior walls, and building another floor frame or a roof.
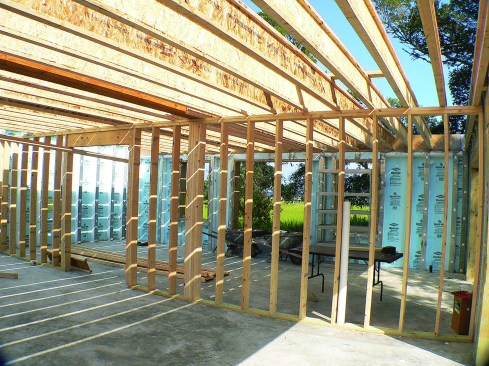
FLOOR FRAMING
In traditional stick framing, the floor platform rests completely atop the wall and flush with the outside. This creates a lot of joints that you need to air-seal, connect for uplift, protect from the weather, and so on. By contrast, Superior Walls panels have a 3 1/2-inch-deep “rim ledge” at the inside top of the wall, completely within the wall’s exterior skin, wherever the floor system needs to bear at the exterior wall. A 2×4 on the flat is cast into that pocket as a nailer and bearing shelf. Wall panels for higher stories rest directly on the concrete top of the panel below, with only one joint to seal and with continuous bearing from the base to the top of the structure.
The height of the floor support pocket can be specified as needed to accommodate the chosen floor framing system, whether that’s dimension lumber, trusses, or wood I-joists. (I prefer to use 12-inch wood I-joists whenever possible, as I did in this floor frame.)
WINDOWS AND PENETRATIONS
Superior Walls panels are delivered with the window openings built in. Each window opening is wrapped with treated 2×10 southern yellow pine (SYP), which is attached to the concrete panel with 20d galvanized spikes that get cast right into the panel when it is made in the factory.
Superior Walls are a great product, but people make mistakes. If a window opening should happen to be 1/2-inch too small, and I’ve already bought the window, I’m in trouble. These openings can be modified in the field, but that involves considerable time and expense. So I don’t order any windows until my walls are on site. Then I measure the openings, and I custom-order the windows from Viwinco (viwinco.com) in Morgantown, Pa. This company is able to deliver a custom window with impact glazing at a competitive price, with just a 10-day lead time.
Other openings can also be preformed at the factory. This house, for example, needed flood vents in the first-story garage level (my base flood elevation at the site was 6 feet above the basement floor). The openings for those vents were cast into the wall at the factory using Styrofoam. On site, we cut the foam out with a recip saw and installed the vents.
But if you need a hole (say, for a dryer vent) and there isn’t a preformed opening in the wall, you can knock a hole in the wall pretty easily with a diamond saw and a hammer drill. In this house, for example, there’s a freestanding gas fireplace in a third-floor room, vented through the wall. Between the concrete studs, the skin of the panel is just 1 3/4 inches thick. For that vent, the fireplace contractor just took a hammer drill, scored all around the opening that was needed, knocked the concrete out, and sealed a vent flange in.
ROOF CONNECTIONS
One of the key elements in building for hurricanes (and tornadoes) is providing a vertical load path to resist wind uplift. The building industry has only recently begun to understand and accept this requirement. Simple things like roof pitches and eave overhangs can have a tremendous effect on the amount of uplift that can result when wind speeds reach 90 mph and more. My engineers have told me to plan on at least 45 to 55 psf of uplift from the roof deck in the case of a strong Category 3 hurricane with winds greater than 130 mph. That is a serious load, considering that an inland roof without heavy snow loads may only be designed for a gravity load of 10 or 20 psf. I have chosen to engineer all of my homes for at least 150-mph winds, which means paying close attention to the connection between the walls and the roof.
To ensure the connection of the roof assembly onto the Superior Walls panel, which is part of the vertical uplift load path, we use double 2×10 SYP top plates, through-bolted at 2 feet on-center with 1/2-inch galvanized bolts onto the top of the concrete wall panels. Each bolt connection is rated at 1,200 pounds. The trusses or rafters are then attached to this double top plate using Simpson H10 hangers (or equivalent). These are rated at 1,340 pounds each when nailed onto SYP. This gives me a roof attachment that should easily meet an engineer’s requirements for 150-mph winds with an 8/12 roof pitch.
It’s important to keep in mind that lower-pitched roofs have greater uplift than steeper roofs. Studies have shown that a 3/12 pitch creates the greatest uplift of all pitches. Conversely, pitches steeper than 8/12 have greater downward forces and less uplift. If local height restrictions force you to use a lower-pitched roof, you may need to increase the capacity of the roof-to-wall connection.
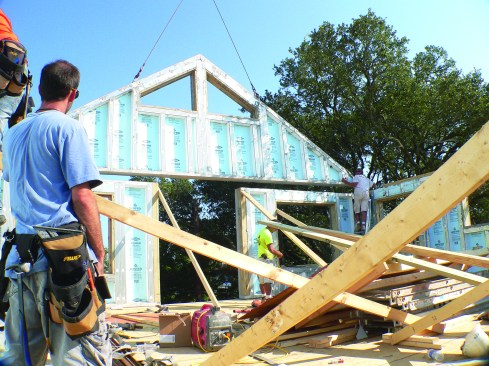
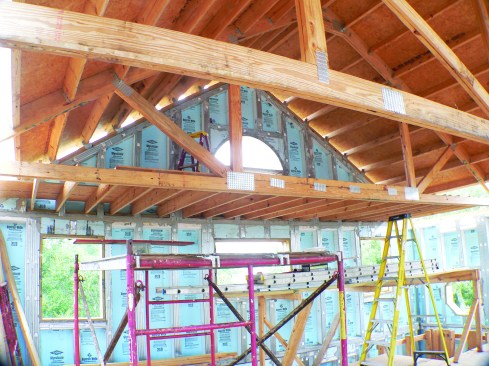
For this project, the Superior Walls crew set my gable end panels on the same day as my upper-story wall panels. My framers then framed the roof using a system of girder trusses and purlins.
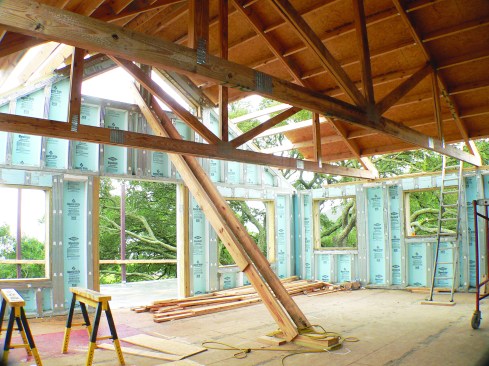
I could have built the roof with a supported ridge and long rafters, but I probably would have needed to use 2×12 rafters because of the span. Instead, I made girder trusses out of 2×10 lumber and then ladder-framed between the trusses using 2×8 purlins. This allowed me to frame with less-expensive lumber, and it left me with 2 inches exposed on my girder trusses that I could wrap in finish trim.
This approach greatly simplified the framing. All we did was put hangers on the faces of the girder trusses, gang-cut the 2x8s, and drop them in.
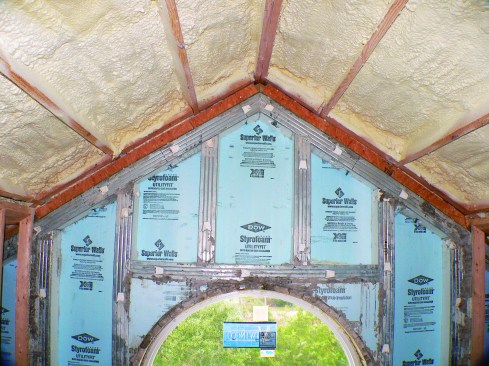
I sheathed the roof with 5/8-inch plywood, installed standing-seam metal roofing, and insulated the underside of the sheathing with 3 inches of spray-applied closed-cell polyurethane, which helps glue the roof deck down to the structure at the same time as it makes the roof-to-wall joint airtight.
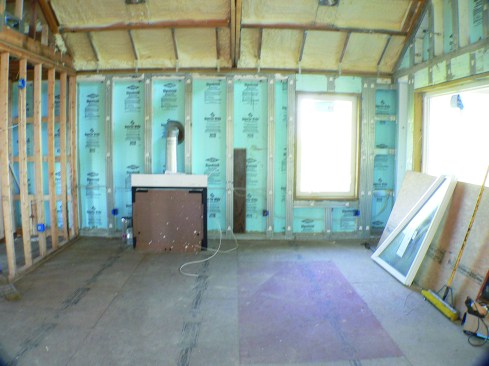
ENERGY AND HVAC
If I have three dollars to spend on energy efficiency, I like to spend a dollar on convection, a dollar on conduction, and a dollar on radiation. The airtight, continuously insulated concrete wall panels minimize convection and conduction. My radiation dollar, I spend on reflective metal roofing.
As I like to tell people, my homes are “small, tall, and tight.” This creates an HVAC challenge: My houses need 30% to 50% less cooling than a conventional home. And because they’re tall with small footprints, each story has a relatively small volume to condition. It’s hard to meet those needs with conventional equipment, because the smallest air-conditioning units are too powerful for any one floor, and ductwork required for a multi-zone air handler serving all the stories takes up too much valuable space.
My solution for the home shown here was to install a Samsung minisplit heat pump with a single 3-ton outdoor unit, and three indoor air handlers that run off that single outdoor unit. The middle floor, where the bedrooms are, has a 1-ton indoor head, and the upper floor (which, because of the cathedral ceiling, is really a floor and a half) has a 1.5-ton indoor head. In addition, the glassed-in porch at the rear of the house has a 9,000-Btu wall unit for occasional use.