Walls facing the ocean take a year-round beating. Continual maintenance and periodic replacements are routine—and often, those everyday jobs also offer the opportunity for a timely upgrade. It’s bread-and-butter work for Mark Pollard and his crew from Thompson Johnson Woodworks, on Peaks Island, Maine. This spring, Pollard and his TJW team stripped out and replaced some aging and outdated windows on a curved house wall, then took the opportunity to upgrade the existing clapboard siding with an advanced rainscreen system, complete with a new, vapor-open Henry Blueskin weather-resistive barrier, bulletproof window-opening prep, and custom-bent zinc flashing. JLC visited the island to follow the action.
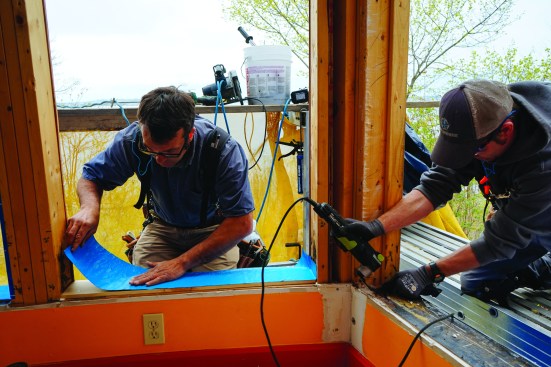
To protect the wall from the weather as they stripped and replaced the existing materials, Pollard and carpenter Tyler Strout made wise use of the Blueskin’s attributes by applying the Blueskin immediately after stripping off the old siding, and then lapping the new membrane temporarily over the existing window flanges. Later in the week, they were able to slit the Blueskin around the old window edges and pull the units out one by one for replacement, without leaving the whole wall open to the weather, even briefly. (One lesson learned, Pollard noted: Existing Ice and Water Shield on the walls comes off more easily if you use an oscillating multi-tool.)
The final phase was to flash the new window head casings with custom-bent zinc flashing (easy to shape to the curve), apply MortairVent rainscreen material, and nail up new cedar clapboards and pine trim. With a 3/8-inch air space behind it, the brand-new pre-primed and prepainted cladding system should serve for many trouble-free years before it needs its next paint job.
Pollard pried off the existing zinc flashing.
Then came the pine trim.

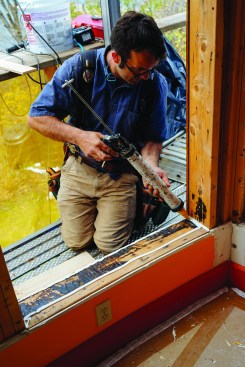
Next came the labor of removing existing peel-and-stick waterproof membrane, which turned out to go much faster with the help of an oscillating multi-tool. Replacing the old membrane with a new, breathable membrane (Henry Blueskin) would make the wall vapor-open as well as watertight. A new rainscreen, with an air space behind the new siding, would help the walls drain and dry when hit by wind-driven island rainstorms.
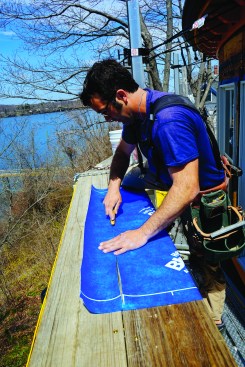
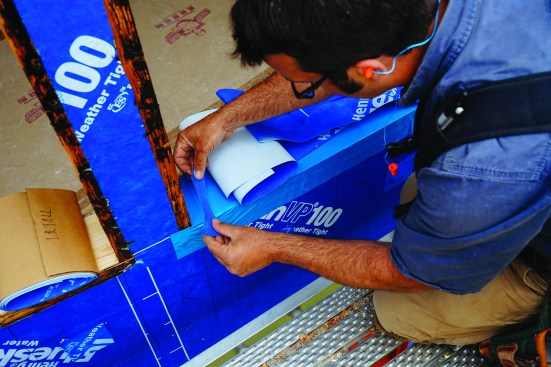
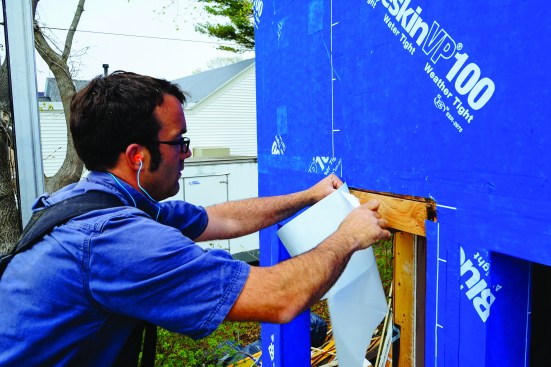
Blueskin VP 100 is easy to handle and apply. Pollard cut the material to size by slitting it with a utility knife.
Then he pieced it onto the wall shingle-fashion.
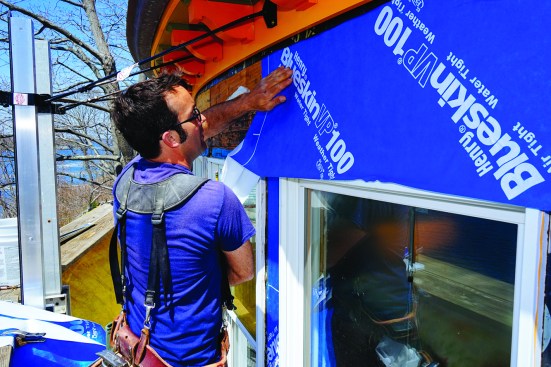
He peeled away the backing as he went and smoothing the pieces into position by hand. At the top of the wall, he left the existing curved soffit trim and bitumen–polyethylene membrane in place.
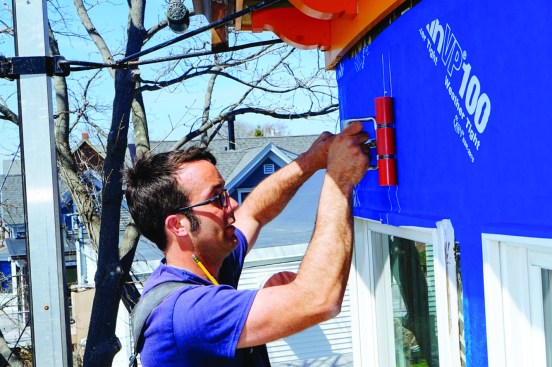
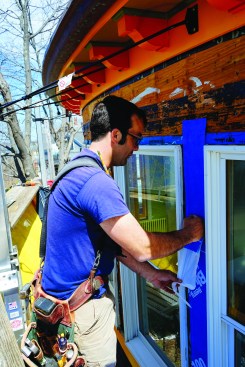
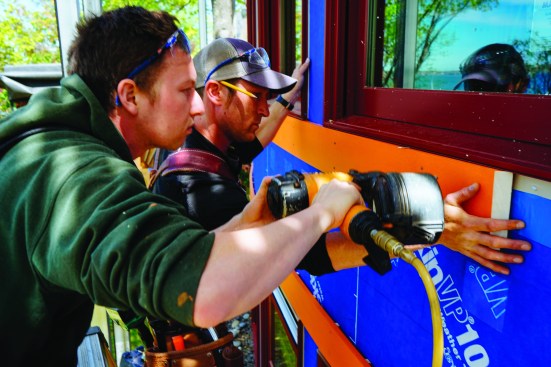
After covering the wall with Blueskin, he went over the whole area with a roller, a recommended practice that activates the material’s pressure-sensitive adhesive. He lapped the new Blueskin over the existing window flanges and frames, planning to cut the windows free one by one as he replaced them in a later step.

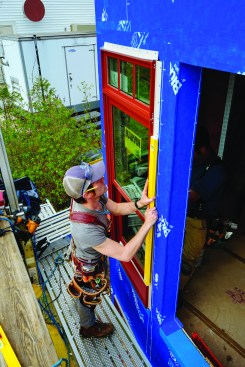
When the entire ocean-facing wall had been weather-protected, the crew could start tearing out the existing Andersen windows and replacing them with new Marvin windows, one or two openings at a time. After slitting along the edge of each aluminum window flange, Strout pulled nails from the flanges with a cat’s paw.
Then he removed the windows and flanges from the openings.
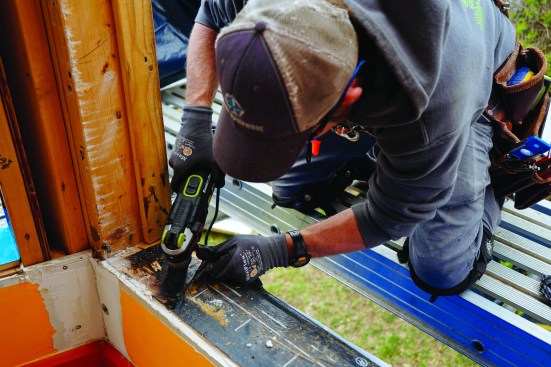
Bitumen membrane on the windowsills also had to come off—again, with the help of an oscillating multitool. Because the newly applied Blueskin remained in place on the walls, the house could be left watertight at the end of each day as long as any newly installed windows had been buttoned up.

After pulling out three windows, Pollard and Strout set about replacing them. The rough openings needed a little tweaking: Strout packed down the window rough head using a 2×6 and some structural screws.
Pollard furred the face of the header out with plywood to match the plane of the existing sheathing.
Next, Pollard prepped the window rough sills: first he applied a bead of adhesive caulk.
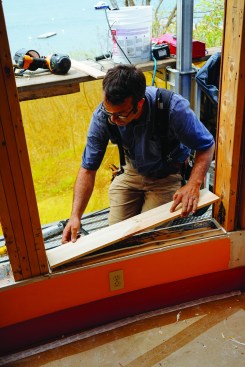
Then a piece of clapboard to slope the sill
and finally a piece of waterproof peel-and-stick Henry membrane
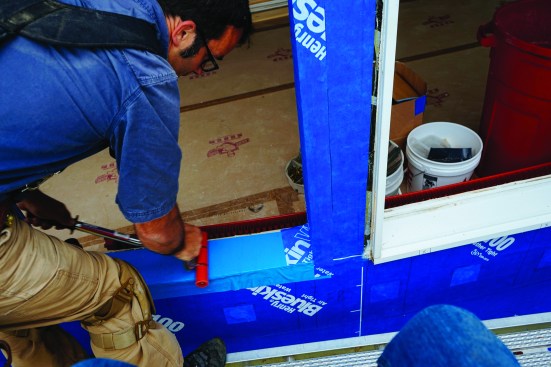
Each rough opening received a watertight wrap. After cutting and folding the membrane at the bottom of the curved windowsill, Pollard applied a custom-cut “bow tie” to the corner.
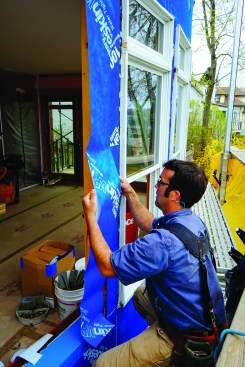
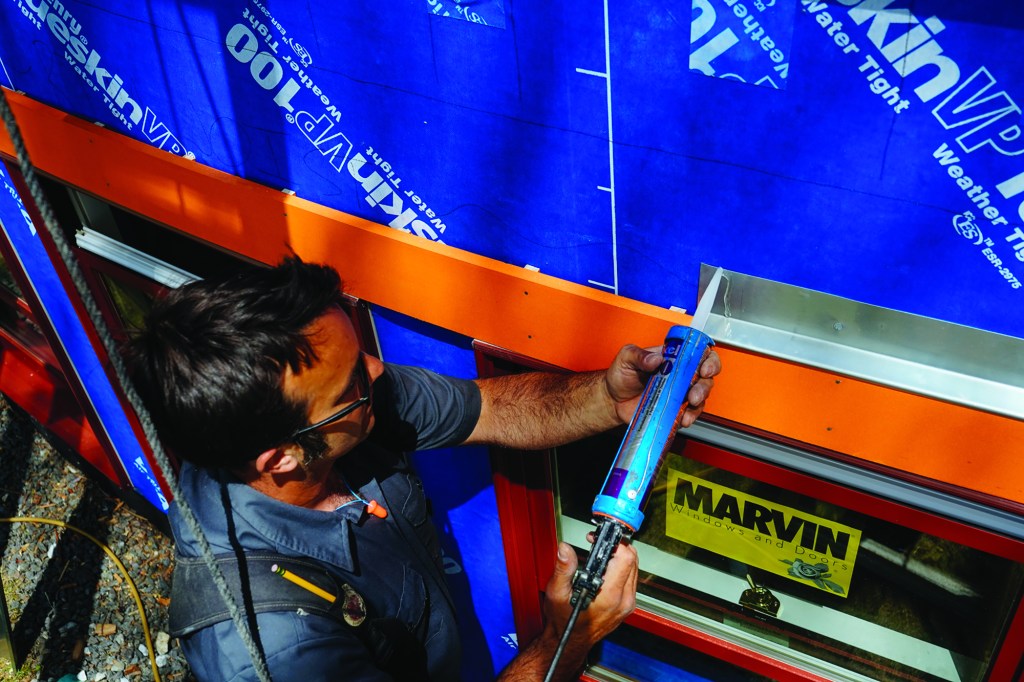
Next, he applied a strip of VP 100 to the side of the window.
He peeled the backing paper from the adhesive backing as he went, and cutting and wrapping the material to fit.
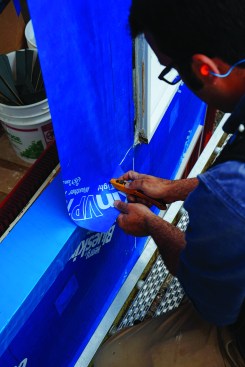
He applied another piece of membrane at the window head.
Then he applied pressure to all the membranes with the roller to activate the material’s adhesive and improve the bond. The reverse lap at the window head is allowed by the manufacturer’s spec, but a bead of silicone caulk is recommended at the joint.
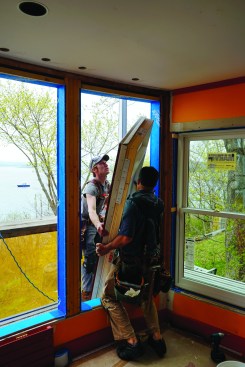
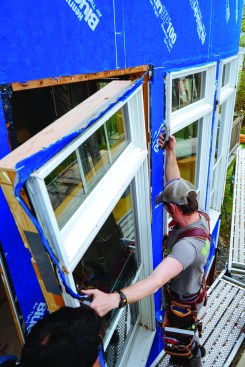
Pollard and Strout installed the new Marvin windows into the prepared openings. They muscled the new units out onto the scaffolding and tacked them in place.
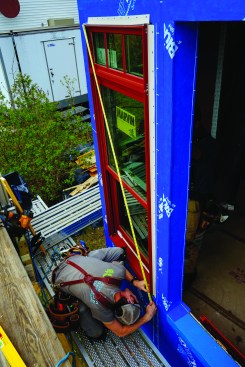
Each unit was checked for square.
Each unit was checked for plumb with adjustments made as needed.
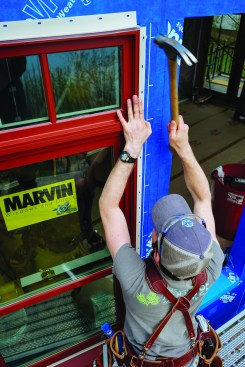
The screws through the side jambs would also help resist wind suction on the window units. Finally, Strout nailed off the flanges with aluminum nails. (Although these flanges were vinyl, Pollard said the crew always uses aluminum nails to keep nail selection simple on site.)
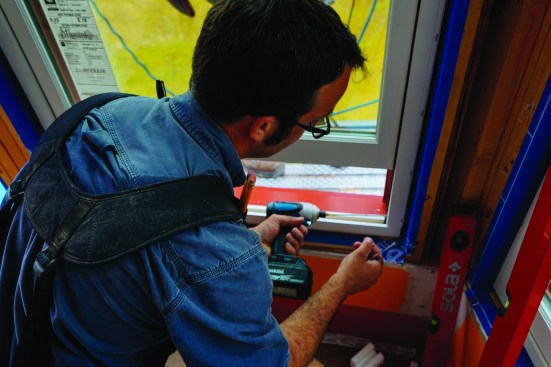
Pollard used long structural screws to pin the windows in place on the inside, splitting the difference to match the curved sill opening.
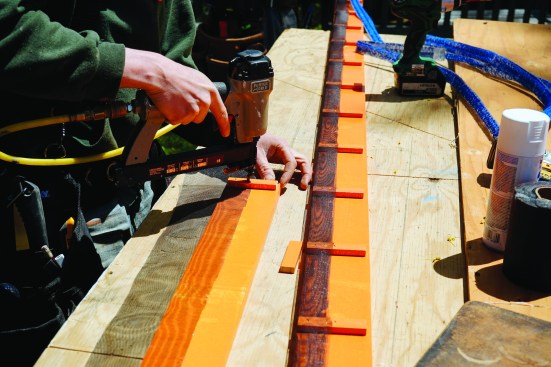
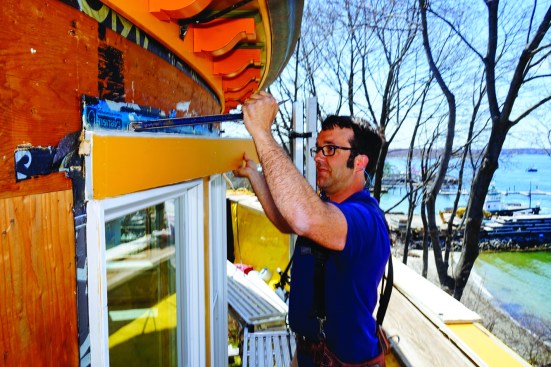
To prepare for siding, the crew installed trim and rainscreen fabric. They first applied spacers and screen to the back of the preprimed 3/4-inch pine trim.
Then the carpenters nailed the trim pieces above and below the windows. Hand pressure was enough to fit the pine trim to the wall radius.
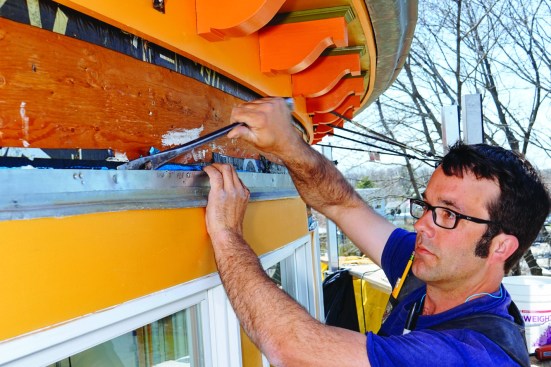
Pollard custom-bent lengths of zinc flashing.
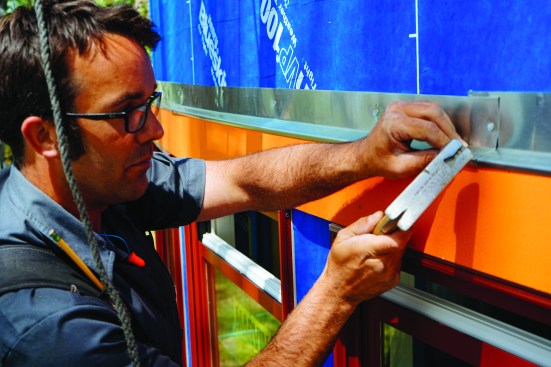
Then he nailed the pieces up above the window head trim, bending the zinc around the curve of the wall.
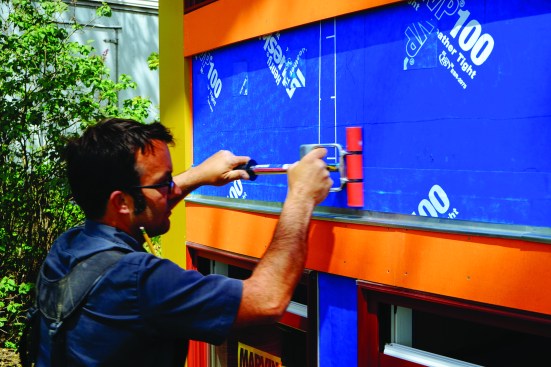
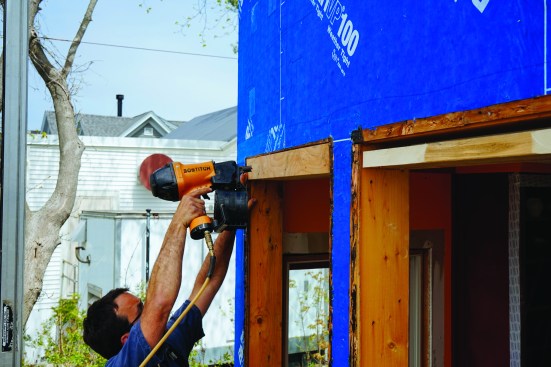
He applied another strip of Blueskin over the top of the flashing.

Then he used a cap-nail gun to fasten MortairVent drainage fabric to the wall. The MortairVent would create a 3/8-inch air gap behind the wall’s preprimed cedar clapboard siding, helping to prolong the building’s paint job.