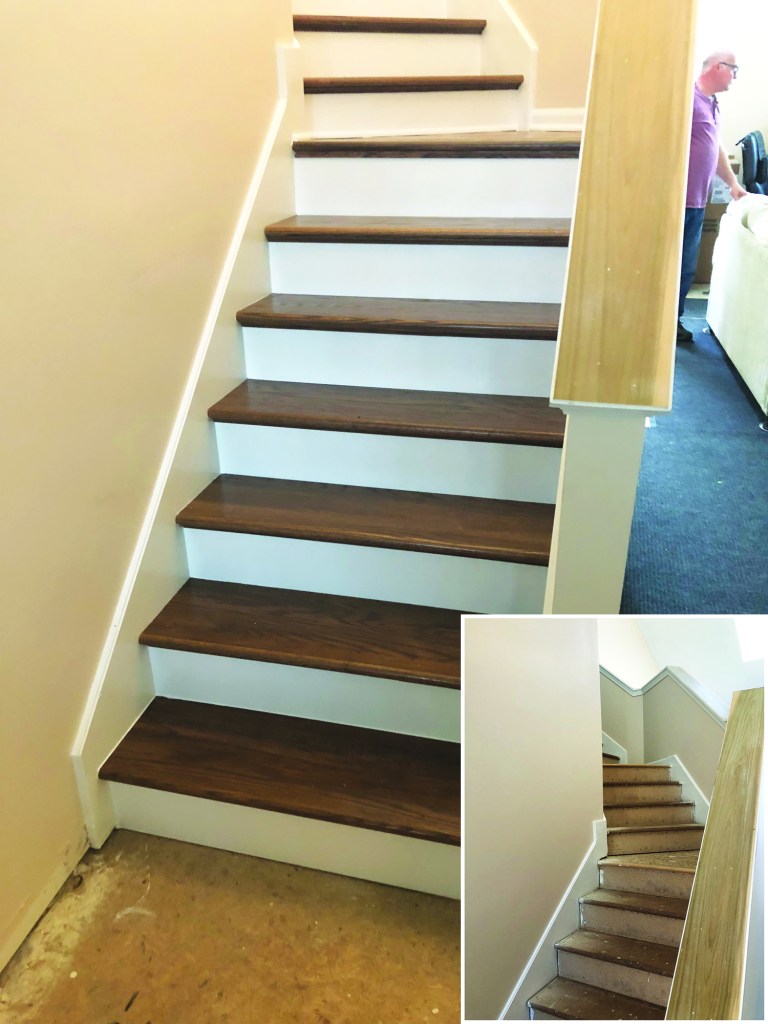
We’ve all had the experience of walking down a staircase covered in worn-out carpet, with each step sloping down just enough to make it feel uncomfortable and questionably safe. Our company, The Carpenter Pros, specializes in transforming these staircases, replacing the old carpeted treads with hardwood treads that are solid and level. In most of the homes we work on, there is only one set of stairs—often going up to the more private, bedroom areas of the home—so we need to do the job quickly and efficiently with minimal mess and disruption.
Demo and Prep Work
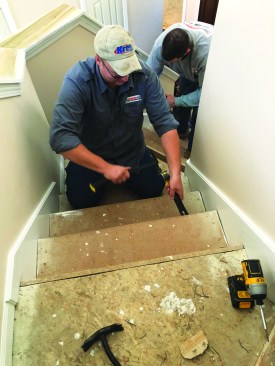
The job always begins with tearing out the old carpet and pad, which includes removing any tacks, staples, and pesky tack strips. In most cases, the original treads and risers for the carpeted stairs are just made from 3/4-inch underlayment, and we take off the treads and remove any remaining fasteners. The risers come off next; we pull any nails from those too.
Because these staircases are often the only access that the homeowners have to the upper floor, we need to provide temporary stairs, especially if the job will take more than a single day. So we scrape off any old adhesive from the horizontal part of the stringers and screw the risers back on as temporary treads. That way, both the remodeling crew and the homeowners have a good, temporary way to access the second floor.
Slideshow: Demo and Prep
1
of 14
After removing the carpet and tack strips from the treads and ri…
After removing the carpet and tack strips from the treads and risers, the author carefully removes the original underlayment treads.
All of the old fasteners are safely removed. Next, he removes th…
All of the old fasteners are safely removed. Next, he removes the original risers.
After removing the fasteners from them, the author sets them asi…
After removing the fasteners from them, the author sets them aside to be installed as temporary treads. With the treads and risers removed, he cleans off any residual adhesive from the stringers.
He then screws the risers down as temporary treads to allow the …
He then screws the risers down as temporary treads to allow the crew and the homeowners to use the stairs.
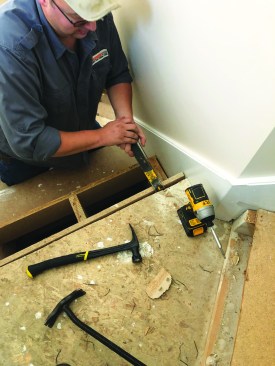
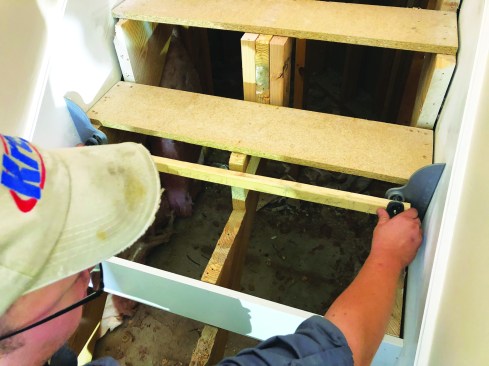
To remodel the stairs, the author begins by removing the first t…
To remodel the stairs, the author begins by removing the first three or four temporary treads. He then uses a Collins Tool Co. stair-tread templating tool to gauge each riser with the tool carefully labeled to keep the orientation straight.
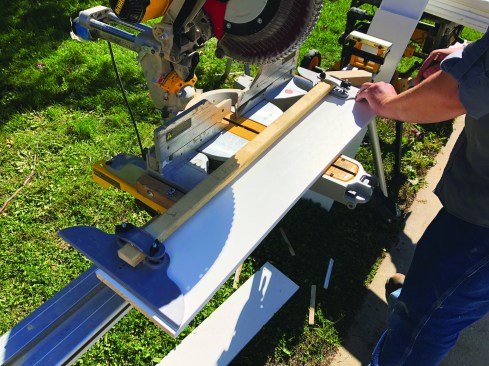
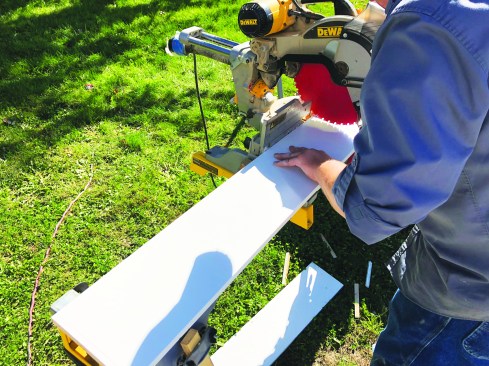
At the saw, he places the template on the riser stock and transf…
At the saw, he places the template on the riser stock and transfers the template layout.
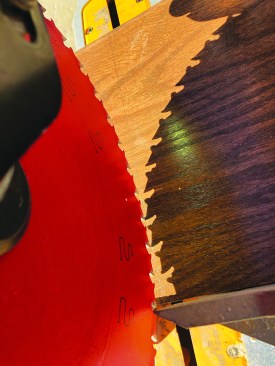
After adjusting the cutting angle of the saw blade, he cuts the …
After adjusting the cutting angle of the saw blade, he cuts the risers precisely to the cut lines.
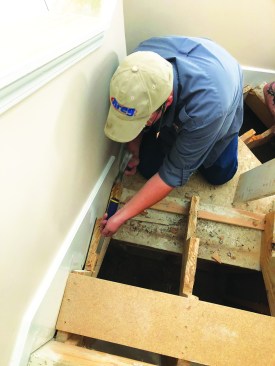
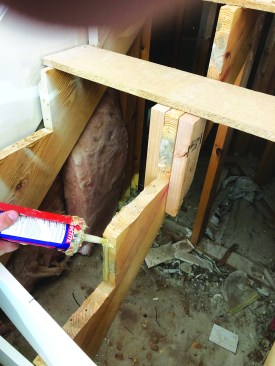
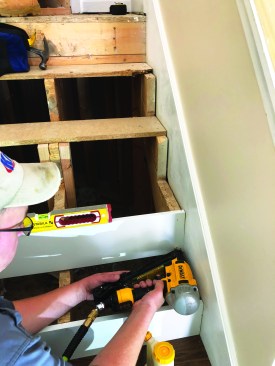
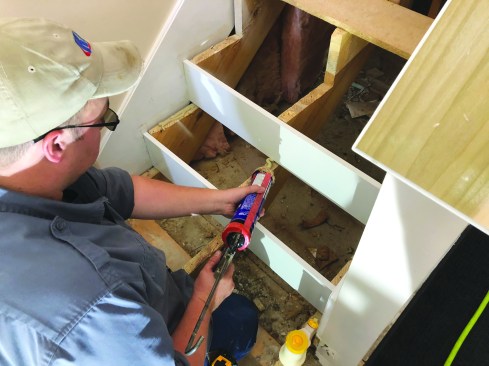
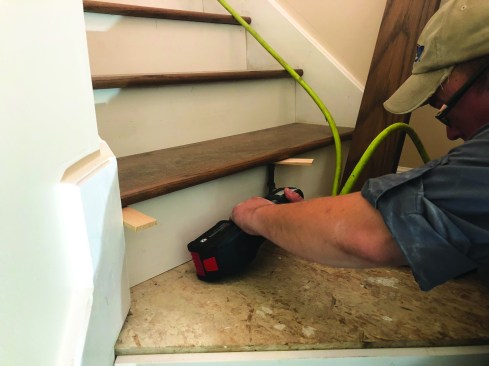
Back at the staircase, he applies a liberal amount of constructi…
Back at the staircase, he applies a liberal amount of construction adhesive to the stringers.
Then he nails the riser on the two outboard stringers (9), makin…
Then he nails the riser on the two outboard stringers (9), making sure to install it level. Nailing just at the ends keeps the risers straight and prevents them from being pulled in if the middle stringer is set in slightly. This is particularly important later when he screws the risers to the treads from behind.
The author uses the same templating tool for the treads.
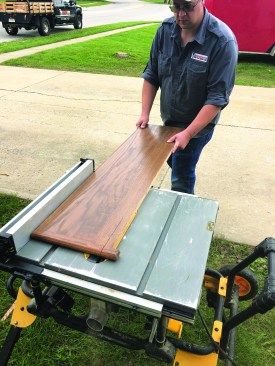
After prefinishing the tread stock off-site to minimize mess and…
After prefinishing the tread stock off-site to minimize mess and smell, he rips the stock to the correct width for the stairway, including a 1 1/4-inch overhang.
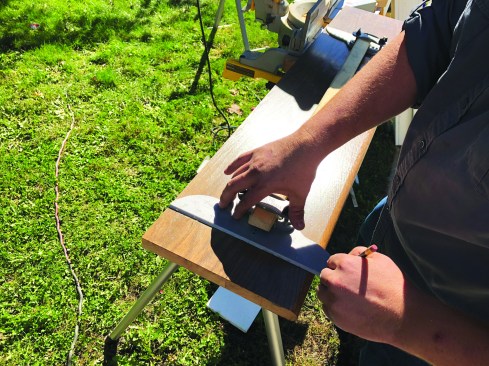
He transfers the layout to the stock.
Then he carefully sets the angle of the saw blade before cutting…
Then he carefully sets the angle of the saw blade before cutting the stock to the layout lines.
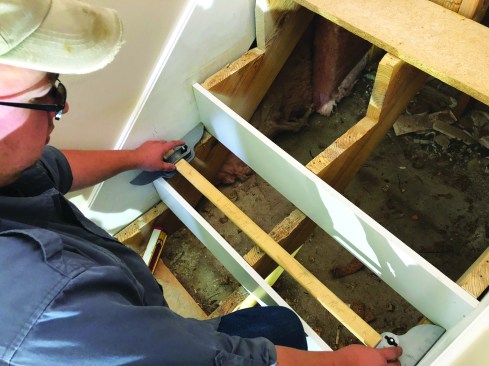
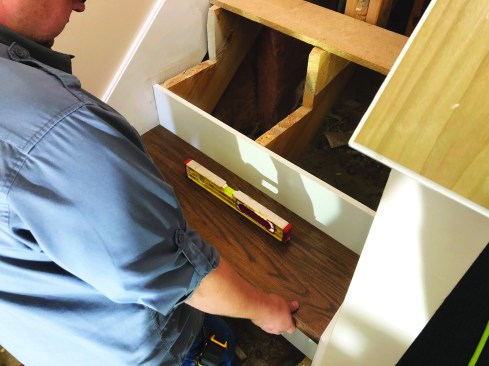
He dryfits the tread and does an initial check for level. If the…
He dryfits the tread and does an initial check for level. If the gap between the stringer and tread is 3/8 inch or more, he glues in thin plywood layers to build the stringer up to a rough height for shims.
Stringer Shrinkage
The majority of stairs that we remodel have stringers or carriages made from dimensional lumber. That lumber is usually still solid and strong, but the nature of wood means that there is more shrinkage near the points of the stringer, which is why many of these stairs end up sloping downward. When we remodel a staircase, we do our best to compensate for that shrinkage by shimming the treads up level.
We also check the rise and run of the steps to determine if they need to be adjusted. It is important that the stairs feel even and comfortable to the people using them.
Slideshow: Finish Treads and Risers
1
of 15
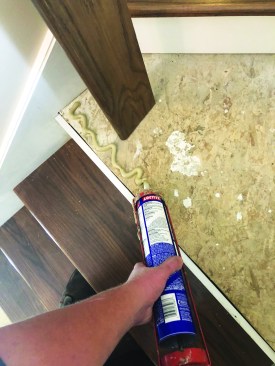
As with the risers, the author applies construction adhesive to …
As with the risers, the author applies construction adhesive to the rough stringers.
After spreading carpenter’s glue on the back edge of the tread…
After spreading carpenter’s glue on the back edge of the tread where it will butt into the riser, he slips the tread into place.
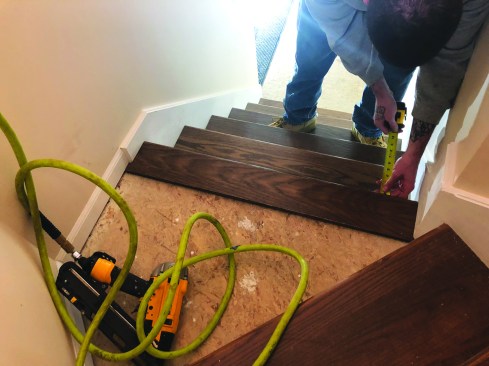
He levels the tread in two directions using either narrow cedar …
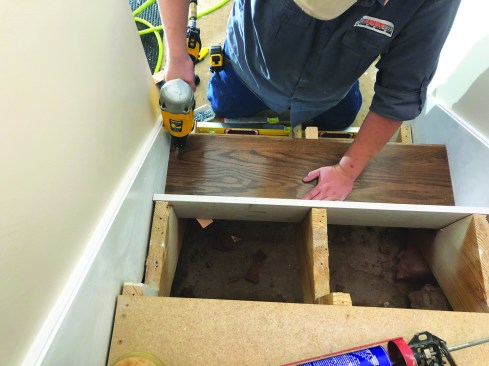
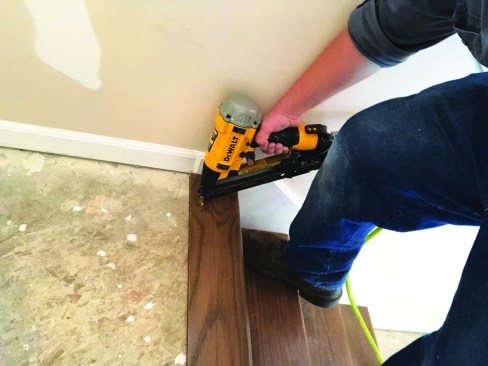
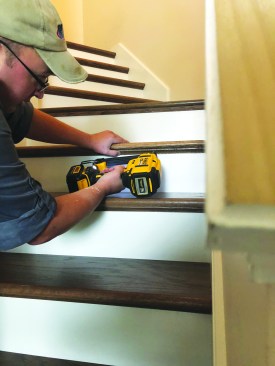
He levels the tread in two directions using either narrow cedar shims or shims cut from 2x4s with a FastCap Fast Shim jig. Locked in place with the adhesive, the shims help to hold the treads level and compensate for any shrinkage in the stair stringers. After shimming the tread properly in both directions, he fastens the treads to the stringers using 15-gauge finish nails.
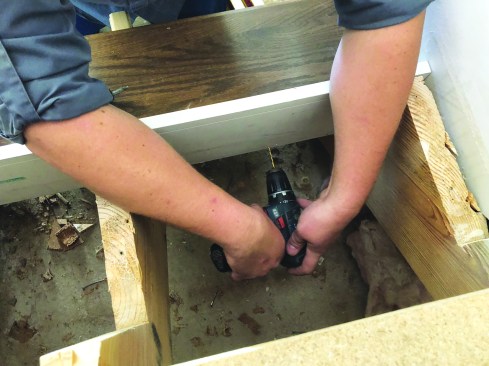
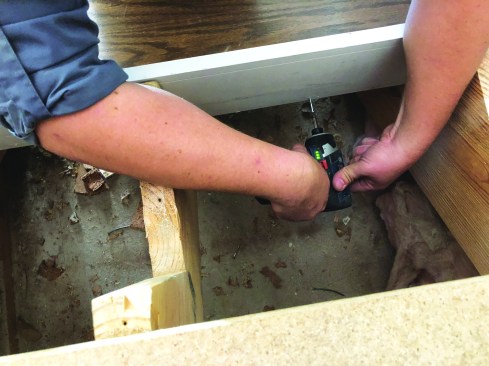
The author attaches each tread to the riser above from the back….
The author attaches each tread to the riser above from the back. First, he drills holes for the fasteners.
Then he drives three square-drive truss-head screws on either si…
Then he drives three square-drive truss-head screws on either side of the center stringer. These screws work with the wood glue both to keep the back of the tread from opening up and to prevent the stairs from squeaking.
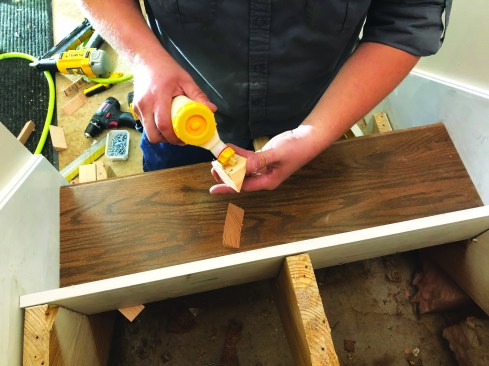
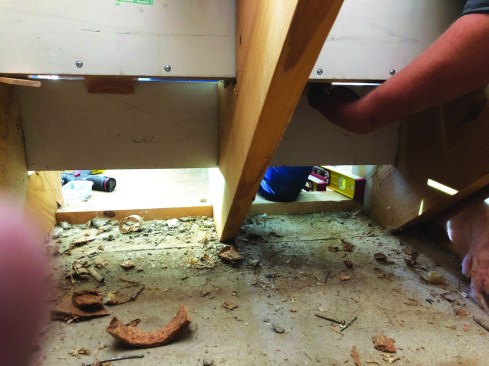
The author fashions triangular blocks from 2×4 stock to help sta…
The author fashions triangular blocks from 2×4 stock to help stabilize the tops of the risers by joining them to the underside of the tread above. He spreads a heavy layer of carpenters glue on the adjacent right-angle sides of the block.
Then reaches under the tread to press the blocks into place (21)…
Then reaches under the tread to press the blocks into place (21). No traffic is allowed on the steps until the glue has set.
When the treads are secured in place, he trims off any remaining…
When the treads are secured in place, he trims off any remaining shims.
After the new treads and risers are installed, the author applie…
After the new treads and risers are installed, the author applies adhesive for the nosing on the stair landing.
Then he checks the overhang …
… before securing the nosing in place.
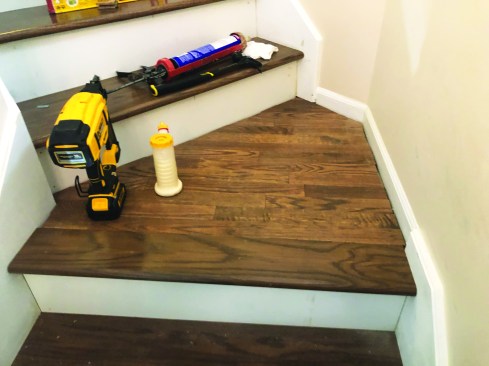
Prefinished flooring fills in the rest of the landing field.
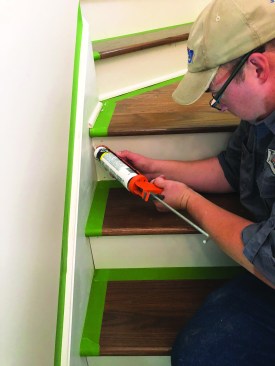
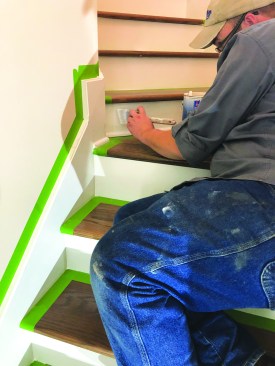
The author installs shoe molding around the landing and caulks a…
The author installs shoe molding around the landing and caulks all the painted seams.
He puts puts a finish coat of paint on the skirts and risers.
The final step is installing prestained cove molding under each …
The final step is installing prestained cove molding under each tread nosing using wood glue and 18-gauge finish nails. The remodeled stairs are then ready for service.
Off-Site Finishing
For tread material, we use solid oak, prefinished with stain and polyurethane off-site to minimize the mess and smell for the homeowners. Generally, we use 1-by stock for the risers, but occasionally we use 3/4-inch finish-grade plywood that I prime and paint off-site.
Before starting, we make sure that all the materials we will need are on site. Then we are ready to remodel the stairs, which usually takes our crew of two less than two days.