Recessed window openings can be flashed with liquid-applied flashings or with peel-and-stick membrane flashing. This slideshow covers the latter.
2 MIN READ
1
of 13
Flashing a shallow recess. At the bottom of the window, first ca…
Flashing a shallow recess. At the bottom of the window, first caulk the framing, then apply pre-fit corners to the outside edge of the recessed opening.
The inside flashing corners go on second.
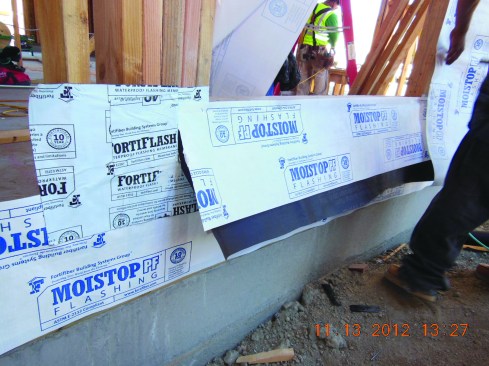
Apply sill flashing across the exterior face of the wall framing…
Apply sill flashing across the exterior face of the wall framing.
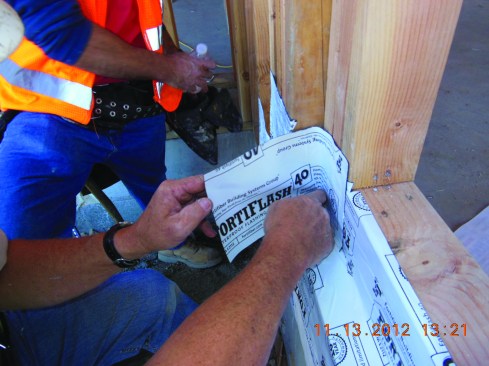
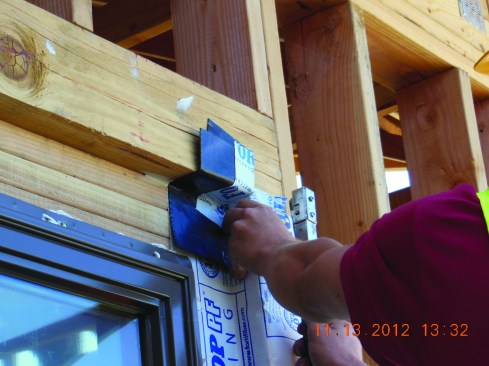
Make two slits at the edge of the opening, and fold the inner to…
Make two slits at the edge of the opening, and fold the inner tongue of the flashing across the horizontal sill and up the inner face below the window opening, rolling it smooth with a J-roller.
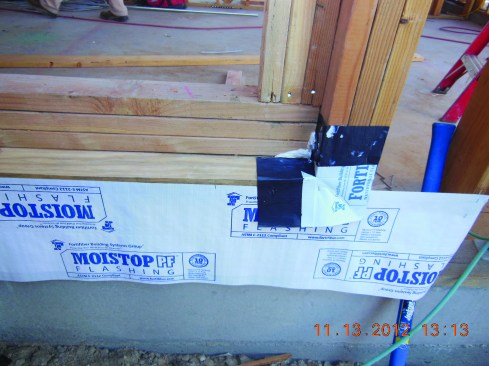
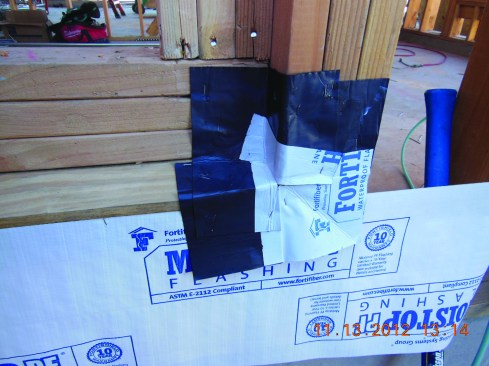
Cut short pieces of flashing membrane to create end dams on both…
Cut short pieces of flashing membrane to create end dams on both sides of the recessed opening. Here, the end dam pieces are bedded in caulk before the installer rolls the edges.
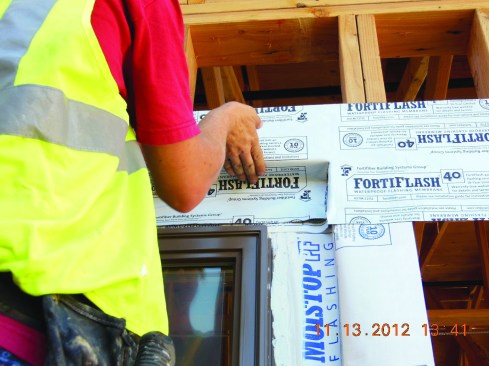
Black paper is installed as a protective layer over the horizont…
Black paper is installed as a protective layer over the horizontal surface of the recess, and a final membrane “apron” to tie in with the WRB is installed on the face of the framing.
With the side flashings in place, the window unit can be install…
With the side flashings in place, the window unit can be installed. (To meet the window manufacturer’s requirements, the window flange must be installed in a bed of sealant; see “Installing Flanged Windows,” Jan/16.)
Remember that the top corners, not just the bottom of the recess…
Remember that the top corners, not just the bottom of the recessed opening, must also be flashed. Install flashing corners on the inner face near the top of the window first …
… followed by the flashing corners on the outside face of the
…
… followed by the flashing corners on the outside face of the
recessed opening.
A head flashing extends fromone edge of the recess to the other.
It is followed by a final membrane flashing applied to the outsi…
It is followed by a final membrane flashing applied to the outside face of the wall.
The final membrane flashing is slit at the edges of the opening …
The final membrane flashing is slit at the edges of the opening and folded inwards across the horizontal head and down over the window flange.
The flashing assembly is completed.
Regardless of which membrane system you use, these guidelines will keep you out of trouble most of the time:
Work from bottom to top. This is obvious to a lot of folks but bears repeating. You have to work from bottom to top to make sure top layers lap over bottom layers.
Pre-formed flashing corners. Pre-formed corners are available from Fortifiber. They’re sold as “Corner Flash A” (for the outer corners of the recess) and “Corner Flash B” (for inside corners). But you can also pre-form corners using DuPont FlexWrap or other flexible flashing material following the DuPont instructions.
Use flashing corners on all corners of the recessed opening, including the four outside edges of the outer face of the opening, as well as the four corners on the wall area in which the window is set. On the bottom of the opening, the corners on the outside edge are installed first, then the corners near the window unit. On the top of the opening, the inside corners near the window are installed first, then the corners on the outside edge. This will ensure that the layers are lapped correctly.
And don’t forget the top corners. A lot of folks are so concerned about the lower sill area, they neglect the top corners of the opening. Those are just as susceptible to blowing rain and water dripping around the top edge and running into a tiny gap.
Protection layer. After the lower recessed edge is correctly flashed, apply a course of building paper to protect this important area from trade damage. Many times, recessed openings are used as tool-holders and stepping stools, which will damage your carefully applied and expensive flashing efforts. Adding a course of building paper or a sheet of nail-on flashing is a cheap insurance policy.
J-roller. The karate-chop method of pushing peel-and-stick into a corner is not enough. Always use a J-roller to smooth the material flat and ensure complete adhesion. Wrinkles and poor adhesion will inevitably lead to leaks.