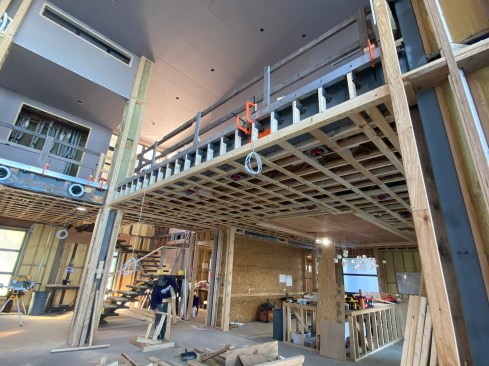
In my company, we not only enjoy figuring out how to do things that we haven’t done before, but we also thrive on it. On a recent project, the plans called for glass railings on the house’s interior and exterior balconies and interior stairs. The architects’ renderings showed glass panels that seemed to emerge out of the hardwood flooring, capped with what appeared to be a sleek wood or metal top rail. While this was a cool detail, it was also intimidating because we had no experience installing glass railings. In this article, I’ll walk through the steps we took to acquire the knowledge needed and implement what proved to be a dramatic design element on a large custom home we have been working on for the last several years.
Initial Research
To learn how we might achieve the architects’ vision, we began by reaching out to a few trade partners, starting with our regular metal fabricator, who had done a few projects with glass railings and metal posts. He in turn recommended a commercial glass installer that he had collaborated with. I reached out, and they were happy to do a site visit and share some preliminary pricing, but the pricing model they use for their commercial projects would have blown the budget.
Next, I called our shower-glass installers, who have a lot of resources through their suppliers. At the same time, I researched the website of one of the big suppliers of glass parts (CR Laurence) that I had become familiar with over the years from looking at glass pulls, hinges, and finishes. No surprise, as a glass hardware supplier, it had everything we needed for glass rails. On the site were numerous styles of glass railings: post to post, post-mounted, face-mounted, etc. We also saw some with a bottom “track,” or channel, about 4 inches tall, like you might see at a mall or other commercial space. This style would meet our needs but left us asking if the client wanted to see a visible bottom channel since the renderings did not include one.
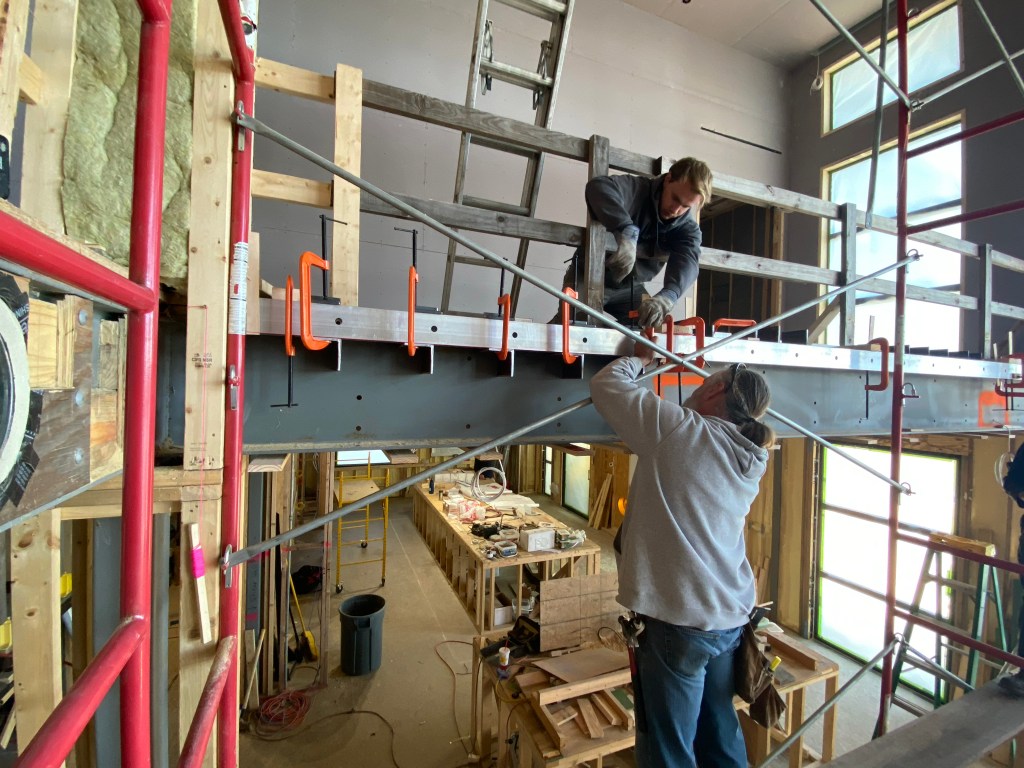
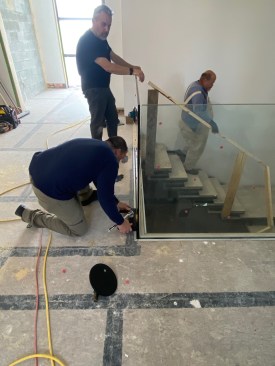
Slideshow: Installing the Bottom Rail
The crew clamps the heavy aluminum bottom rail flush to the subf…
Tricky Detail
Meanwhile, we were still having weekly client meetings, which gave us a chance to check in with the clients’ expectations. After looking at numerous photos of glass railing styles, they confirmed that they preferred the look in the renderings.
Scouring Pinterest and Instagram, we found photos of railings with the glass coming straight out of the floor and hardwood flooring installed tight to either side of it. This meant the channel for the bottom mount had to be installed below the hardwood. If this were the case, though, how would we replace the glass if something went wrong? (Whenever we install a product—especially one new to us—we always consider possible future maintenance issues.)
We went back to our glazers and quizzed them on installing the glass panels into the channels. They explained that the glass is placed in the channel on plastic spacers. Two overlapping plastic shims (called Taper-Locs) are slipped between the channel and the glass; then, using a special tool provided in the installation kit, the installer squeezes the shims together to lock in the glass panel and hold it rigid. The glazers explained that this same tool can be used to adjust the panel placement or remove the shims if a panel needs to be replaced but only with full access to the top of the channel. Consequently, if we were to cover the channel with hardwood flooring and there was a problem with the glass, the hardwood would have to be removed to address it. This was a concern.
Our team discussed the problems around ripping out hardwood flooring if the glass somehow was damaged during the remainder of construction or by some kind of accident after move-in. Because the railing wrapped around corners, the hardwood floorboards would run parallel to some railing sections and perpendicular to others. Removing a board parallel to the railing would be feasible, but where the flooring was perpendicular to the rail, every board would have to come out. An alternative might be to install a “lock board” or “picture frame” board on both sides of the glass, so only two boards would need to be removed in any location.
At our next client meeting, we presented what we had discovered about the potential need for access to the channel and our solution to the problem. The clients were comfortable with the picture-frame flooring option, even if it might require removing some flooring to repair the panels in the future. We’ve found that when we’re open with the client about what the expectations should be if things do go wrong, they are usually receptive. It at least gives them the opportunity to say no, and if an issue arises, they are already aware of what it takes to resolve it. This can go a long way toward preventing client frustration.
Preparing for the Install
With most of the “how” figured out, we could get started on the doing.
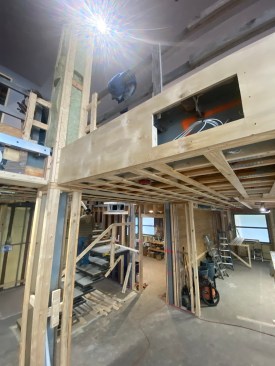
Our next move was to order the glass channel. This product can be selected with a fascia mount (holes in the side), a surface mount (holes in the bottom), or an undrilled track. A fascia mount worked best for us. The lag screws would go right into the 2-by that capped the steel beams that ran the perimeter of the balcony locations.
We couldn’t move forward with the hardwood flooring until we installed the glass. We had already been planning to set the doors and trim on the finished floor, so this accelerated our timetable for the glass installation. This also meant having to protect the glass for the remainder of the project.
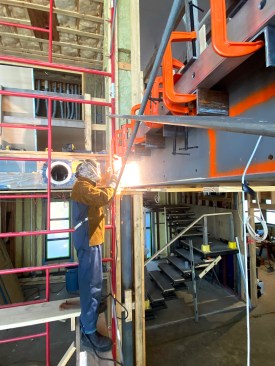
Being unfamiliar with glass railings, we consulted with our structural engineer about the mounting location. After he reviewed the CR Laurence specs, he confirmed that using the track with the ½-inch-thick tempered glass and aluminum rail would meet the lateral requirements for guardrails. But with a single mechanical fastener in the fascia mount vertically (they were spaced 12 inches on-center running horizontally), we were still concerned that the assembly could create a hinge point and allow more flex in the glass than we would like. We brainstormed with our framer and steel fabricator on ways to reinforce this connection, hoping to take advantage of some steel I-beams beneath the channel location. Because the glass channel was aluminum, we couldn’t simply weld it to the steel beams, so (after running it by the engineer) we settled on welding pieces of steel angle to the beams directly under the channel to lock it in place.
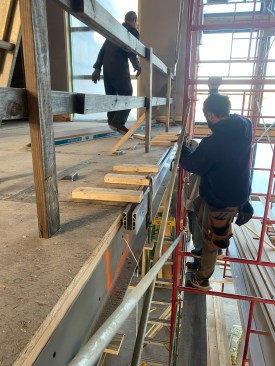
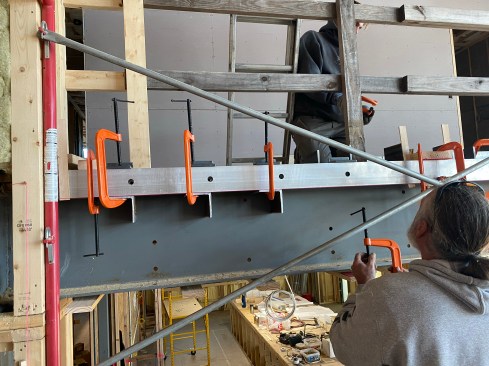
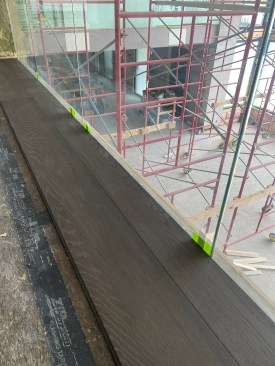
Once we had the glass channel in hand, we tasked the carpenters on site with installing it. Precision would be key when it came to the placement of the heavy aluminum bottom rail. The lead framer came up with the idea of fastening 2×4 scrap blocking to the top of the subfloor extending out over the balcony. This would allow them to push the channel up tight knowing it would be flush with the subfloor. Once they installed the blocking, the framers used large C-clamps to hold the channel pieces in place, making minor adjustments with shims as needed. We cut the channel on a 12‑inch miter saw with a Diablo non-ferrous blade, slow and steady.
The welders followed suit, using the C-clamps to sandwich the channel between some scrap steel above and their small pieces of ¼-inch steel below, welding them in place. It was cool to watch as the carpenters and welders worked together to set the channel and steel angles. They were able to knock out the main balcony in just about one day.
With all the steel and glass channels in place, the carpenters boxed out around the steel beams to prepare them for wallboard. At the same time, we worked with the glazers to create an equivalent panel layout for any area that would take more than two panels. The panels would all be around 48 to 60 inches to keep their fabrication and installation manageable. We also planned for about a ¼-inch gap between panels and at each wall or column termination.
We progressed through the plaster walls and ceilings in these spaces until the glass arrived, and the glazers could set all the panels. This process went smoothly and set us up to start on the hardwood flooring. Since we had established a plan for the hardwood flooring adjacent to the glass, we were ready to go.
Slideshow: Installing Glass Panels
To secure a glass panel in its aluminum channel, an installer us…
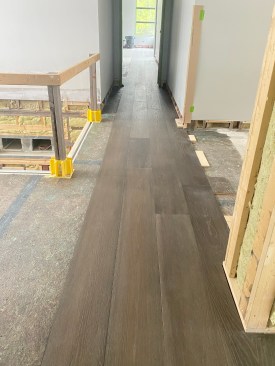
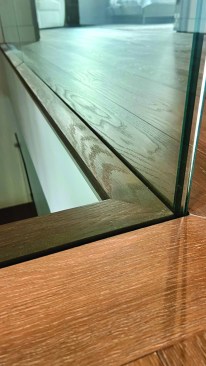
We started the hardwood on the long hallway upstairs, which was also the longest run of glass. This would allow us to establish parallel lines between the glass and hardwood. One other detail we discussed with the hardwood flooring installers was how much space to leave between the glass and the wood to allow for expansion and contraction throughout seasonal swings in humidity. With the ⅛-inch gap the flooring installers wanted, the aluminum track would be visible, which was not the look our team was going for. On a modern project like this, tolerances are often tight, and since there aren’t a lot of ways to hide imperfections, we compromised and agreed on a ⅟₁₆‑inch space between the glass and wood to maintain the appearance of a tight fit. To keep the spacing consistent, we used some flat plastic shims that our window installers had turned us on to; they come in ⅟₁₆-inch increments and are super handy.
Working Out Details
While we were working through the details of the spacing between the glass and the wood, we realized that the raw edge of the wood would be visible when you stood back and looked down at the base of the glass. The floor manufacturer, Carlisle Wide Plank Flooring, provided us with some additional stain for touch-ups. After cutting their pieces, the installers applied the stain with a rag, gave it a few minutes to dry, and then installed them. The main goal was to darken the wood behind the glass; we all agreed that no finish was necessary.
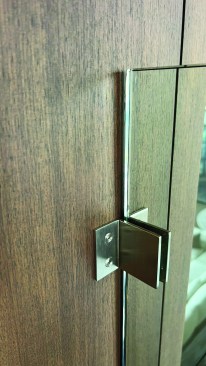
During one of our weekly client meetings, we were reviewing a white oak top rail that the clients had previously approved. The clients informed us that they wanted to eliminate the top cap and instead install a no-top railing, glass panels only. This was a surprise, as the plans and renderings had always shown a small top rail, not to mention that we were counting on the top rail to bring all the glass panels in plane with each other. A top rail would also have added some rigidity to the glass panels.
With clients, our answer is always yes; we might not know how we are going to do it, but we figure it out. We went back to the glass hardware supplier and found some stainless steel clips that would fit between glass panels and at any terminations to help stiffen things up. We proceeded to order a few samples to show the client. Once those came in, we mocked them up between some of the already installed glass panels, and the clients gave us the green light to use them everywhere.
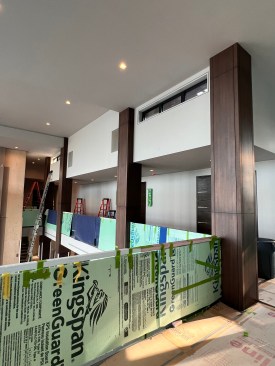
Site Protection
Once all the glass was installed, there was still a lot of construction to complete for the project and protecting the glass was critical. We placed sheets of ½-inch rigid foam on both sides of the panels and capped the vulnerable top edge with 2 inches of rigid foam. We also opted to drop moving blankets over the foam, to minimize wear and tear and add a layer of protection. The foam was removed numerous times as the project went on, to allow for measuring and installing of column facades, plaster work, painting, and such. We took special care to keep the foam clean when it was off. Any foam that took on significant debris, we would replace, to prevent scratching the glass.
Removing the protection from the glass was one of the last things to happen as the job wrapped up. At that time, we installed all the hardware spacer clips. The pieces almost disappear, giving the client the ultra-modern, clean install they were after.