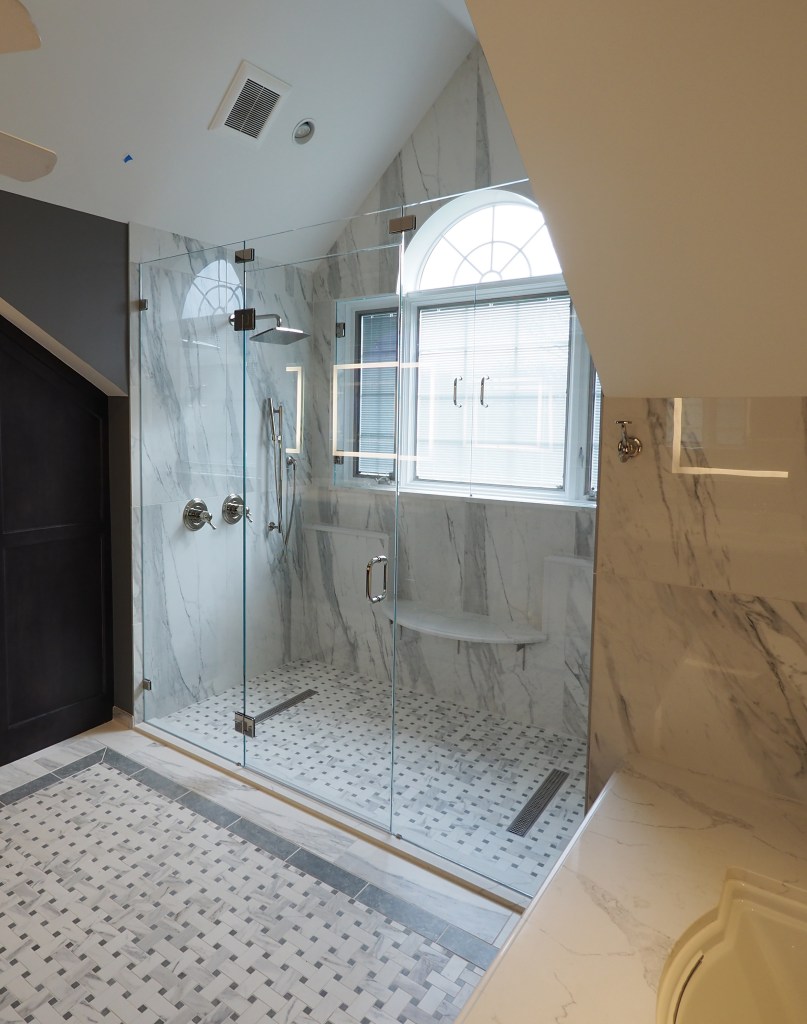
Clients often like having natural daylight in a shower, but subjecting a window to constant wetting presents some obvious risks if the waterproofing isn’t implemented well.
Double Trouble
In a shower window, we have two main “loads” to deal with: splashing water and condensation. Because both tend to concentrate the moisture at the bottom of the window, we need to provide near-perfect waterproofing there.
Our first line of defense is to reduce the bulk water load, which we do by installing a glass window cover to block most of the direct spray and splashed water. Most often, we use a piece of shower glass that matches the regular shower enclosure glass and have them both installed by the same subcontractor. We hinge these glass covers so the owners will have access to the windowpanes for cleaning. A shower curtain can also work. A plain curtain is typically not fancy enough for most of our projects, but that’s what we had in my last house.
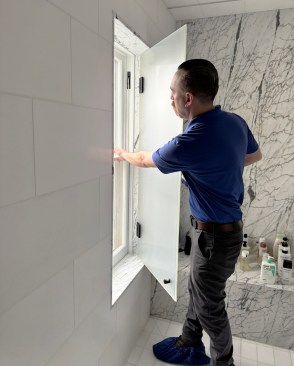
One of the last components to install is the first line of defense against splashing water: The author’s company has the shower glass subcontractor fabricate hinged glass panels to cover the window.
For condensation management, three strategies can help: First, a higher performing window will be much warmer on the inside, which in turn will reduce the amount of condensation forming on the inside surface of the window glass. Second, we prefer using a fiberglass or vinyl window frame that isn’t vulnerable to peeling paint or wood rot. Last, we strive to put an exhaust fan with a timer switch, or an ERV inlet port, inside the shower to help it dry out quickly after use. The faster the condensation evaporates, the less damage it can wreak on the window or its opening.
Having done all that, it’s still prudent to assume there will be significant water on the inside of the window at times, especially when it’s exceptionally cold outside or when someone decides they need a 30-minute shower.
Enhanced Waterproofing
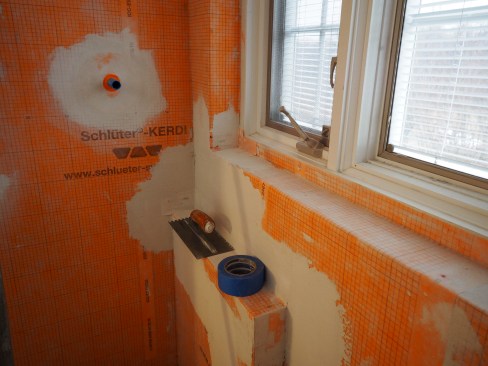
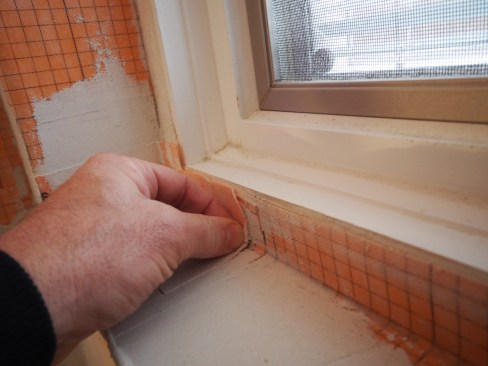
At an existing window in a new shower, the author’s company installs Kerdi membrane, lapping it onto the window. While Kerdi is a good product, in this application as a window waterproofing it is inherently risky, requiring near-perfect workmanship.
When we install any window, we slope the sill and use flashing tape to make a water-managed “sill pan” that directs any water in the rough opening to the outdoors. Inside the shower, we typically waterproof the walls up to above the showerhead. With a little bit of forethought, we can install these two water management elements—the waterproofing membrane on the walls and the sill pan—so water has to go in or out and can’t get into the framing to cause damage.
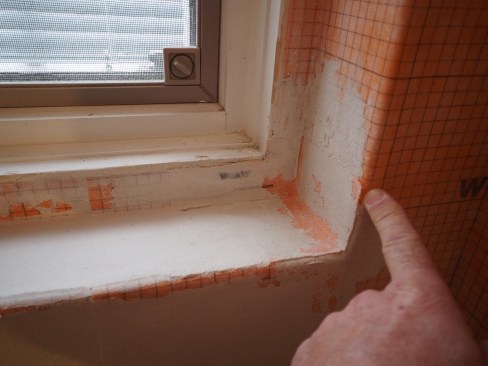
The author identifies two instances where the membrane is not sealed and will need extra attention from the crew.
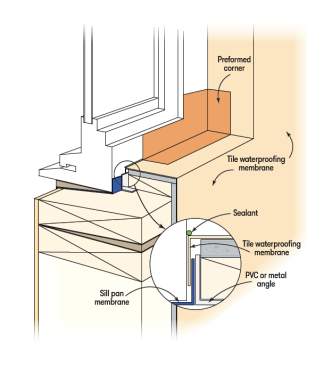
Because the tapes, sealants, and shower waterproofing may not be compatible with each other, and because sticky adhered connections are inherently less reliable than overlaps and gravity, we’ve come to prefer to tuck the shower waterproofing down over the raised back edge of the window flashing pan. While this does need to be explained (over and over) to the folks with the tools on, once understood, it’s relatively easy to do, and it’s hard to get wrong in a way that will leak. This is our standard for new construction when we can control the installation of the window pan and the shower waterproofing.
New Construction Detail
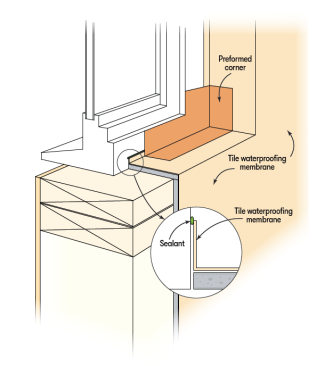
However, in many cases we’re remodeling an existing space and the windows are not being removed, so we are stuck working with whatever water management is already in place. This is much riskier and requires perfect workmanship on our part to get right. We always assume there isn’t an intact window flashing pan we can turn up—a good assumption since we’ve rarely seen one. Typically, where there is windowsill flashing, it’s usually well short of being able to extend out and upward, and it usually has holes, cuts, missing areas, or other deficiencies. Given these existing shortcomings, we do our best to seal the shower waterproofing to the inside of the window.
Existing Construction Detail
Close attention to detail and careful inspection before installing the tile do not offer guarantees but will give us the best chance the membrane will stick for years to come. One step helps: We usually remove extension jambs to eliminate leaks through the seam between the window unit and the extension. This gets rid of a wide, flat piece of wood at the bottom of the window where all the water ends up. We replace the extension jambs with tile or stone, or with synthetic trim, such as solid PVC, which will hold up to lots of water exposure.