Media rooms, home offices, master bedrooms, meditation rooms–in almost every home I build or remodel, my clients ask me to soundproof at least one room. If you are considering some noise proofing on your project, let me give you a tip that can help you attain the noise reduction you are expecting. No matter how much Quiet Rock or Green Glue is used on a project, the outlets, switches, and holes are the biggest sound-transmission paths that I see overlooked. Watch the video above, and then follow these steps carefully.
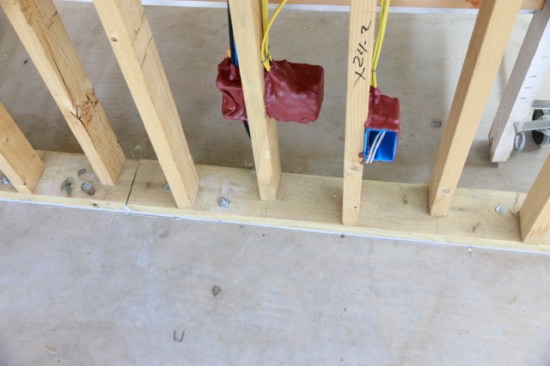
Putty Pads installed on outlets. Notice the staggered 2×4 studs with a 2×6 base plate.
1. Install an acoustic putty pad to all penetrations to the drywall. I like the thick, red pads the best. They run about $100 on Amazon for a case of 20 and are much better than the thin ones sold at the big box stores.
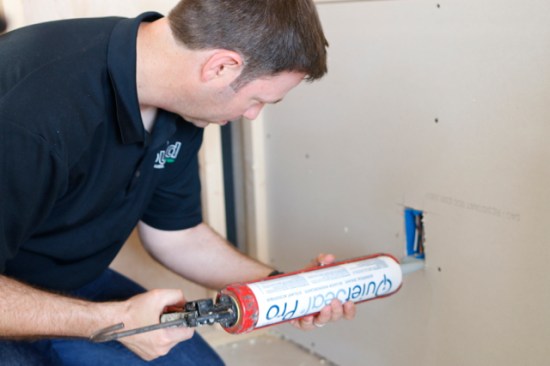
2. Install drywall (or QuietRock) as you normally would, but after the outlets are cut out, apply an acoustic sealant between the drywall and the box to complete the installation.
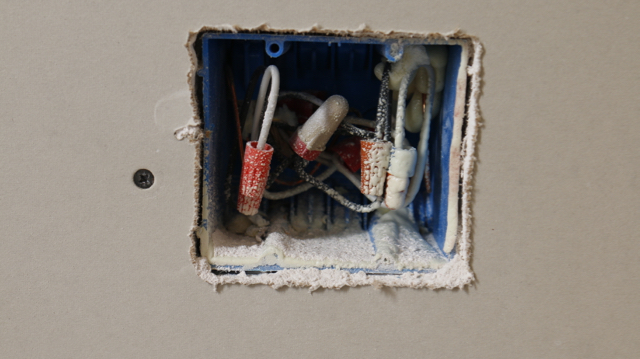
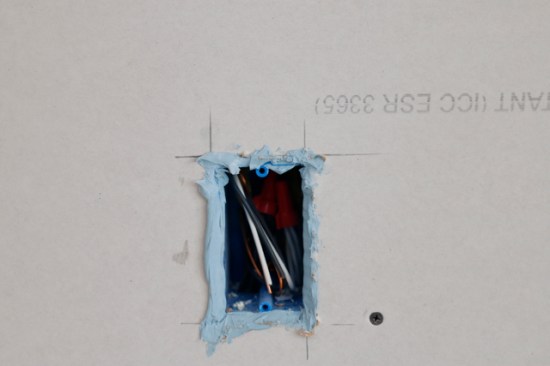
Notice the air gaps around the edge of the drywall? This hole must be filled with acoustic sealant.
This is an important step. Don’t miss this or your soundproofing job will not achieve its full intended rating.
That’s it. Acoustic sealant is applied. Install the outlet and cover plate and this hole is sealed up acoustically (though I should have smoothed it with my finger to make the outlet cover sit flush easily).
I hope this tip helps! Be sure to see this Playlist of other videos and blog posts on the topic of Soundproofing.