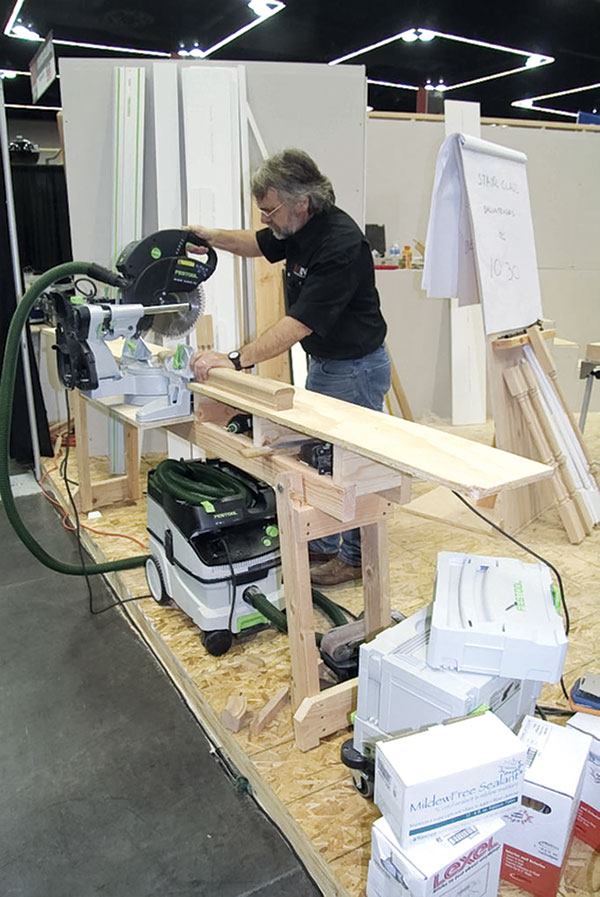
I hate it when I go to a job site and see some carpenter trying to cut a long molding while his $800 miter saw is balanced on a piece of drywall set on a plastic trash can. For one thing it’s dangerous. I like a continuous wooden table that’s long enough for me to safely trim the end of a 10-footer. I also want to be able to screw a stop to it for repeat cuts.
This is the saw stand I use. It takes me two hours to build; it’s made of four 8-foot 2x4s, an 8-foot 2×6, less than half a sheet of 3/4-inch plywood, a few 1-5/8- and 3-inch drywall screws, and four 3-1/2-inch-by-3/8-inch carriage bolts. I usually mount a power strip on it so I can use it as a workstation too.
You can figure it out from the pictures, but here are a few tips. The 2×6 crosspieces that support the work surface are notched to fit between the 2×4 rails so that the infeed and outfeed tables are exactly the height of the chop-saw table (the table on one of my saws is 3-1/2 inches high, the other 4-5/16 inches high).
The center platform is about an inch longer and wider than the base of the saw. I usually use 48-inch-by-12-inch pieces of plywood for the upper tables. You’ll probably have to cut the corner off the right-hand table to clear the handle of saws that miter to 60 degrees.
I usually don’t add fences to the wooden tables. The saw’s metal fence works well enough even for long pieces, and I can easily screw on a zero-clearance table and fence for cutting little fragile moldings.