There are many ways to properly ventilate a bathroom exhaust fan, and plenty of options available to run the exhaust through a shingle roof or directly through a wall. However, I rarely see one installed through an exposed-fastener metal roof, so I have had to devise a way to do this efficiently.
For a bathroom on the interior of a floor plan, running the duct through the attic and out the roof is often the most direct, if not the only, option. While a gable-end wall may sometimes be an option, we have had customers balk at this when it was practical. More often, it is not practical. For a typical 50-cfm bath fan, code limits the length of 4-inch exhaust ducts to a straight run of 56 feet or the equivalent. The termination equals 30 feet, and each 90-degree elbow is equal to 15 feet, so you’re often not left with very much distance.
This is the reason I typically opt to go out the roof, and since many of the homes we work on have exposed-fastener metal roofing, this method has proven to work time and time again for us. The following photos and captions explain how we do it.
Fan Installation
1
of 4
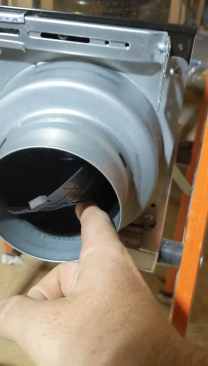
Suppliers often recommend zip ties for securing ducts to fan hou…
Suppliers often recommend zip ties for securing ducts to fan housings, but that is not enough.
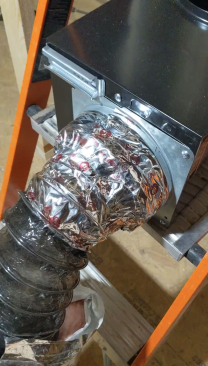
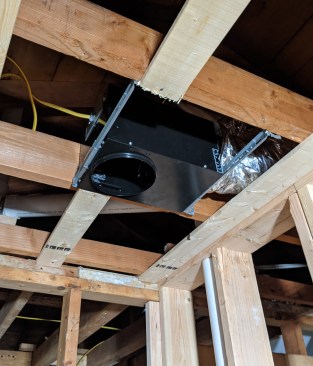
Using insulated duct is important to help prevent condensation f…
Using insulated duct is important to help prevent condensation from forming inside the duct, where it may collect or drip into a room through the fan body. To connect insulated flex duct, the author first secures the inner plastic sleeve with a high-quality foil tape …
… He then pulls up the insulation and secures it with the zip…
… He then pulls up the insulation and secures it with the zip tie.
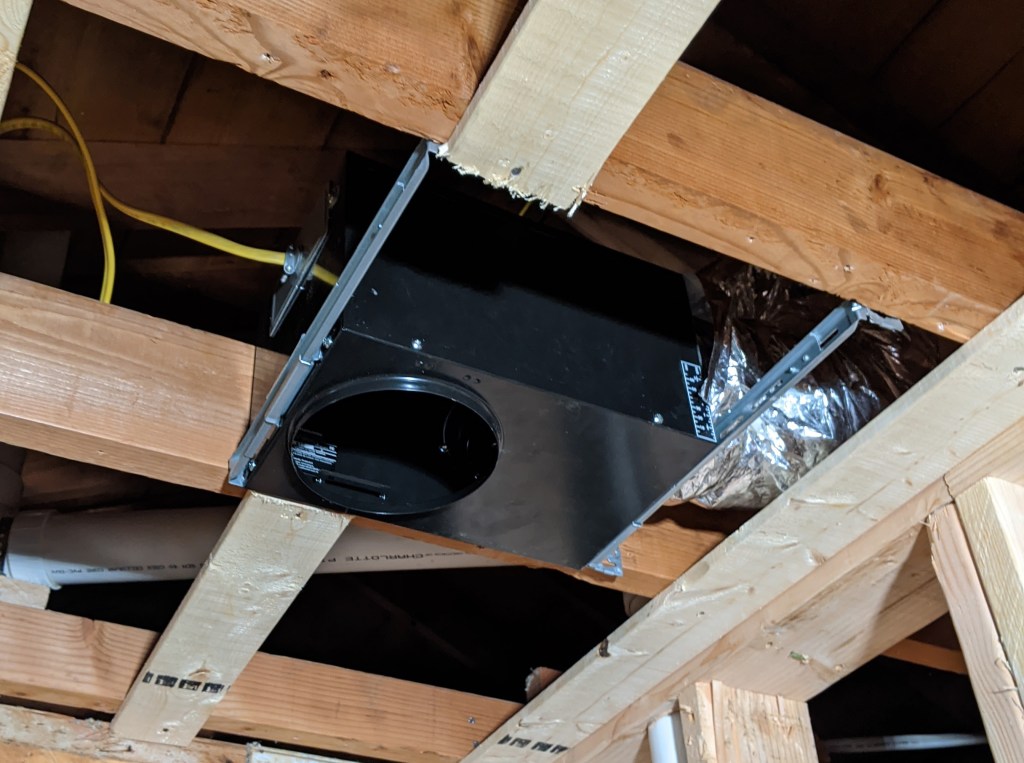
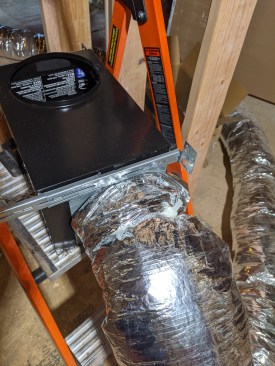
It’s usually easier to secure the duct to the fan first and th…
It’s usually easier to secure the duct to the fan first and then install the fan in the ceiling.
Vent Pipe
1
of 7
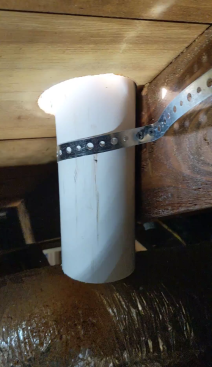
Once the fan is installed, the author strategically cuts a hole …
Once the fan is installed, the author strategically cuts a hole as close to a framing member as possible. This member will provide support for the vent pipe. Temporarily using pipe strap, he attaches a short length of 3-inch PVC pipe to the rafter next to the hole.
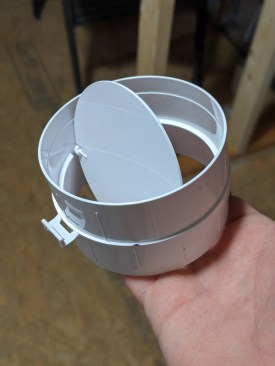
To further help prevent condensation, the author installs a seco…
To further help prevent condensation, the author installs a secondary damper near the outlet, using this type of PVC backdraft damper, which is available online for around $10.
He can find the damper only in a 4-inch diameter, so he tapes it…
He can find the damper only in a 4-inch diameter, so he tapes it to a 3-inch PVC coupler.
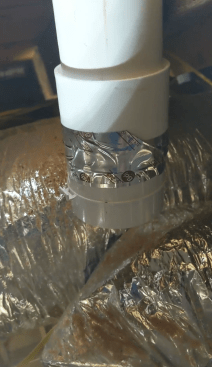
The author glues the damper assembly to the short PVC pipe on th…
The author glues the damper assembly to the short PVC pipe on the rafter, making sure that the damper is in the appropriate closed position.
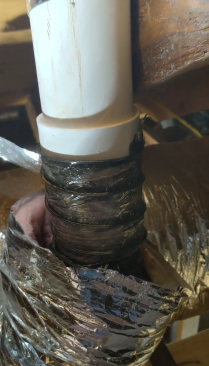
After cutting the duct to length, the author tapes its interior …
After cutting the duct to length, the author tapes its interior sleeve around the damper assembly.
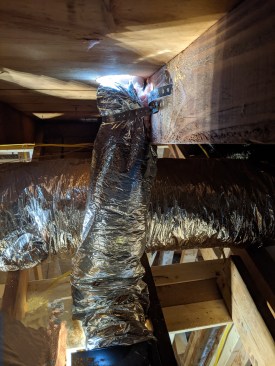
The insulation jacket is cut longer than the inner sleeve to all…
The insulation jacket is cut longer than the inner sleeve to allow the insulation to be pulled over the short PVC pipe, insulating it up to the roofline.
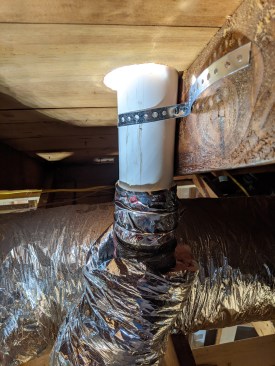
To secure the insulation, he backs out the screws on the pipe st…
To secure the insulation, he backs out the screws on the pipe strap, pulls up the insulation, and after a final check outside to make sure the pipe is plumb and straight, he reattaches the pipe strapping permanently.
On the Roof
1
of 4
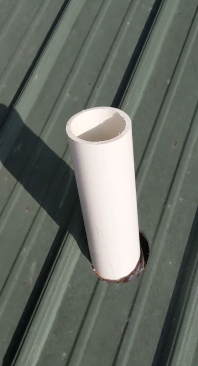
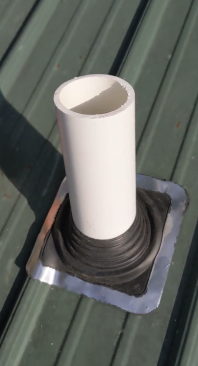
On the outside, the result is a common and easy pipe penetration…
On the outside, the result is a common and easy pipe penetration through the exposed-fastener metal roof.
The author then installs a flexible boot (this one is made by Oa…
The author then installs a flexible boot (this one is made by Oatey), which has a soft aluminum and lead edge made to conform to the panel ribs. (For more on the installation of this type of boot, see the author’s article “Reroofing With Exposed-Fastener Metal Panels,” Sep/20.)
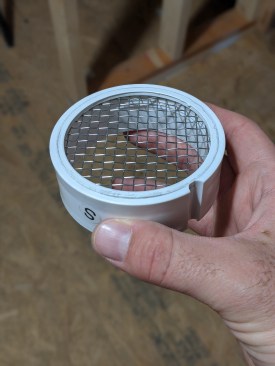
The final steps address two concerns: vermin and water entering …
The final steps address two concerns: vermin and water entering the exhaust pipe. To combat vermin, the author uses a PVC mesh insert , which he buys online for around $9.
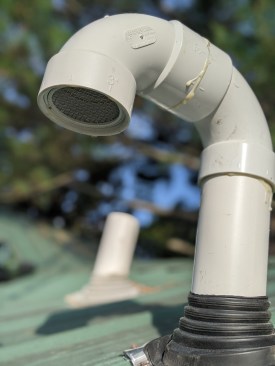
To prevent water from entering the exhaust pipe, he connects two…
To prevent water from entering the exhaust pipe, he connects two 90-degree elbows together and attaches them to the exposed PVC stack. He keeps the outlets high enough to prevent snow from blocking them. In areas with more snowfall, they can be made higher, though in practice, the exhaust typically melts snow away from most roof vents before it can cause problems.