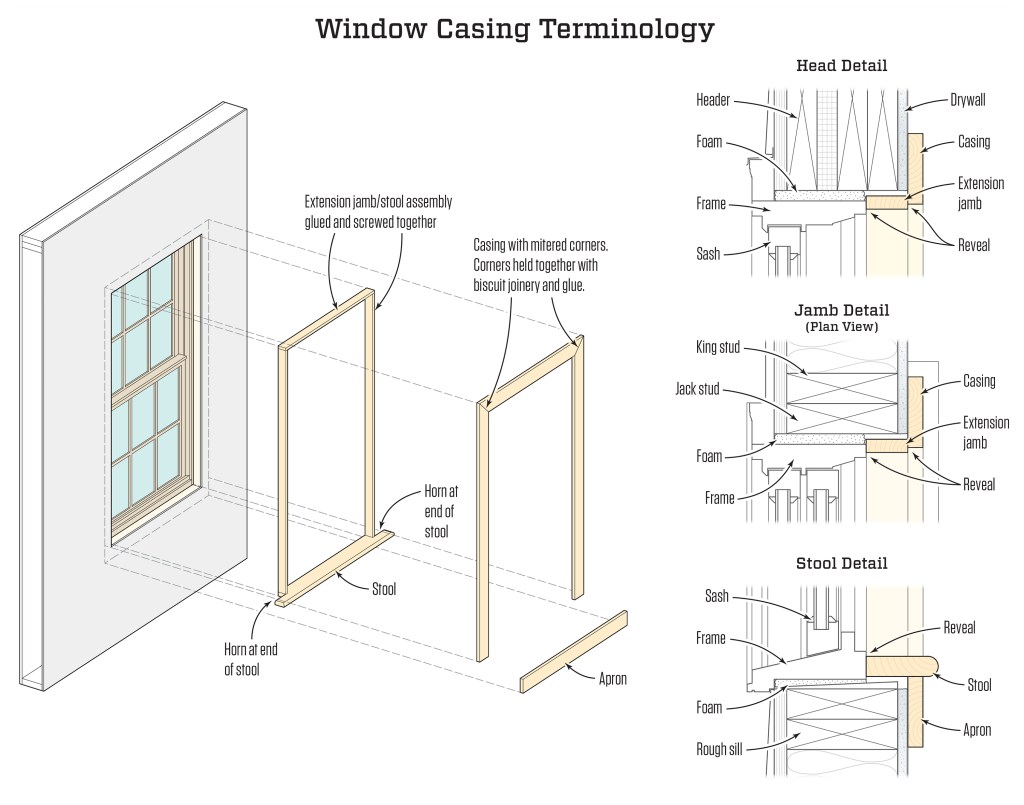
Measure for the extension jambs
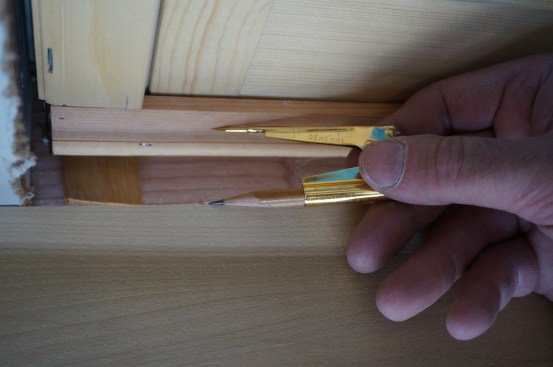
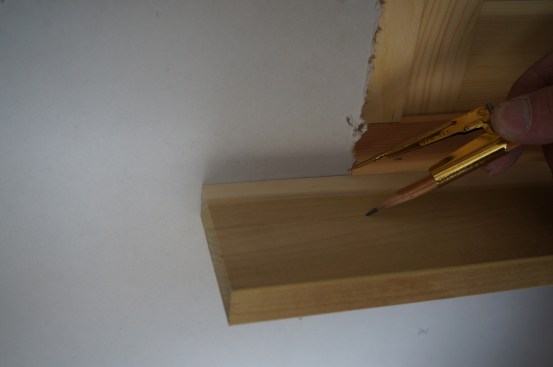
Most windows I trim out need jamb extensions. To determine the width of the extensions, I measure between the edge of the jamb and the wall surface at every corner and jot each dimension on a note pad. A quick way to find these measurements is to bridge between adjacent wall surfaces with a layout square and then measure to the edge of the square. At this time, I also measure the inside dimensions of the window, both width and height, and record those measurements as well.
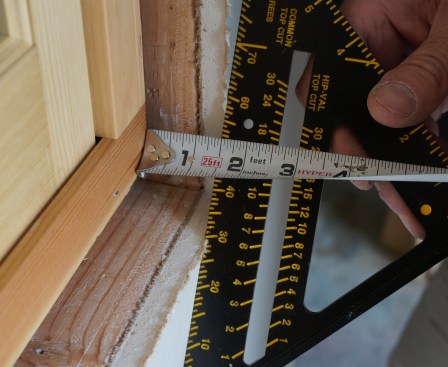
The first step in casing a window is measuring for the jamb extensions, pieces of wood that extend out from the window frame, flush with the interior wall surface. Measure at each corner and record the measurement.
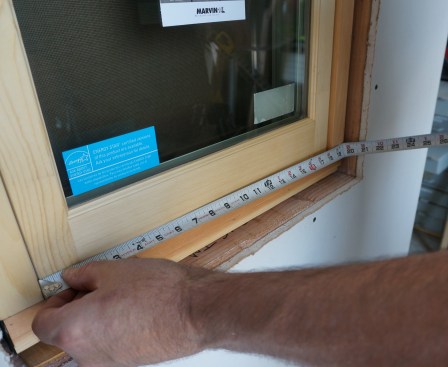
Next, measure the inside dimensions of the window frame both vertically and horizontally. Record these measurements.
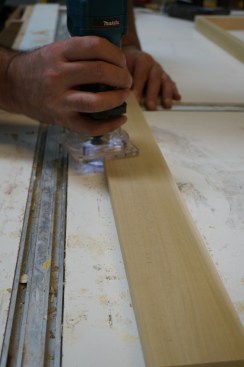
Rip the stock for the stool to the proper width and cut it to length. Ease the edges of the stock with a router.
Scribe the Stool
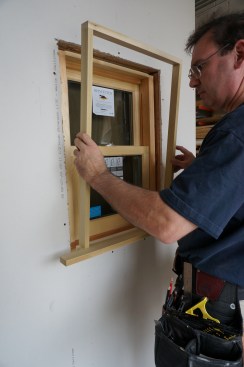
Windows used to be set up to receive a rabbeted stool, and the traditional way of trimming a window was to install the stool first with the extension jambs installed on top of the stool. But most modern windows are not set up this way, and while many finish carpenters opt to follow that scenario, I just let the stool do double duty as both the lower horizontal extension jamb and window “sill.” Either way the stool is the first piece of trim to be cut and installed.
From the measurements I took earlier, I already know how deep the extension jamb part of the stool needs to be. Next, I need to figure the amount that the stool will extend, or overhang, into the room. On most casing projects, I let the stool extend 3/4 to 1 inch beyond the thickest part of the casing. The colonial casing that I installed on the window in the photos was 5/8 inch thick along the outside edge, so adding a 1-inch overhang and the 5/8-inch casing to the extension depth of 1-1/2 inches gave me a total width of 3-1/8 inches for the stool. For the length of the stool, I allow enough for the stool horns to extend 3/4 inch beyond the outboard edge of the casing on either side of the window.
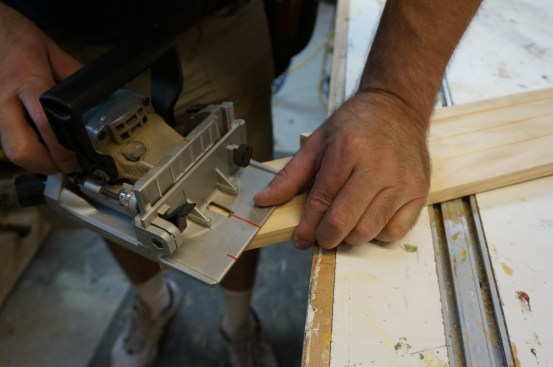
I milled the stool out of 3/4-inch-thick poplar, easing the outer edges with a router equipped with a 1/8-inch round-over bit. The walls around window openings are notorious for being uneven for many reasons. To make the stool meet the walls and the window perfectly, I scribe the stool to fit. This process begins by marking the centerline of both the window and the stool. Then I hold the stool against the opening, align the centerline marks, and set my dividers or scribes to the distance between the inside edge of the stool and the window frame. On each side of the window, I run the point of the dividers along the wall while the divider pencil marks the wood that I’ll need to remove to form the horns at either end of the stool. I also mark the edges of the opening where the stool returns to the window.

Measure and mark the centerline on the window frame as well as on stool stock. Hold the stock in place and align the centerline marks.
Set the dividers at the distance between the edge of the stool and the window frame.
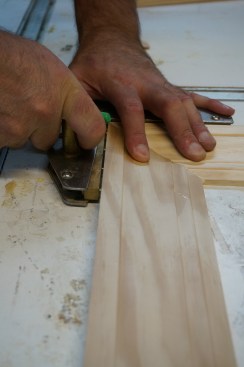
At the work bench, I cut the stool to the scribe lines using a jigsaw, and check to make sure it fits tight to both the window and the wall. If additional fitting is needed, I usually do it with a hand plane.
Holding the point of the dividers against the wall, scribe a line for the parts of the stool that extend to either side of the window opening.
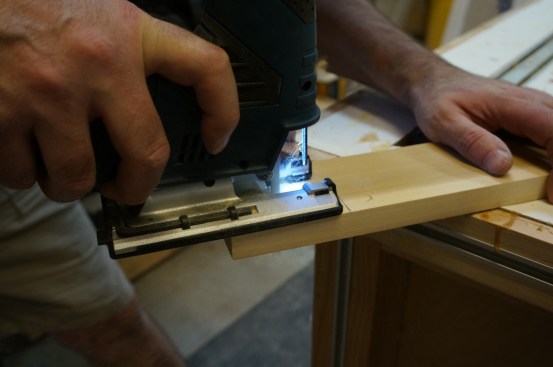
Using a jigsaw, follow the scribe lines to create the horns on the stool stock.
Reveals
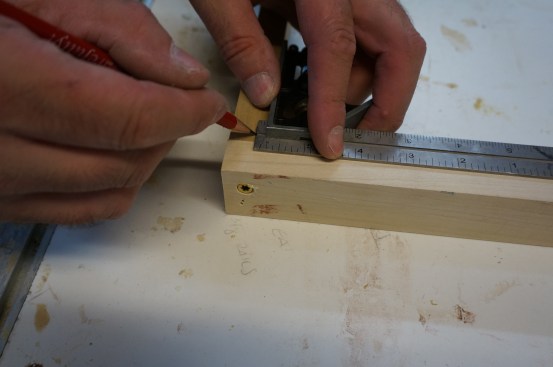
Next, I cut and prepare the extension jambs. If I’m lucky, the extension jambs are a consistent width and I just have to rip stock for them on the table saw. I wrote down the inside dimensions of the window, but those are not the final lengths of my extensions. One thing that finish carpenters learn early on is that casings and jamb extensions are easier to execute and look better when installed with an offset (more commonly referred to as a reveal) between them and whatever they’re attaching to. I typically use a reveal of 1/4 inch unless a client instructs me to do otherwise. I mark the reveals at each corner using a combination square. These marks are not for measuring but rather for registering the components as I install them.
Rather than measuring between reveals for the final lengths, I simply add the reveal dimensions (and thickness of the jamb extension stock, if required) to each piece as I cut it. For the vertical extension jambs, I add twice the reveal (1/2 inch total) to the dimension I’d written down. For the horizontal extension jamb, I again add twice the reveal and twice the thickness of the extension stock (typically 3/4 inch X 2, for a total of 1 1/2 inches) to the length I’d recorded earlier.
After ripping stock to the measurements taken earlier, cut the p…
Cutting and Assembling
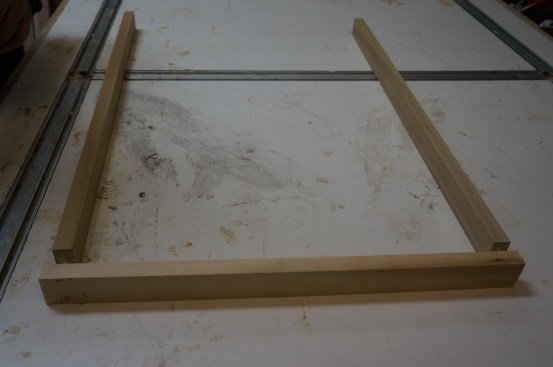
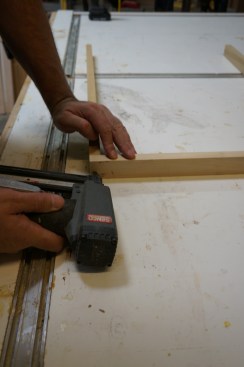
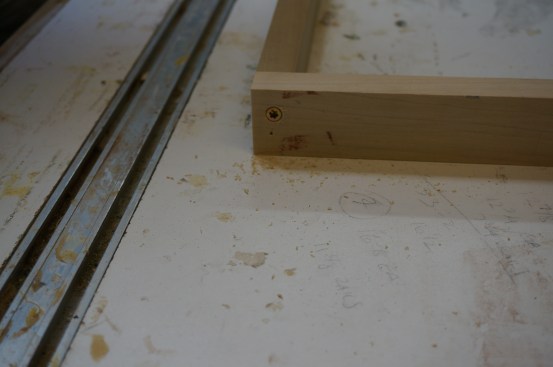
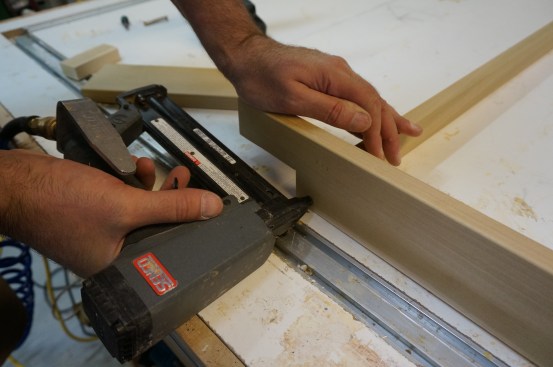
When all the jamb extension pieces are cut to length, I fasten them together into a single assembly that will be easy to install. I glue and tack the jamb extensions together using 18-gauge brads, and then add 2-inch wood screws at each corner–-a single screw for stock up to 2 inches wide, and two screws for wider material. I always pre-drill for each screw to minimize splitting the wood.
Then I fasten the stool to legs of the extension Jamb assembly with glue and nails. Finally, I strike marks around the perimeter of the assembly about every 18 inches for the casing reveal. I also measure and record the inside dimension of the extension assembly to calculate the length of each piece of casing.
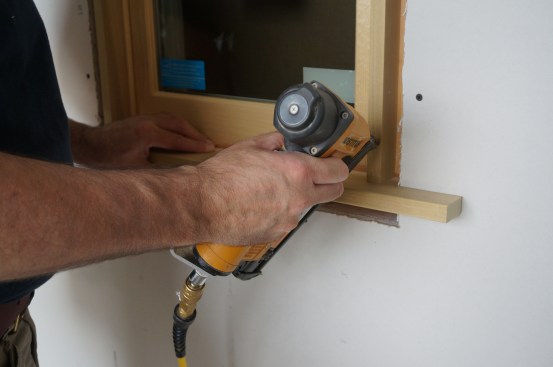
The assembly is now ready for installation. I set it in place using my reveal marks to make sure it fits where it’s supposed to. When I’m satisfied, I run a bead of glue around the perimeter and drive nails to attach the assembly to the window.
Cutting Casing
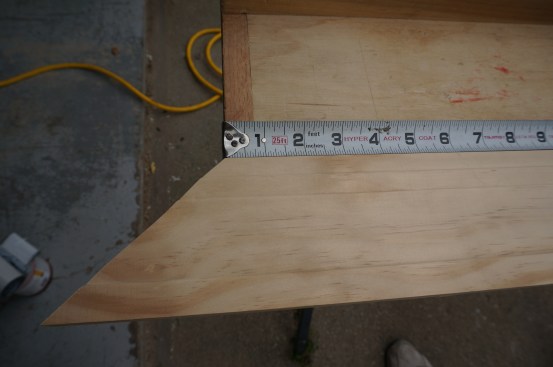
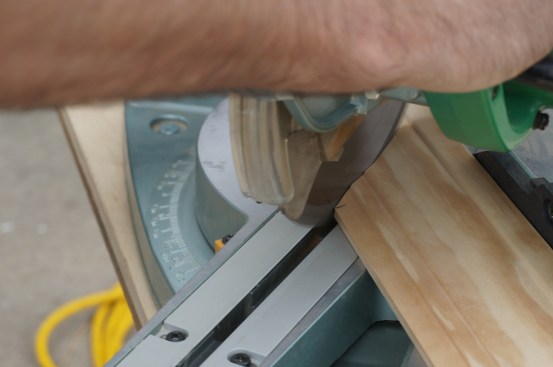
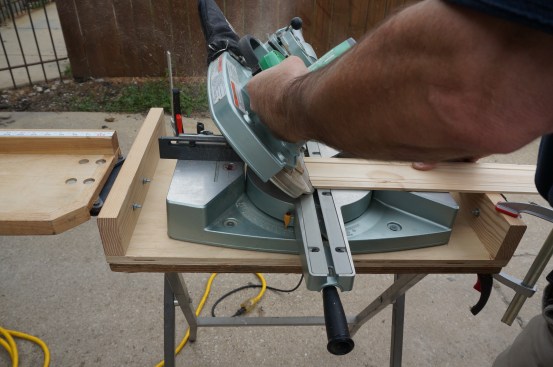
To prepare the casing, I cut a 45° miter on one end of each of the three pieces. The two vertical legs have 90° cuts on the bottom and the head casing has a miter at each end. For the legs, I use the measurements that I took off the extension assembly and add the reveal dimension for the length to the short point of the miter. To make the measurement, I sent the piece on the work table with the short point of the miter flush with the end of the work table. Then I can just hook my measuring tape on the end of the table to measure and mark the length. The 90° cuts on the legs make it easy to line up the saw blade for cutting.
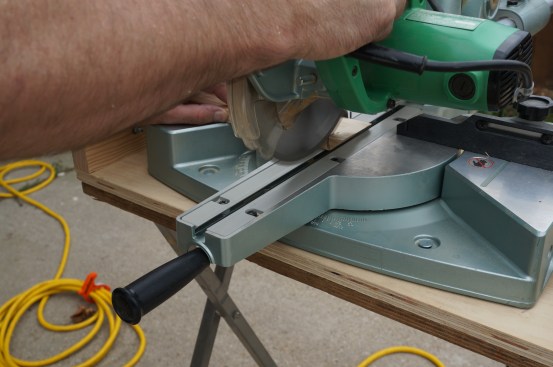
For the head casing, I add twice the reveal to the assembly measurement, and then measure and mark the short point-to-short point length. I cut the opposite 45° miter taking extra care cut exactly to my mark. For these cuts, I always try to use a sharp, good-quality blade to minimize splintering and tearout, and whenever possible I orient the stock against the fence in a way that any minor tearout will occur on the less visible outside edge of the casing.
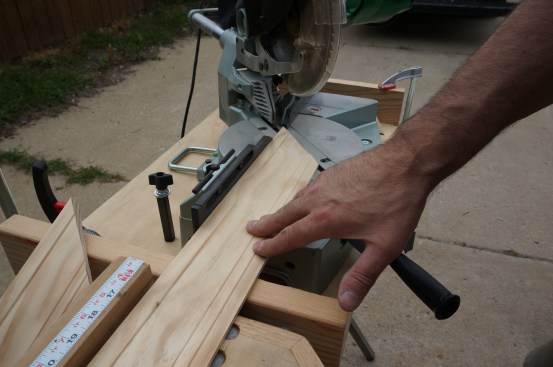
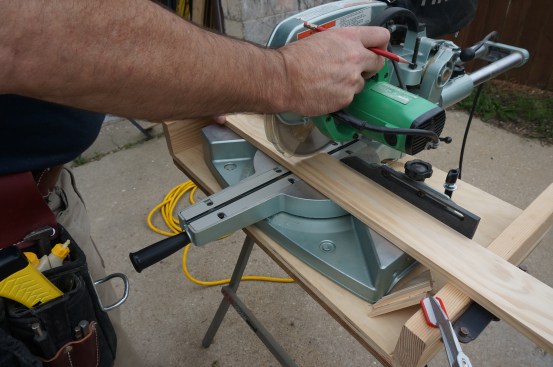
Start by mitering one end of each of the three pieces of casing.
Pre-assemble the Casing
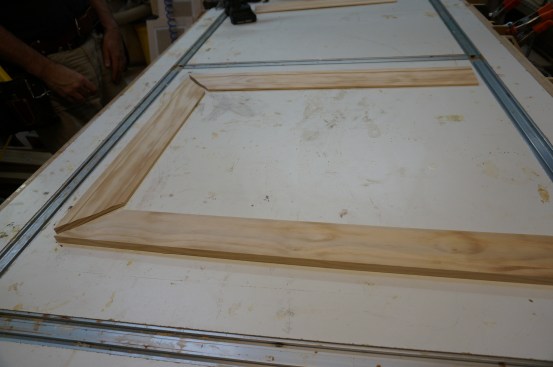
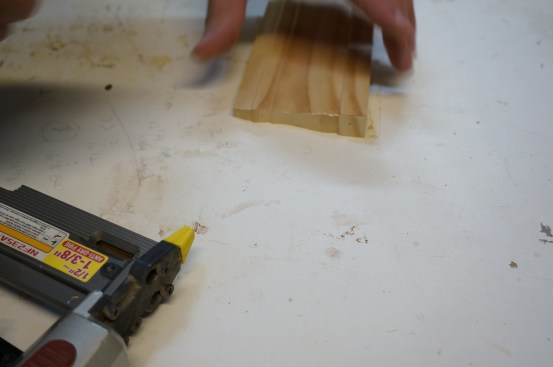
For a beginner, the temptation might be to install one piece of casing at a time. But just as with the jamb extensions, it’s faster and more accurate to assemble the casing on a workbench or assembly table before installation. To keep the miters tight, I reinforce the joints with biscuits and assemble them with special miter clamps called Clam Clamps.
I set the biscuit joiner for the largest possible biscuit the molding can receive, and work from the back of the casing to cut the slots for the casing miters. I apply glue to both the biscuits and the end grain of the miters, then clamp the joint with a Clam Clamp. Glue joints need pressure applied to them for the glue to cure properly, and the Clam Clamps provide that necessary pressure. I typically use “yellow” glue (usually Titebond) that requires about a half-hour clamping time, so I leave the clamps on for at least that long. Once I’ve removed the clamps, the joints are incredibly strong and are likely to remain tight for the life of the trim.
Apron Returns
While still at the workbench, I cut and prepare the apron. The length of the apron should be the same as the length of the head casing, and the ends should line up with the outside edges of the side casings.
The ends of the apron receive bevel cuts for the returns.
To make the tiny return pieces, first make a bevel cut on the end of the stock and then cut it square.
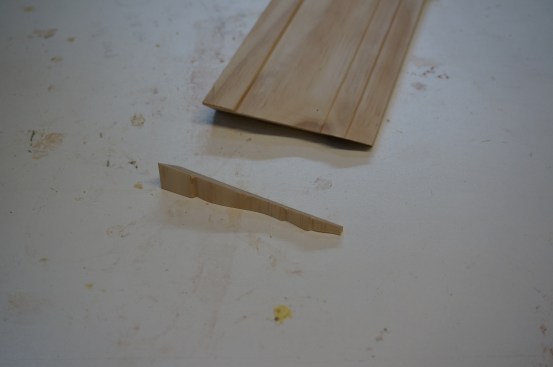
Here the return has been cut and is ready to be applied to the end of the apron.
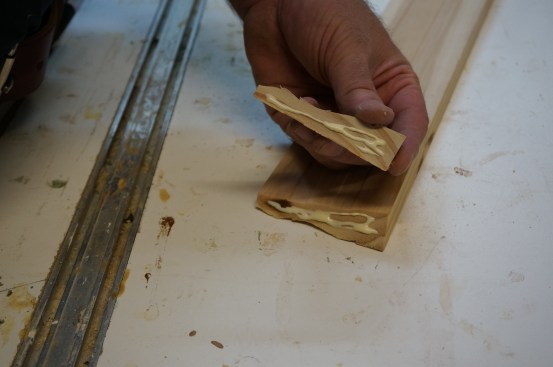
Put glue on both the return and the bevel cut on the end of the apron.
Tiny 23-gauge pins hold the return in place until the glue has cured.
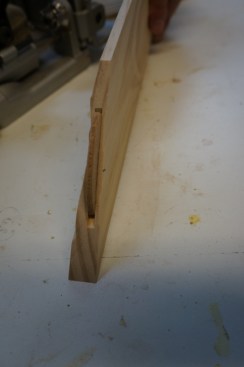
You can’t simply square-cut the ends of the apron, as doing so exposes the plowed reverse side of the molding and looks unfinished. Instead, finish the ends with returns (sometimes referred to as “self returns”). When I cut the apron to length, I make 45° bevel cuts at both ends. I repeat the process on the ends of a scrap of the casing material, being sure to cut both left- and right-hand bevels. I then make 90° cross cuts to create small, triangular pieces. These are the returns, which I then fasten to the apron using glue and 23-gauge pins.
Note: When you cut the tiny returns they can get kicked by the saw blade’s teeth, and fly into oblivion. To prevent this from happening, make the 90° crosscuts by plunging down with with miter saw and then let go of the trigger. Allow the blade to stop before letting the blade to come back up.
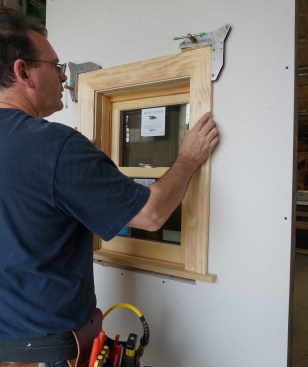
The casing assembly sits on top of the stool horns while the author aligns it with the reveal marks on the extension jambs.
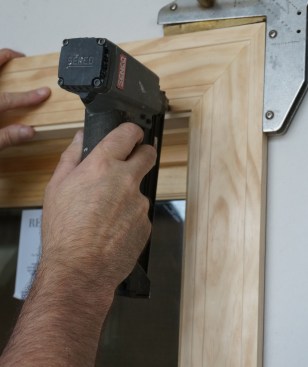
Finish nails along the inside edge secure the casing in place. Note that the nailer is held with the nose perpendicular to the edge to keep the nail heads parallel to the grain.
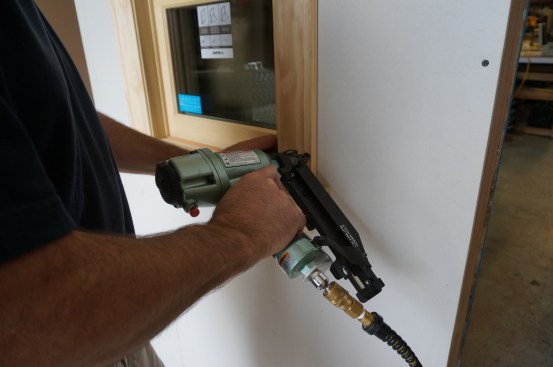
Larger 16-gauge finish nails attach the outside edge of the casing to the wall framing.
Install the Casing
The final step is installing the casing. I position the pre-assembled casing on the reveal marks that I’d made on the extension jambs, and nail the assembly to the extensions with 18-gauge brads, typically 1 1/4 to 1 3/4 inches long. I make sure to hold the nailer gun perpendicular to the casing so the heads of the brads are parallel with the grain, which minimizes the chance of splitting the fragile edge of profiled moldings. Next, I nail the casing to the wall, usually with 16-gauge finish nails long enough to penetrate the framing by at least an inch.
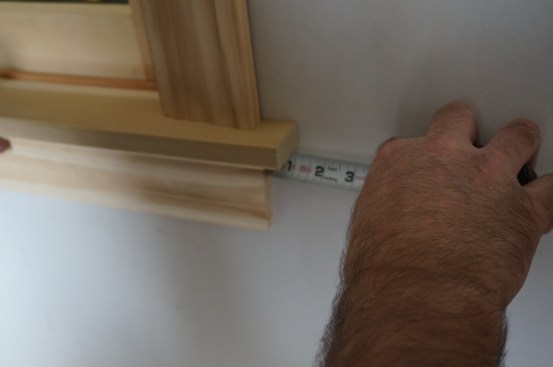
The end of the apron should line up with the outside edge of the casing above. Here, the author matches the measurement from the end of the stool horn.
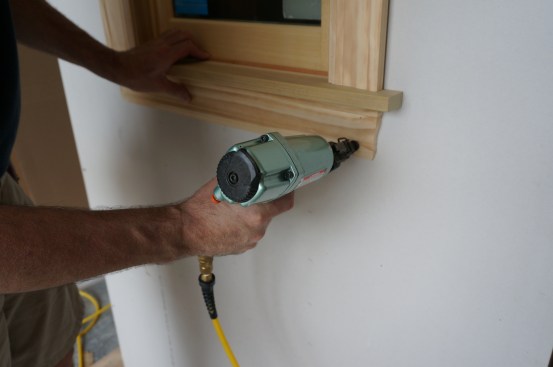
The final task for casing a window is nailing the apron in place. 16-gauge finish nails anchor the apron to the framing around the opening.
The apron is the last piece to go in. I run a bead of glue along its top edge and line up the ends with the casing legs above. I fasten the apron to the framing with the same 16-gauge finish nails that I used on the casing.
All photos by Sue Burnet