Check the RO First
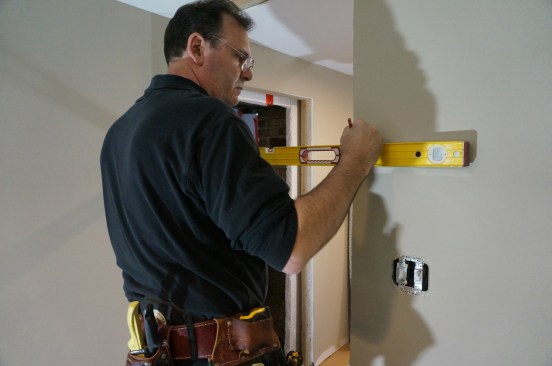
I begin by checking the opening for plumb using a long, good-quality level. I pay particular attention to the hinge side of the opening, because this side sets the tone for the door’s operation. If the frame needs adjustment, I often remove the nails securing the jack stud to the king stud and shim behind the jack until it’s plumb. I then re-secure the jack with plenty of fasteners. Even if the jacks are plumb, I often add fasteners to the hinge side to be sure it’s well secured. With the weight of the door pulling on the jacks, they can work loose over time and cause the door to bind.
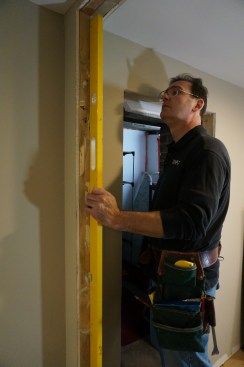
Using a long level check the jambs to make sure they are plumb and square to the opening.
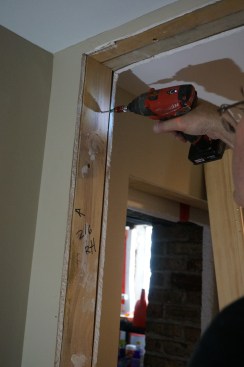
Drive a couple of long screws through the jacks on the hinge side as insurance to keep the jacks from loosening up over time, which can cause the door to sag.
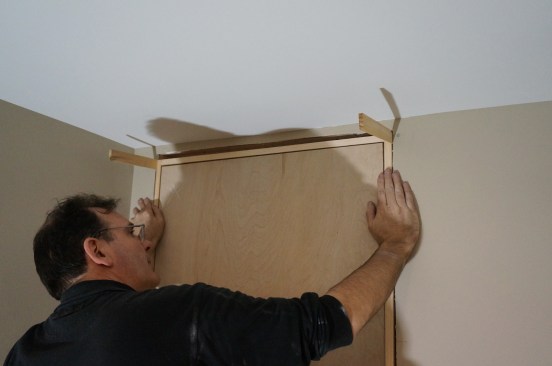
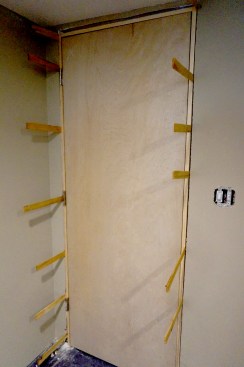
Next I check the opening to make sure the legs are not cross-legged. To determine whether an opening is cross-legged, I drive a nail or screw through the drywall at each corner, leaving it proud of the surface by a half inch or so. I tie a string to one of the fasteners and stretch it diagonally from corner to corner, forming an X pattern. I make sure the string is flat against the surface of the wall at each corner, and then check the intersection of the strings in the middle of the opening. The strings should be just barely touching. If they’re not touching, the two sides are not in the same plane and the opening is “cross-legged.” If that condition is not corrected, a door installed in the opening will not operate properly.
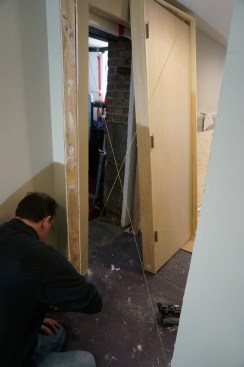
Stretch diagonal strings from the corners of the opening to check for cross-leggedness, a condition where the sides of the opening are not in the same plane.
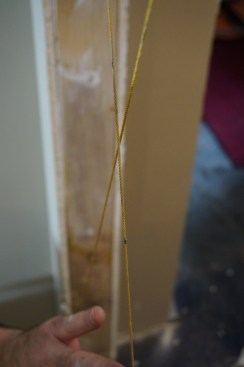
If the sides of the opening are in the same plane, the strings should barely touch where they cross. If the strings are not touching, adjust the framing in or out until the opening is plumb and the strings are touching.
To correct a cross-legged condition in new construction, I can usually coax the offending wall back into position by tapping on the bottom plate with a small sledgehammer. That solution, of course, might not be advisable, particularly if the surface of the wall is plaster or tile. When I can’t move a wall to correct a minor cross-legged condition, I sometimes set the jambs in plane with the wall and then adjust the door stops to compensate. Severely cross-legged openings often require that the door assembly be set out of plane in relation to the wall, and then the jambs get either planed or padded out to make them flush with the surrounding walls.
As a final check, measure the width of the opening. It should be the width of the assembly plus 1/2 inch (1/4 inch extra room on either side).
Rough openings are oversized so that doors can be adjusted plumb, even when the opening itself is not plumb. The accepted industry standard is to frame the RO 2 inches wider than the width of the door slab. In theory, this leaves about a 1/4-inch space on either side of the jamb. However, most of ROs I see are wider than this. I check the width of the RO, and if it’s more than 1/2 inch wider than the outside dimension of the door assembly, I pad the side of the opening with a scrap of plywood. I keep precut squares of plywood on hand in thicknesses ranging from 1/4 to 3/4 inch and cut to 4 1/4 inches square, which is slightly narrower than a conventional 2×4 wall with 1/2-inch drywall applied to both sides. To pad out the opening, I just tack blocks to the jack stud every 12 inches or so.
Level the Head
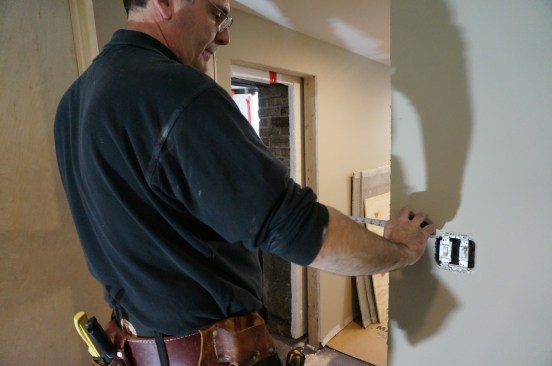
To make the reveal even between the top of the door and head jamb, the assembly must be installed with the head jamb level. To make the head jamb level, I first check the floor for level across the opening and note any difference. The easiest and most accurate way to determine the difference is to measure up a given distance on one side of the RO (I always choose an even number such as 60 inches). Next I level across the opening and mark the second side. Then I measure down to the floor on that side.
To make the head of the assembly level, first measure up on one side a given distance; in this case, 60 inches.
Then level across the opening and make a mark on the other side.
If the second measurement is greater than my first (60-inch) measurement, I remove the difference from the jamb leg that will be on the first side. If the second measurement is less than the first dimension, I remove the difference from the other jamb leg. When I’m setting more than one door in a room, I usually shoot a level control line around the room with a laser level. Then I measure off the control line to cut the jambs to length, which ensures that all the door heads in that room will be at the same height.
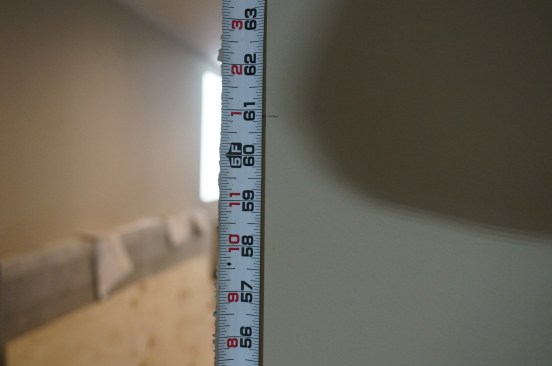
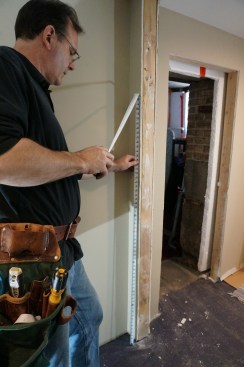
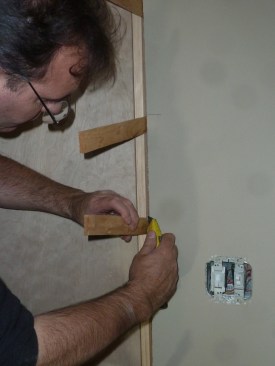
Measure from the floor on the second side. In this installation of doors in a finished basement, the measurement is 60 7/8 inches. The difference between the two measurements must be removed from the bottom of the door jamb to let the door head sit level.
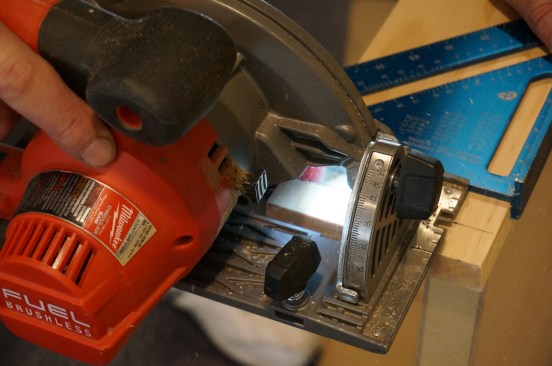
Measure up the difference you discovered and remove that amount from the jamb leg.
Installing the Door Assembly
With the RO ready and the jamb legs trimmed as needed, the unit should fit easily into the opening with between 1/8 inch and 1/4 inch of space between the side jambs and the RO. At this point, some carpenters prefer to pull the hinge pins and remove the door from jambs before installing the assembly, but I leave the door slab attached to the jamb and use it to gauge the fit of the door within the jambs.
At every step in the process, I pay close attention to the reveal between the door and the jambs. I try to maintain a 1/8-inch margin along the head jamb and a strong 1/16-inch gap between the edges of the door slab and the side jambs.
Set the door assembly in the opening and insert shims on either side of the head jamb. These shims hold the assembly in the opening without fasteners. Check to be sure the reveal is the same all around the door.
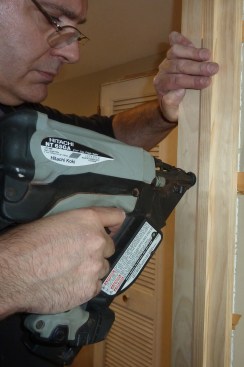
Snug a shim into the gap between the jamb and the framing just above the top hinge.
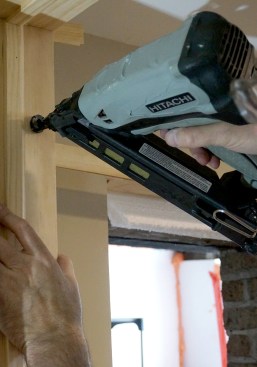
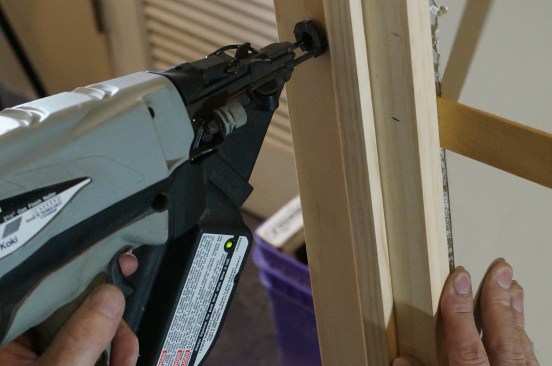
Drive a single nail above the shim. The pressure from the nail keeps the shims from moving, but allows them to be adjusted easily if necessary.
With the assembly sitting in the opening, I start by inserting shims on either side of head jamb, which lodges the door in the opening without fasteners and lets me concentrate on shimming the assembly properly without holding it. At this point, the side jambs should be resting on the floor, the head jamb should be level, and the margins along the head and side jambs all fairly even. I insert shims behind the top hinge and drive a single 15-gauge finish nail above the shim. This nail secures the door yet allows me to adjust the shims in or out if needed. I insert shims at the bottom hinge and then plumb the hinge jamb using a long level.

Plumb the hinge jamb and insert shims at the bottom hinge as well.
Because I’ve already plumbed the jack stud, the level works as a straightedge as much as for plumbing purposes in this application. Again I drive a single nail above the shims. I repeat the process for the middle hinge, using the level to keep the hinge jamb perfectly straight.
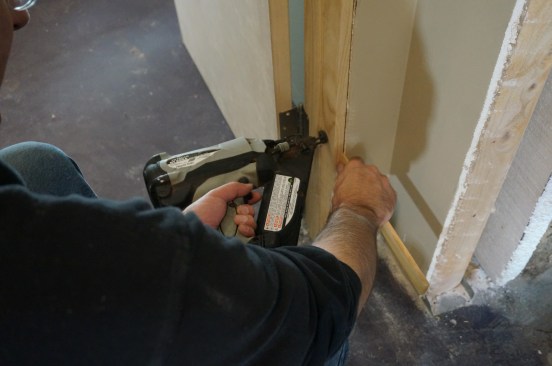
As before, drive a single nail just above the shim.
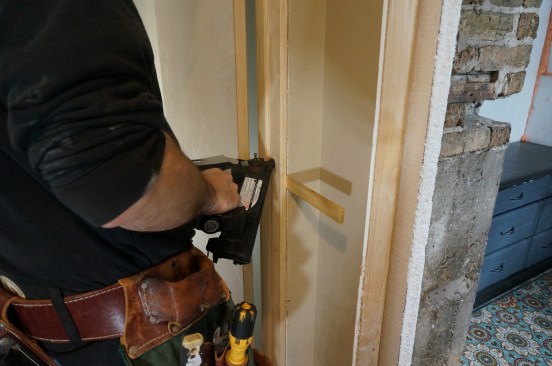
Do the same at the middle hinge.
Once the hinge side jamb is secured, I close the door and re-check the margin between the slab and the jamb on the strike side. If the door has been properly hung and I’ve done my prep work correctly, the margin should be very close, with only minor shimming required to make it consistent. I insert the first shims for the strike jamb at the bottom of the door, and then behind the strike plate at the middle of the jamb. As with the hinge side, I drive nails above these shims as well.
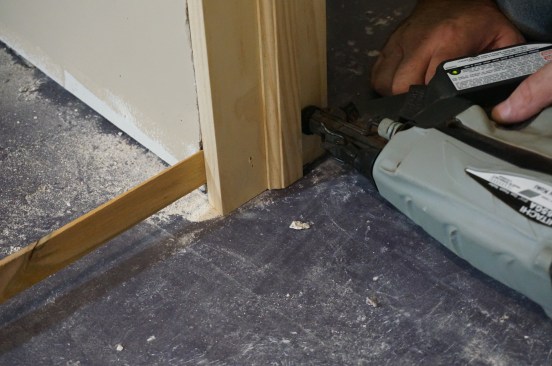
On the latch side, insert a shim at the bottom of the jamb and secure it with a nail driven just above the shim.
Repeat the same procedure at the middle and top of the latch jamb.
Insert intermediate shims every 12 to 16 inches along both jambs.
When the reveal between the door slab and the jambs is perfectly even, go back and secure the jambs at each shim with two nails driven through the shims this time.
When I’m happy with margins on all sides of the door, I add intermediate shims on both sides of the door about every 12 to 16 inches. These extra shims help stabilize the jambs over their entire length. Before nailing off the jambs at the shim locations, I close the door and check the margins all around one last time. If any final tweaking is necessary, I adjust the shims as required (these adjustments are usually minor). When I’m satisfied with the operation of the door and the margins, I drive two 15-gauge nails through each set of shims, one on either side of the door stop.
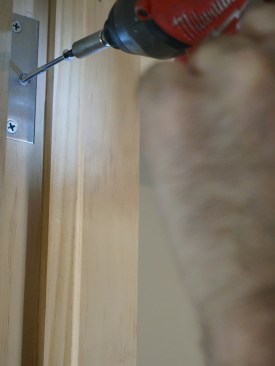
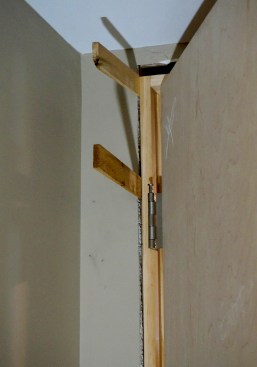
When you are happy with the hinge jamb, remove one of the hinge screws and replace it with a screw long enough to screw into the framing behind the jamb. The screw secures the top hinge in place for the rest of the installation.
After nailing off the jambs, cut the shims off flush with the edge of the jambs using a utility knife or an oscillating tool.
To prevent the door from sagging in the future, I remove the screw from the top hinge that’s closest to the stop (and to the center of the jamb) and replace it with a 3-inch screw with a finish that matches the hinges. This screw is long enough to extend through the jamb and into the jack stud. As a final step, I cut the shims off flush with the wall surface using either a utility knife or an oscillating multi-tool. The door is now ready for the casing and a knob set.
Photos by Sue Burnet