Decide Where to Start
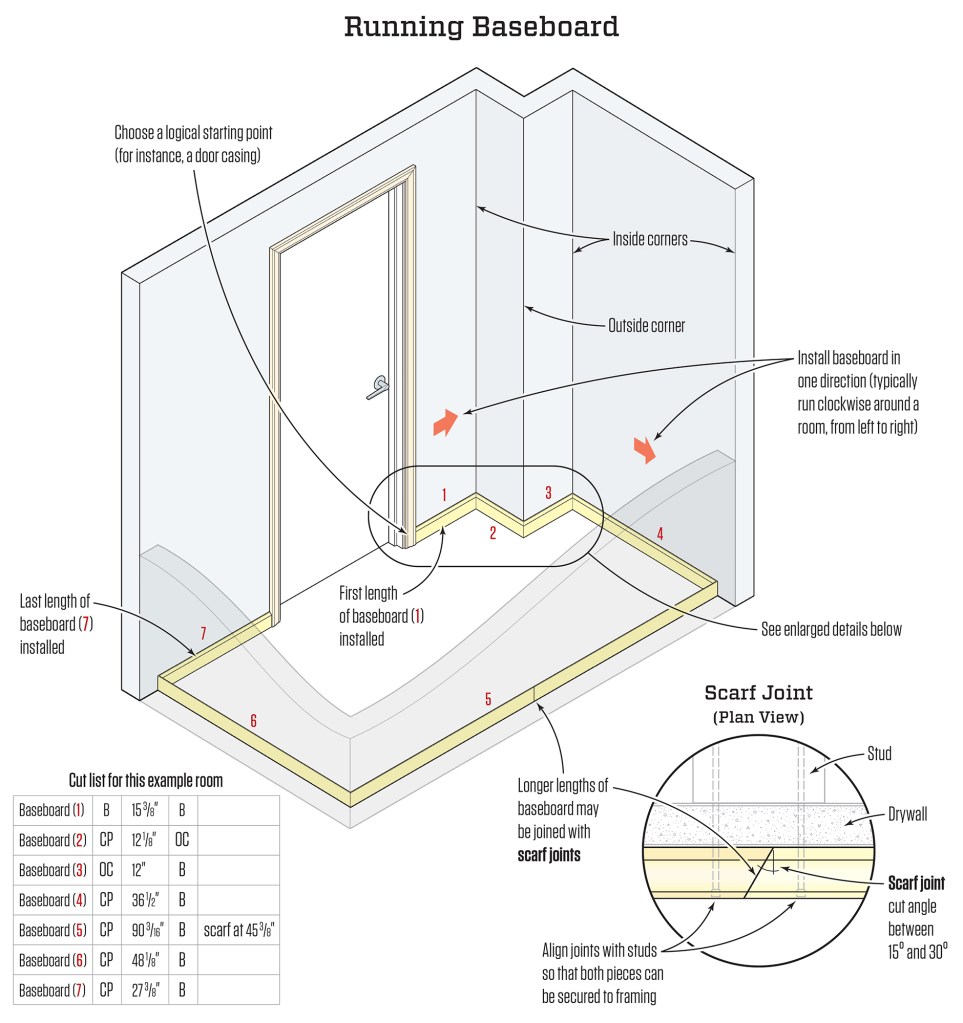
To run baseboard around a room efficiently, you should establish a sequence for both measuring and installing the pieces, and then stick to that pattern. Choose a logical starting point for the sequence. I prefer to start at the doorway and work my way from the door casing clockwise around a room from left to right. Going in this direction means that the coped ends of my pieces will be on the left. Because I’m right-handed, I find it easier to cope the left end of material; but others (especially southpaws) may opt for working in the opposite direction.
Make a Cut List
No other area of trim installation benefits more from having a cut list than baseboard. If you work off a list, you need to be on your hands and knees only twice: once for measuring and once to install the pieces after they’re cut. Without a list, you would need to do the baseboard a length at a time, constantly getting up and down, which is slow and tiring. In addition, depending on the house layout, it’s not uncommon to have the miter-saw station several rooms away, and having a cut list minimizes trips to and from the saw.
Another benefit to making a cut list is that it teaches you to trust your measurements. Mistakes become evident almost immediately, but more often than not, if you do cut a piece of base incorrectly, you can use it elsewhere on the project, for shorter runs or spliced with another piece for a longer run.
As you work around the room taking measurements and compiling a …
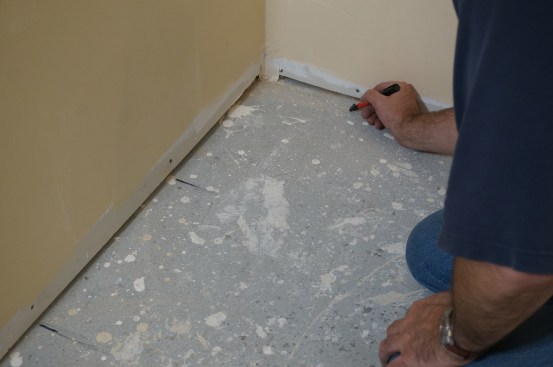
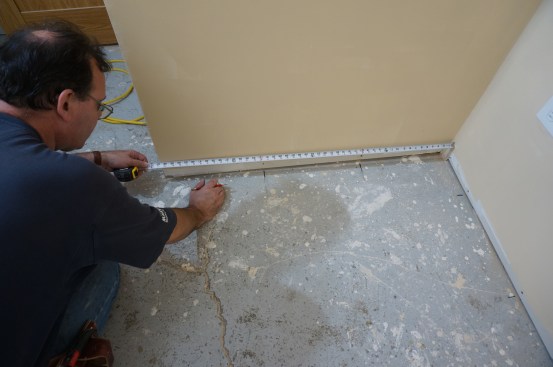
When I am at floor level to make the list, the first thing I do is mark out the stud locations on the floor as I measure each wall section. These marks will take the guesswork out of making sure the baseboard is fastened securely to the wall framing.
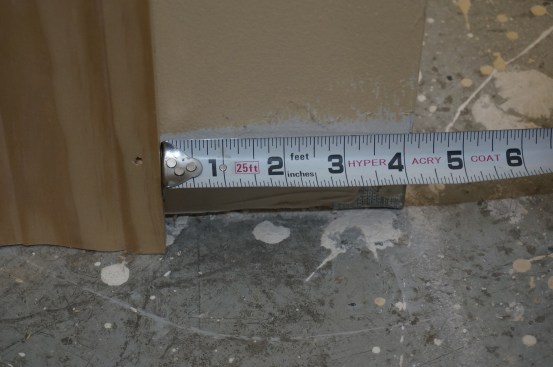
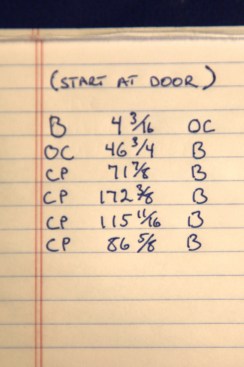
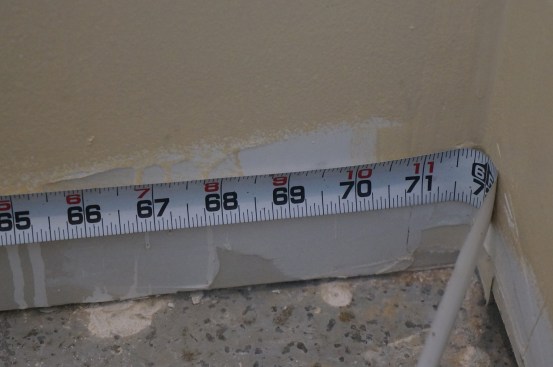
To make the list, I butt my tape measure against the door casing (my starting point) and measure to the next intersecting wall, in this case an outside corner. On my paper, I write “B” for butt cut in the left-hand column; the measurement, 4 3/16, in the middle; and then “OC” for outside corner, in the right-hand column. When I am at the saw, I will know to make a butt cut on the left end of the board and then measure 4 3/16 inches to the short point of an outside miter.
Next, I butt the tape into the corner of the next intersecting wall. For this piece, I write “OC,” the measurement of 46 3/4, and “B” because the right-hand end of the piece is a butt cut that starts the next coped corner. For the next piece, I butt my tape into the left corner and “fold” the other side into the right corner. Learning to read the proper length in this configuration takes a bit of practice because the blade does not nest neatly into the corner. For this piece, I write a “CP” for a coped end on the left, the measurement, and then “B” for a butt cut at the other end. I continue around the room in this manner, marking all the lengths and the end cuts until I reach the opposite side of the door casing.
Many carpenters use laser distance measurers, often called laser “tapes.” These expensive but accurate tools can save time, but for this article, I’ll stay with a conventional tape measure, which is the tool used most often for this task. As you record your measurements, keep in mind that it’s not critical to measure to 1/32 inch. When you cope an inside baseboard corner rather than mitering it, the measurement doesn’t need to be too precise—the next piece of base will usually cover any slight gap in the corner. That said, I try to cut all pieces of baseboard in a room slightly longer than the actual measurement. This extra length (which can be 1/16 inch on pieces 8 feet or longer) allows the base to be “sprung” into place, closing the coped joint in the process.
Cutting Baseboard
Once I have recorded the measurements and end treatments for each piece, I set up my miter-saw stand, which will serve as my work station for cutting. The wings of the stand support the stock and they are a convenient spot to cope the trim after cutting it to length. I try to set up the stand against a long wall in the largest unoccupied room on the level of the house where I’ll be working. I stack the lengths of base neatly along the opposite wall, but never more than a couple steps away from the saw to minimize wasted motion.
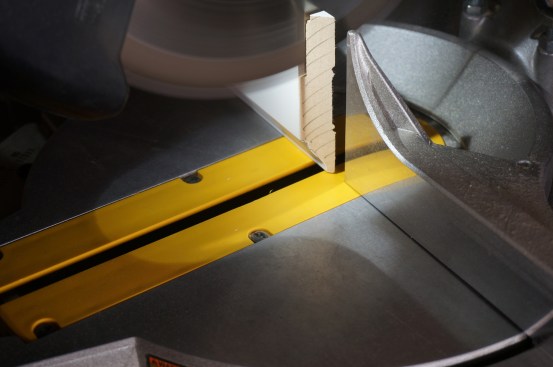
When cutting baseboard, make the angled cut on a board first. If both sides are angles, such as for an inside corner to an outside corner, make the angled cut for the inside corner first so that the measurement can be pulled from the long point.
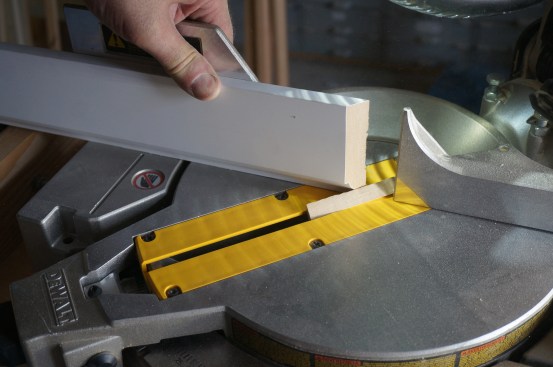
For cutting trim such as baseboard and casing, I like to use a 12-inch dual-bevel (non-sliding) compound miter saw. This saw has the capacity to cut most of the stock that I work with, but a good sliding compound miter saw will work just as well. When cutting baseboard, I load the stock onto the saw-stand wings one piece at a time. Because molding often comes from the supplier with out-of-square ends, I start by making a fresh square cut if that end is to be used at a joint. If an angled cut is required, I usually make that cut first (photo 6). Then I measure the length for the piece I need and make the required cut at the opposite end. The process is repeated until all the base for a room is cut to length. Any cut-off pieces stack neatly nearby in order of length. On larger jobs, I’ll often write the length of these pieces on the end, using a dark pencil.
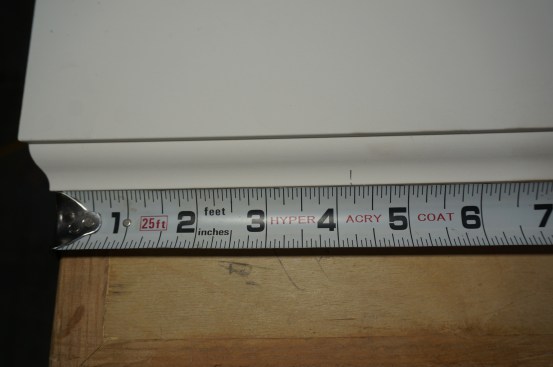
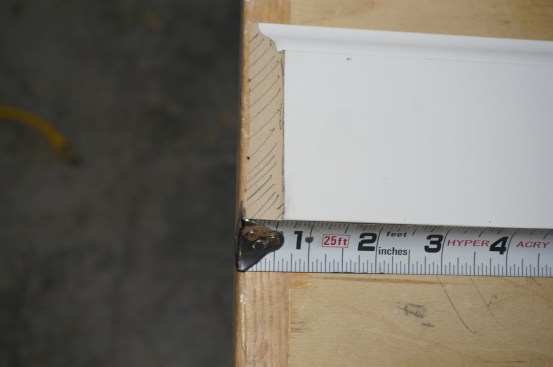
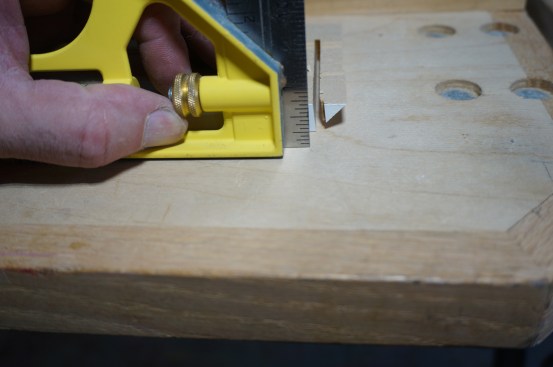
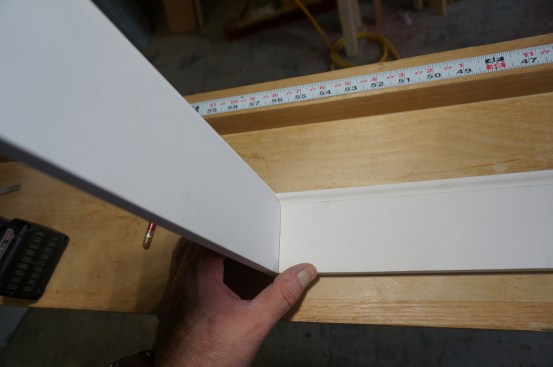
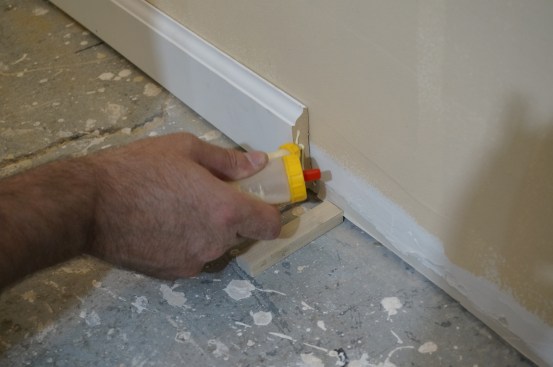
To make an accurate measurement from the short point of an angle for an outside corner, align the short point with the edge of the work bench or saw table, and hook the tape on the table to pull the measurement.
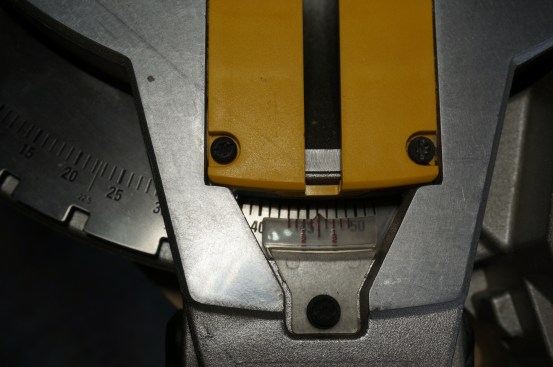
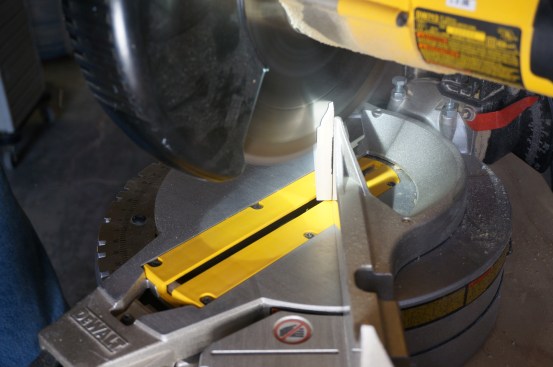
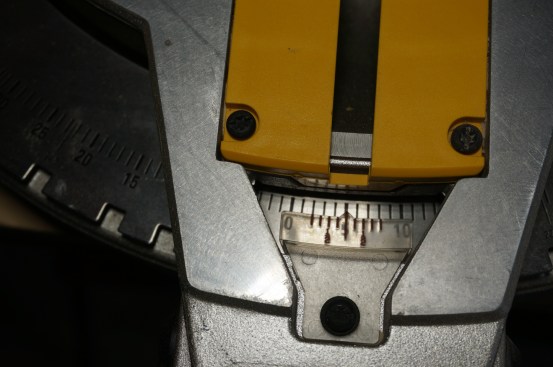
Outside corners are usually slightly more than 90°, so to split the angle, the author sets the miter saw at 46°.
To measure from an angled cut for an inside corner, I can just hook the tape on the long point of the angle. If I need to measure from the cut for an outside corner, I align the short point of the cut with end of the saw table, where I can hook my tape to pull the measurement. Because of the layers of drywall mud, outside corners are notorious for being more than 90°—usually closer to 92°—so when I make that cut, I set the miter angle to 46° so that the corner will close nicely.
Coping a Corner
Coping is a way of joining two pieces of trim at an inside corner joint. Instead of cutting matching angles on both pieces, you run one piece into the corner with a square cut, and you cut the profile of the molding into the end of the other piece to create the joint. It sounds complicated, but the technique is quite simple, as long as your tools are accurate and sharp. The best part is that a coped joint is forgiving and can often hide variations of a few degrees in the corner angle—something that is difficult to accomplish with a mitered corner.
The first step to coping an inside corner is making a 45° angle…
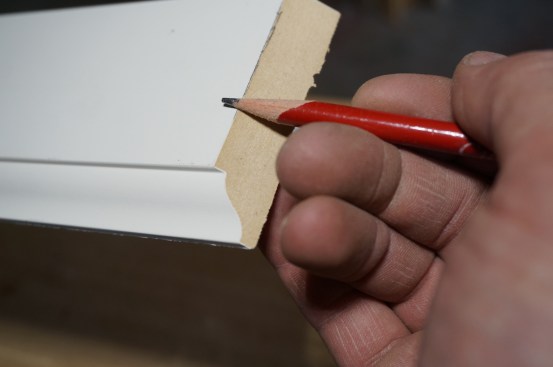
For the typical 90° inside corner, I measure and cut the first piece to run into the corner. For the mating piece, I cut a 45° angle across the face of the stock. I then measure the piece and cut it to length, again by hooking the tape on the long point of the angled cut. Now I’m ready to cope. The angled cut exposes the profile of the piece as cut at 45°, which I further enhance by running a pencil across the edge of the short point. Then it’s simply a matter of removing the material in the beveled area.
On many styles of trim, such as the colonial baseboard seen in the photos, the profile has a straight section, which I cut first by turning the piece upside down in the miter saw. I set the saw blade angle to 5°, so that the saw cuts slightly less than square. This technique, known as back beveling, ensures there is no material behind the cope that can interfere with the joint closing tightly. With the saw at that angle, I make the cut, letting the blade follow the straight line down to where the curved part of the profile begins. The result is a cut that slants away slightly from the profile line.
Next, I clamp the stock firmly to a bench or to a similar surface (such as the wings of my miter saw stand). The traditional tool used for removing the curved part of the profile is a coping saw, which has a thin blade held in tension between two ends of a hoop. The blade on a coping saw should be mounted in the saw with the teeth pointed toward the handle so that it cuts on the pull stroke. (Another tool that can be used for coping is a jigsaw fitted with a coping foot from the Collins Tool Company, but I would recommend mastering the concept and technique with a coping saw first).
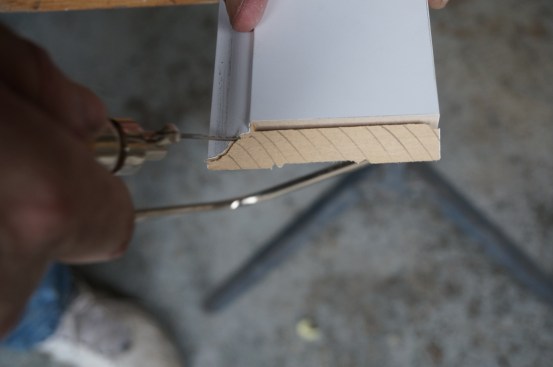
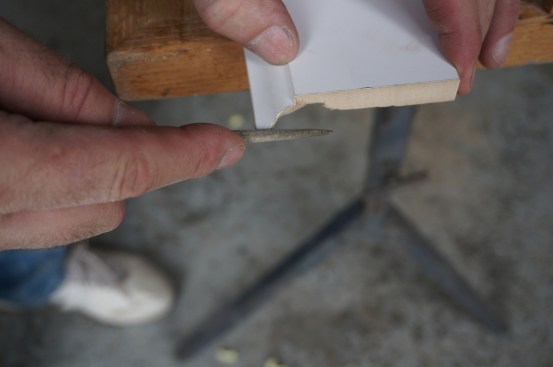
Begin the coping cut at the long point of the curve. This point is fragile, so take care not break the point off with your beginning strokes. (If the 45° line at the top of the joint is not important, you can make the first part of the cut square to the face of the board, which essentially removes the delicate point). I remove the wood along the curved part of the profile following the edge that I highlighted with a pencil (photo 15), keeping the blade as close to the edge as possible, without cutting into the face of the trim.
The trick to successful cutting with a coping saw is making quick strokes while applying minimal pressure. And the beauty of the thin coping saw blade is that it allows you to pivot the saw to follow the curve. Don’t worry about leaving a little of the edge uncut at this point. There’s no shame using a file or sandpaper to tweak a cope until it fits properly. Always make sure to hold the saw blade at a 5° to 10° angle to back-bevel the cut. As with the miter-saw angle for the straight part of the cut, back beveling helps to ensure that the joint will close tightly without interference. If you are a novice at coping, I’d recommend making several practice copes on scrap material to master the technique, and test-fitting the cope before trying to install the piece.
Outside Corners
The best way to deal with an outside corner joint is to bisect the angle of the corner. Most outside corners are 90° in theory, but the corner bead and drywall mud usually pushes them to 92° or more. So for most outside corner cuts, I usually just set my miter saw to 46° to cut the bevel angle on the opposing pieces (as mentioned earlier). Most miter saws have detents that lock the saw firmly at 45° and it can be difficult to override this setting by just a degree or so. If the walls are not 90° to each other, I calculate the bisected angle when I’m making the cut list, and I note the angle on it.
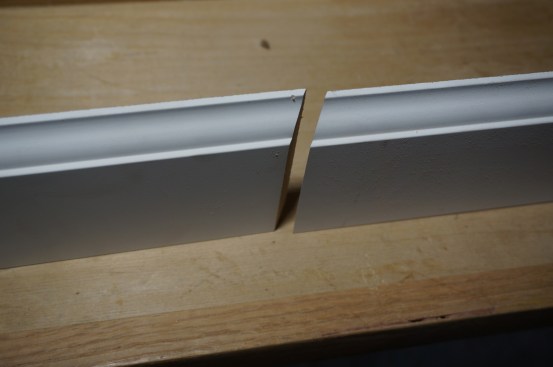
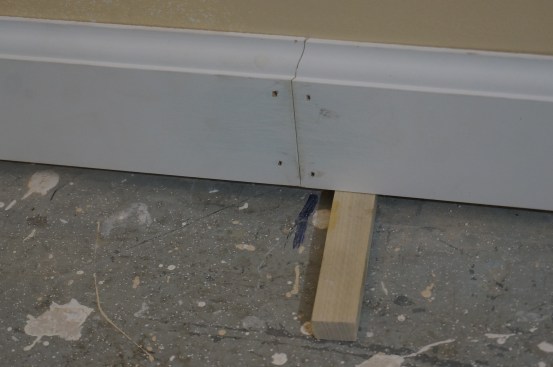
A scarf joint joins two pieces of trim end-to-end to make up a longer length. Mirror-image miter cuts are made on the ends of the boards, usually at 30°.
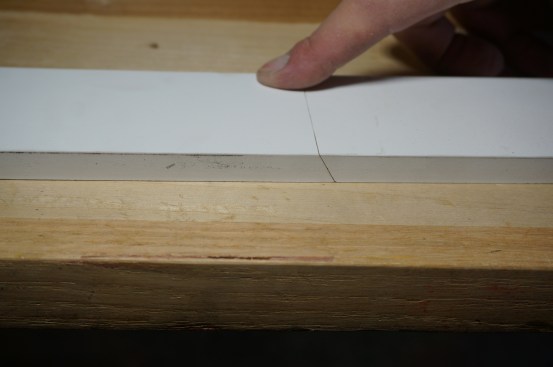
If done properly, the resulting scarf joint should form an almost seamless transition between the boards.
Scarf Joints
When the material on hand is shorter than a length on your cut list, a scarf joint can splice two or more pieces of trim together to create a longer length. A scarf joint is much like an outside corner, with mating bevel cuts. The difference is that with a scarf joint, the opposing pieces should nest neatly together, with one miter overlaying the other. This requires that mirror images of the joint be cut on the mating pieces. The scarf-joint cuts have to be made at opposite ends of the pieces so that they join seamlessly. Most carpenters make their scarf joint angle between 15° and 30° degrees. I plan for the scarf joint to land on a stud so that both pieces of stock can be secured to the framing as well as to each other.
Installing Baseboard
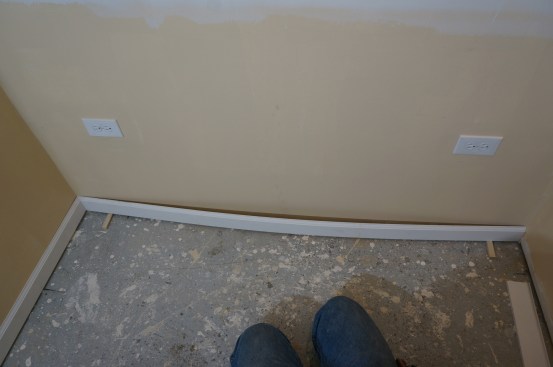
After all the pieces are cut to the specifications on my cut list, I bring them to the room and distribute them roughly where they will be installed. If the finish flooring has already been installed, the baseboard usually sits directly on top of it. This approach works well for hard surfaces, such as tile and wood, but rooms receiving carpet are a different matter. In those cases, I ask the homeowner or GC what the combined thickness of the carpet and padding will be, and then set the base just shy of that dimension. For the room in the photos, the thickness of the carpet and pad being installed was just over 1/2 inch, so I cut several blocks at 7/16 inch thick and used those to space the baseboard off the floor during installation. This approach allows the carpet layers to tuck the edge of the carpet under the base for a cleaner look. Installing the carpet under the baseboard also keeps the base from being partially hidden by the carpet, which makes the baseboard appear narrower.

Installation follows the same order as measuring and cutting. Th…
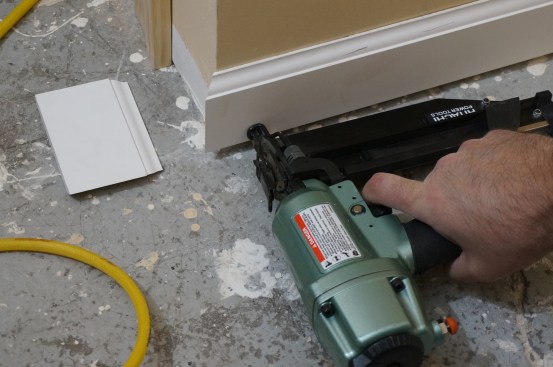
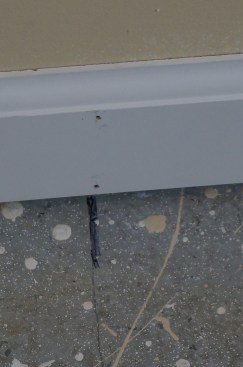
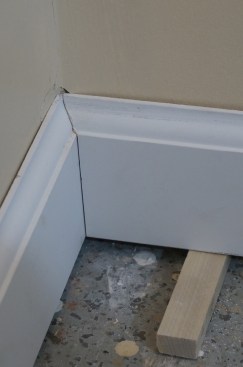
If all the pieces were cut and detailed accurately, installation should be a snap—literally. I begin with the first piece that I measured and work my way around the room in the same order. Recall from the cut list that the first piece butted into the door casing and went to an outside corner. Whenever an outside corner is involved, I set the two sides in place at the correct height (in this case, on the flooring spacers) and make sure they align perfectly at the corner. Then I fasten one side in place at the stud location nearest to the corner, and work my way down the board, driving two nails at each stud. I drive the first nail about 1/2 inch from the bottom of the base—ideally into the wall plate—and the second nail directly above the first, about 1/4 inch below the profile and into the stud. This pattern gives the painters plenty of room to fill and sand the holes.
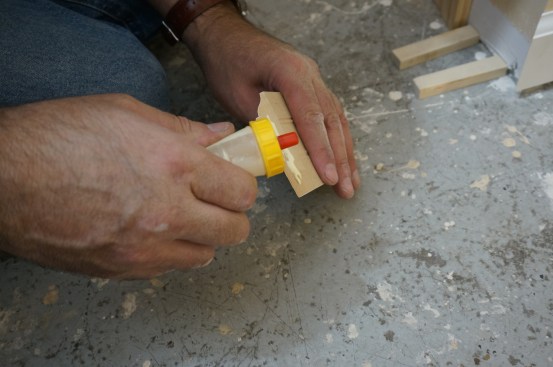
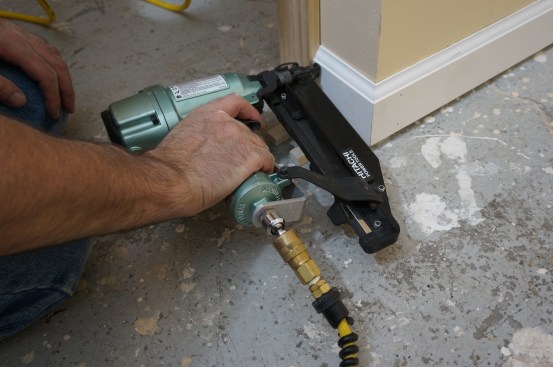
Most carpenters use pneumatic nailers to install baseboard and trim, because they are inexpensive relative to the efficiency they bring to the task. For most baseboard installations, I use a 16-gauge finish nailer and load it with nails that are long enough to penetrate the framing by at least an inch. I find that 16-gauge nails are usually more than adequate to secure the majority of the baseboard we install, and these nails leave a smaller hole than the 15-gauge nails. To complete the outside corner, I spread carpenter’s glue on the mating surface of the joint, and then set the remaining piece into place at the proper height. I nail that piece off, taking care to keep the joint perfectly aligned. To add strength to outside-corner joints, I drive shorter (1 1/2-inch) 18-gauge brads through the face of the baseboard and into the ends of the abutting pieces.
Continuing around the room, I set the next piece in place. Ideally, the center of the piece should bow away from the wall slightly. This bow allows the material to spring into place, which tightens the coped inside corner at the same time. Again, I start at one end and work towards the other, securing the base with nails at each stud location. At scarf joints, I apply carpenter’s glue to the mating beveled cuts and then align the two pieces so that the joint is flush. I drive nails on either side of the joint to stabilize it, and then I work from the joint in both directions to secure the rest of the boards. It should be noted that glue at a scarf joint does not add a lot of strength, because the joint is joining end grain to end grain. But the glue does seal the joint against moisture. And if the baseboard is stain-grade, the glue will help prevent “stain creep,” which occurs when end grain absorbs more stain than the adjacent face grain, creating dark or splotchy areas.