…
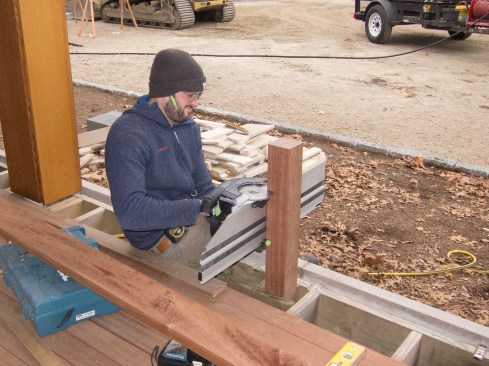
We began by installing vertical support posts between the deck’s major red cedar-clad columns, breaking the nominal 14-foot column spacing into three meticulously aligned and equally spaced sections.
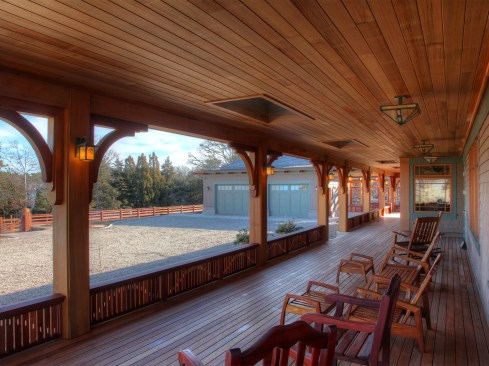
The railing’s finish height was 18 inches, or bench height, ab…
The railing’s finish height was 18 inches, or bench height, above the veranda’s decking, while the deck’s surface itself was 2 feet above the planned final grade—close enough to grade that a guardrail wasn’t required. Here, Keith Jalbert cuts a 4×4 mahogany support post to height with a Festool saw.
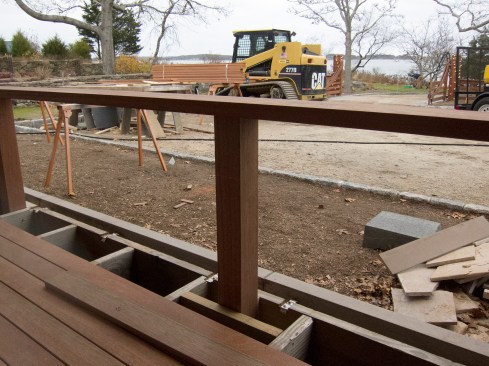
We secured the posts to the 2×10 deck framing with solid blockin…
We secured the posts to the 2×10 deck framing with solid blocking and TimberLok screws. Prior to installing the railing assembly, I pre-checked the sub-rail and railing cap’s fit between the 14-inch-square columns by aligning a long, straight test piece with squared ends, spanning the 4×4 posts, noting any out-of-square issues. With few exceptions, the columns were remarkably in parallel, a tribute to Cregg’s careful execution and a relief to me. The test piece allowed me to gauge and correct for small discrepancies from square, adjusting the slide compound saw accordingly. Here, the 2×6 mahogany sub-rail is attached to the 4×4 posts with #10 x 3-1/2-inch stainless steel screws.
At the red cedar-clad columns, we fit the sub-rails, set to lase…
At the red cedar-clad columns, we fit the sub-rails, set to laser level, and fastened them using a Kreg pocket jig and stainless steel screws.
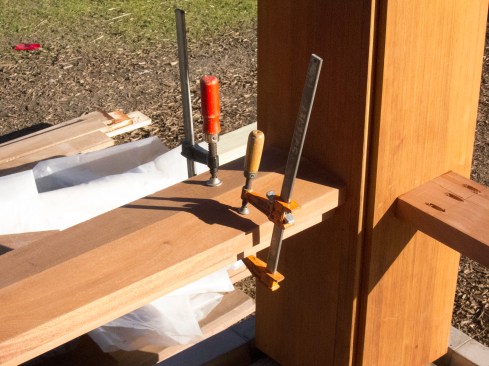
The special-order railing cap, cut from 8/4 x 8-inch mahogany, had an 8-degree dual pitch to shed water, with a ¼-inch-deep plough in its underside to accommodate a 2×6 sub-rail.
…
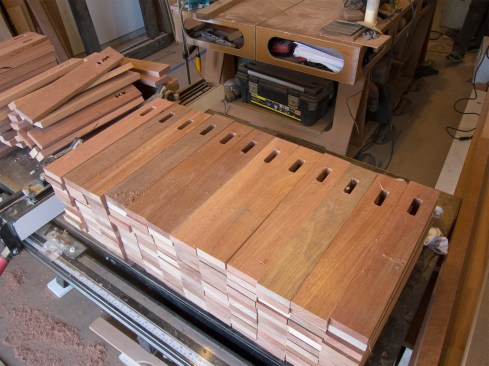
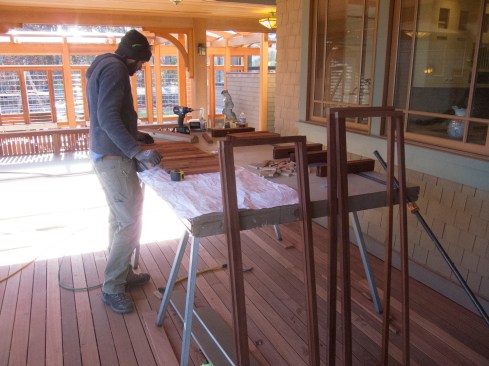
The perforated sine-wave pattern required five basic “forms,” stepping down in sequence and, when flipped end-for-end, stepping up again. The architect’s plans provided a slat length of 12-1/2 inches—not taking into account the 1-inch-wide and 1-1/2-inch-wide respective top and bottom cleats that would secure the slats in the assembly. Finish carpenter Liam McCooe and I ripped 1×4 mahogany decking to a 2 1/2-inch width and then cut it into 15-inch lengths. However, because of the difference in width between top and bottom cleats, we needed to adjust the perforation location for the flipped pieces, by the ½-inch difference, to maintain an equal reveal between cleat and perforation. So, we divided the required count for each slat type into two equal stacks, and devised a simple color code for orienting all pieces.
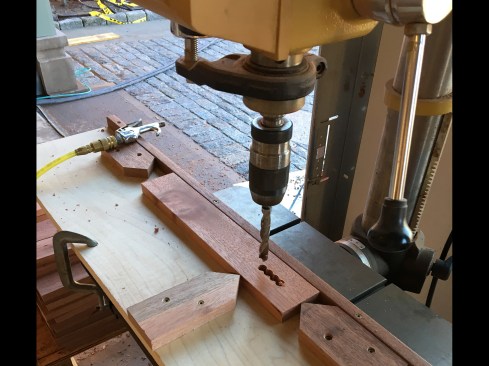
We cut the perforations, starting with a rough hole on the drill…
We cut the perforations, starting with a rough hole on the drill press. I manned the press, using a simple jig with re-locatable end stops and a 7/16” spur bit to bore four adjacent holes (nearly 2300 holes in all).
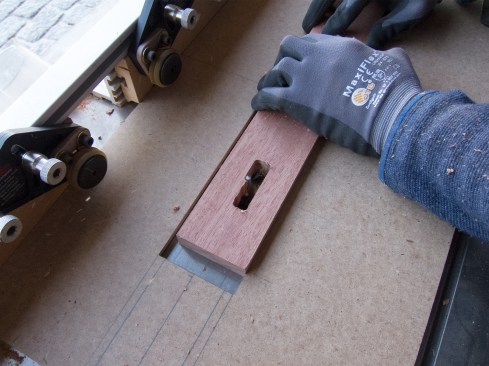
Liam used another jig, clamped to a router table, to clean up th…
Liam used another jig, clamped to a router table, to clean up the perforation profile with a 1/8-inch-radius solid carbide straight bit. We re-adjusted both jigs for each of the five groups.
As a final step before assembly, the painting crew face-sanded e…
As a final step before assembly, the painting crew face-sanded each piece using random orbital sanders and 150-grit disks, and broke the sharp edges with a sanding block. Then, they dipped each slat in an exterior, oil-based stain bath and brushed off the excess.
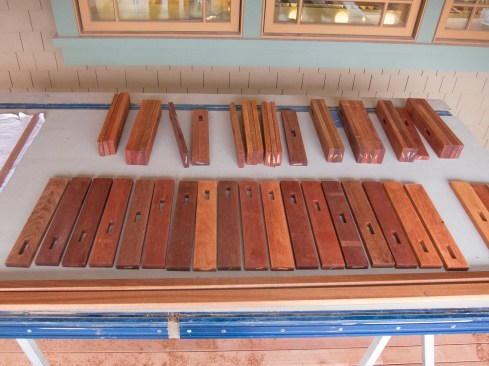
They placed the finished slats on drying racks, laying them out …
They placed the finished slats on drying racks, laying them out to our color-coded assembly order.
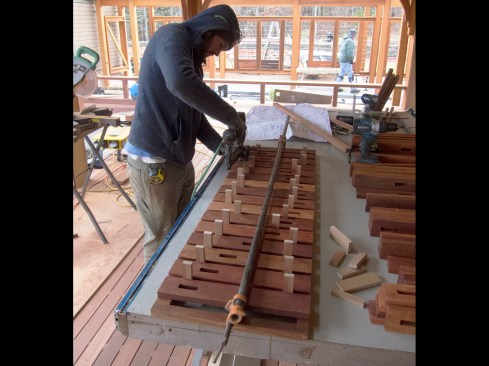
As we started to assemble the individual sections on the worktab…
As we started to assemble the individual sections on the worktable, some of the pieces weren’t fully dry—we were up against a firm deadline to finish, and it was in the high 30’s outdoors; not optimal for drying. This required us to wear rubber-coated gloves kept things from getting too slippery.
While Liam focused on slat layout and assembly, I stayed a step …
While Liam focused on slat layout and assembly, I stayed a step ahead of him, cutting and joining the cleat frames, two per section. Each pair of frames was accurately cut to fit its specific location between columns. The frames were simple, with the top and bottom cleats butted between two end pieces, connected using 1-3/4-inch stainless trim-head screws. We ripped the stock from 5/4 mahogany planks and ran it through a planer to clean up the saw-tooth marks. I used a Kreg face clamp to keep pieces aligned while pre-drilling and screwing the frame corners together.
We used small blocks of 1/2-inch MDF as spacers between the slat…
We used small blocks of 1/2-inch MDF as spacers between the slats, clamped the assembly together, and fastened the slats to a cleat frame with stainless-steel brads. With the slats nailed to one frame, we laid the next frame on top and fastened it off.
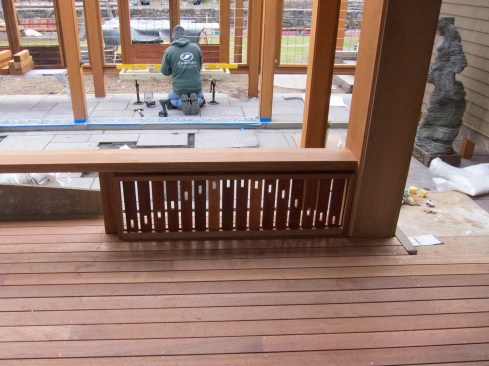
We worked from one end of the deck to the other in sequence, pla…
We worked from one end of the deck to the other in sequence, placing assembled sections in their allotted space. Finishing the installation, we screwed the railing sections through their cleats into the columns and the sub-rail, using stainless trim-head screws.
All told, we made rectangular cutouts in 567 vertical slats for …
All told, we made rectangular cutouts in 567 vertical slats for 34 individual railing sections throughout the home.
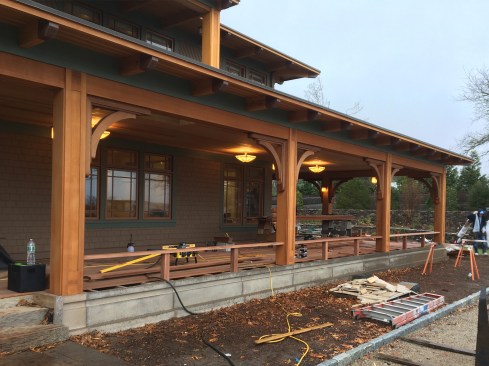
Last fall, working for Cregg Sweeney Artisan Builders, I helped build a decorative railing for a veranda on a large, Craftsman-style custom home in South Orleans, Mass. This was a huge project. Cregg and his crew had been working on the house for two years before I was hired last winter to supplement his finish carpentry crew. We finally worked our way out the front door and turned to completing some exterior details, which included the railing for the covered deck.
Up until this point, I’d only heard rumors of some elaborate wave pattern, but final drawings had been pending until just before we were ready to tackle this piece of the job. Aline Architecture of Orleans, Mass., delivered a detailed sheet depicting 34 individual railing sections incorporating 567 vertical slats—each with a small, rectangular (1/2- x 2-inch) perforation in staggered elevation—which would combine to create a running sine-wave pattern in the railing face. Built in solid mahogany, this promised to be a one-of-a-kind undertaking. See the slideshow for the decorative railing’s layout and assembly.