
Last fall, a client asked me to build barn doors for a new outbuilding. There were two openings in need of doors: one about 8 feet square and the other 12 feet square (the larger opening would allow him to move small boats he planned to build in and out of his new ground-level shop). He wanted hinged double doors for each opening, and because the shop would be conditioned space, he asked that they be insulated. To let extra daylight into his shop, transom windows would be incorporated into the design of the larger doors.
Sizing the doors. We chose 2-inch-thick rigid polyiso insulation (R-14) for the cores of the new doors. On the exterior surface, he wanted to use 5/8-inch T1-11 plywood siding, bordering the T1-11 with red cedar to match the barn’s western-red-cedar trim. The interior surface would be 3/8-inch AC plywood, making the door’s total thickness 3 inches.
For the transoms, I ordered fixed-light, 2-by-5-foot insulating units with 2-7/8-inch jamb depths from Andersen’s “Silver Line.” Including the red-cedar trim above and below the transom window and at the base of the doors, the total height of the larger doors would be 11 feet 10 inches.
Torsion boxes. I planned to build the doors torsion-box style (essentially, scaled-up hollow-core doors with two skins over a lightweight inner grid). I knew they would only be as flat and true as the surface I assembled them on, so I selected dead-straight 2-by SPF lumber and screwed together an open-frame temporary workbench. I made the bench the same size as the biggest door, scrupulously set to a laser level line and braced to be wobble-free.
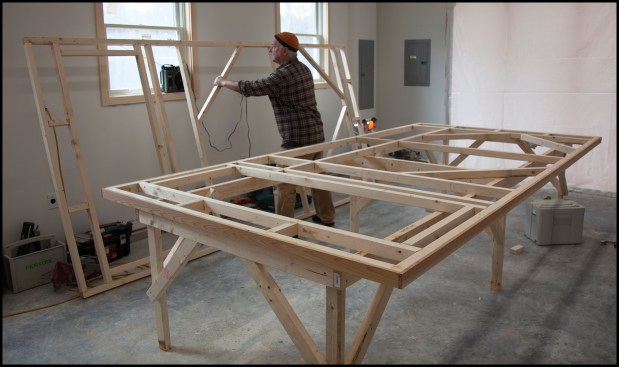
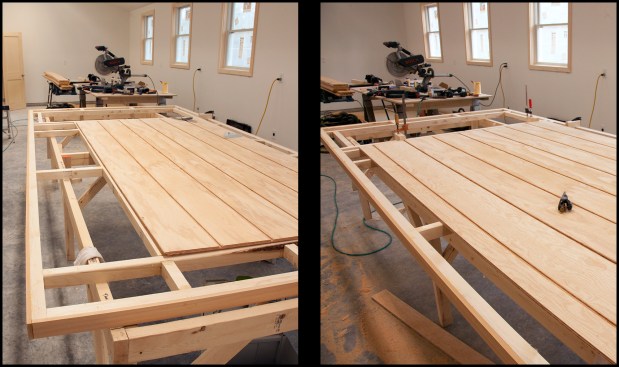

Starting with larger door pair, a temporary workbench was built …
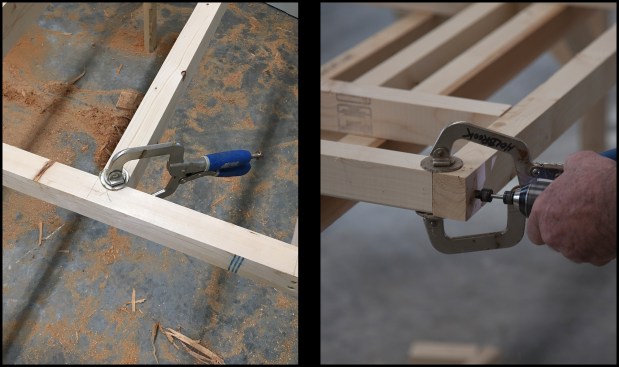
For the doors’ inner grids, I used 2×6 SPF ripped to a 2-inch width. I laid out the grids straight and square (undersized by the thickness of the red-cedar border) and incorporated the window rough opening. To reinforce the heavy-duty strap hinge locations—four per big door and three for the smaller doors—I added blocking. I used urethane glue and screws to assemble the grids, clamping the pieces flush, then gluing, predrilling, and screwing every joint.
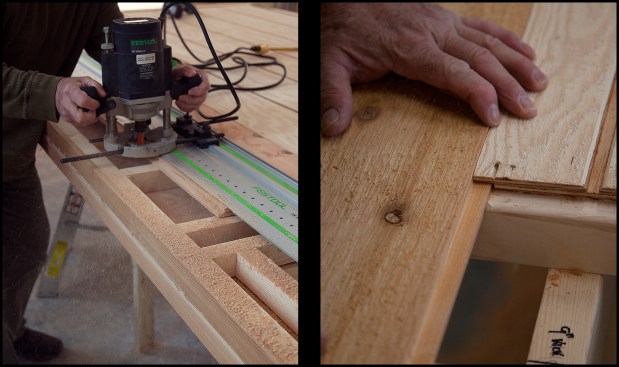
Next, I wrapped the perimeters with 2-inch-wide western-red-cedar strips. I glued the cedar with urethane adhesive, clamped it up, and let it cure. Because I planned to rip the door edges to a straightedge at final sizing, I avoided using fasteners. I assembled the grid for the second door directly on top of the first, using it as a pattern. I set this second grid aside, marking its opposite face as exterior so that I’d have a mirrored construction once both doors were complete and paired.
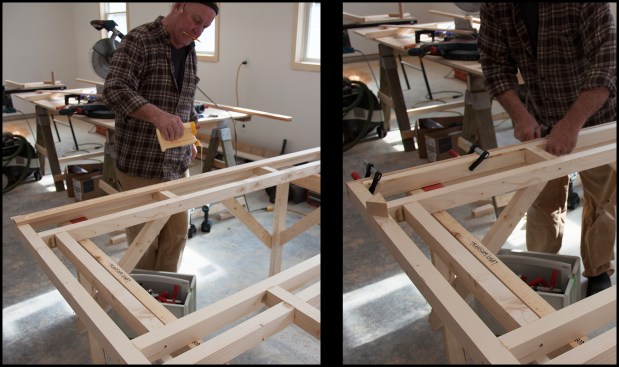
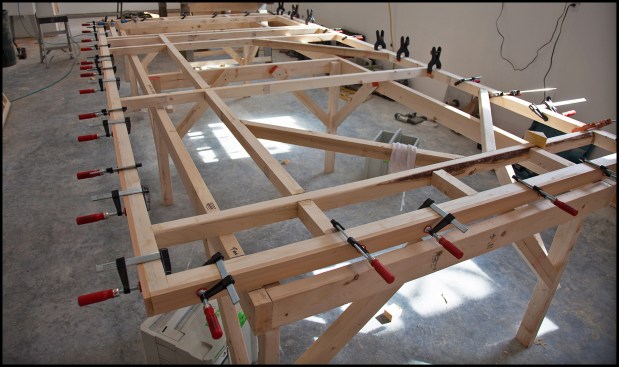
Assembling the pieces. Next, I installed the full-size 4×8 T1-11 panels, which required narrow add-on panels to bring the exterior siding to the same width as the 5-foot-wide transom windows. Here, I backed the joint with a full-length grid member. To provide a seal and eliminate the need for continuous backing at the vertical joint between the cedar border trim and the T1-11, I detailed the joints with the same 1/2-inch shiplap used to mate the T1-11 panels.
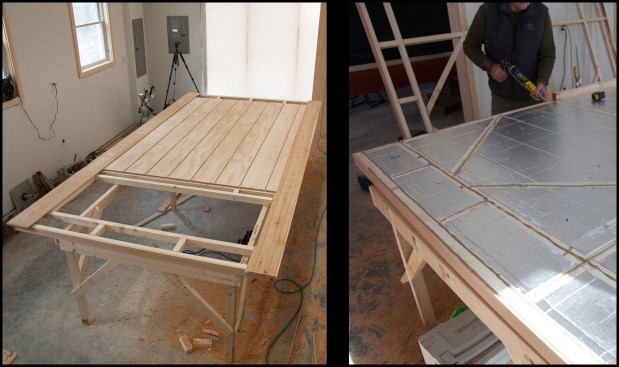
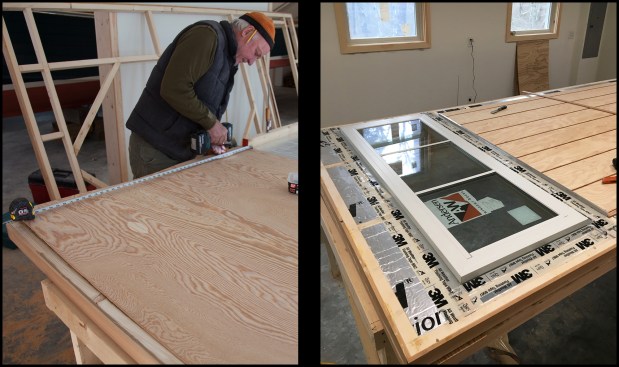
I attached the panels to their grids using urethane glue and stainless trim-head screws, fully gluing the T1-11 shiplap to seal it. After allowing the glue to dry overnight, I flipped the doors and installed the 2-inch rigid foam, followed by the 3/8-inch AC plywood interior face. Then I flipped the doors again to install the windows, first dressing the openings with sequenced 3M flashing tape that overlaps aluminum flashing I used to cap the T1-11. Before trimming the windows, I covered the nailing flanges with another sequenced layer of tape. Making the smaller pair of doors followed much the same track, although simpler, without windows or border trim.
Installing the doors. It took three men to move the big, 200-plus-pound doors to the opening. I’d already drilled and screwed the hinge pintles along the quadruple 2×6-framed jambs, using a story pole to locate them relative to the blocking in the doors. We shimmed the doors in the opening, establishing a uniform reveal at the side and head jambs. Next, we applied the strap hinges, hanging each on its pintle, then drilling through the door and installing the 3/8-inch carriage bolts.
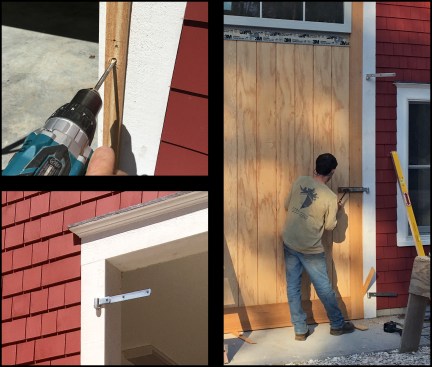
A story pole was used to locate the hinge pintles relative to the blocking centers in the doors (photo, top left). They were screwed into quadruple 2×6-framed jambs, then the strap hinges were hung on each pintle (photo, bottom left). Each door leaf was fastened to the strap hinges with 3/8-inch carriage bolts, hardwood spacer blocks were installed between the hinge and the door to account for the hinge pintles (photo, right).
We knocked the shims out and door number one swung free, with a nice sense of heft to it. Door two followed suit, with all clearances shockingly good. The final proof came with all shims removed and the doors swung to join at center. I honestly expected some degree of misalignment, regardless of careful layout. Whether by luck or design or some of both, the doors swung smoothly, with a nice, substantial feel, and met nearly perfectly at center. I then left it to my competent client to apply astragals and interior security bolts.
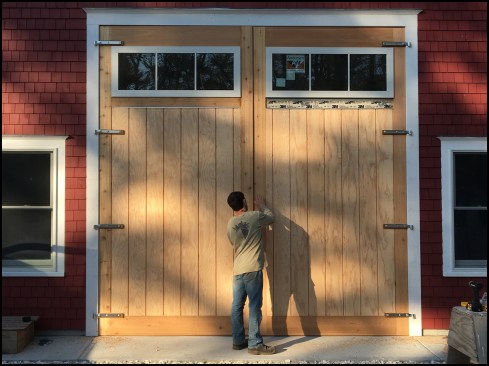
With shims removed, all the clearances were shockingly good. The doors swung smoothly, with a nice hefty feel, and met nearly perfectly at center. Installing the astragals and interior security bolts was left to the author’s competent client (photo, above).
Photography by Dave Holbrook