The most common mistakes – the places where installers need to always pay attention – are reverse flashing, improper cuts, poor surface prep, and not properly seating the flashing on the substrate.
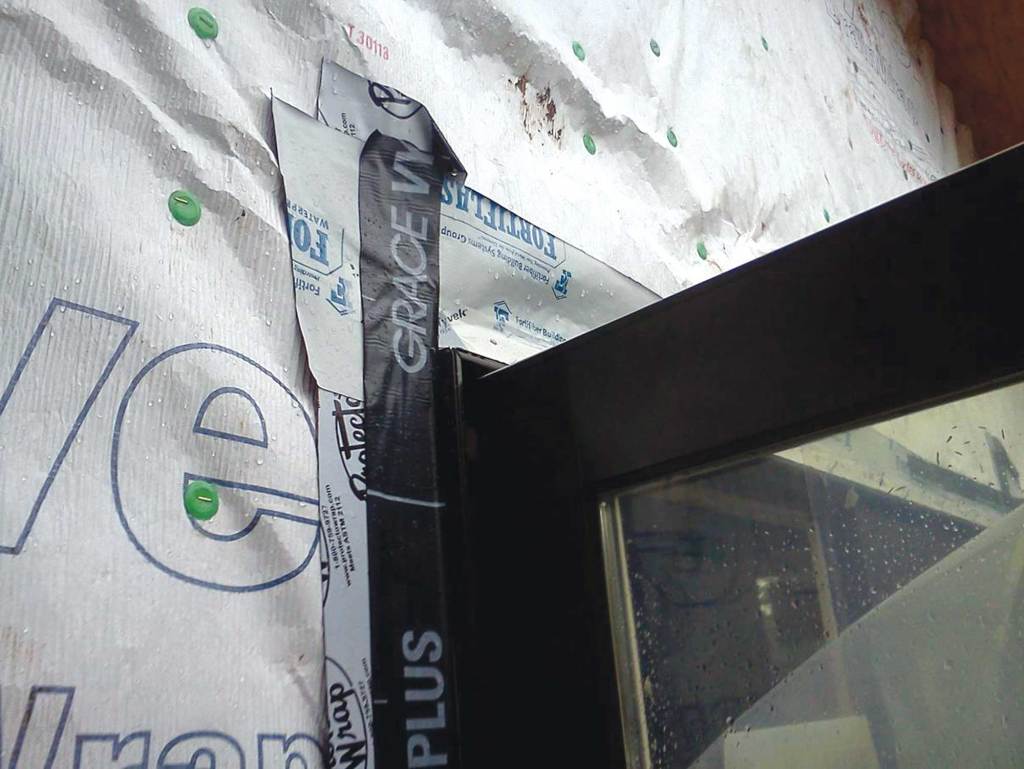
Reverse shingling, where the upper layers go under the lower layers, is the most common installation mistake. All flashing details should provide 100% mechanical drainage paths so that they shed water even if the adhesive fails.
Improper cuts. Water always follows an edge. Often a piece of flashing is cut then lapped over the piece below. The cut should direct water away from the vulnerable area, preferably out onto the WRB. The most problematic cuts are at windowsills – a good argument for using one-piece flexible product in that area.
Roe Osborn
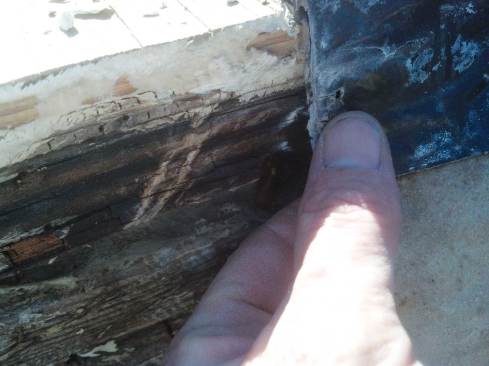
Regardless of flashing type, the substrate needs to be clean and dry. No flashing will stick to dirty, cold, wet and frozen surfaces. There can also be adherence problems with the rough side of OSB – even if it’s bone dry and clean – as well as with gypsum and masonry-based substrates. In these cases, a primer will fill in any irregularities in the substrate and will also provide extra adhesion.
Improper surface prep. Regardless of flashing type, the substrate needs to be clean and dry. No flashing will stick to dirty, cold, wet, and frozen surfaces. There can also be adherence problems with the rough side of OSB – even if it’s bone dry and clean – as well as with gypsum and masonry-based substrates. In these cases, a primer will fill in any irregularities in the substrate and will also provide extra adhesion.
Fastener placement. The self-sealing properties of peel-and-stick flashings should be taken with a grain of salt. For instance, fasteners should not be driven through the flashing in areas where water could collect, as in a windowsill.

A plastic spreader is a great way to create the initial bond of the tape to the sheathing. If enough pressure is carefully and meticulously applied, the spreader can create the permanent bond. Whenever possible it is always best to go over the tape with a roller.
Seating adhesive flashings. Peel-and-stick flashing tape needs to be mechanically smoothed with a roller or other device that applies mechancial pressure to promote adhesion. Smoothing the flashing with hand pressure is not enough.
For more on flashing exteriors, visit the JLC Field Guide.