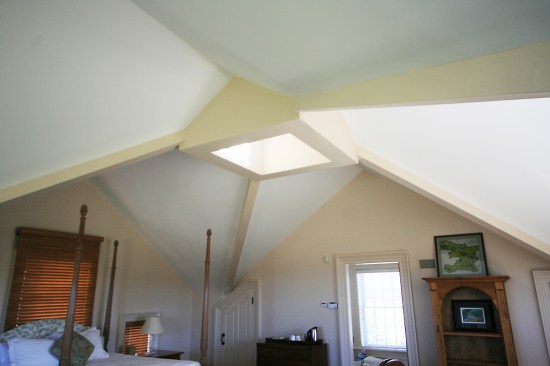
Periodic leaking around the cupola’s interior light well had o…
Periodic leaking around the cupola’s interior light well had occurred since the home’s initial construction. In a DYI effort to remedy the situation, the homeowners removed stained drywall, but encountered water-damaged framing. That’s when they called us.
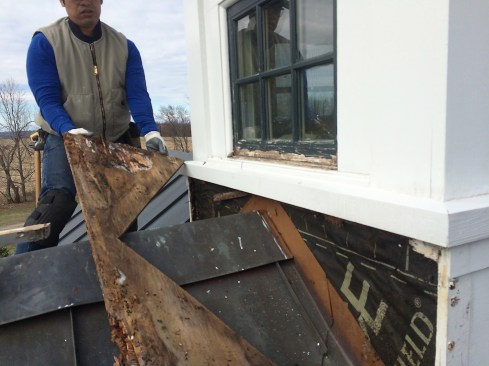
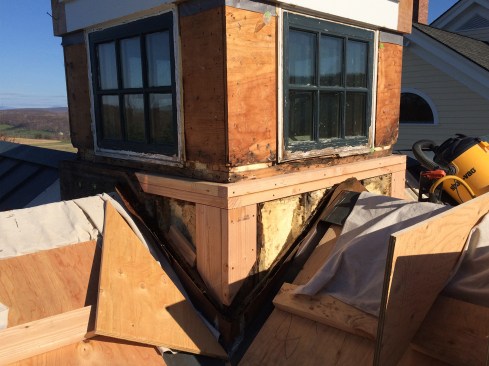
We began our investigation by removing the outer, plywood-clad f…
We began our investigation by removing the outer, plywood-clad finish base of the cupola. We found the copper roof-to-wall flashing had been reverse-flashed, with the copper placed on the outer surface of peel-and-stick.
Another red flag was that sheathing behind the peel-and-stick at…
Another red flag was that sheathing behind the peel-and-stick at the top of the base felt spongy, prompting us to demo the upper portion of the cupola.
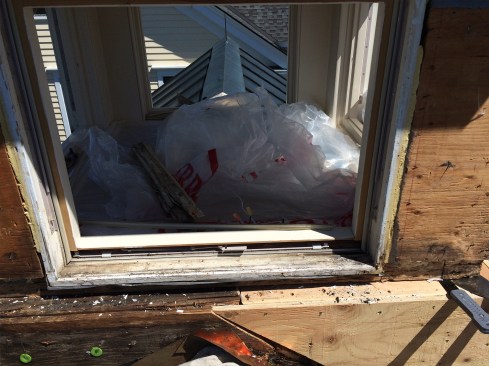
During our inspection, the clients informed us the original buil…
During our inspection, the clients informed us the original builder agreed to “remedy” the initial leaking by retrofitting a piece of ¾-inch quarter-round trim around the windows on the exterior, rendering the awnings inoperable.
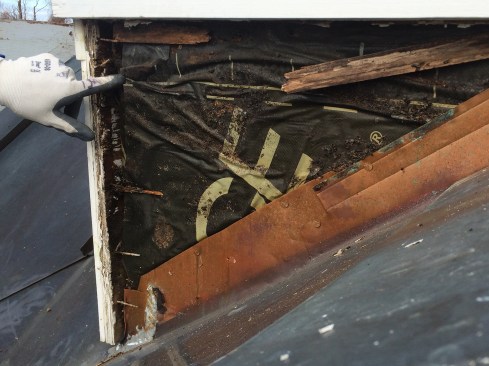
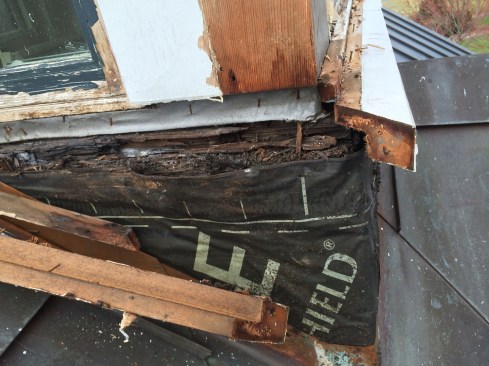
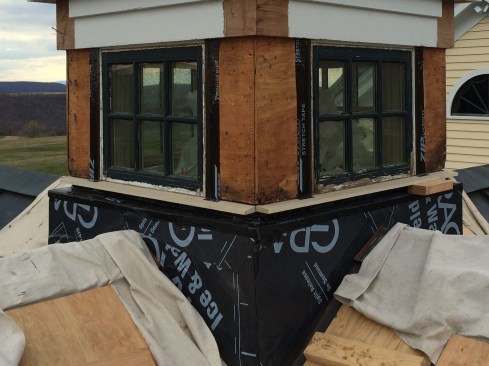
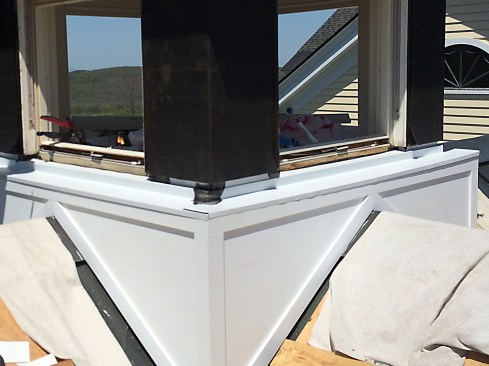
When we removed the existing corner boards and wrap-around sill,…
When we removed the existing corner boards and wrap-around sill, we discovered the previous builder omitted critical, transitional flashing between the cupola’s upper portion and its wider base.
The upper portion’s WRB drained onto the exposed, stepped-out …
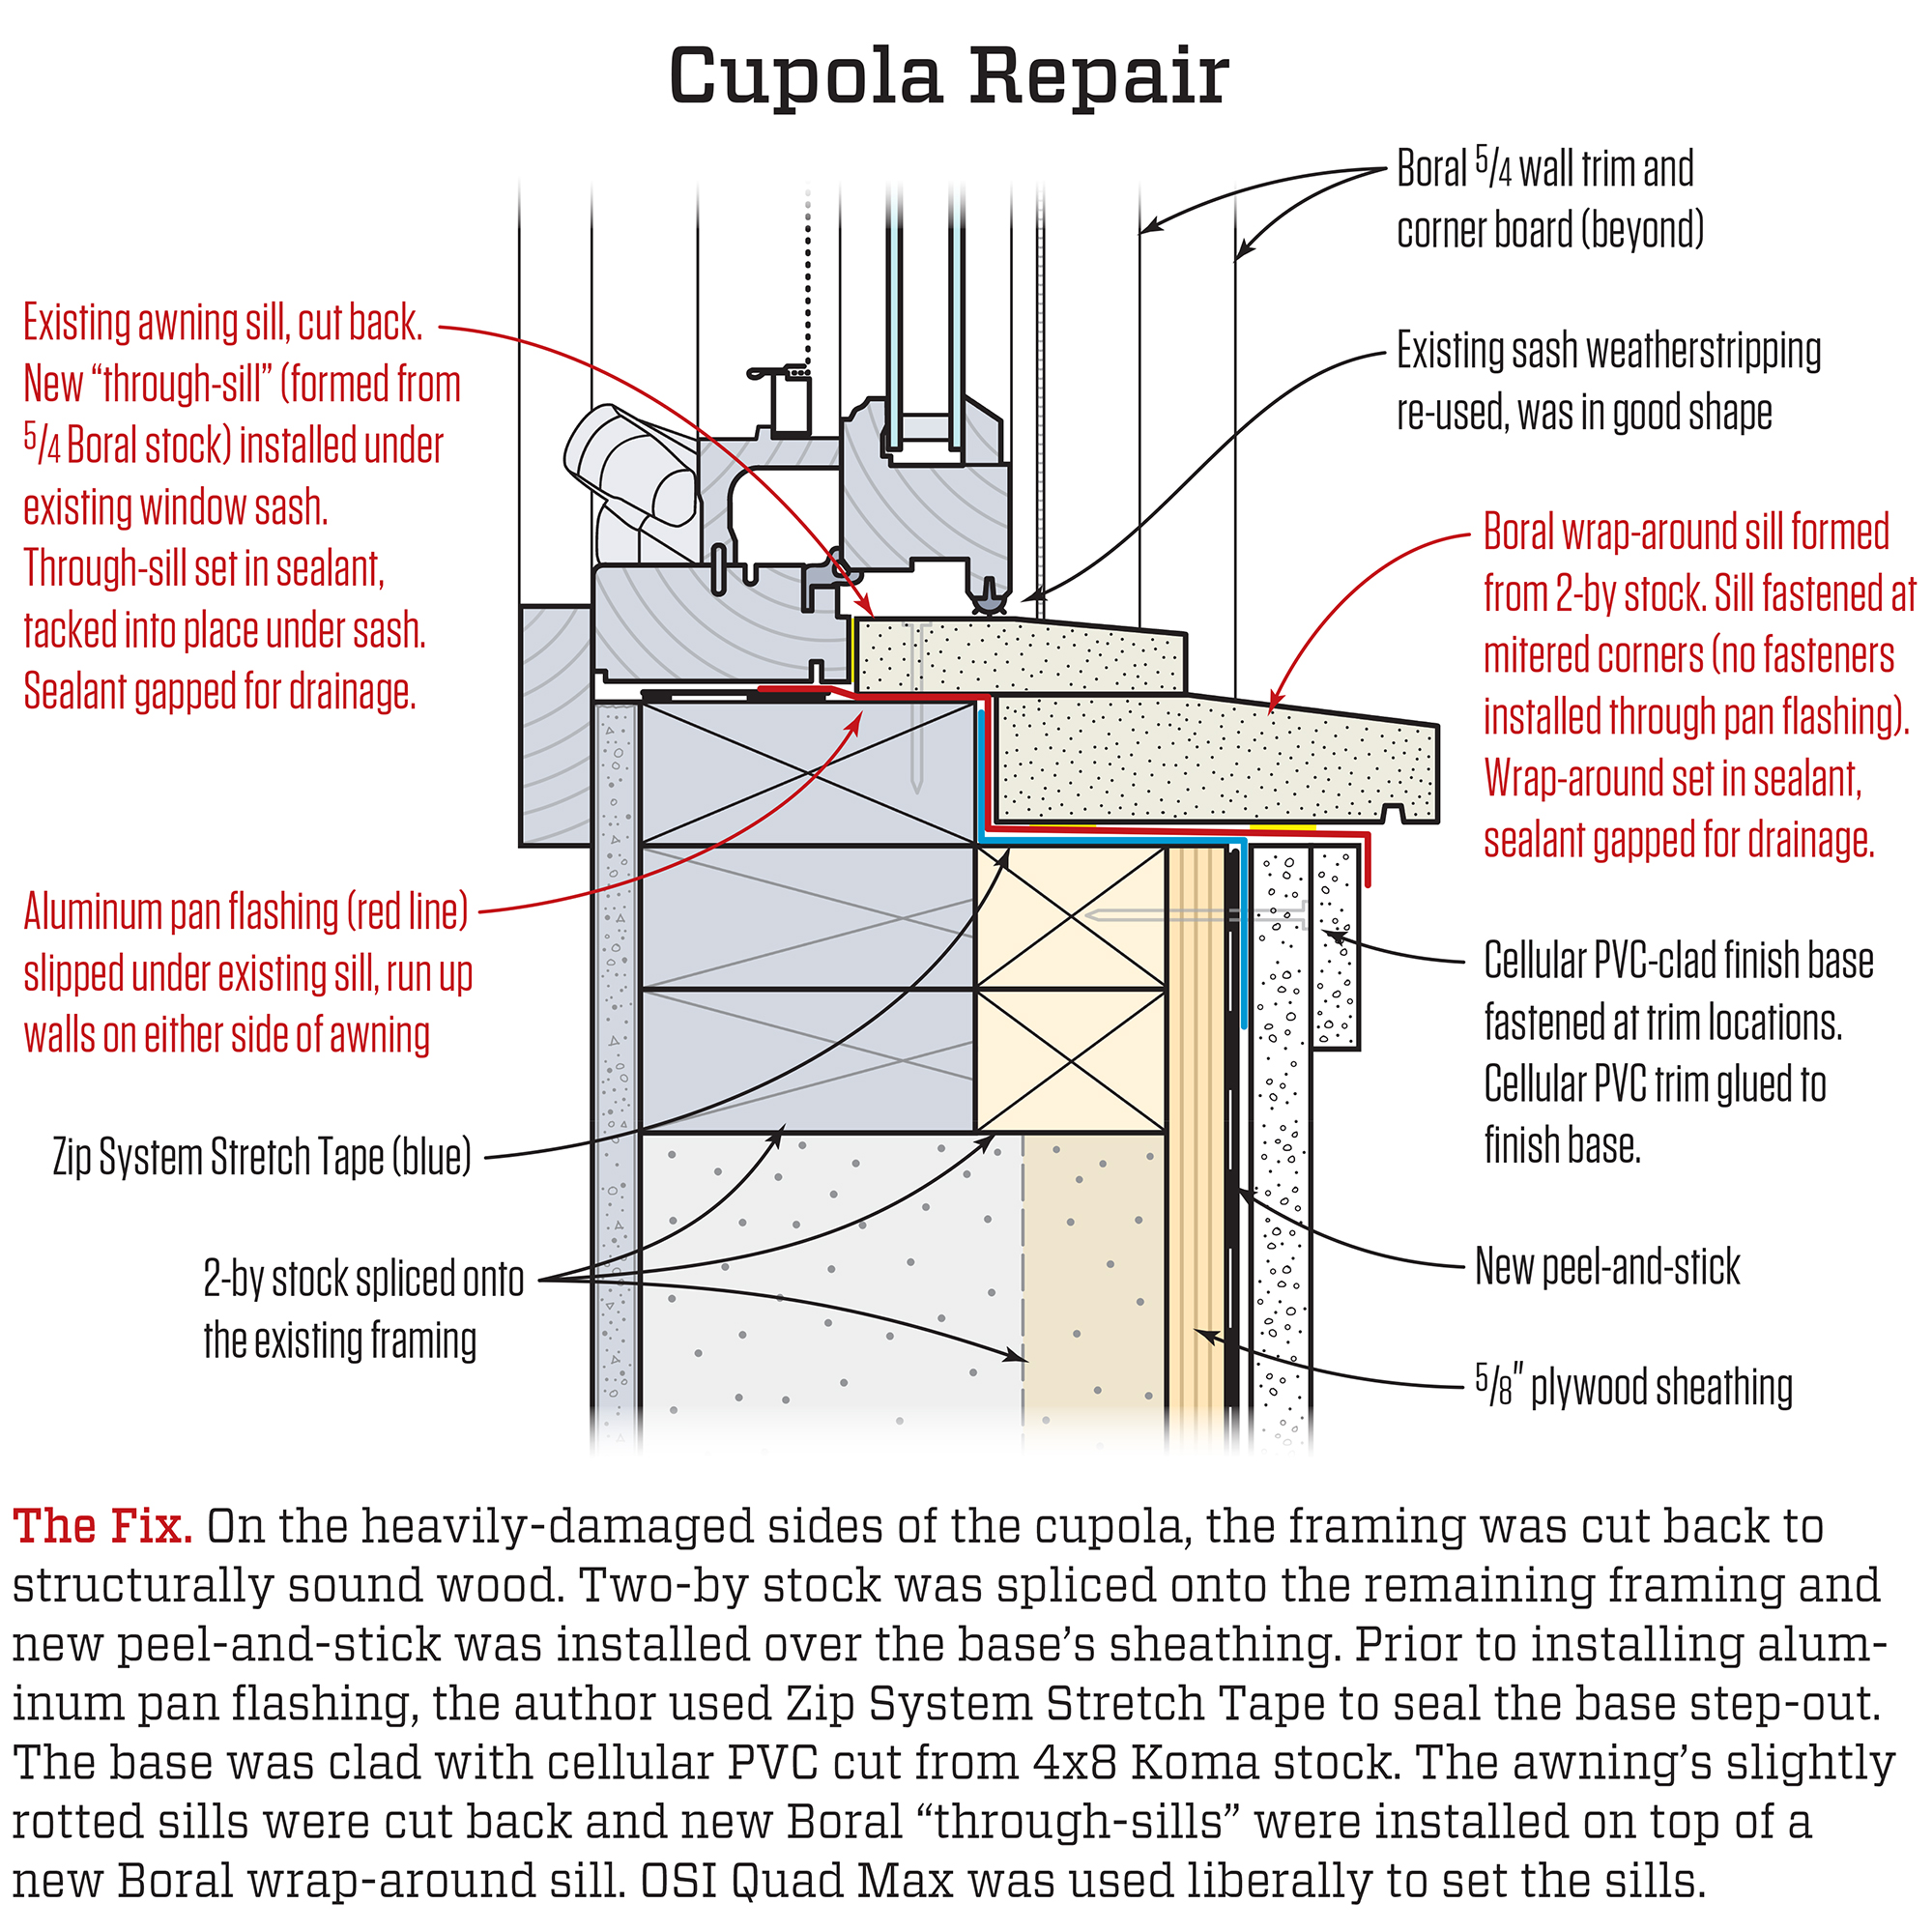
The upper portion’s WRB drained onto the exposed, stepped-out base framing, turning this handsome architectural feature into a conduit for water. Also, cracks along a site-applied 5/4-square sill trim appeared to be the likely water entry points. See detail 1.
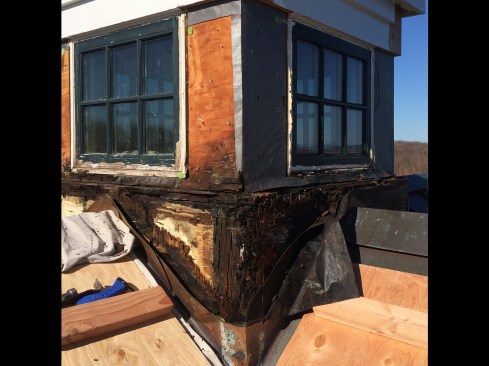
The Fix. Our plan was to rebuild the cupola’s base in place, s…
The Fix. Our plan was to rebuild the cupola’s base in place, salvaging as much of the existing structure as possible. Starting where the damage was the worst, we carefully removed the deteriorated material a little at a time to keep the cupola stable.
Fortunately, the demolition work was largely confined to the upp…
Fortunately, the demolition work was largely confined to the upper part of the base and to the exterior side. On the heavily damaged sides of the cupola, the framing was cut back to structurally sound wood. Two-by stock was spliced to the remaining framing.
The existing windows didn’t need to be replaced, which saved u…
The existing windows didn’t need to be replaced, which saved us from having to do any interior trim or drywall work. The seam between the awning’s sill and site-applied 5/4 trim was a likely water entry point and caused slight rot to the factory sill. See detail 1.
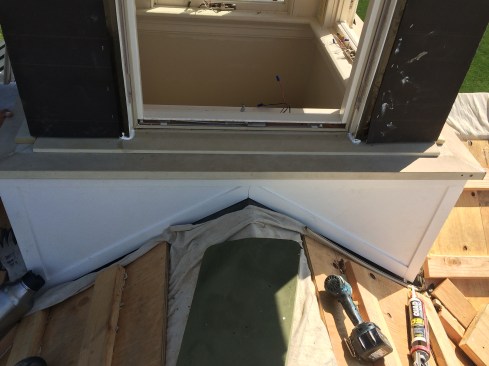
We covered the base sheathing with peel-and-stick, lapping the e…
We covered the base sheathing with peel-and-stick, lapping the existing copper roof-to-wall flashing. Zip System Stretch Tape was used to seal the base’s 2-inch-wide step-out, then we dry-fit a new “through-sill” to help determine the finish elevation of the top of the cupola base. See detail 2.
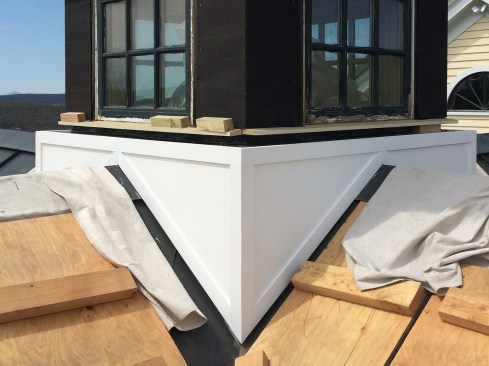
For the cupola base’s cladding, we cut the triangular shapes o…
For the cupola base’s cladding, we cut the triangular shapes out of a 5/8-inch 4×8 sheet of PVC by Koma, fastened them with screws at trim locations, and glued trim pieces on top to hide the fasteners.
The awning’s sill was cut back approximately to where its oper…
The awning’s sill was cut back approximately to where its operable hardware was concealed. Then, aluminum pan flashing was slipped under the existing sill about an inch, run up walls on either side of the awning.
The through-sill solved the problem with the leaky seam between …
The through-sill solved the problem with the leaky seam between the existing factory-applied sill and trim; the window sash’s weatherstripping now sits on top of a solid piece of Boral. For the wall trim and corner boards, we used 5/4 Boral to match the existing salvaged cedar stock.
A wrap-around sill, formed from 2-by Boral stock, was installed….
A wrap-around sill, formed from 2-by Boral stock, was installed. We fastened it only at the mitered corners and set it in sealant, providing gaps in the sealant for drainage. Then, we installed Boral “through-sills” on top of the wrap-around sill, which we butted up against the existing awning’s altered frame. See detail 2.
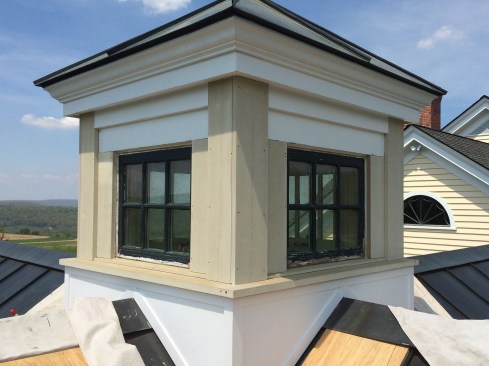
The carriage-house garage is attached to a house that sits up on…
The carriage-house garage is attached to a house that sits up on a high, exposed site and the cupola’s prominent location on the roof subjects it to a regular pummeling of wind and rain. Each layer of new trim was designed to shed water away from the cupola and under each layer we installed an appropriate flashing.
The cupola’s interior light well was left opened to dry out fo…
The cupola’s interior light well was left opened to dry out for a while, then drywalled and painted. The entire restoration took two carpenters eight days to complete, not including the painting.
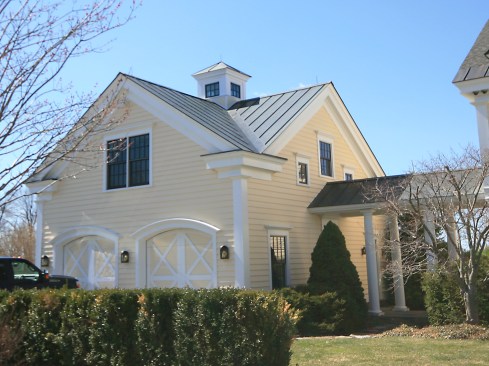
Last fall, my company was asked to investigate a roof leak originating from a cupola atop an attached carriage-house garage. From the exterior, nothing appeared to be wrong with the cupola or the surrounding roof. But the inside was a different story. According to the homeowners, there had been gradual, periodic leaking around the interior light well since the home’s construction. After a particularly bad storm last summer, the water staining worsened, prompting them to remove the damaged drywall—exposing open-cell-foam-filled stud bays and water damage to the framed enclosure. That’s when they called us.
The house was fairly new, approximately 10 years old. Above the garage was a guest bedroom with a cathedral ceiling that reflected the roof’s four valleys. At the peak, the cupola, with its four awning windows, served as a light well. On our initial walk-through, the clients informed us of the leaky cupola’s history. The original builder had blamed the window manufacturer for the leak, and the manufacturer had blamed the builder. After a lot of finger pointing, the builder agreed to “remedy” the problem by retrofitting a piece of ¾-inch quarter-round trim around the windows on the exterior, rendering the awnings inoperable. The feuding parties moved on—without having solved the problem.
During our inspection, we discovered the following: reverse-flashed roof-to-wall flashing; missing flashing where the cupola’s upper portion transitioned to its wider, lower base; and poor trim detailing, which relied on paint and caulk to keep the elements out—they quickly failed, allowing water to pour in. So, as far as flashing was concerned, the workmanship on the cupola was a whole bowl of “wrong.”
Photos by Ryan Labrenz and Isaias Antonio-Santos
For the repair, we knew each layer of new trim had to be designed to shed water away from the cupola and under each layer we needed to install an appropriate flashing.