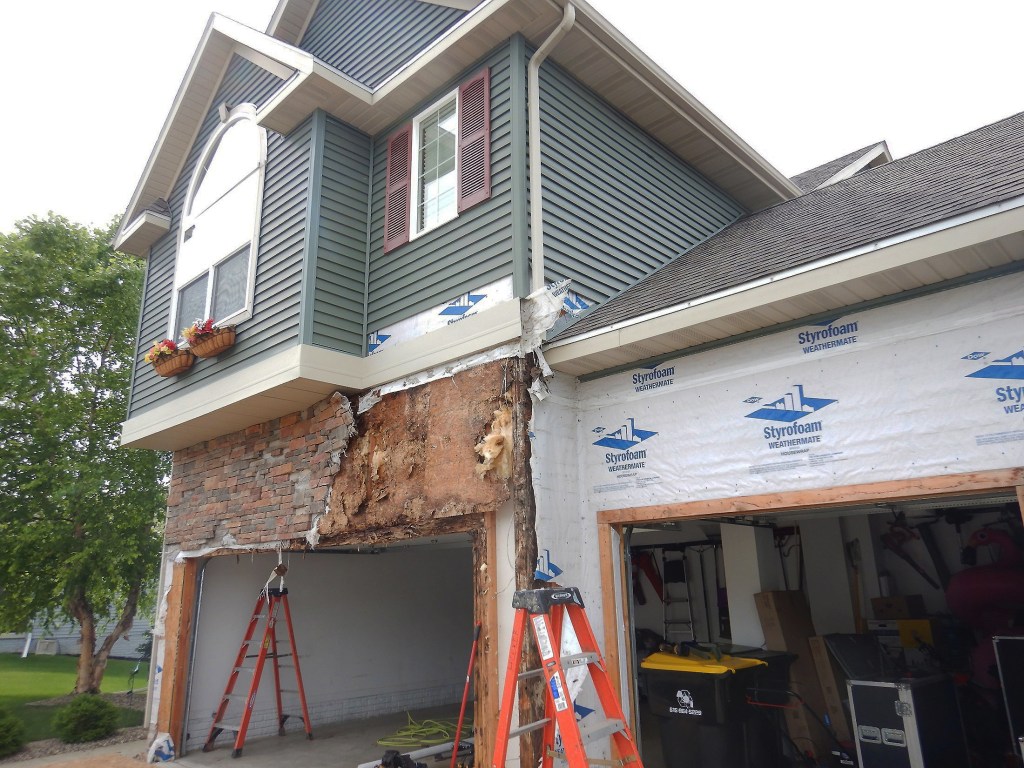
A big production builder recently hired me to help resolve a slew of exterior failures above garage doors. On more than 300 of the builder’s houses, ineffective detailing and a complete lack of flashing over the garage doors has led to deterioration and, in a number of cases, severe rot of the garage door header and surrounding framing. This problem is not isolated to this one builder. I see similar problems around the country on my travels as a building investigator and expert witness. It’s clear that many builders are not addressing these siding details effectively.
Mixed Siding Troubles
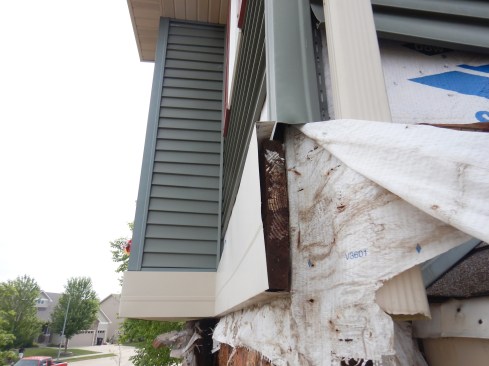
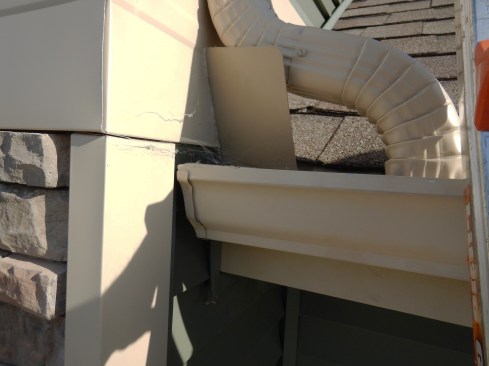
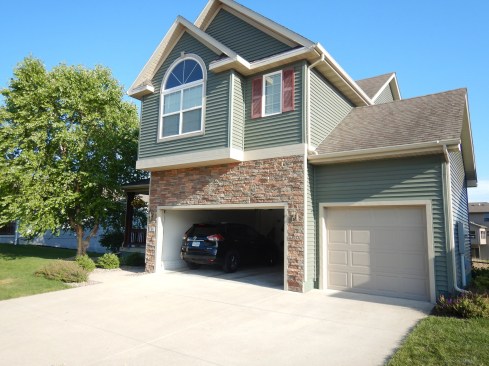
In this article, I’ll focus on one of the production houses that suffered the most extensive damage. Parts of that house, including the face of the garage, are sided with manufactured stone, while most of the home, including the room above the garage, is sided with vinyl. Over the garage, the two cladding materials are separated by a wood band capped with aluminum coil stock; the garage door trim is also capped with it.
The severe damage (shown in the photo at top and in the slideshow below), including the complete devastation of the LVL garage door header, resulted from a series of missing flashing details as well as the lack of an effective drainage plane.
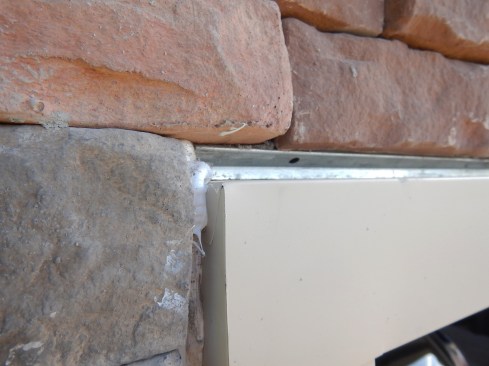
The builder had applied a single layer of housewrap to the walls before slathering them up with mortar and applying the stone. Any water draining from the upper walls hit a mortar dam and traveled in three ways:
- Water that got through the vinyl siding flowed down the crack between the housewrap and the manufactured stone. There was no flashing here, just the vinyl starter strip.
- Some water flowed down the exterior, soaked through the manufactured stone, passed through the housewrap by capillary action, and soaked the OSB sheathing.
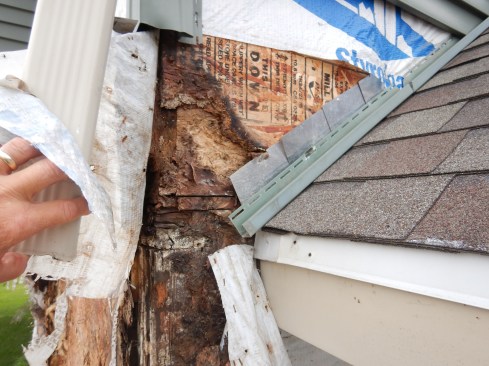
- Water also flowed around the coil stock, soaking the wood band separating the vinyl and manufactured-stone sidings, as well as the framing and trim surrounding the garage door.
In addition to the problem of water leaking past the siding, this house was missing kickout flashings at wall-to-roof intersections. This dumped an extra-large volume of water onto the corner of the garage, accelerating the destruction of the framing.
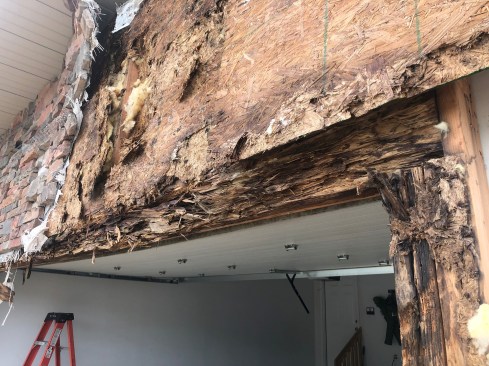
A combination of flashing mistakes turned the sheathing and LVL…
All siding must drain. An adequate drainage space behind the siding is especially important with manufactured stone because all those chunks of concrete and mortar hold a lot of water. That water is more likely to leak into the framed wall than it is to evaporate to the outside. When mortar is applied directly to housewrap, it bonds to the housewrap and allows water to seep directly through the membrane by capillary action. For this reason, building codes require a two-layer WRB behind stucco and manufactured stone. In theory, the outer layer serves as a bond breaker, while the second layer functions as the drainage plane.
However, I don’t think there’s enough space between two layers of ordinary housewrap to provide adequate drainage. Instead, I recommend installing a rainscreen mat, such as Sure Cavity or Gravity Cavity from MTI (mtidry.com) over one layer of housewrap. The MTI products have a channeled plastic mat covered with a synthetic textile scrim. The scrim is supposed to function as the bond breaker, but I recommend installing the scrim toward the building and facing the stiff plastic channels outward.
This technique evolved from our experience of failures with other rainscreen products that have an entangled mesh that’s too soft to allow expanded metal lath to self-fur. If the stand-outs on the lath fall into a channel of the MTI product, we want the mortar to fill the channel to encase the lath. And if they fall on the raised portion of the channel, the plastic is stiff enough to push the lath into the mortar to self-fur as intended.

ased on the author’s recommendations, the builder installed a …
Getting Capped Trim Right
Metal capping on trim can be problematic because it traps water and doesn’t allow the wood beneath it to dry. To have a fighting chance, coil stock needs an upturned leg bent along the top so the WRB can lap it shingle-style and be taped to the metal (see illustrations below).
Above the garage door where there had been no flashing at all, I recommended installing an L-flashing over the capped trim. For the actual fix, the masons used a weep screed instead of an L flashing with a drip leg. Both will serve as a counterflashing over the capped trim, but I recommend bedding these metal trims in sealant to provide an added level of protection.
Click to enlarge image below.
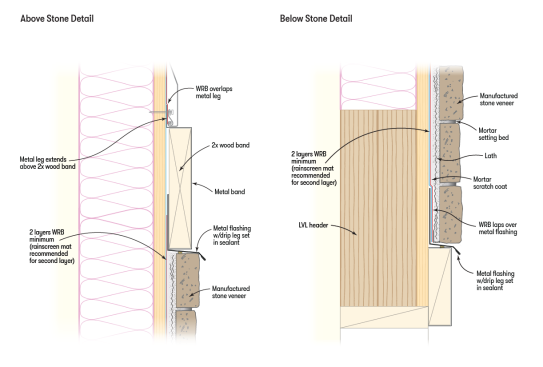
Two critical details: Above stone (left): The coil stock encasing the wood band has an upturned leg that serves as a flashing. The WRB laps over and is taped to this leg. Below the band, an L-flashing with a drip leg has been bedded in sealant. Both flashings direct water that gets behind the siding to the exterior. Below stone (right):