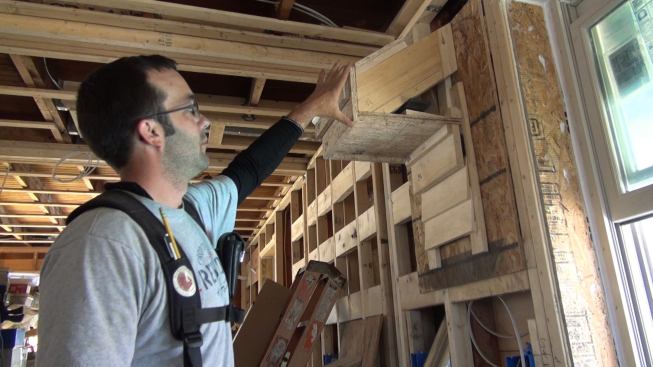
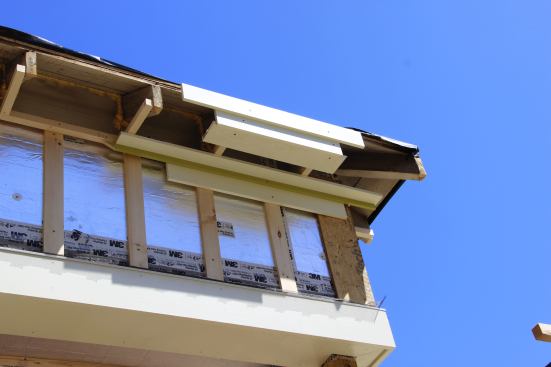
Project lead Mark Pollard with a full scale mock-up of the main …
Project lead Mark Pollard with a full scale mock-up of the main roof trim detail, created in collaboration with designer Rachel Conly. The full scale model helped the team fine-tune the proportions of trim elements, and let the construction crew see how the rain screen wall assembly would be vented at the top of the wall.
Ted Cushman
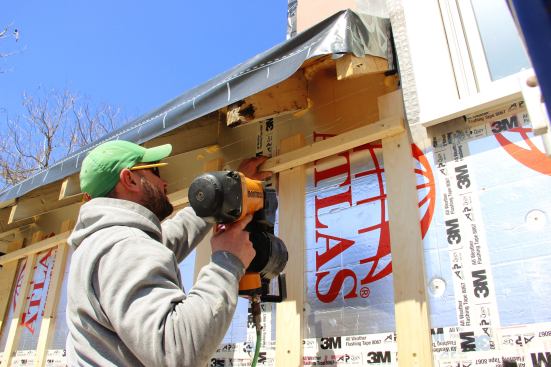
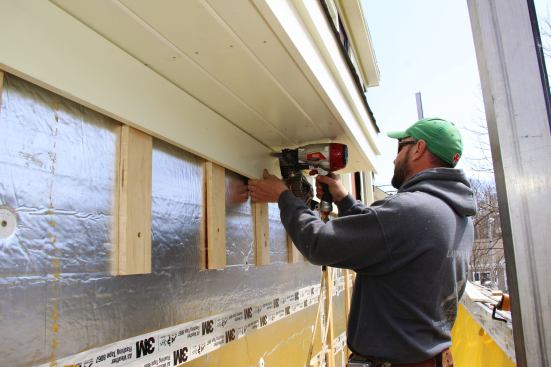
Carpenter Shane Fenton applies a a soffit nailer over the rain s…
Carpenter Shane Fenton applies a a soffit nailer over the rain screen wall strapping.
Ted Cushman
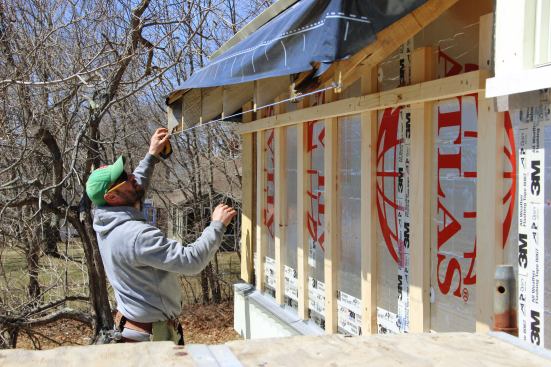
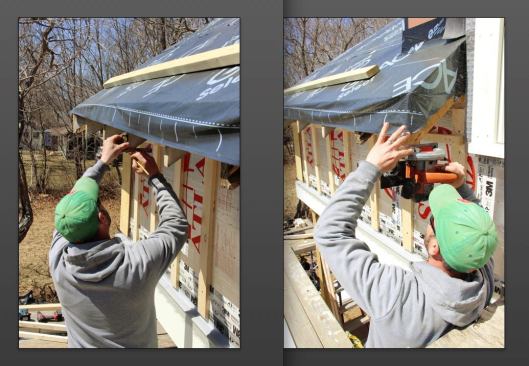
Fenton snaps a line on the fascia cut of the existing roof rafte…
Fenton snaps a line on the fascia cut of the existing roof rafters. Irregularities in the existing house framing made it hard to establish straight, level lines around the roof on the remodeled eave.
Ted Cushman
Fenton lays out a level line on the roof rafter endss (left) and…
Fenton lays out a level line on the roof rafter endss (left) and makes the level cuts (right).
Ted Cushman
Fenton attaches level soffit nailers to the rafter cheeks.
Ted Cushman
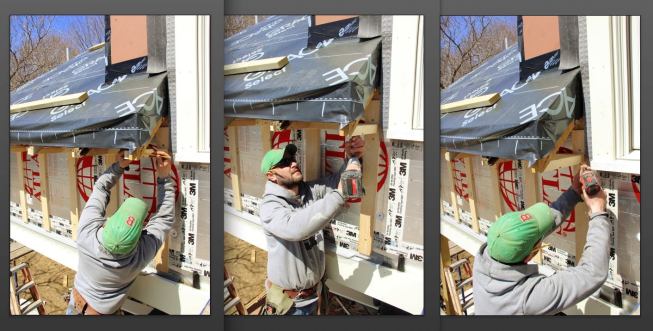
At the eave return, Fenton scribes a level nailer to match the u…
At the eave return, Fenton scribes a level nailer to match the underside of the end rafter (left), screws the nailer to the rafter (center), and screws the nailer to the ledger on the house wall (right).
Ted Cushman
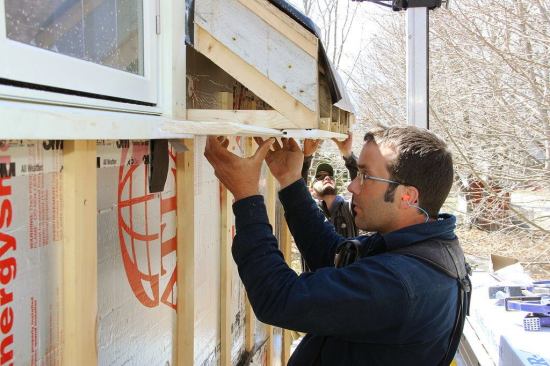
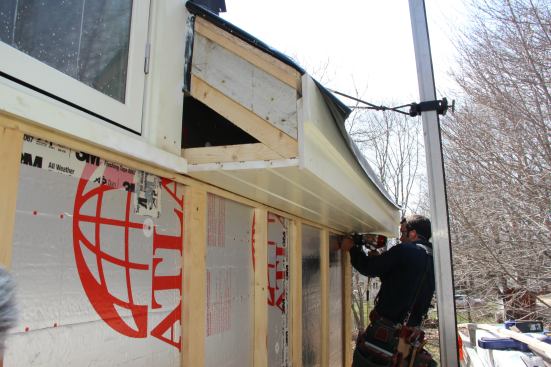
Pollard and Fenton had to figure out the termination points for …
Pollard and Fenton had to figure out the termination points for the trim work on the fly by holding pieces of trim in place.
Ted Cushman
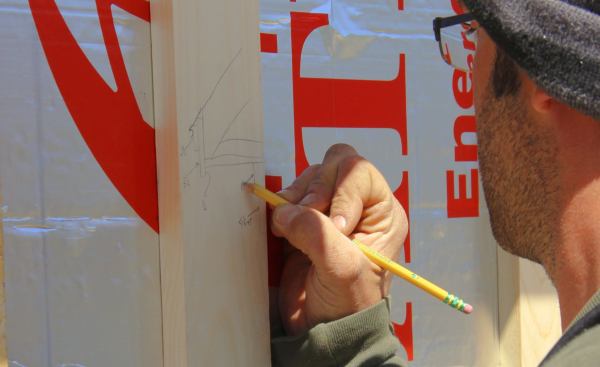
The team's theoretical eave trim solution, defined by the full s…
The team's theoretical eave trim solution, defined by the full scale mockup model, didn't quite correlate to the reality the carpenters discovered as they worked around the house and confronted the old roof system's out-of-whack hundred-year-old framing. Here, Pollard sketches out a modified version of the trim design that's tweaked to fit the real situation.
Ted Cushman
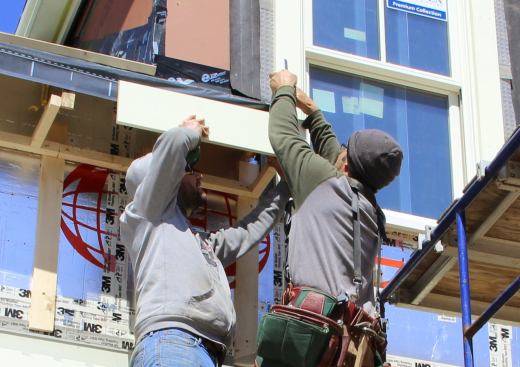
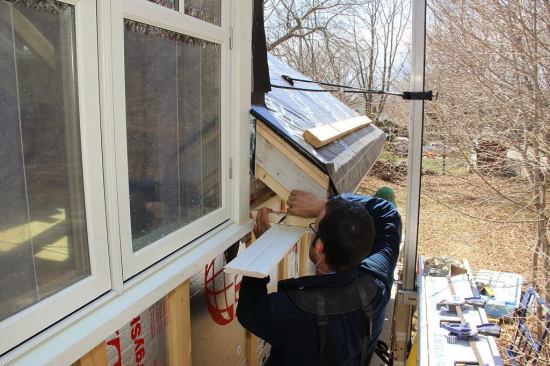
The frieze board wrapping the entire perimeter made for a unique…
The frieze board wrapping the entire perimeter made for a unique challenge in locating the roof trim. Elevations varied from corner to corner, and the window sill placement was critical in making this trim detail successful. The crew is seen here verifying, again, in the field how the elevations will carry around the house. All of the effort straightening the framing of the house paid off, and only a minor amount of splitting the differences was needed to install the trim.
Ted Cushman
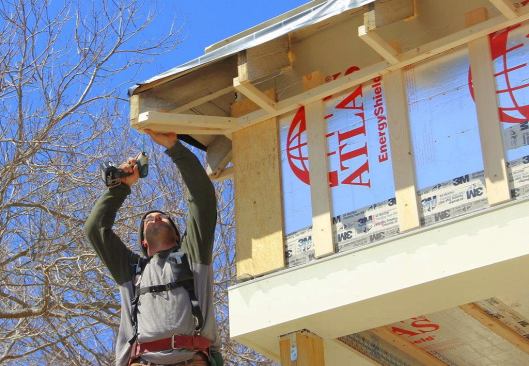
View of the "real world" mock-up, complete with rain s…
View of the "real world" mock-up, complete with rain screen details. After quickly assembling this mockup in place, Pollard and Fenton climbed down and viewed the assembly from the ground to check the visual effect of the proportions.
Ted Cushman
Pollard installs blocking for soffit nailing at the corner of th…
Pollard installs blocking for soffit nailing at the corner of the eave.
Ted Cushman
The tongue-and-groove soffit board material was pre-painted with…
The tongue-and-groove soffit board material was pre-painted with one coat of exterior latex prior to installation. Here the crew is lining up the miter at the outside corner, then marking the other end to be cut to length.
Ted Cushman
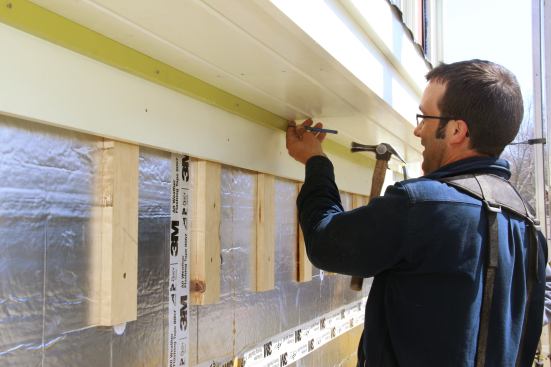
Pollard scribes a cut line onto the soffit board as Fenton holds…
Pollard scribes a cut line onto the soffit board as Fenton holds the other end of the board in place.
Ted Cushman
The third soffit board is persuaded into position then fastened….
The third soffit board is persuaded into position then fastened. The three pieces were laid out so the outer board would have the same reveal as the inner board after the frieze and bed molding are installed on the wall.
Ted Cushman
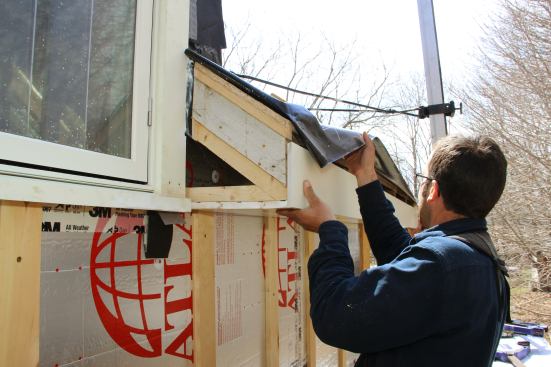
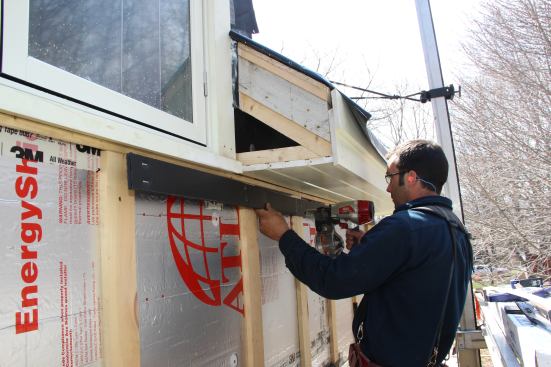
Pollard and Fenton position the fascia for installation. The roo…
Pollard and Fenton position the fascia for installation. The roofing membrane was intentionally left long in order to be trimmed later to seal the rafter bays against the elements.
Ted Cushman
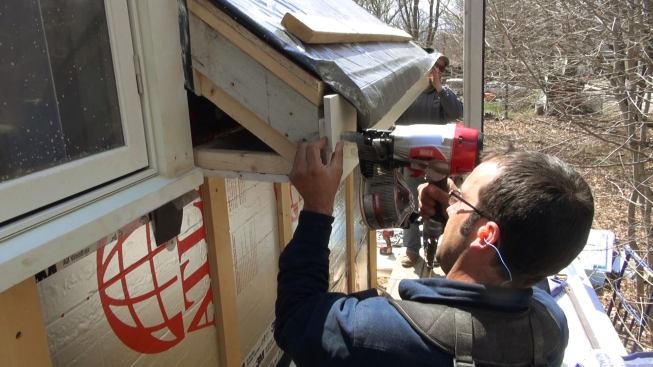
Pollard nails "shadow trim" in place after priming the…
Pollard nails "shadow trim" in place after priming the end miter cut. The roof membrane will be stapled near the top edge of the shadow, then trimmed so that it will be hidden behind the roof drip edge.
Ted Cushman
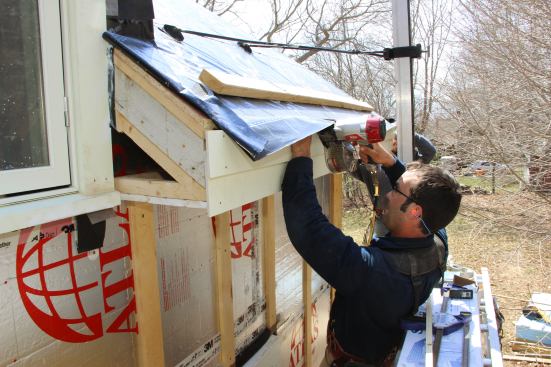
The outer top corner of the shadow board is positioned in plane …
The outer top corner of the shadow board is positioned in plane with the roof sheathing and fastened with 8d stainless steel ring-shank nails.
Ted Cushman
A seven-sixteenths-inch-thick strip is installed below the soffi…
A seven-sixteenths-inch-thick strip is installed below the soffit to act as padding for the frieze board and bed molding.
Ted Cushman
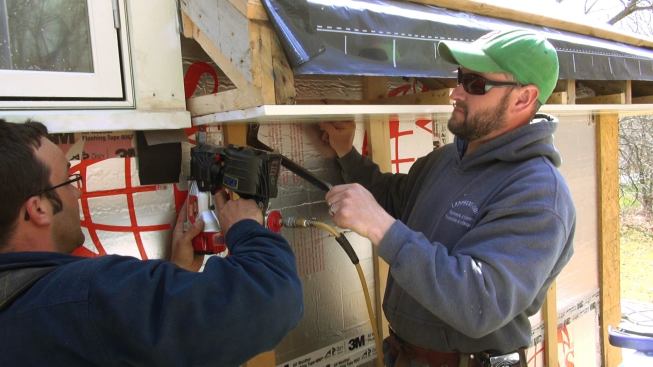
Pollard installs Cor-A-Vent SV-3 siding vent to the wall top bef…
Pollard installs Cor-A-Vent SV-3 siding vent to the wall top before installing the frieze board beneath the soffit. He leaves a three-eighths-inch gap between the vent strip material and the thin thick furring strip. This gap will allow air to exhaust from the rain screen wall assembly, through the SV-3, and then between the frieze board and clapboard siding to be installed later.
Ted Cushman
Fenton nails the frieze board to the wall strapping. The frieze …
Fenton nails the frieze board to the wall strapping. The frieze board runs around the entire house just below the plane of the roof eaves and the dormer windows, serving as a unifying trim element that ties the home together visually.
Ted Cushman
As a final touch, Pollards fastens pre-painted bed molding is ov…
As a final touch, Pollards fastens pre-painted bed molding is over the frieze, setting the nails flush to the surface of the trim. The whole trim package will get a final coat of paint once the siding is complete.
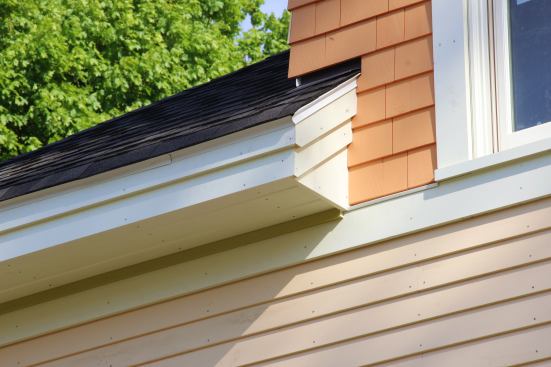
The trimmed-out eave sits ready for a final coat of paint in lat…
The trimmed-out eave sits ready for a final coat of paint in late May.
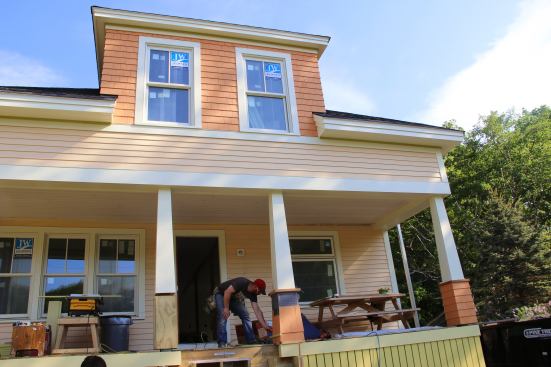
Another look at the front of the home. With upper level trim det…
Another look at the front of the home. With upper level trim details complete, the crew is working on wrapping the front porch columns.
Will Crosby
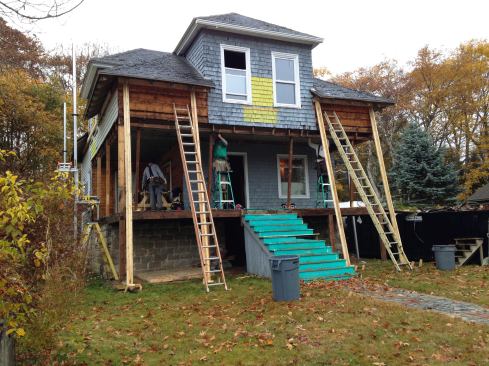
Hey — remember this? A photo of the house taken six months ago…
Hey — remember this? A photo of the house taken six months ago by homeowner Will Crosby shows the early demolition phase of the work.
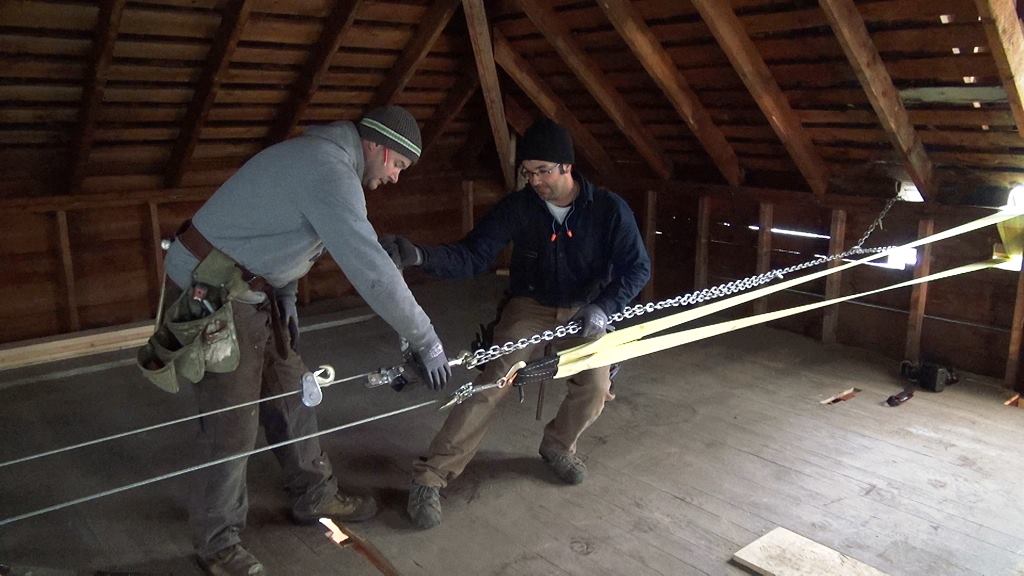
For the last six months, JLC’s Coastal Connection has been following Thompson Johnson Woodworking’s progress as the Peaks Island, Maine, contractor undertook a complete, ground-up renovation of an old vacation home. Most of our coverage has focused on high-performance energy-efficient envelope details. But the structural problems the house presented were, if anything, even more challenging than the energy issues. And completing the job with appropriate, high-quality exterior cladding and trim details has also turned into an interesting story.
Here we follow along as the site crew applies custom trim elements at the roof eave. In keeping with the home’s history, its island setting, and its relatively plain form, the new trim package uses flat boards applied in a simple built-up style with a Craftsman feel (see slideshow).
But in laying out and applying that relatively simple package, the crew have themselves to thank for investing their time and energy in straightening out the home’s sagging, racked, twisted and leaning frame in the early stages of the job (see “Island House Makeover: Re-Framing the Roof,” Coastal Connection 1-12-15) . In the photo above, we see project lead Mark Pollard and carpenter Shane Fenton straining to pull the decrepit old frame into some semblance of regular form last winter. The building was as far as six inches out of whack when they started demolition, Pollard says. This spring, as the crew laid out its trimwork, the remaining discrepancies in the roof and wall rough framing amounted to less than a half inch — a manageable problem which could be readily worked out with a little forethought.