

Michael Byrne
Plot out the dimensions of the patio and transfer them to the me…
Fitting the Crack-Isolation Membrane
With the mortar bed entirely floated, I turned to fitting the membrane. A word of caution: Be sure that the membrane you choose is specifically designed for exterior use. Membranes that you depend on for interior tile installations may have a limited lifespan if used outside. In fact, some interior-only membranes can be ruined by just a few days of exposure to direct sunlight, even after the tile has been installed.
The membrane I used for this project was Noble Deck (noblecompany.com), which is specifically designed for exterior use for waterproofing, joint bridging, and crack isolation. Because I was using the membrane for crack isolation only, this installation was relatively easy. The sections of the membrane that were needed to cover the courtyard could simply be butted together, whereas if the membrane had been needed for waterproofing as well (such as on a deck or a balcony over a living space), I would have had to overlap all of the seams by 2 inches and turn up the perimeter of the membrane onto the walls to ensure a watertight substrate.
The Noble Deck membrane I used comes in 6-foot–wide rolls and can be installed using either a companion contact-type cement or a latex-modified thinset mortar. The contact cement is relatively easy to use compared with thinset mortar and is rated for this type of application, but because the courtyard would experience a high volume of traffic and excessive heat buildup during the hot South Carolina summers, I decided to use latex-modified thinset mortar (Mapei polymer-enriched thinset mortar, mapei.com) instead. It was a judgment call, but in my experience, this type of mortar performs better under such extreme conditions.
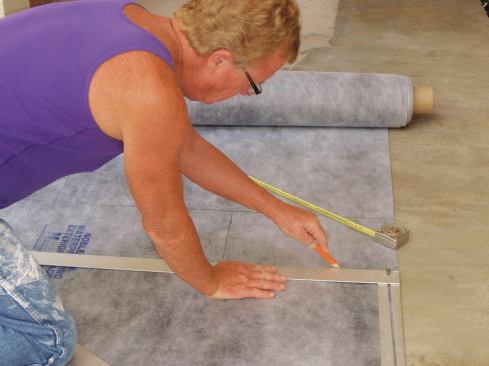
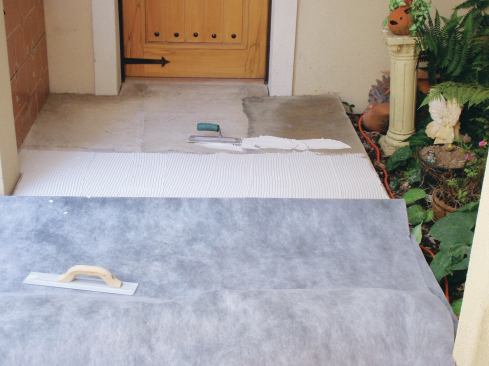
Because I could use the full width of the membrane, I started at the front door. I plotted out the various dimensions of this area and transferred them to the surface of the membrane. I needed a minimum 1/4-inch-wide movement joint wherever the floor tiles butted against a wall, and none of the tiles could be in direct contact with the mortar bed, so I kept the membrane within 1/4 inch from any abutting surface.
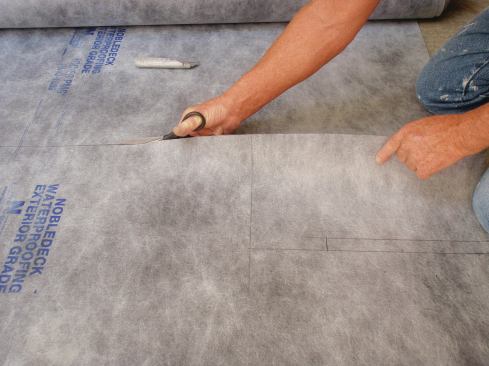
After plotting the dimensions on the membrane using a 3-4-5 folding square and a marker, I cut the membrane sheet to size with a pair of sharp scissors.
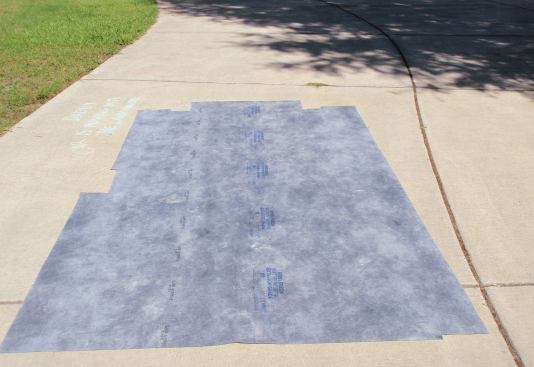
I could have run the membrane in one continuous sheet from one end of the courtyard to the other. But because the floor plan of the area was quite irregular, doing so would have wasted a lot of time and material. Instead, I worked in smaller, more manageable areas, and extended the first section of membrane just down to the jog for the flowerbed.
When I set the membrane in place, I noticed a large upward curl along the edge of the sheet, which was a mistake on my part. It may seem like a minor point, but upward curls such as this often pull away from the bonding adhesive. I should have plotted the dimensions on the other side of the membrane, with the curl facing down. This problem was quickly remedied, though, by letting the membrane sheet lie in the warm sun on a flat surface for 10 to 15 minutes until it relaxed.
Installing the Membrane
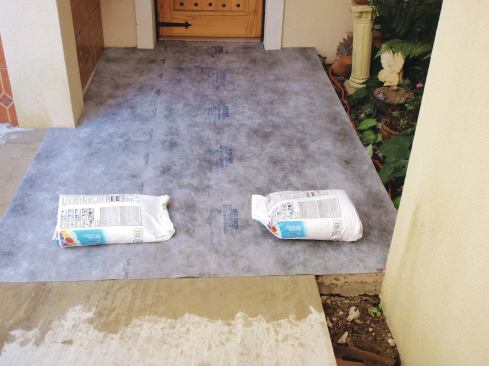
Properly aligning a sheet membrane before installation can be daunting, but the technique I used here ensures a high degree of accuracy. After cutting the sheet to size and verifying that it properly fit the area, I moistened the mortar bed with clean water so that it wouldn’t suck moisture out of the thinset mortar. Then I positioned the prepared sheet on the damp floor. Once it was perfectly aligned, I weighed the sheet down with a couple of bags of thinset mortar (buckets of water would have also worked fine) to lock the sheet in place.
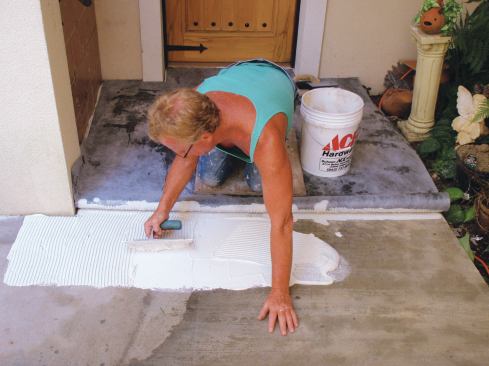
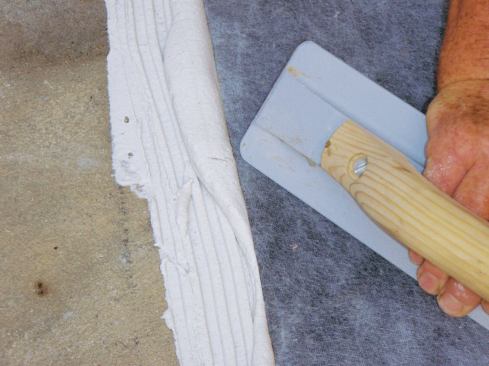
I carefully pulled the front edge of the sheet about halfway back from the entry door to expose the dampened mortar bed. Then I knelt down carefully on the doubled-back sheet—making sure that I didn’t accidentally move it or put a crease in it. Using a 1/4-inch square-notched trowel held at a very low angle, I combed out the latex-modified thinset about 18 inches toward the door from the membrane fold. On a very smooth surface, I could have used a 1/4-inch V-notched trowel, though the notch size and shape isn’t as important as the amount of thinset mortar that is applied: too much can create a lumpy surface, while too little can result in minimal adhesion.
With the thinset troweled on, I flopped the sheet back down. Using the smooth edge of a flat trowel and a short straightedge (less than 18 inches), I embedded the sheet into the thinset mortar that I’d spread, using heavy pressure and pushing any excess mortar toward the door. Once that section was smooth and flat, I again pulled back the sheet to expose the bare setting bed. I spread thinset mortar over the next 18-inch section of the setting bed and repeated the same process, flopping the membrane down and embedding it in the thinset mortar I’d just spread. I continued to replicate this series of steps, advancing 18 inches at a time until I reached the front door.
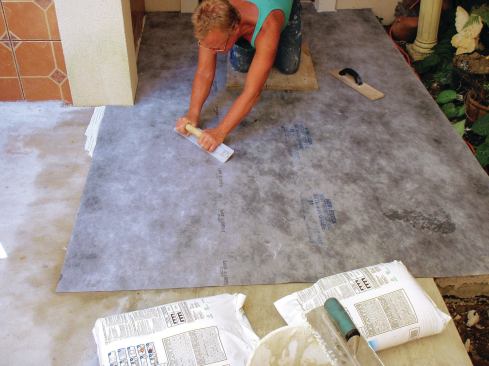
Once the first half of the sheet was embedded and I was certain that the membrane was smooth and flat against the setting bed, I placed protective boards over the embedded section and pulled the loose half of the sheet back far enough to expose the edge of the thinset that I had previously applied. I could then make a seamless transition from the first section into the second. I repeated the same series of steps as I did for the first half. After the entire sheet was adhered, I went over it with a magnesium float to embed the membrane firmly into the layer of thinset mortar, pushing any excess mortar out to the edge of the sheet where it could be removed before fitting the adjacent membrane sheet.
I continued the membrane installation by locating the next largest area that could be covered with a section of full-width material. I repeated the layout, fitting, and embedding process on that sheet and moved on, gradually working down to smaller and smaller areas until the whole floor was covered. At that point I let the entire membrane sit undisturbed for 48 hours to ensure that the latex thinset mortar had hardened and dried completely. With the setting bed detailed for slope and drainage, and the crack-isolation membrane in place, the floor was finally ready for me to start installing the tile.
A word about outdoor tile & climate
For this project located in the hot South, I just snapped layout lines on the finished membrane and installed the tile and grout much like I would for an interior tile floor. Without any real danger of freezing, there were no worries about the type of tile and whether or not it would absorb water. Similarly, I installed the isolation membrane to minimize worries about cracks—not waterproofing or the climatic effects on the substrate.
But what if we had been doing this job in Duluth, Minn.? Fact is, tile is used outdoors all the time in cold climates. For this particular floor, I used multicolored slate that was not impervious, and because the direct sunlight will dry out any rain-soaked tiles, I opted not to seal it. In a colder climate, I would have chosen an impervious stone similar to the slate that’s used on roofs. Another option for an outdoor tile floor in a cold climate would be to use non-absorptive porcelain.
The thinset and grout for tiling outdoors in any climate is the same as what I’d use for wet-area interior applications. Just be sure not to leave any voids in the thinset or grout that might trap moisture, which could cause freeze/thaw damage in freezing climates or mold in warm ones.
Contributing editor Michael Byrne is a tile setter and the moderator of the tile forum at jlconline.com.