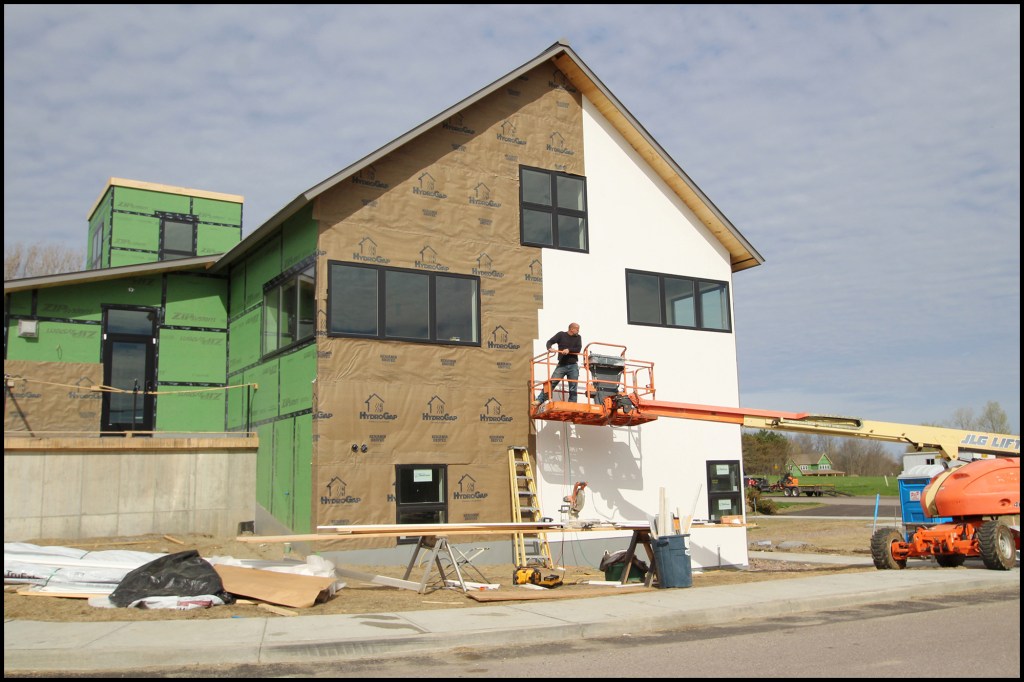
The library was built to be highly durable with 2x8-framed walls sheathed with 1/2-inch OSB and 2-inch Zip System R-Sheathing (with dense-pack cellulose). Wide windows reduced the number of long grade-to-soffit runs of vertical siding.
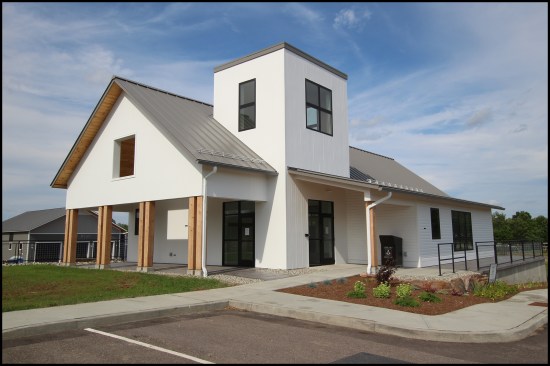
A few months ago, my nephew, Josh Goodrich, and I completed work on a new library in my hometown of South Hero, Vt. We worked in collaboration with Hayward Design Build on the project. The building was designed by architect David Roy of Wiemann Lamphere Architects in Colchester, Vt., and his plans called for it to be clad with Boral TruExterior poly-ash siding—with vertical shiplap covering most of the building and horizontal Dutch lap (cove) on a small section on the front of the building.
1
of 6
Dutch-lap siding was face-nailed with 8d SS ring-shank nails, th…
Dutch-lap siding was face-nailed with 8d SS ring-shank nails, the heads flush with siding and placed within 2" of the edge of each board.
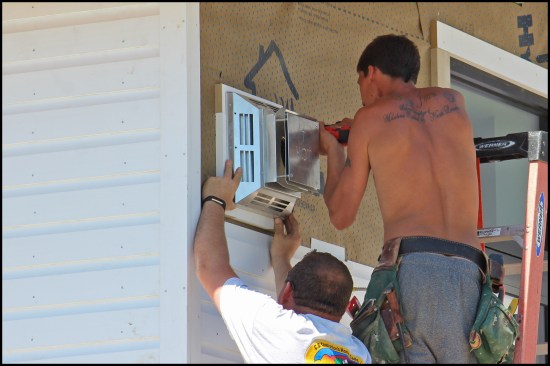
Large penetrations were blocked with Boral; head trim was run ov…
Large penetrations were blocked with Boral; head trim was run over jamb trim. The fan unit’s flange set in sealant.
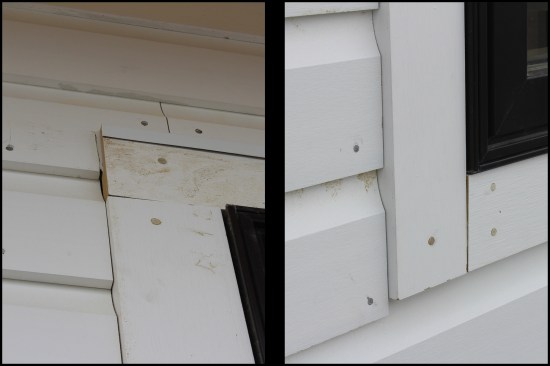
Windows (and doors) at horizontal siding locations were trimmed …
Windows (and doors) at horizontal siding locations were trimmed out with Boral; head trim was run over jamb trim (photo, left), the jambs run past the sill trim (photo right). The Boral siding expands and contracts significantly less in temperature changes than vinyl, wood, engineered wood, and fiber cement siding. Here, the siding was butted to the trim with no gap.
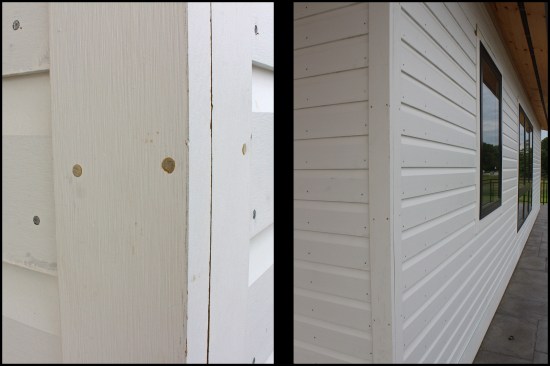
Boral 1-by outside corner trim were installed with stainless ste…
Boral 1-by outside corner trim were installed with stainless steel screws, 16‑inch-o.c. Auto-body filler was used to fill the nail holes (photo left). The Dutch lap siding was nailed off 14 inches o.c. along snapped lines (photo right).
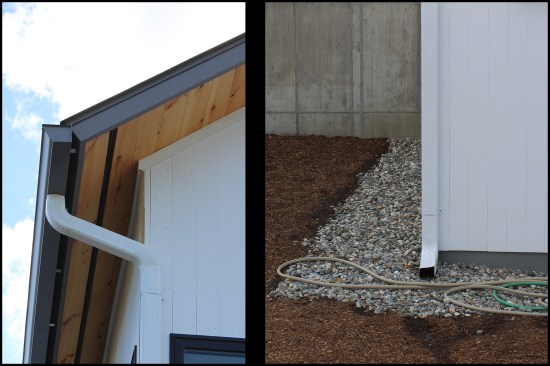
Frieze board trim was installed at siding-to-soffit junctures. A…
Frieze board trim was installed at siding-to-soffit junctures. A gutter system (photo left), as well as a band of stone around the whole building greatly reduced back-splashing onto the siding and fiberglass-reinforced plastic protection barrier at grade (photo right).
Finishing up, hole filler and any raw Boral were spot primed and…
Finishing up, hole filler and any raw Boral were spot primed and painted. Gaps were sealed with urethane-based, paintable caulk, followed by a finish coat of Sherwin Williams Resilience; the painters rolled it and then brushed it.
I’ve installed Boral trim on a number of residential projects over the past five years, but this was my first time out with its siding. In the area I work, it’s not common to side homes with Boral, due to its price point. Lack of awareness about the product may also play into this (a number of local builders and homeowners dropped by the fairly high-profile site to ask about it—a few even took home offcut pieces to play with).
1
of 7
Head and jamb window flanges were taped to the sheathing with Zi…
Head and jamb window flanges were taped to the sheathing with Zip flashing tape, then the WRB was installed (photo, left). The Benjamin Obdyke Hydrogap drainable WRB was installed with a 4-inch horizontal (shingle-style) lap and a 6-inch lap at vertical laps. Metal drip cap and Siga Rissan and Fentrim tapes folded onto the sills’ frames (photo, right) were incorporated into the drainable WRB.
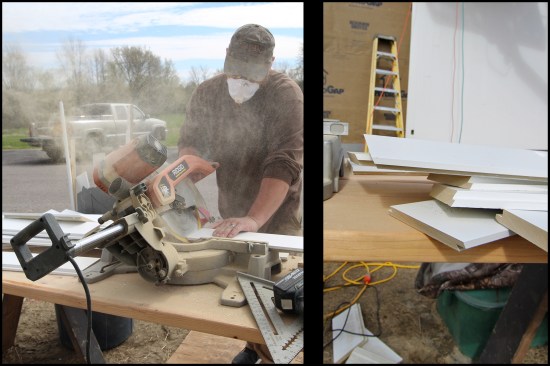
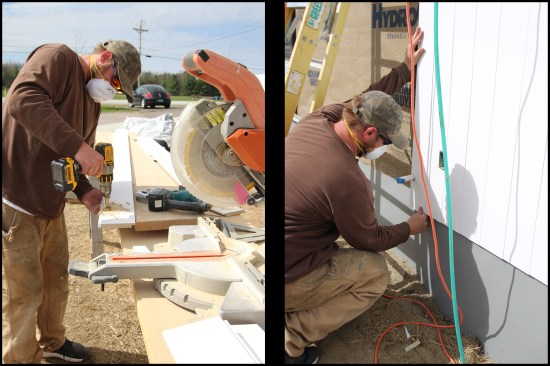
A quality dust mask was a must while cutting outside (photo, lef…
A quality dust mask was a must while cutting outside (photo, left). Butt joints for the vertical siding were cut at 30-degree angles (photos, left and right). Field-cut edges do not need to be primed or painted, also it’s important to store the Boral flat on a level surface and keep the material clean and dry (installing product wet or saturated may result in gapping at joint locations).
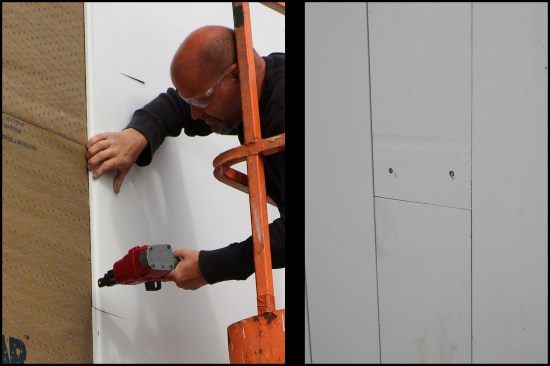
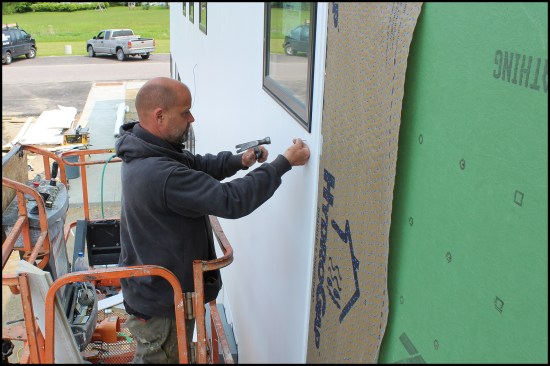
The siding was installed with 2-inch-long ACQ staples 8 to 10 in…
The siding was installed with 2-inch-long ACQ staples 8 to 10 inches on-center, blind-nailed along the sides (photo, left). Joints were butted together with no gap and were face-nailed with 8d stainless steel ring-shank nails, the nail heads driven flush with the siding’s surface (photo right). Small dents and imperfections in the stock were either offcut or infilled. Here, the mark above the fasteners was later infilled with auto-body filler, then spot primed and painted.
Jigsaws and drills with Forstner bits (photo, left) were used to…
Jigsaws and drills with Forstner bits (photo, left) were used to cut the siding around penetrations (photo right). Coarse jigsaw blades lasted much longer than fine ones. Later, the joint was sealant with a paintable, urethane-based sealant.
Due to wind, the HydroGap WRB was installed vertically on the no…
Due to wind, the HydroGap WRB was installed vertically on the north elevation as the siding was installed. The author nailed by hand near windows to avoid damage to underlying flanges and flashings (the vertical siding run to the window frame).
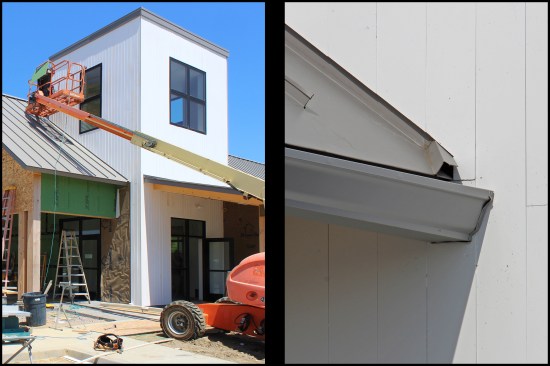
At the stair tower (photo, left), the siding was installed with …
At the stair tower (photo, left), the siding was installed with a 1-inch gap between the roofing and bottom edge of siding; note the kick-out flashing formed into the roofing pan (photo right).
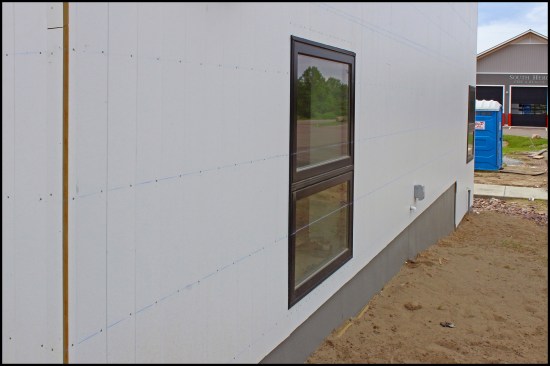
With the vertical siding installed, the author snapped lines to …
With the vertical siding installed, the author snapped lines to help line up the final 16‑inch-o.c. face-nailing. Also of note, the vertical siding lapped over a fiberglass-reinforced plastic protection barrier, “Groundbreaker” by Nudo, at grade.
Key takeaways. Here are a few postmortem tips regarding installation:
Use quality stainless steel fasteners that will last as long as the siding.
Snap lines for all face-nailing to line up nail heads (for both the vertical and horizontal profiles).
Use inexpensive tools for cutting, as grit from the Boral tends to get into motors and the sliding mechanisms of saws.
Use quality blades and bits for cutting (coarse jigsaw blades lasted much longer than fine ones).
Take care handling long lengths, supporting them as required.
Since the overall structure was built to be highly durable, the Boral siding plays a large role and is worth the investment. The factory-primed (or raw) vertical 1×6 shiplap siding cost around $5.00 per square foot, plus an additional $1.77 per square foot for painting. The horizontal 1×6 Dutch lap (cove) siding was a little less, at $4.80 per square foot, plus the $1.77 square-foot painting cost. Our town is excited about its new library; we expect it (and the Boral siding) to last long time.
Gaps were sealed with urethane-based, paintable caulk, followed by a finish coat of Sherwin-Williams Resilience (two coats of paint had been applied to the siding by a painting subcontractor offsite prior to delivery). The Boral siding comes factory-primed on its outward facing sides; a factory finish is not available. Factoring in the paint, the cost of the siding is greater than fiber-cement, but the durability of Boral is a worthwhile investment.