As stone masons, we see a bare concrete foundation as a clean canvas waiting for us to work the magic of our craft. Stone veneer is a straightforward way to enhance the look of just about any home—regardless of its design.
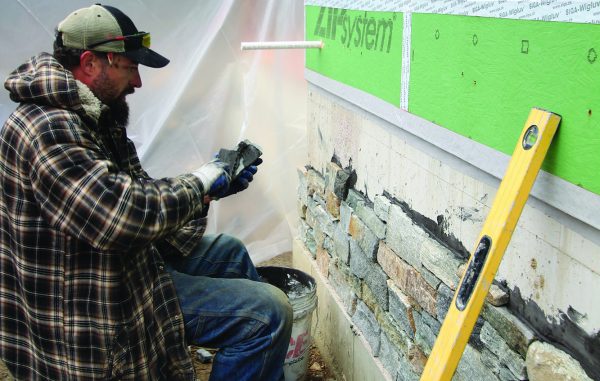
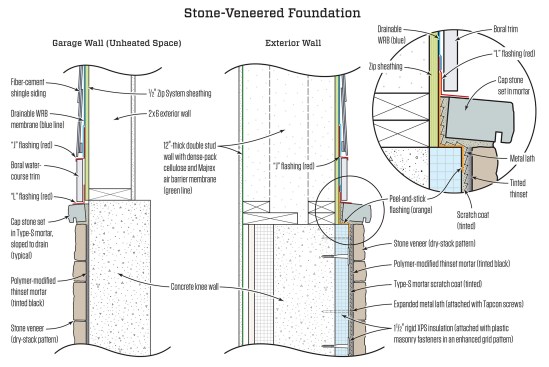
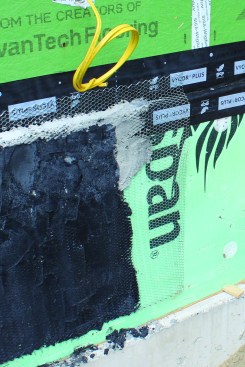
Where the foundation is not insulated, masons use a polymer-modified mortar to apply the stone veneer directly to the foundation concrete. In areas where rigid foam covers the foundation, expanded metal lath with a scratch coat of Type-S mortar creates the base layer for applying the stone veneer.
Faux vs. real stone. At grade level, foundation veneer is apt to sustain damage from routine activities and wear and tear. With faux stone, the color is only on the surface, so abrasions, chipping, or cutting exposes the base color, usually gray or light tan.
Even so, until recently, manufactured (aka faux) stone was the material of choice for foundation veneer, because it was much less expensive than natural stone. Advances in cutting technology, however, have brought the cost of natural stone down to nearly that of faux stone, making it more affordable.
Two challenges. On this slab-on-grade home in northern Vermont, the garage foundation was plain concrete, while the rest of the foundation was insulated with rigid foam. We used two different approaches to applying the veneer. While stone readily adheres to bare concrete, the rigid foam insulation required metal lath with a scratch coat of Type-S mortar, which gave the veneer a good surface to adhere to.
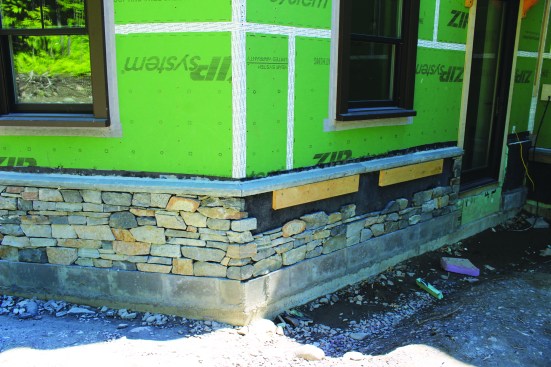
For a dry-laid look, we added black tint to the mortar, which made it less visible through the gaps between stones. A bluestone cap was added as a design element after we’d finished much of the veneer.
1
of 6
Thin concrete block raises the stone shelf cast into the foundat…
Thin concrete block raises the stone shelf cast into the foundation closer to grade.
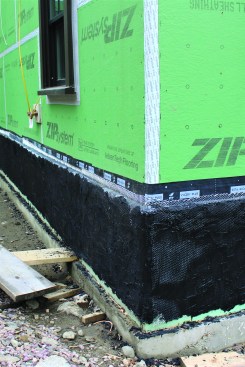
Flashing tape protects the bottom of the sheathing behind the me…
Flashing tape protects the bottom of the sheathing behind the metal lath.
The black scratch coat provides a dark background for the “dry…
The black scratch coat provides a dark background for the “dry-laid” stone.
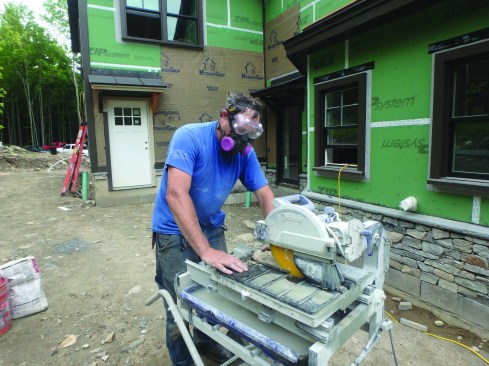
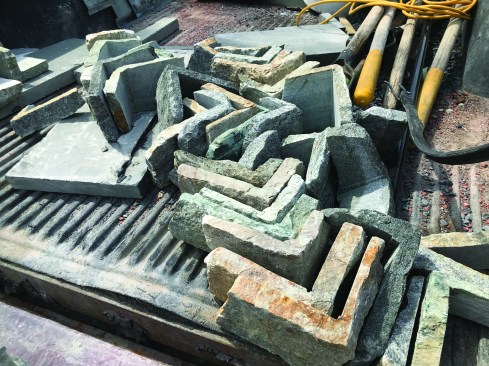
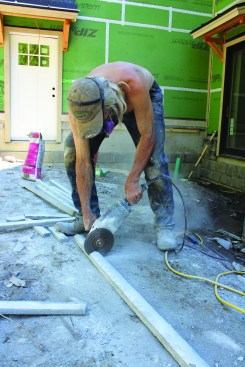
The masons use a heavy-duty wet saw to cut the stone veneer when…
The masons use a heavy-duty wet saw to cut the stone veneer when needed. The saw has a tilting head for cutting miters.
To make the cut edges less visible, the crew installs them facin…
To make the cut edges less visible, the crew installs them facing downward. To fine-tune the fit of a stone, a mason uses the chisel end of a masonry hammer to chip away unwanted material.
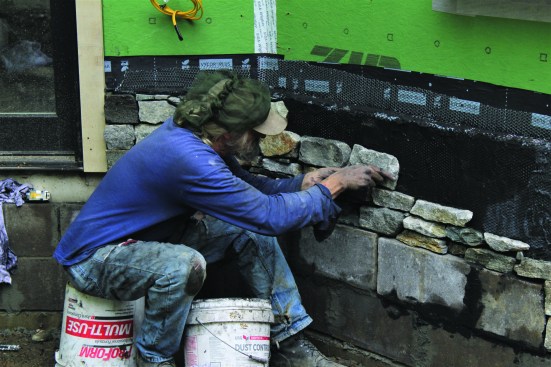
Because the crew works on small areas at a time, they hand-mix t…
Because the crew works on small areas at a time, they hand-mix the mortar in small batches, adding concentrated masonry tint to the exterior-grade polymermodified thinset to create the black mortar for adhering the stone veneer.
1
of 10
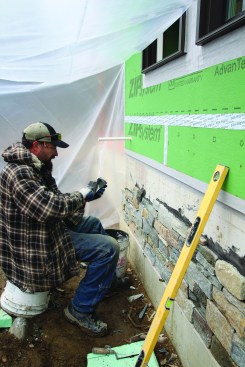
The blend of ledgestone and slightly larger ashlar stone comes w…
The blend of ledgestone and slightly larger ashlar stone comes with a nominal thickness of 1 1/2 inches. After trimming each stone to fit, the mason applies mortar to the bare concrete. He then butters the back of the stone …
… and presses it into place.
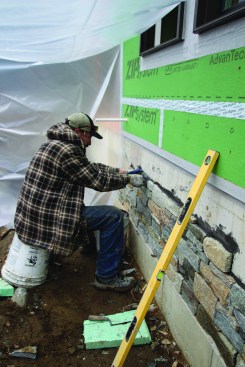
The crew uses the same process to apply stone to the scratch-coa…
The crew uses the same process to apply stone to the scratch-coated areas.
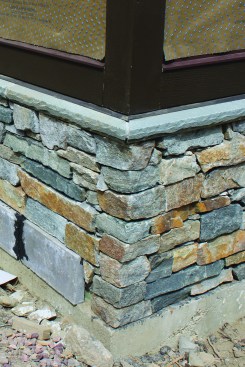
The crew uses factory-cut corner pieces for the 90-degree corner…
The crew uses factory-cut corner pieces for the 90-degree corners.
They install the corner pieces first and then work back toward t…
They install the corner pieces first and then work back toward the field on either side.
The finished corner veneer looks like solid blocks of stone set …
The finished corner veneer looks like solid blocks of stone set in alternating directions on the corner.
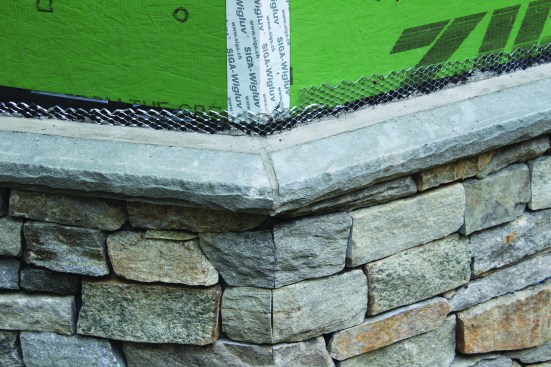
To make the 45-degree corners, the crew cuts 22.5-degree miters …
To make the 45-degree corners, the crew cuts 22.5-degree miters from the same stones, again working from the corner outward during installation.
Cutting the miters from the same stone creates a sharp line with…
Cutting the miters from the same stone creates a sharp line with the grain of the stone continuing through the miter.
This makes the stone in the finished corner seem continuous thro…
This makes the stone in the finished corner seem continuous through the break.
1
of 12
The prefabricated Pennsylvania bluestone cap comes ripped to 2 3…
The prefabricated Pennsylvania bluestone cap comes ripped to 2 3/4 inches wide.
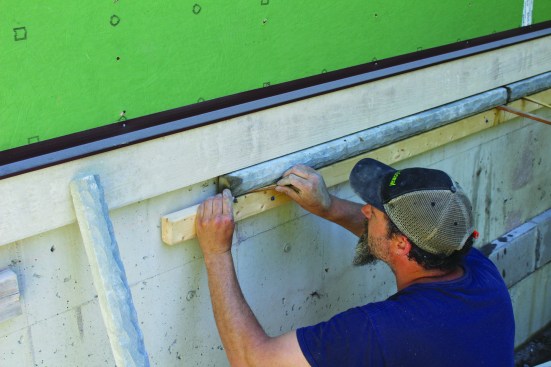
The crew cuts the cap to length with a diamond wheel on a grinde…
The crew cuts the cap to length with a diamond wheel on a grinder.
The project designer opted for the cap after the project was sta…
The project designer opted for the cap after the project was started, so the crew put it in before finishing the field below.
Where they hadn’t begun the veneer process, the crew installs …
Where they hadn’t begun the veneer process, the crew installs temporary cleats to install the cap, which sits on top of the lath-covered rigid foam.
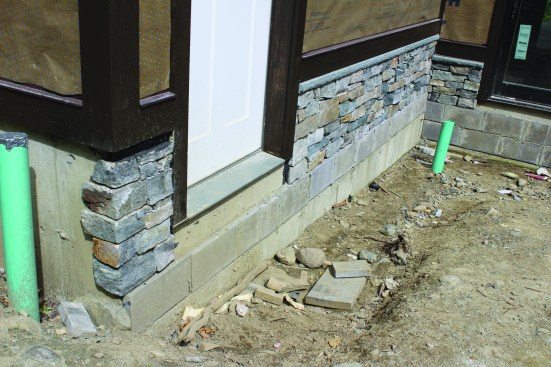
Where the foundation is not insulated, the crew installs the cap…
Where the foundation is not insulated, the crew installs the cap directly below the trim.
Corners are mitered, and excess lath above the cap is trimmed of…
Corners are mitered, and excess lath above the cap is trimmed off after the cap is installed.
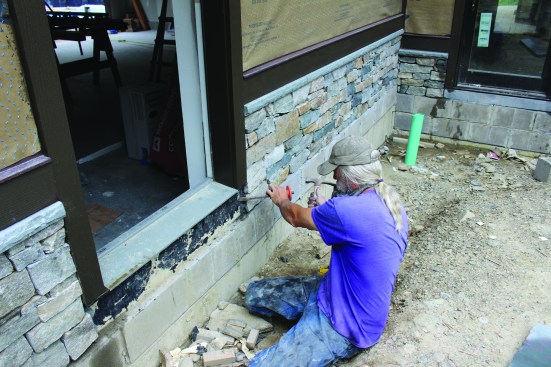
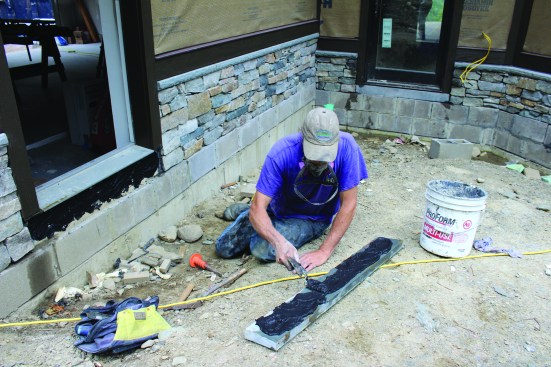
To create a solid toekick below each door, the crew cuts slabs o…
To create a solid toekick below each door, the crew cuts slabs of Pennsylvania bluestone to fit each spot. They remove any chunks of mortar left behind from installing the veneer.
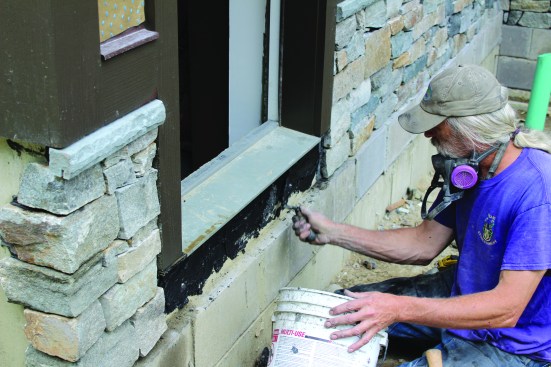
Then a layer of mortar is spread on the foundation.
They wet down the back of the toekick to keep it from sucking mo…
They wet down the back of the toekick to keep it from sucking moisture out of the mortar as it sets up.
A layer of mortar is spread on the back of the damp toekick.
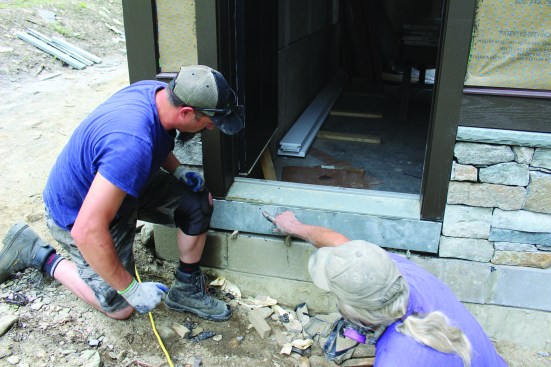
Two crew members carefully lift the stone into place.
After pushing the stone tight against the door threshold, they s…
After pushing the stone tight against the door threshold, they slip in temporary wedges to hold the toekick in place until the mortar sets.
Brothers Tom and Peter Chappelow own and operate Half Moon Stone Works. Each of the brothers has over twenty years of masonry-related experience. Half Moon Stone Works specializes in all manner of masonry property enhancements, providing north western Vermont with decorative and functional, patios, walks, stairs and walls in addition to natural and manufactured stone veneers. The Chappelow brothers take pride in their timeless craft, using traditional low-impact methods, and maintaining a work ethic that provides the highest quality results.