


Mark Parlee
When applying a liquid waterproofing membrane over OSB or plywoo…
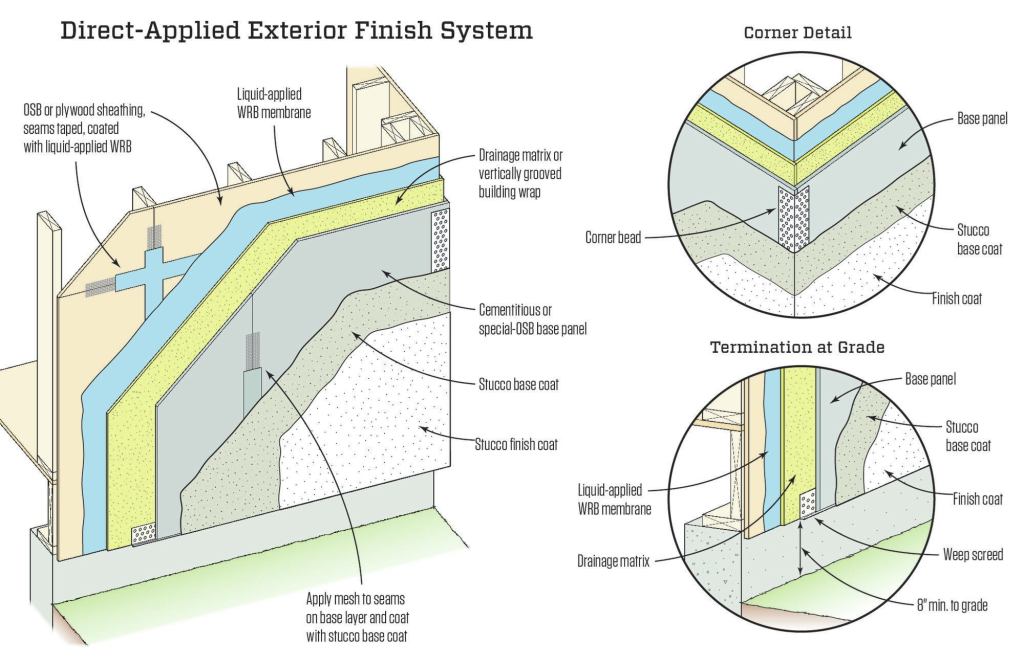
DRAINAGE PLANE
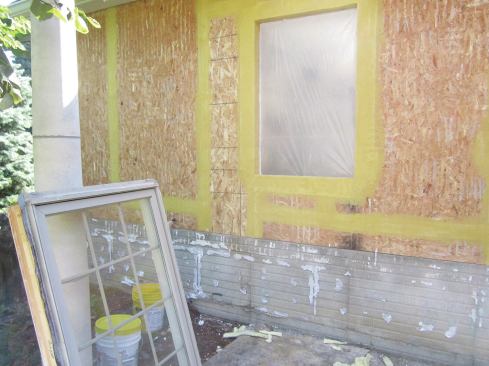
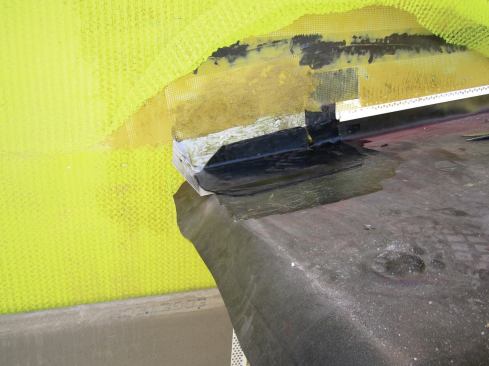
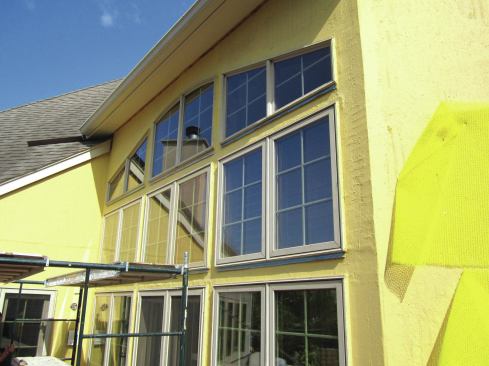
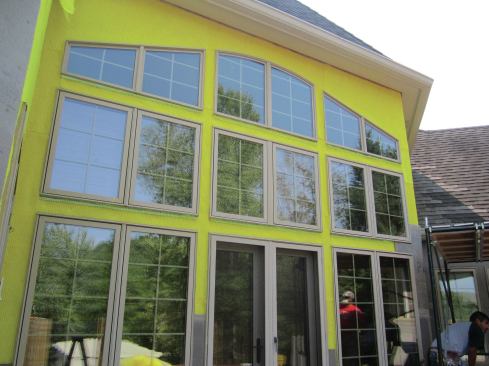
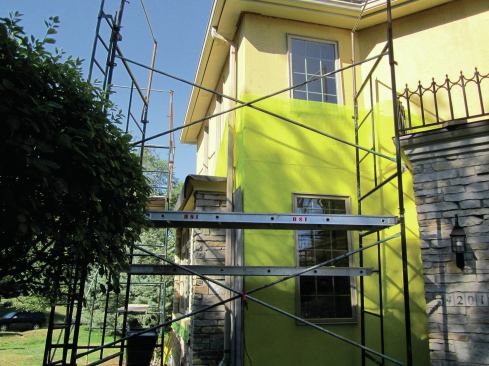
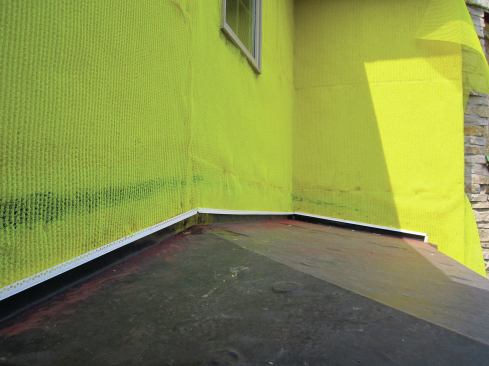
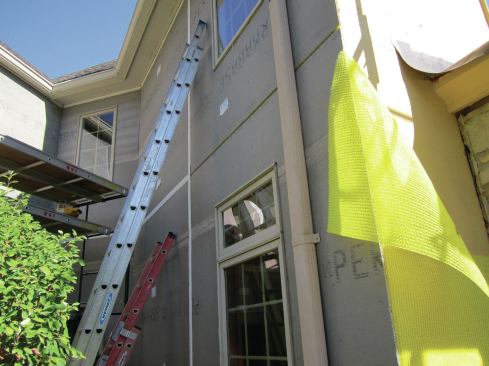
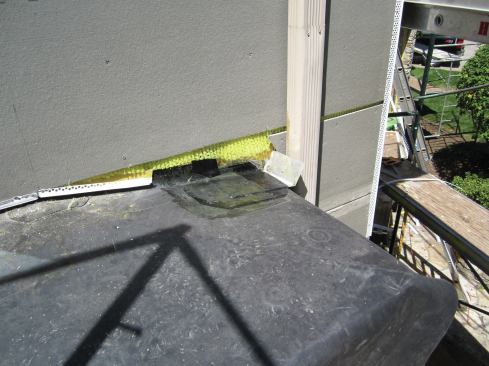
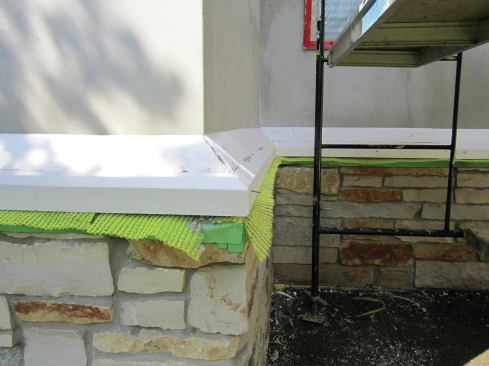
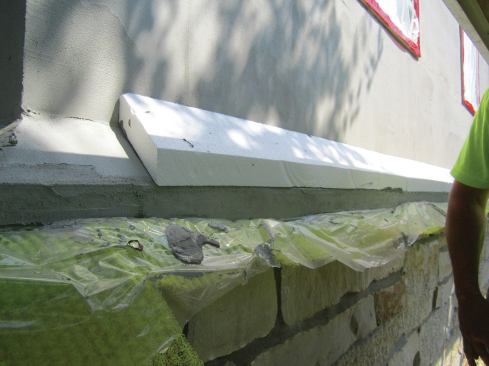
The layer that most often gets missed in a DEFS assembly is the drainage layer. I typically use a rainscreen material, such as Keene Building Products’ Driwall Rainscreen or Benjamin-Obdyke’s Home Slicker, the bright yellow matrix that’s shown in the photos in this article. I’ve also used Masonry Technology’s Gravity Cavity, which was developed for brick walls but works for stucco systems as well. You could even use a vertically grooved building wrap, such as Tyvek StuccoWrap.
The key is to use a material that creates a three-dimensional separation between the WRB and the base panels that will be installed over it. The liquid-applied WRBs are somewhat permeable, and if the base panel is pressed tight against them, any water that gets behind the base panel has the potential to wick through the WRB. The separation created by the drainage matrix allows the water to drain down the wall instead.
BASE PANELS
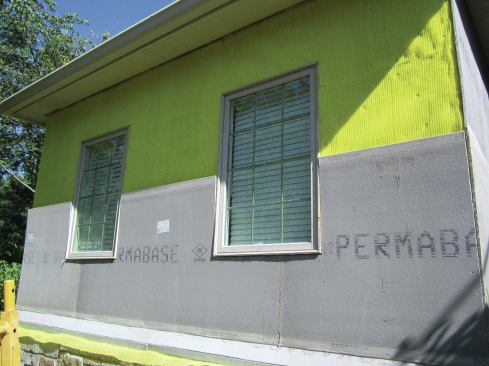
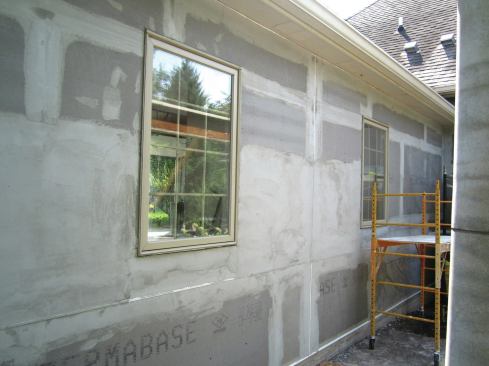
Over the drainage matrix go the base panels. This is the key difference between EIFS and DEFS assemblies. The DEFS base panel replaces the insulation panel found in an EIFS assembly. The assembly loses its insulation value, but it gains in durability and impact resistance.
There are a number of options for stucco base panels that can be used. We typically use PermaBase, a cementitious panel made by National Gypsum. We also see a lot of James Hardie HardieBacker fiber-cement panels and LP SmartSide, an OSB product that’s treated with a zinc borate compound to discourage fungal growth.
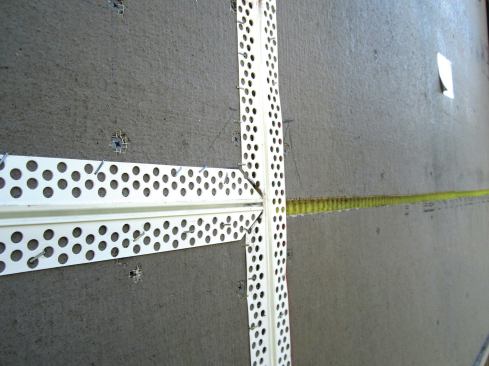
Control joints. As with an EIFS assembly, the wall area needs to be segmented by placing a control joint every 10 to 12 feet, both vertically and horizontally. The purpose of these joints is to force controlled cracks. If the wall area were larger, the stucco coating would pull itself apart due to thermal expansion and the wood framing’s swelling and shrinking due to changes in humidity. By installing a control joint, however, you limit the cumulative expansion over the wall area, essentially breaking the wall into a neat matrix of rectangles.
The control joint is fashioned by spacing the base panels 1/2 inch apart and applying a vinyl strip with an “M” profile that will accordion in and out as the wall swells and shrinks. Vinyl stucco accessories, including control joint strips and corner bead, are available from a number of sources; one common supplier is Amico Building Products.
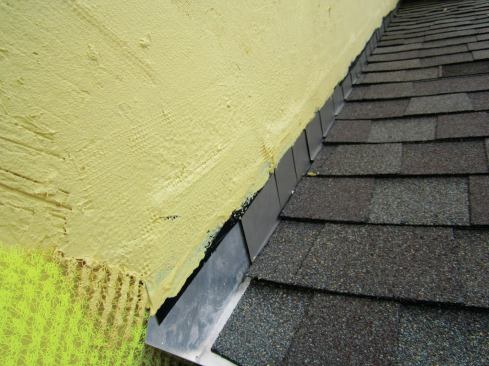
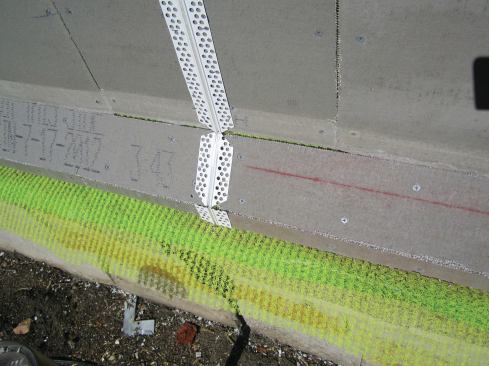
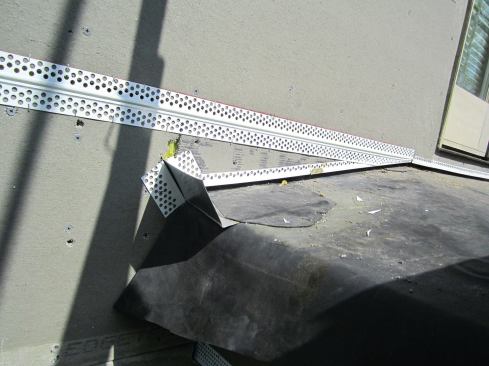
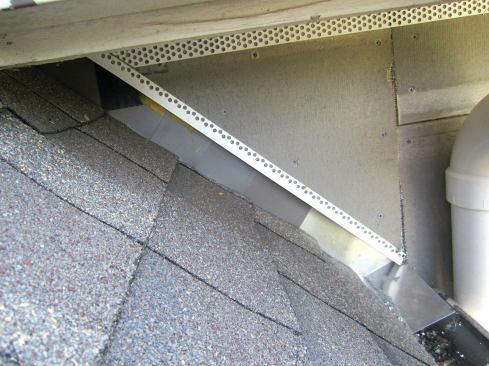
Vertical control joints should completely divide the wall section. We bring the joint right through any transition at the wall base. Horizontal control joints are typically placed between floors along the second- (and third-) floor band joists. Where the horizontal joint intersects a roofline or bump-out, we are careful to integrate the control joint with edge treatments at the base of a wall.
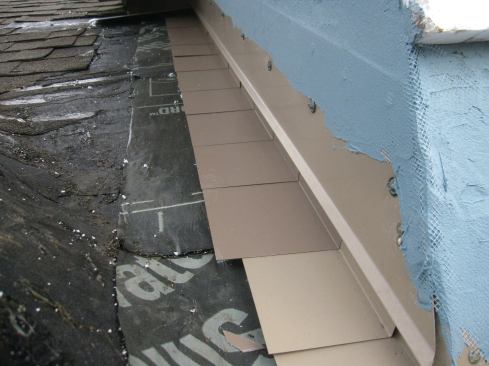
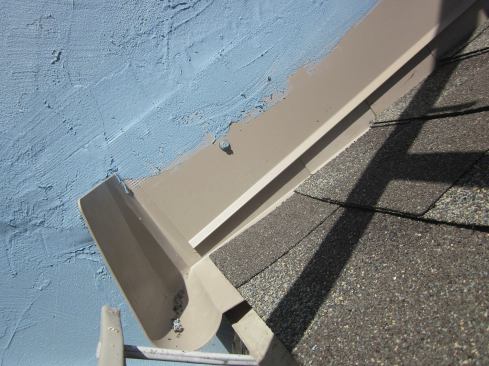
J-track and corner bead. We typically use a vinyl J-track (sometimes sold as “casing bead”) at the base of walls to finish out the exposed bottom edges of the panels. True to its name, it has a J-profile to receive base panel, and it has weep holes that will allow any water that drains through the assembly to escape. It functions like a screed as well. When the stucco base coat is troweled on, the installer’s trowel will ride on the proud, outside edge, revealing a small slice of vinyl that will later be painted over by the finish coat.
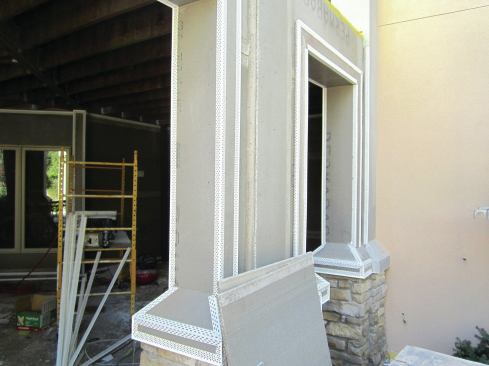
Outside corners should get a corner bead to create a crisp edge to define architectural details in the facade.
The base panel should finish out at least 2 inches above a paved surface or above a sloped roof. Above exposed grade, most manufacturers will allow a minimum of 6 inches, which conforms with the 2009 IRC, but better is the old code standard of 8 inches, to keep the bottom of the stucco out of the splash zone at the dripline.
STUCCO BASE COAT
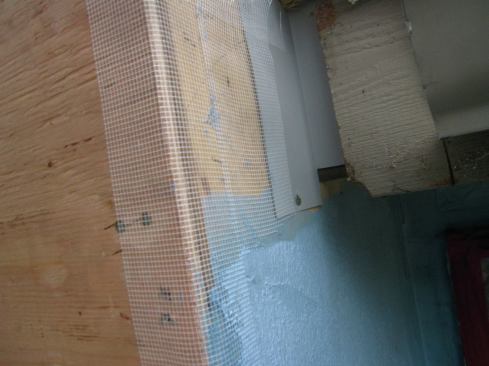
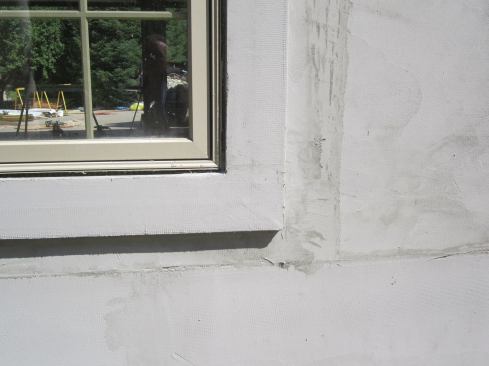
An EIFS system would typically include an impact-resistant mesh over the entire surface of the foam boards. With DEFS, mesh is applied only at the joints, to help prevent the panel edges from telegraphing through the stucco. Like the mesh applied at the WRB layer, the mesh applied to the joints at the base panel layer is embedded—only in this case the embedding material is the stucco base coat.
This base coat is a cementitious material. It’s not quite as hard as the scratch coat in a traditional three-coat system, and it doesn’t go on as thick. Each manufacturer provides specifications for the thickness, typically around 3/8 inch to 1/2 inch per coat. What’s critical is that the material be applied at a consistent thickness, so there are no sags or recesses. Much like with a plastered interior wall, imperfections in the base coat will telegraph through the finish coat.
DETAILING WINDOWS & DOORS
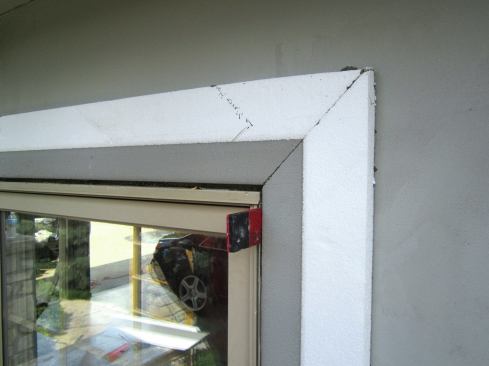
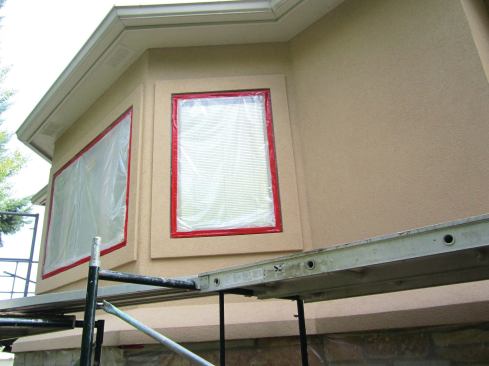
As mentioned earlier, the detailing of windows and doors starts at the WRB layer. After the base coat has cured, we apply a foam trim and give that a base coat. The trim is held 3/8 inch away from the edge of the window or door, creating a channel that will later be sealed with backer rod and caulk, as shown in the illustration above.
For the trim, we use a pre-formed foam trim. This is sold either as pre-finished trim or as a starter strip for EIFS foam board with a “backwrapped” edge. This ensures that the edge and back are coated with an even base coat that will keep water from being absorbed into the EPS trim, and it provides a uniform surface for the caulk sealant, which is applied as a final step after the finish coat. When we finally do apply the backer rod and caulk around the windows, we want the sealant to adhere to the backwrapped edge, not to the finish coat. The thinking here is that the contraction of the sealant, which tugs at the ends of its hourglass profile, could cause the finish coat to separate from the base coat. To prevent this from happening, we are careful to tape the windows so that the edge of the tape securing the poly that protects the windows will give us a crisp edge to which we can apply our sealant, free of any finish topping.
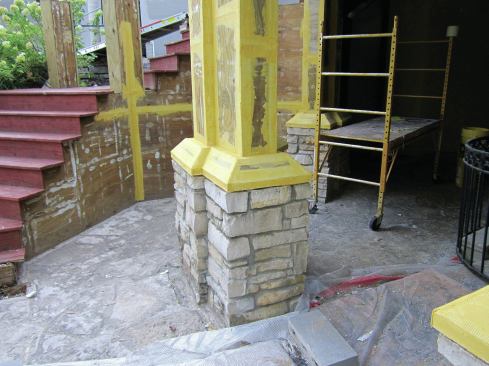
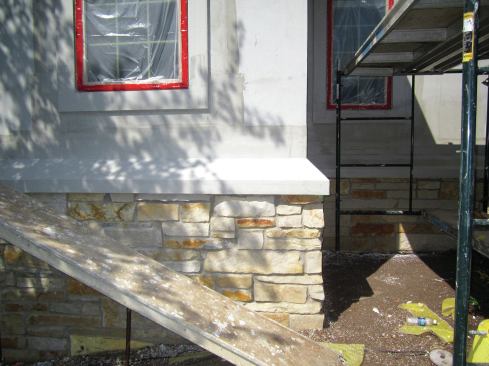
Along with applying window and door trim, we now can finish the detailing of the transition to the stone base—a common detail in our area. The beveled base was built up with layers of EPS and finished over with the stucco base coat.
FINISH COAT
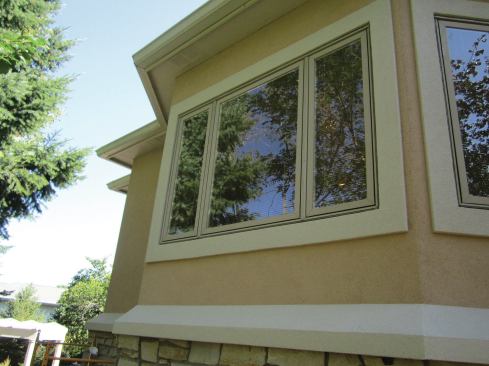
The finish coat is an acrylic latex. We refer to it as “thickened paint.” These days it’s a pretty good elastomeric material. And manufacturers continue to improve the formulation. It can be sprayed on, but afterward should be worked to the proper texture with trowels. The guys who do this work are amazingly skilled with a trowel and can create a wide variety of finishes.
SEALANT
The final step, as noted, is applying sealant at windows and doors, per the illustration. The head should not be caulked, so that any water that leaks behind the stucco and drips down the drainage matrix will have a way to escape. Similarly, the sill should be left open so that any water that leaks through the windows can flow into the drainage cavity in the assembly and out the bottom edge.
These details will work to keep water out of the walls. But remember, check them against the manufacturer’s installation instructions and the product ESR. And document all your work. If problems arise down the road, you want to be able to establish the fact that you adhered to the manufacturer’s guidelines at every step.