
Rigid Foam
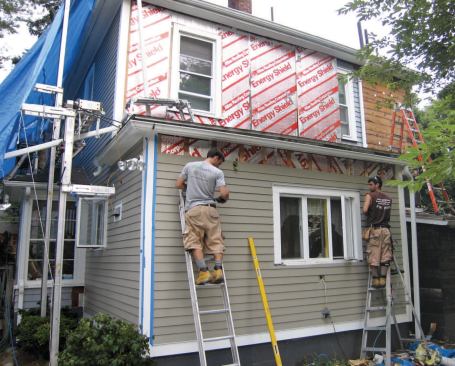
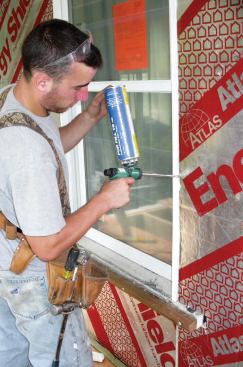
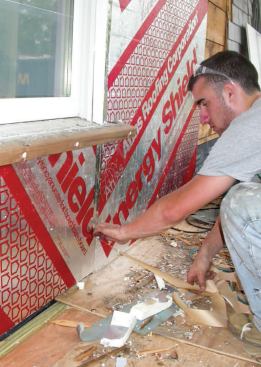
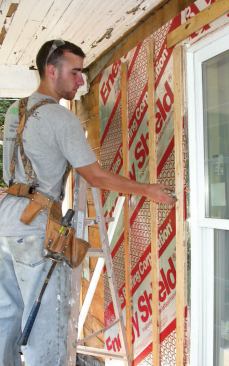
We wrapped the sheathing with Atlas Energy Shield polyiso foam (800/388-6134, www.atlasroofing.com), which has a high R-value (R-6 per inch), a low water-absorption rate (less than 1 percent), and a very low perm rating (0.03 for one inch-thick foam). It also has a reflective foil facing that becomes a very effective drainage plane when the seams are taped. However, working with this material when the sun came out was like working in front of a large pizza oven. To keep cool, we tried to stay in the shade or under our tarps as much as possible when it was sunny.
We fastened the rigid foam to the wall with 2-inch galvanized roofing nails, tacking the sheets in place with four or five fasteners per sheet. Since we were hip-deep in scraps of old shingles, we used them instead of aluminum disks as washers for the fasteners.
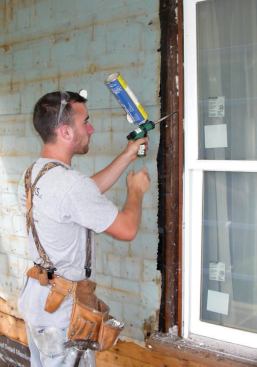
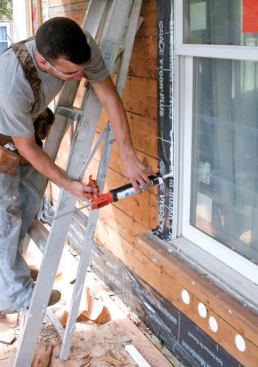
In this wall assembly, the rigid foam acts as the air and vapor barrier and as the drainage plane, so we took pains to seal the joints carefully. First, we filled in the nooks and crannies and quick-cuts with spray foam. Then we taped all of the seams with Atlas WRB flashing tape to continue the air-seal.
At windows and doors, we notched the foam around the sills and butted the boards up to the jamb extensions as best we could. We filled any gaps between the jamb extensions and rigid foam with spray foam, then covered the joints with flashing tape.
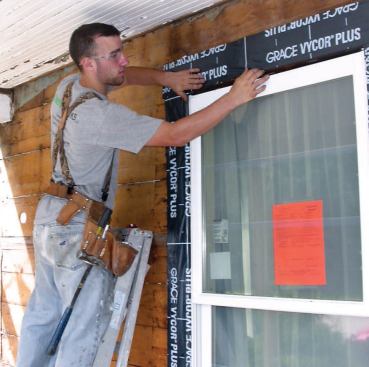
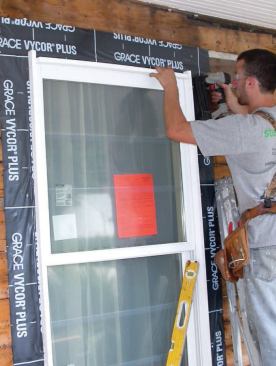
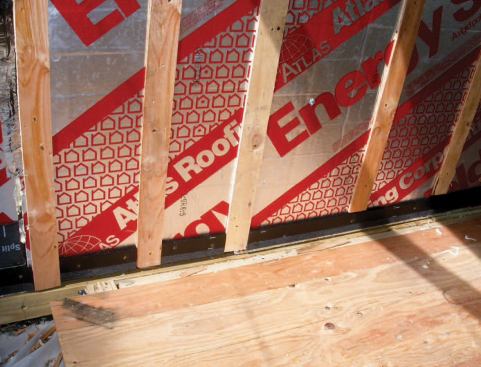
At the corners, we taped the sheathing with Vycor before installing the rigid foam, then taped the joints afterward. We also wrapped the exposed bottoms and edges of the sheets with tape (pulling the tape from the back to the front), which should help keep insects from burrowing into the foam.
To find out how effective the foam and tape was in controlling air infiltration, we did one more blower-door test before we started to hang the siding. We found that we had reduced airflow by another 150 cfm to about 2,400 cfm50, or 6.45 ACH50 – still not tight enough to necessitate mechanical ventilation but about as good as we could hope for without air-sealing the attic and foundation. The total wall R-value was now better than R-19, a 30 percent improvement over the dense-packed walls alone, with the added benefit of a thermal break.
Rainscreen?
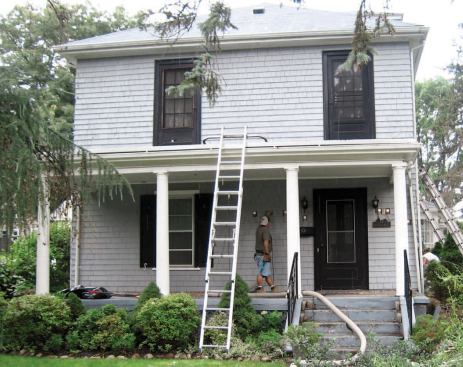
We ripped strips of 3/8-inch PT plywood to use as rainscreen battens. Not only will this drying space behind the siding add several years to the paint job, but it allowed us to put up siding during one of the rainiest Junes on record without worrying about trapping moisture underneath.
We located the battens over wall studs and filled the gaps between them along the bottom edge of the house with Cor-A-Vent siding vents (800/837-8368, www.cor-a-vent.com). The screened vents prevent insects from nesting behind the siding while allowing moisture to drain and air to circulate.
I also wanted to install air gaps at the top of the walls to promote air circulation, but this would have involved tearing into the soffits and wasn’t in the budget. Instead, we clad the weathered plywood soffits with prefinished 1/4-inch-thick fiber-cement HardieSoffit panels (888/ 542-7343, www.jameshardie.com), another low-maintenance product.
Around window and door openings we nailed up 3/8-inch-by-4-inch PT plywood strips, located where they could provide a nail base for the exterior trim. At the corners, we offset 4-inch-wide battens so they would extend past the corner boards and provide nailing for the siding.
Siding
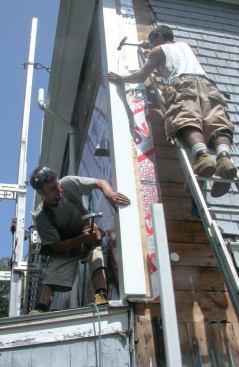
Though we repaired a few rotted windows with epoxy, we replaced most of the window and door casings with 1×5 Azek PVC trim. At the corners, we installed one-piece Azek 5/4x6x6 corner boards, which should do a better job of blocking water than the 5/4×6 fiber-cement trim boards we’ve used in the past. Besides being very heavy and tough to work with, fiber-cement trim boards have milled edges that make it tough to close up the butt joints on corner boards.
Finally, we installed 5 1/4-inch HardiePlank fiber-cement siding with a 4-inch exposure. With a single coat of factory-applied paint, HardiePlank has a 15-year finish warranty (a second coat extends the warranty to 25 years). We nailed the siding up with 3-inch stainless-steel ring-shank siding nails, which were long enough to penetrate through the PT plywood and foam into the sheathing and studs. Over the header trim on the windows we nailed standard aluminum window flashing directly to the battens before installing the siding. We caulked between the siding and the trim with Geocel ProColor SWD sealant (800/348-7615, www.geocelusa.com) color-matched to the HardiePlank.
Performance and Cost
The cost of blowing cellulose into the walls was about $2,300. According to the blower-door testing company’s modeling software, the cellulose should save the homeowner $687 per year, paying for itself in a little less than 3 1/2 years before any federal tax credits or local rebates.
Wrapping the walls with rigid foam cost about $2,700. With an estimated annual energy savings based on R-value alone of $167 per year, the payback period for the rigid foam would be about 16 1/2 years – but that calculation doesn’t take into account the reduction in air leakage. Overall, the simple payback period for the insulation portion of the project – including six new windows – should be 5 1/2 years; removing the windows from the equation reduces it to a little over four years.
Results. In the year before our insulation project, our client burned 758 gallons of fuel (assuming gallons burned = gallons replaced by delivery). Using climate data from www.weatherdatadepot.com for reference, I divided 758 by the number of actual heating degree days in that location – 4,317 heating degree days in 2008/2009 – to calculate that he was burning .176 gallon of fuel per heating degree day.
In the heating season after the insulation project there were 3,577 heating degree days. Our client burned 408 gallons of fuel at a rate of .114 gallon per heating degree day, a difference of .06 gallon per heating degree day, or a reduction in oil consumption of 35 percent. Last year, he burned 484 gallons over 3,916 heating degree days, a slightly higher rate of .124 gallon of fuel per heating degree day.
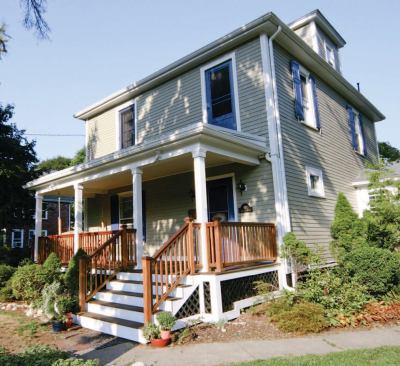
Energy savings are important, and my client is very happy to be saving money. He’s also more comfortable in his house and should enjoy reduced energy and maintenance costs for years to come.
Steve Greenberg owns Steveworks LLC, a remodeling company in Newton, Mass.