
Tom O'Brien
The author believes that windows should be replaced if they're f…
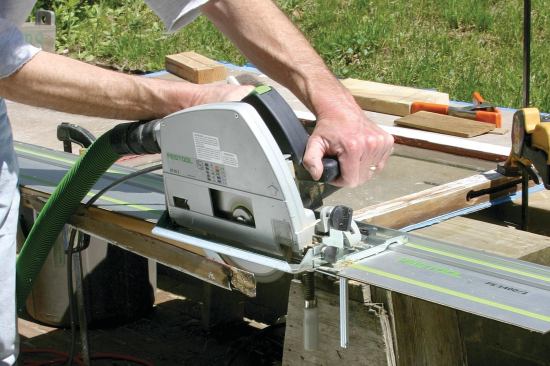
Materials
Tom O'Brien
The author believes that windows should be replaced if they're f…
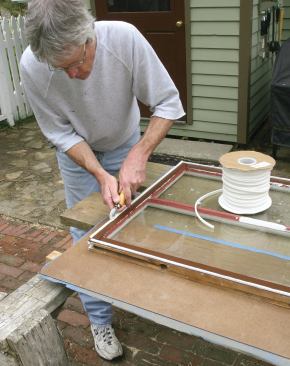
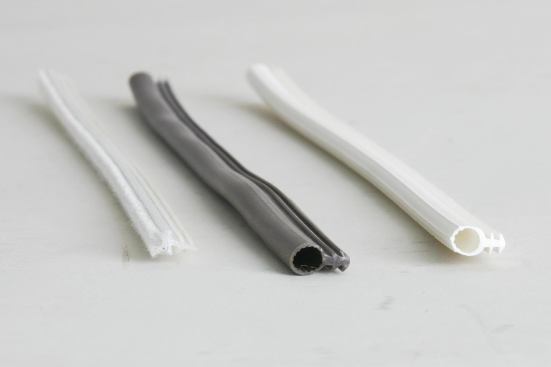
Over the years, I’ve experimented with a variety of materials and techniques for weather-sealing double-hung windows. What’s worked best for me is a combination of silicone-rubber tube seals on the top and bottom surfaces and polypropylene pile brush seals on the side rails (see slideshow). I use the brush seals because the side-mounted weather seals have to be able to withstand abrasion when the sash is raised and lowered. The other weather seals are only subject to compression. I’ve been weatherstripping windows and doors for decades, so I’ve built up a substantial inventory of shapes, sizes, and colors of seals that I can rummage through to fine-tune a fit, or solve a problem. It often doesn’t matter what color you use, but it’s nice to be able to put a bronze tube seal on the meeting rail of a dark-colored window, so that it’s not noticeable when the window’s opened.
For most windows, I use a 1/4-inch tube seal (white or bronze) for the meeting rail, a white 3/16-inch tube for the bottom, and gray 1/8-inch brush seals for the side rails.All these products, as well as the router bit that carves the mounting slots, are sold by Resource Conservation Technology (800/477-7724, conservationtechnology.com).
Preparation
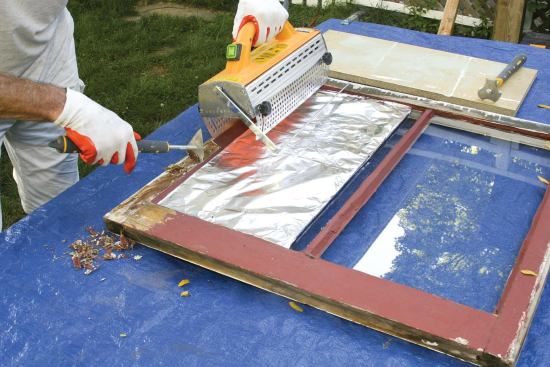
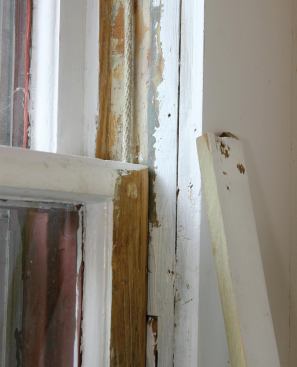
Weather seals are most effective — and least likely to bind — when they’re gently compressed, not squeezed tight. So before I rout the grooves that will house the various materials, I trim the bottom edge of the sash by about 1/8 inch to allow for the tube seal that goes on the bottom.
Before the sash is reinstalled I’ll make space for the seals that mount on the three remaining surfaces of the sash by ripping the stops and planing the face of the stool. Typically these cuts also remove about 1/8 inch, but if I notice before the sash is removed that it fits loosely in the frame, or if the tops of the meeting rails weren’t flush, I’ll modify the cuts accordingly.
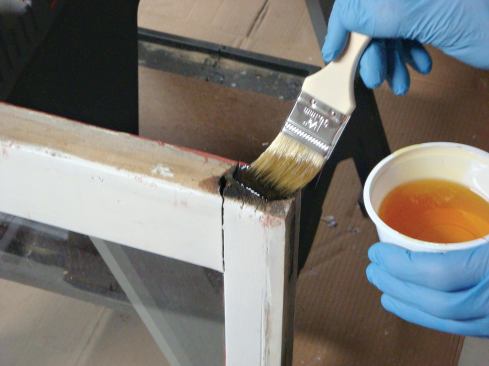
Rot treatment. After trimming the bottom rail, I repair any damaged spots with epoxy wood filler and slather the vulnerable end grain with epoxy consolidant to prevent rot.
Installing the Seals
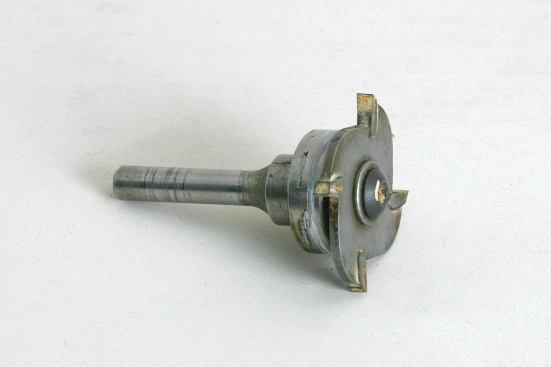
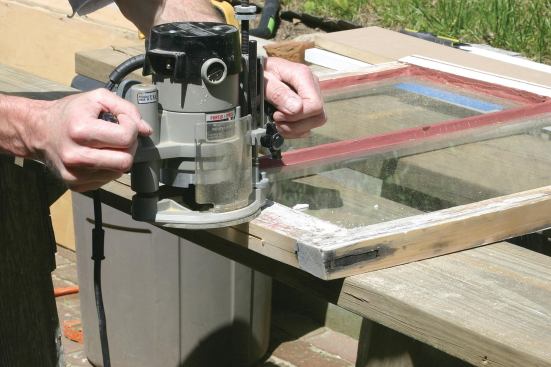
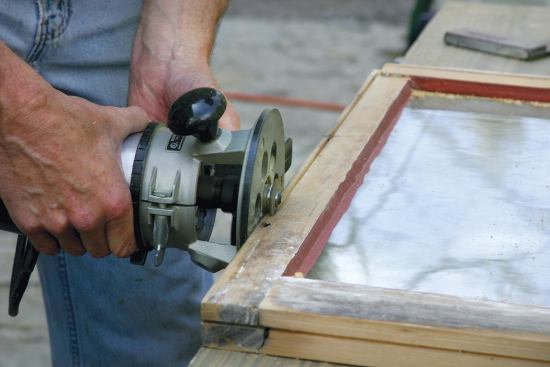
The weather seals have barbed tails that snap into a 3-millimeter groove that can be cut with a self-piloted router bit. The placement of each groove (relative to the edge of the window) is different for each type of weather seal. If I’m upgrading only a couple of windows, I’ll chuck the router bit into a plunge router and adjust the stops to match the offsets. If it’s a bigger job, I’ll outfit three routers with separate bits and label them as to location, so all I have to do is reach for the one I need.
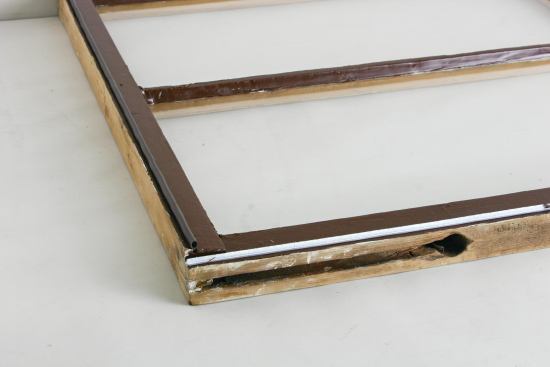
Layout. The placement of the top and bottom slots isn’t critical, but for the side slots it matters; too far from the edge and the weatherstripping won’t line up with the stop; too close to the edge and the slotting bit leaves a narrow strip of wood that’s vulnerable to breakage. So I center the slots on the sides exactly 1/4 inch from the outside edge.
For aesthetic reasons, I center the tube on the meeting rail 3/8 inch below the top edge; this puts the top of the seal just below the top rail of the window, where it won’t leave an unsightly gap. I center the tube under the bottom rail 5/8 inch behind the face of the sash.
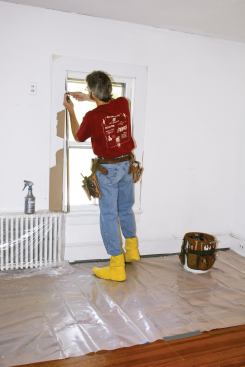
Slotting. The router bit’s top-mounted pilot makes it easy to control, even on face cuts. To ensure that all of the weather seals snap in without any fuss, I make two smooth, steady passes for each slot, then vacuum out the cavity. After the cutting is done but before installation, most of the window — except the gliding surfaces — gets primed and painted.
I measure each seal by laying it in position on the sash, marking the end with a Sharpie, and cutting it with scissors. It’s important to avoid stretching the tube seals or they’ll shrink and leave a gap. A plastic-wheeled roller makes it easy to firmly seat the weatherstripping in the groove, but you can also use a screen tool or just finger pressure.
Putting It All Back Together
Once the sash is ready to be reinstalled, I always take the time to double-check the condition of the sash cords. If they’re frayed, or stiff from years of sloppy painting, they should be replaced. To ensure that all the moving parts glide smoothly, I lubricate the inner workings of each pulley with a squirt of Tri-Flow, and rub a block of paraffin wax (the kind that’s used for canning) along all of the running surfaces, including the stops.
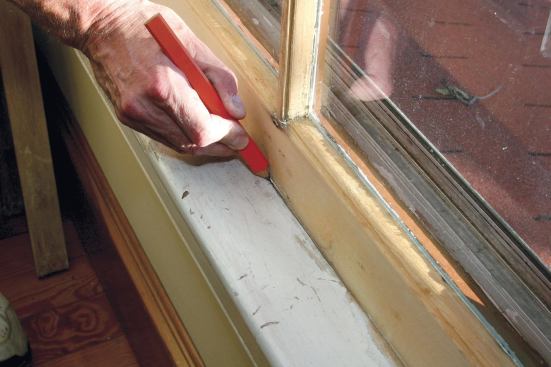
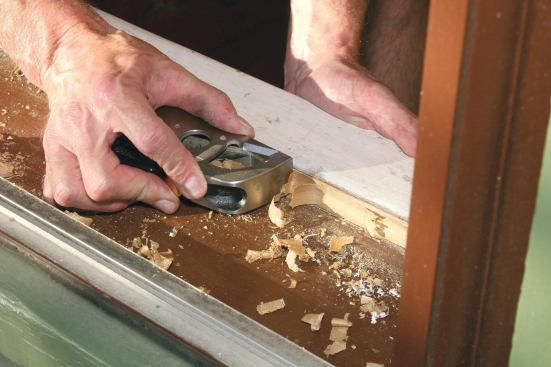
After attaching the cords, I temporarily place the sash in the opening and let it rest on top of the stool. While applying gentle pressure against the stops, I scribe the stool to determine how much stock must be removed to allow the window to close . In most cases, it’s a hassle to remove the stool, so I trim it in place using a Veritas bullnose plane with a removable toepiece that lets me work right up to a corner (veritastools.com). A multi-tool and a detail sander work well too.
The final step is to replace the stops. I start by tacking each one in place on the top with a hand-driven 4-penny finish nail. Next, I close the window and push the bottom of the stop tight enough to gently compress the brush seal. Then I tack the bottom and drive two or three more nails in between. I don’t set the nails until I’m satisfied with the fit and the operation of the sash. A properly installed sash lock ensures a tight seal at the top; the only place the stop must tightly engage the sash is at the bottom.
Tom O’Brien is a JLC contributing editor and a restoration carpenter in New Milford, Conn. Photos by Jake O’Brien.