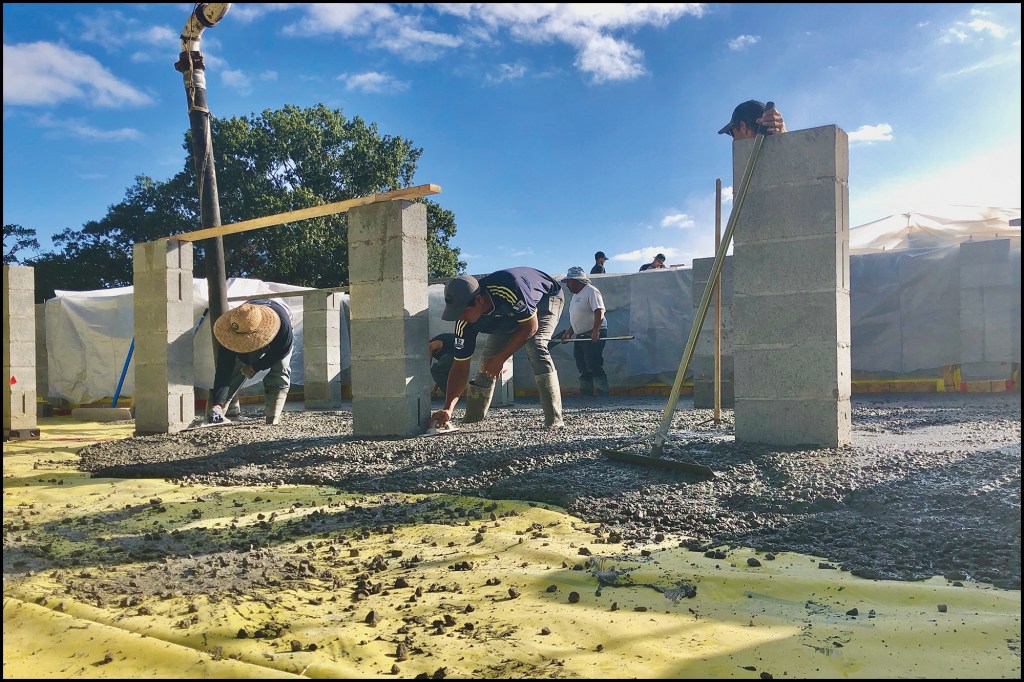
After we rake the sand smooth and level it out (figure 6, left), it’s time to install the vapor barrier. Our first choice is Stego Wrap’s 15-mil below-slab product, which we’ve found stands up extremely well to jobsite foot traffic (figure 6, right). It’s a little difficult to fold this stiff membrane up the wall and around corners, but we’ve came up with a solution that works fairly well. After laying out the vapor barrier, we nail 3-inch-wide strips of 1/2-inch OSB plywood to the stem wall on top of the 6-inch-wide vertical strips of foam, sandwiching the vapor barrier down tight to the foam. This step ensures that the membrane lays up against the foundation wall and out of way, leaving the concrete crew with a clean screed surface (figure 7).

Figure 6. After compacting the sand base (left), workers install the Stego Wrap vapor barrier, carefully cutting and folding it to fit around corners and piers (right).

Figure 7. OSB strips fastened over the membrane to the CMU walls hold it in place until the slab is poured. Pipe openings in the membrane are sealed either with Stego tape or with black Stego Mastic, which is made for sealing around pipes.
On the corners, it takes a little bit of skill to master the best folding techniques (it’s a little like wrapping a present). Fortunately, Stego makes a very sticky red tape that works great for sealing up folds, taping lap joints, and taping to itself as needed (figure 8).

Figure 8. Seams and edges are sealed with red Stego tape, which is also used to protect the linear drain openings during the pour (left, right).
After the vapor barrier is down, we use 4-inch-wide strips of 1/2-inch-thick Nomaflex (a polypropylene expansion joint material that we get from our concrete supplier) to make expansion joints around the base of the piers, which also helps to lock in the membrane flaps during the pour. We tack the strips together with 3/4-inch-long nails, then wrap the corners with Stego Wrap tape.
Finally, once the vapor barrier is installed and detailed, we go around and make sure all of the penetrations through the membrane and stem wall are sealed either with tape or with Stego Mastic, which is made for sealing around pipes. We also tape off the drain openings in preparation for the slab pour (figures 9–12).

Figure 9. Because the slab isn’t structural, there is no need for rebar or extra-strength concrete, though the author typically specs fiber reinforcement.
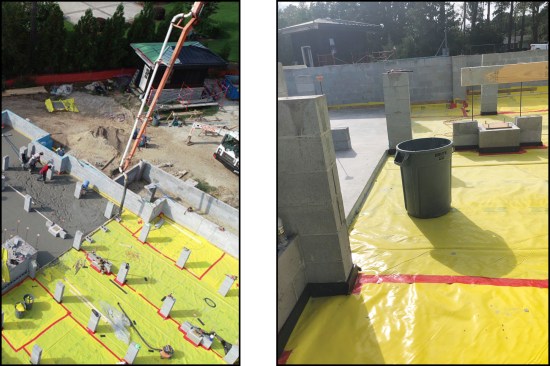
Figure 10. On a large project, the crawlspace slab is typically poured in sections (left); visible around the base of the piers is black 1/2-inch-thick Nomaflex expansion joint material (right).

Figure 11. A small slab can be fitted with a single drain, while a large crawlspace requires several drains, with each slab section sloped toward a drain.

Figure 12. Control joints sawn into the slab control cracking (left), while the author organizes penetrations through the wall by marking them with paint colors that correspond to the local DigSafe code (blue for water, green for sewers and drain lines, red for electrical, yellow for gas lines, and so on) (right).
Insulation
After the slab concrete has been placed and allowed enough time to cure, we can move on to framing; once the house is dried in, we wrap up the final steps of insulating the crawlspace walls.
First, we remove the 1/2-inch OSB strips and trim away any excess Stego wrap that extends too far above the concrete slab. Next, we seal the foam-to-wall connection with a polyurethane concrete sealant (backer rod may be required) or spray foam to prevent the possibility of moisture coming up between the membrane and the CMU walls later. Then we insulate the stem walls with 2-inch-thick Thermax polyisocyanurate foam board with a foil facing, which eliminates the need for a thermal ignition barrier, or we have a spray foam contractor come in and coat the CMU walls to the desired R-value. When insulating with spray foam, make sure to confirm that your insulation contractor includes coating the foam with an intumescent (or fire-resistant) paint in their bid.
Depending on the outside grade on a project, we may also include waterproofing for the exterior walls. We like to use Poly Wall’s below-grade waterproofing system, a two-part system that uses its Home Stretch liquid-applied waterproofing membrane and Arroyo Drain Board (figures 13–15).
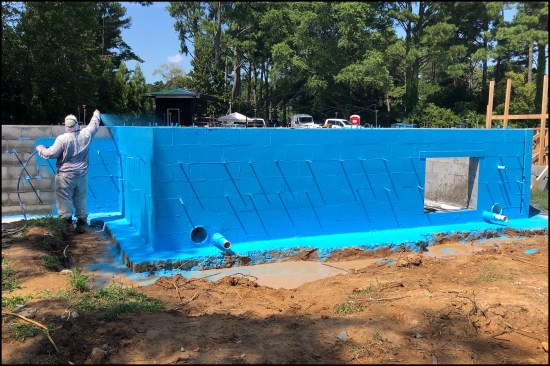
Figure 13. On this project, the CMU walls were sprayed with Poly Wall Home Stretch liquid waterproofing membrane…
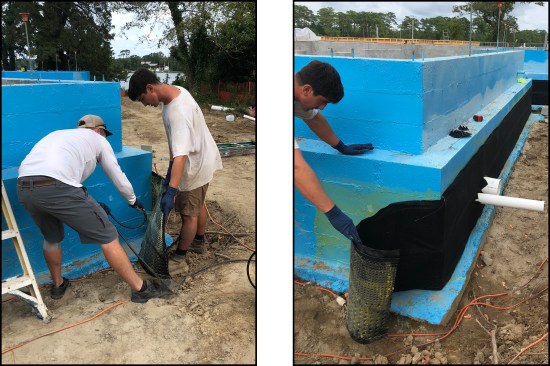
Figure 14. …then covered with Arroyo dimple-mat drain board glued to the walls with Quick Grip spray adhesive (left, right).
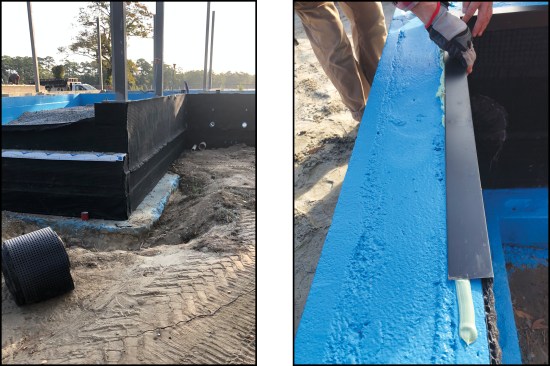
Figure 15. The masonry shelves are flashed with Home Stretch detail tape (left), while the tops of the walls are capped with aluminum flashing bedded in sealant (right).
After we’re done, our clients are assured of a superior crawlspace environment that will provide them with durability, higher performance, and an overall healthier home environment.
Photos by Rick Mills, illustration by Tim Healey