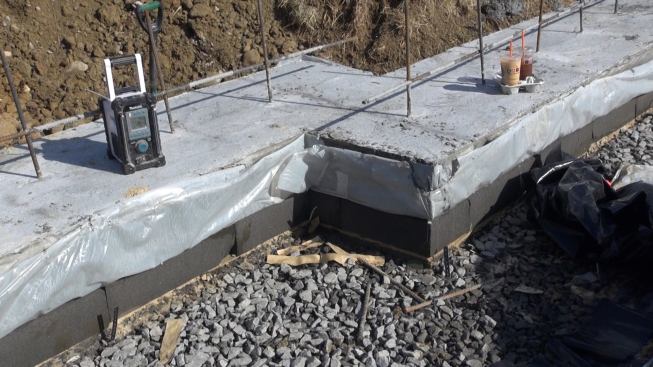
A view of the perimeter strip footings for the house’s basemen…
A view of the perimeter strip footings for the house’s basement foundation walls shows the layer-cake construction of the insulated footing detail: first, a base of compacted “trap rock,” then a layer of compacted crusher run, topped by a layer of sand, and then the insulating layer of Pittsburgh Corning Foamglas. Plastic slip sheeting above the Foamglas keeps the concrete footing isolated from the Foamglas, so that expansion or shrinkage of the concrete won’t damage the relatively brittle insulation material.
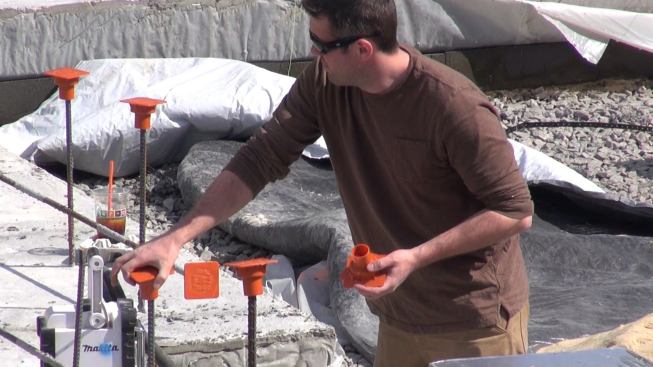
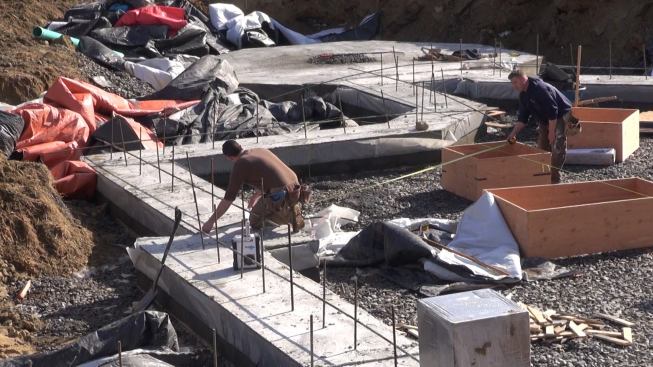
Auburndale carpenter Casey installs protective safety caps on th…
Auburndale carpenter Casey installs protective safety caps on the rebar projecting from the building’s perimeter footing.
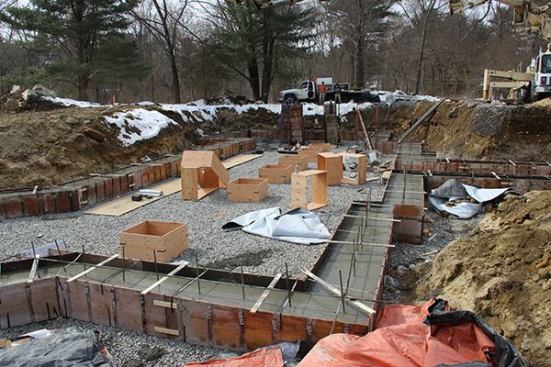
Unlike many Passive House projects, this building has a relative…
Unlike many Passive House projects, this building has a relatively complex footprint. Here, we see the perimeter basement wall footings already poured, with forms for the interior pad footings distributed around the gravel base inside the home’s footprint.
Carpenters Casey and Tim locate the positions for the interior p…
Carpenters Casey and Tim locate the positions for the interior pad footing forms.
Carpenters Tim and Matt position another plywood pad footing for…
Carpenters Tim and Matt position another plywood pad footing form.
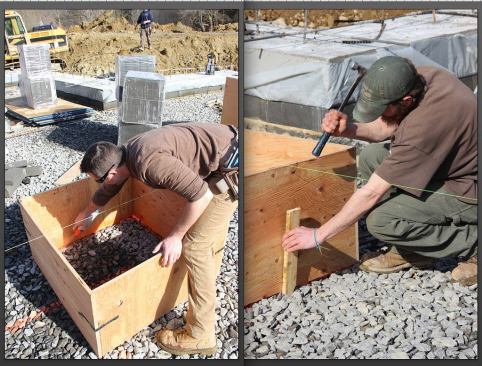
Left, carpenter Casey marks the position of the plywood form ont…
Left, carpenter Casey marks the position of the plywood form onto the trap rock sub-base using orange spray paint. Right, carpenter Matt pounds a stake to secure the form in place.
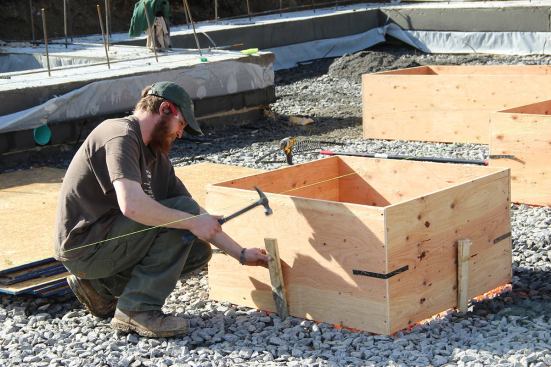
Carpenter Matt drives a stake into the trap rock sub-base to sec…
Carpenter Matt drives a stake into the trap rock sub-base to secure a plywood pad footing form in position.
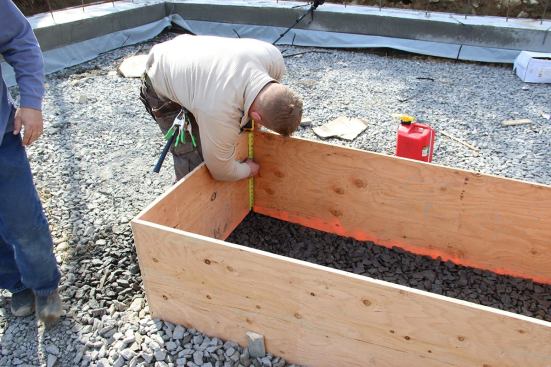
Carpenter Tim lays out the planned finish elevation for the conc…
Carpenter Tim lays out the planned finish elevation for the concrete pad footing onto the plywood footing form, in preparation for placing base material and fitting insulation into the form.
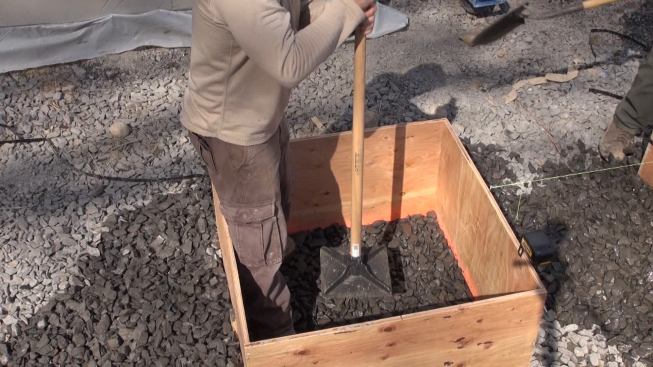
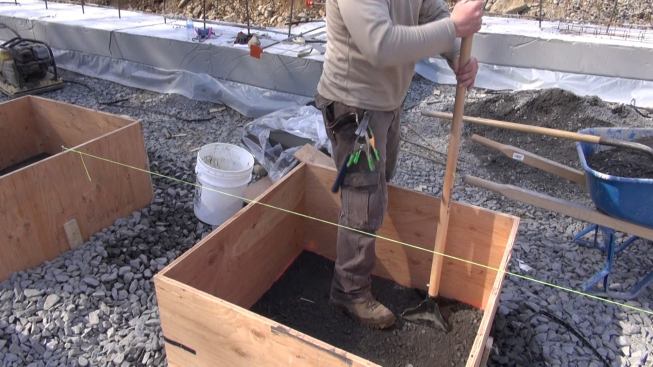
Carpenter Tim compacts the trap rock sub-base inside the plywood…
Carpenter Tim compacts the trap rock sub-base inside the plywood pad footing form.
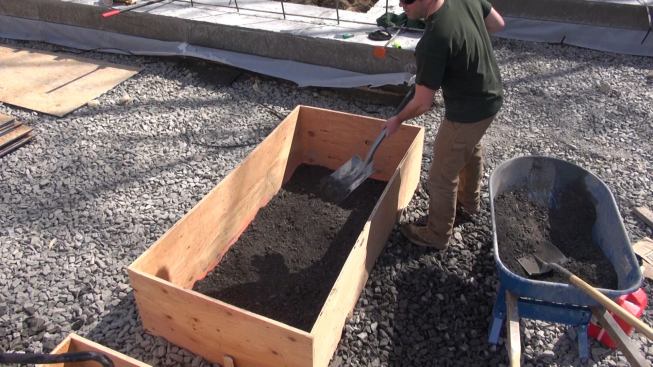
Carpenter Casey shovels “crusher run” base material into a p…
Carpenter Casey shovels “crusher run” base material into a plywood form. The crusher run contains a graded mix of fine gravel and stone dust, which compacts readily into a strong and smooth surface.
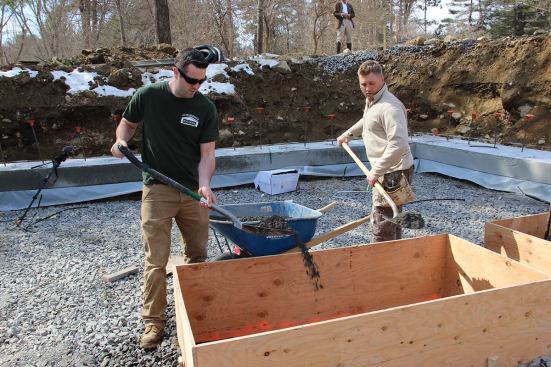
Tim shovels crusher run into a form.
Casey and Tim shovel crusher run into the plywood form.
Tim screeds the crusher run layer smooth and level with a scrap …
Tim screeds the crusher run layer smooth and level with a scrap of plywood.
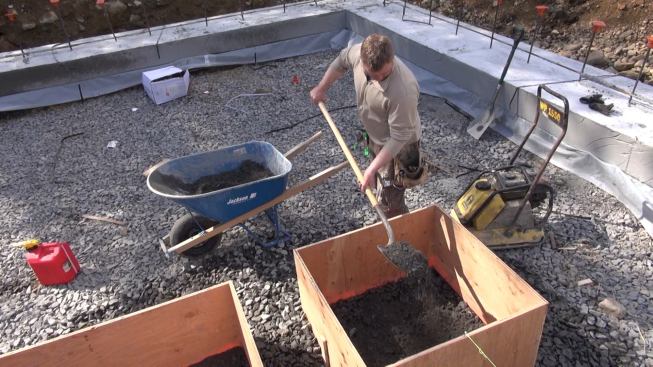
Tim compacts the crusher run layer before adding an additional p…
Tim compacts the crusher run layer before adding an additional protective layer of sand.
Compacting the crusher run on top of the trap rock inside the pl…
Compacting the crusher run on top of the trap rock inside the plywood form.
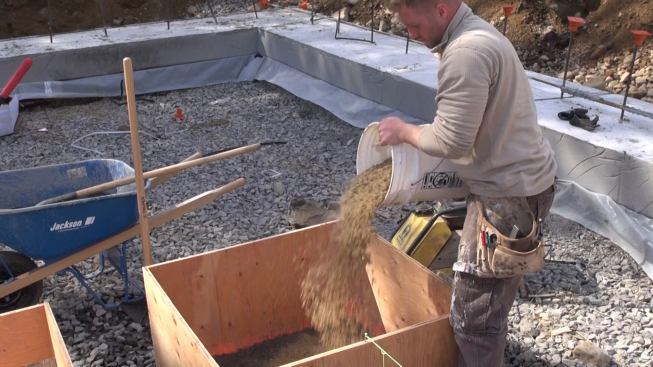
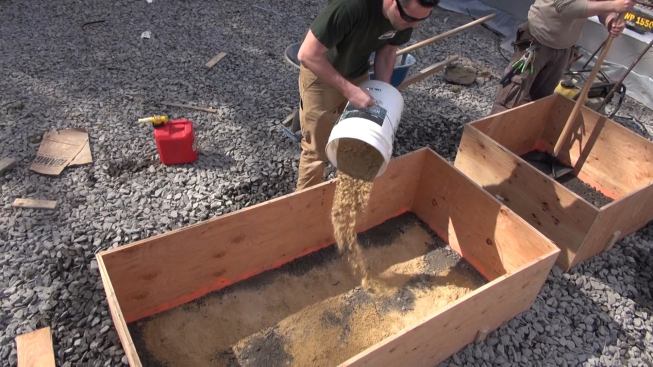
Adding sand to the form. Sand serves to protect the relatively f…
Adding sand to the form. Sand serves to protect the relatively fragile Foamglas and provide a smooth, flat cushion of support for the insulating material.
Adding sand to the form.
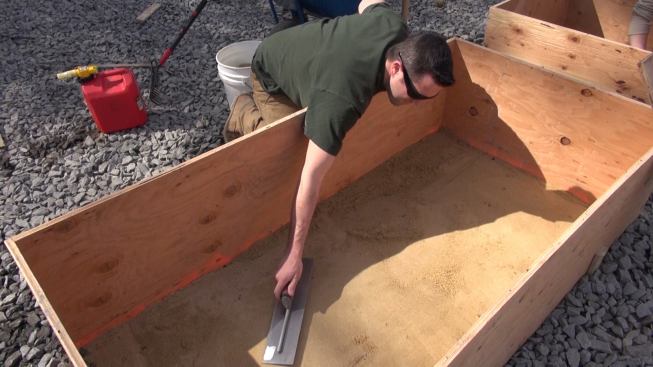
Troweling the sand smooth and flat.
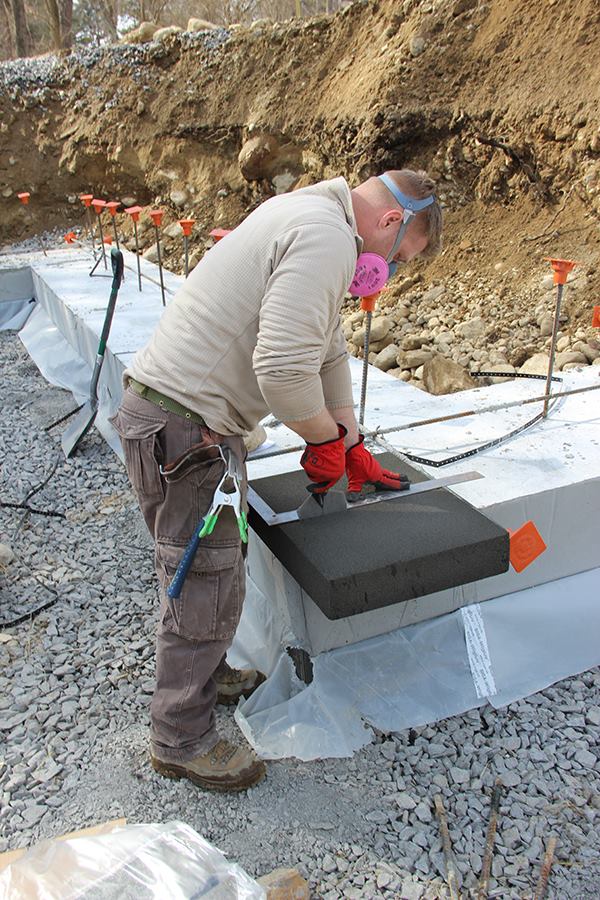
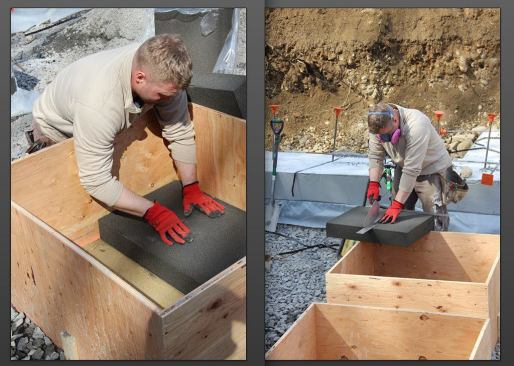
Tim places a two-foot-square piece of Foamglas into the prepared…
Tim places a two-foot-square piece of Foamglas into the prepared form (left), then trims another piece of Foamglas to fit using a trowel. Foamglas cuts easily with a trowel or handsaw, but workers should wear respiratory protection while cutting the material in order to guard against small glass particles or fibers, which carry a risk of lung damage.
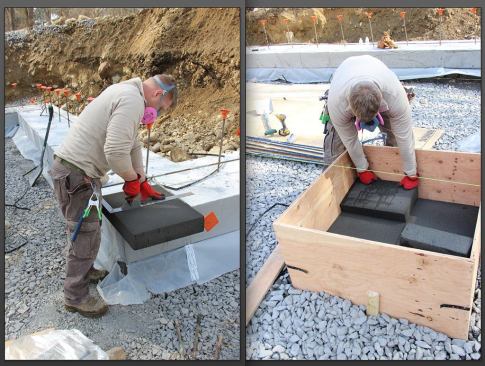
Wearing a respirator to protect his lungs, carpenter Tim cuts a …
Wearing a respirator to protect his lungs, carpenter Tim cuts a piece of Foamglas (left) and places it into the form (right).
Boston, Massachusetts has just been through one of its roughest winters in history. But the builders here have seen snow before — and spring is here now. Before the snow had melted, Nick Falkoff, Mike Dutra, and the crew of Auburndale Builders were breaking through frozen ground to start the foundation for a custom Passive House in the Boston suburb of Wayland. By mid-March, Auburndale had the project well underway.
Passive House details add cost to any building, and designers often compensate for the added cost factors by simplifying the building’s form, sticking to simple compact boxes. But this project is different. Designed by Framingham architect Donald Grose, this house will have a complex footprint, a 14-pitch slate roof, brick cladding, copper gutters, and luxury interior amenities like an island cooktop range and — wait for it — a steam shower.
Details like the steam shower are a challenge for the project’s all-star cast of consultants, which includes Marc Rosenbaum of South Mountain Company (on mechanicals) and Deap Energy Group’s Mike Duclos (on envelope details). The Passive House consultant for the project is Maryland-based Michael Hindle, who contributed the foundation insulation detail shown here (see Slideshow). Hindle developed this detail in collaboration with his wife, architect Carri Beer of Brennan and Company Architects in Ellicot City, Maryland; Hindle says the pair have used the same system successfully on an earlier custom Passive House project in Maryland.
Passive House builders tend to avoid foam insulation when possible, but many projects still involve large quantities of expanded polystyrene (EPS) insulation below grade, where acceptable substitutes are hard to find. Foundation insulation can be controversial; while some critics will argue that insulating between the footing and the relatively temperate ground is not cost-effective, others will make the point that foam insulation comes with its own environmental penalties. So the Passive House subculture is actively exploring alternatives — such as the product Hindle specified for insulation under the house footings: Foamglas from Pittsburgh Corning (foamglas.com/building). Above, carpenter Tim cuts a piece of Foamglas with a steel trowel and fits it into place in a pad footing form.
Foamglas is inert and watertight, but it’s somewhat brittle and friable, and it is rumored to be vulnerable to surface degradation if it goes through repeated freeze-thaw cycles while wet, according to Mike Duclos. With the weather warming, freeze-thaw was a relatively minor concern on this project. But to give full support and protect the material from damage, Hindle’s detail calls for multiple layers beneath the Foamglas: first, a sub-base of strong two-inch to three-inch “trap rock”; next, a course of carefully compacted “crusher run” containing a graded mix of fine gravel and stone dust, which forms a stable, compact surface; and finally, a thin layer of sand to provide firm, uniform support for the Foamglas. For a step-by-step tour of the process, view the slideshow.