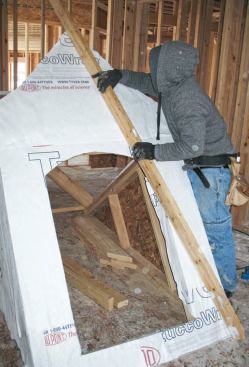
Wall Layout: We used a factory corner of a sheet of OSB as a gia…
Wall Layout: We used a factory corner of a sheet of OSB as a giant framing square as we built the walls. I took the dormer's rise and run from the plans, and we cut the top plates and end studs accordingly.
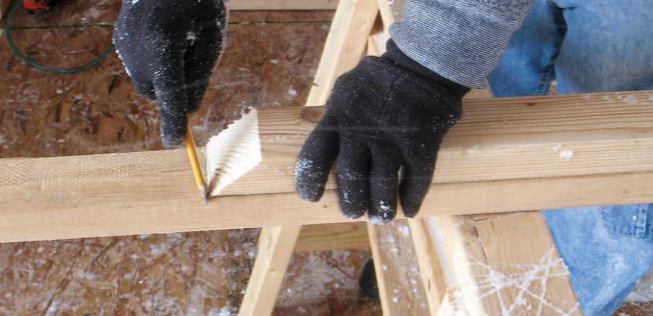
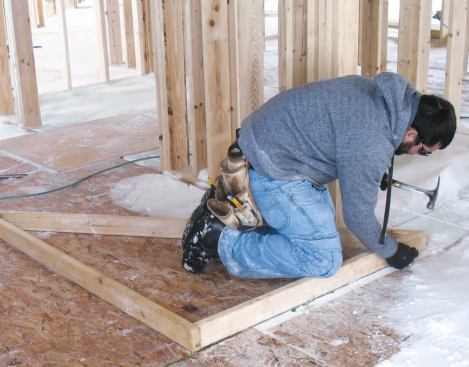
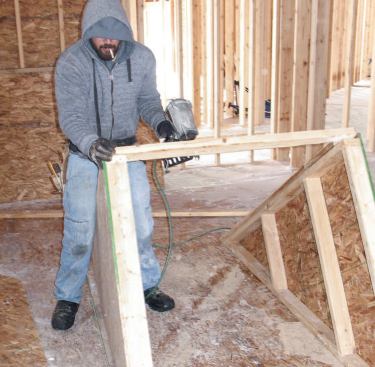
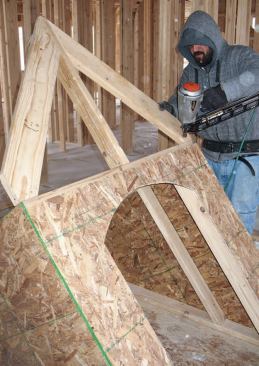
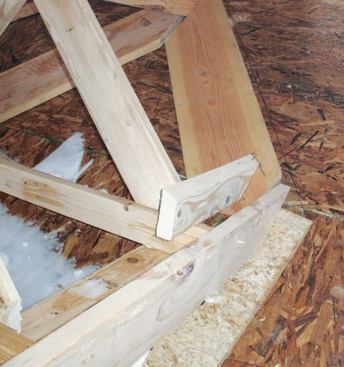
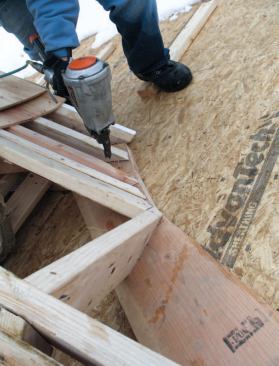
Wall Layout: Frame members are beveled at one end to match the r…
Wall Layout: Frame members are beveled at one end to match the roof pitch, then nailed together.
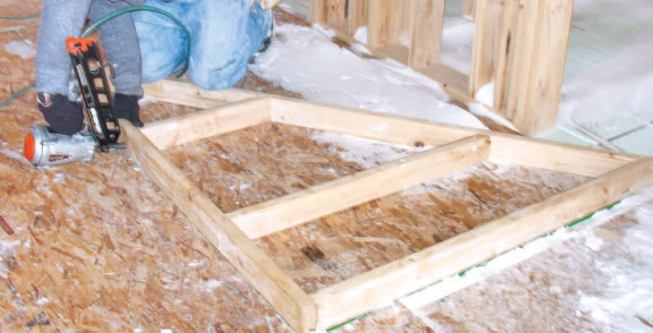
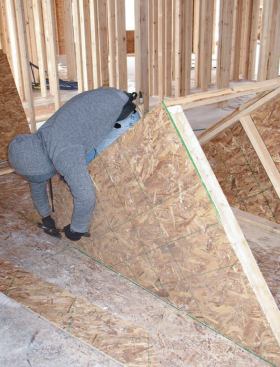
Wall Layout: We laid these right-angle assemblies along the edge…
Wall Layout: We laid these right-angle assemblies along the edges of the OSB to keep them square, then simply pulled the length of the bottom plates (the hypotenuse of the triangle) with a tape measure — no calculation necessary.
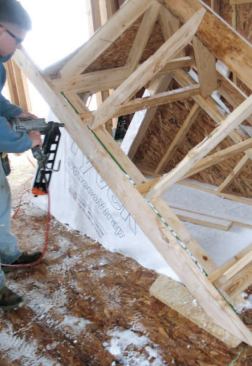
Studs: I laid out the wall studs working backward from the roof …
Studs: I laid out the wall studs working backward from the roof layout so the rafters would stack on top of the studs. The 24-inch on-center rafter layout was determined by the depth of the rake overhang — 6 inches, in this case. It pays to take time to get the stud layout right, because that generally eliminates extra cuts in the sheathing. Before nailing the studs in place, we tacked each wall triangle to the edge of the OSB "square" to ensure accuracy.
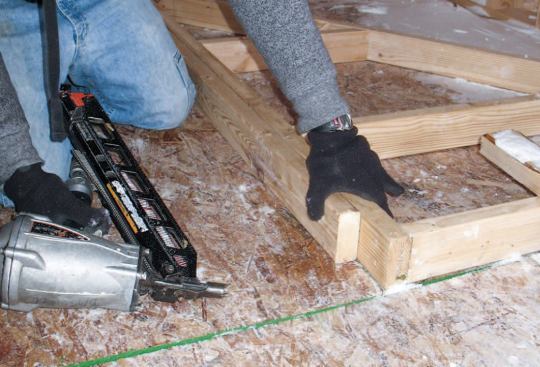
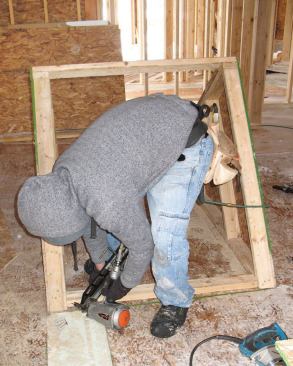
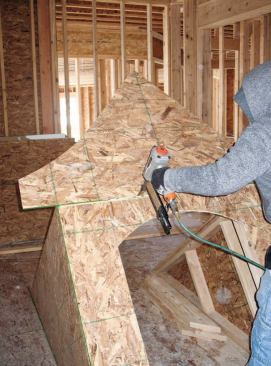
Studs: Nailing the studs in place.
Studs: After nailing the studs in place, we added the double top…
Studs: After nailing the studs in place, we added the double top plates, holding them back 3 1/2 inches to allow for the lapping top plate across the front.
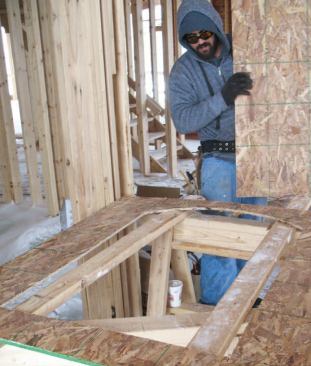
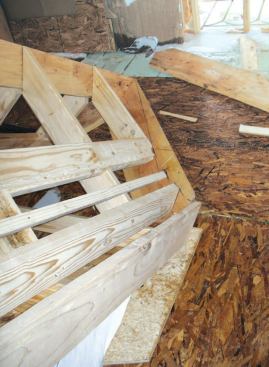
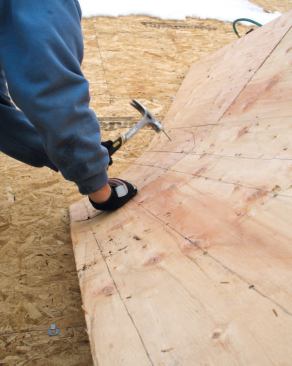
Standing Up the Walls: We butted the two wall frames together to…
Standing Up the Walls: We butted the two wall frames together to keep them square.
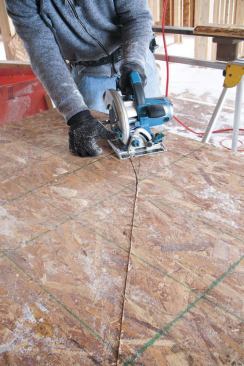
Standing Up the Walls: Sheathing is nailed on and trimmed in pla…
Standing Up the Walls: Sheathing is nailed on and trimmed in place.
Standing Up the Walls: Next, we stood up the sheathed walls and …
Standing Up the Walls: Next, we stood up the sheathed walls and joined them with a top plate across the front.
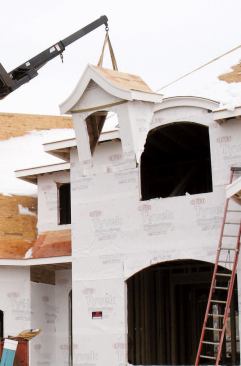
While framing a new house, we had to build a small decorative dormer on the steeply pitched roof. We own a forklift with a telescoping boom; it’s easily got the capacity to lift a dormer like this (as well as much larger ones), so we typically build the dormer on the ground for the sake of safety and efficiency, then hoist it into place with the lift. On this job, we were able to work in the dry on the first-floor deck, and the project kept my carpenters busy on a couple of snowy afternoons when I might otherwise have sent them home early. In this article I’ll describe the steps we took to speed the framing.
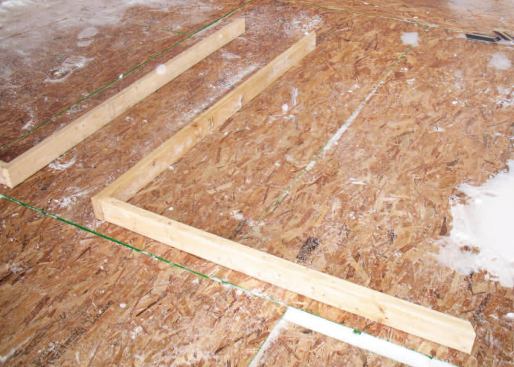
Wall Layout
We used a factory corner of a sheet of OSB as a giant framing square as we built the walls. I took the dormer’s rise and run from the plans, and we cut the top plates and end studs accordingly, beveling each of them at one end to match the roof pitch, then nailing them together. We laid these right-angle assemblies along the edges of the OSB to keep them square, then simply pulled the length of the bottom plates (the hypotenuse of the triangle) with a tape measure – no calculation necessary.
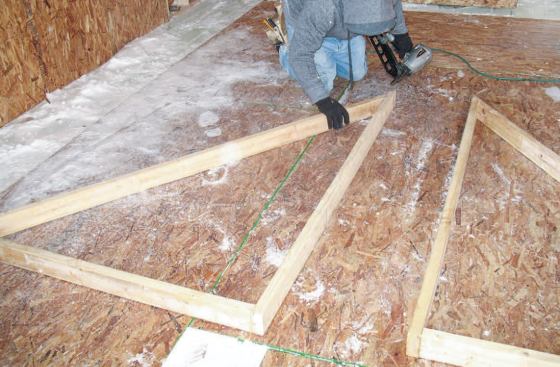
Studs
I laid out the wall studs working backward from the roof layout so the rafters would stack on top of the studs. The 24-inch on-center rafter layout was determined by the depth of the rake overhang – 6 inches, in this case. It pays to take time to get the stud layout right, because that generally eliminates extra cuts in the sheathing. Before nailing the studs in place, we tacked each wall triangle to the edge of the OSB “square” to ensure accuracy. After nailing the studs in place, we added the double top plates, holding them back 3 1/2 inches to allow for the lapping top plate across the front.
Standing Up the Walls
We butted the two wall frames together to keep them square, then nailed on the sheathing and trimmed it in place. Next, we stood up the sheathed walls and joined them with a top plate across the front.
1
of 10
Squaring Up: We added a bottom plate, then squared up the assemb…
Squaring Up: We added a bottom plate, then squared up the assembly.
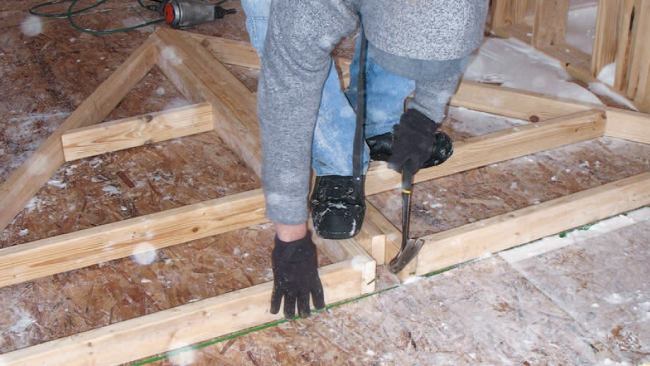
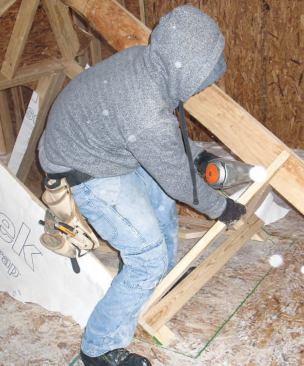
Squaring Up: Toenailing it to the deck kept it from shifting aro…
Squaring Up: Toenailing it to the deck kept it from shifting around as we worked on it.
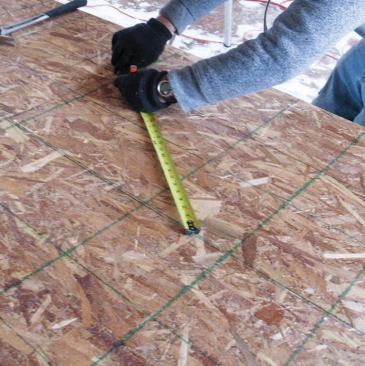
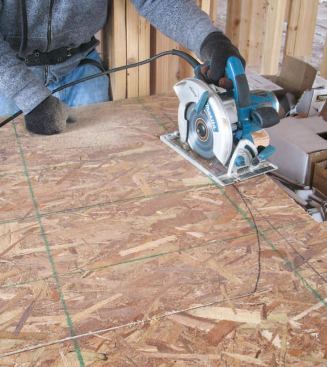
Front Wall: We laid out the front wall sheathing, pulling the ra…
Front Wall: We laid out the front wall sheathing, pulling the radius for the arch-top window with a measuring tape.
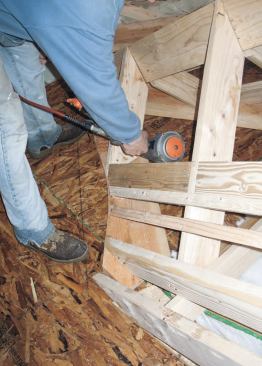
Front Wall: Openings were cut out with a circular saw.
Front Wall: Openings were cut out with a circular saw.
Front Wall: We held the sheathing back 3/4 inch at the top to al…
Front Wall: We held the sheathing back 3/4 inch at the top to allow the gable sheathing to lap the plate. We then filled in the rest of the front wall framing, doubling up the corner studs and installing trimmers and a sill.
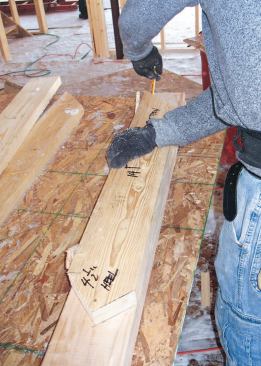
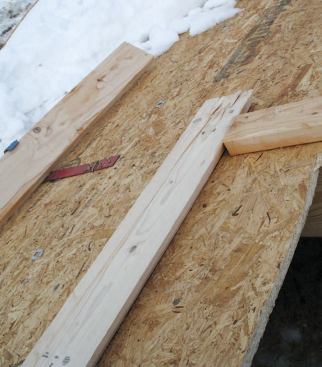
Rafters: Though the construction drawings showed curved rafter t…
Rafters: Though the construction drawings showed curved rafter tails cut out of full-dimension 2x12s, I decided that framing the roof with straight rafters and building up the curved profile with horizontal blocking would be easier and provide better nailing for the bent sheathing. We made a rafter pattern out of 2×6 stock and cut the first pair of rafters.
Rafters: The rafters are installed flush with the gable end and …
Rafters: The rafters are installed flush with the gable end and their plumb cuts flush with the outside edges of the sidewalls.
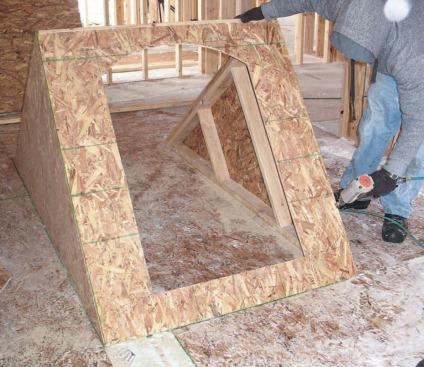
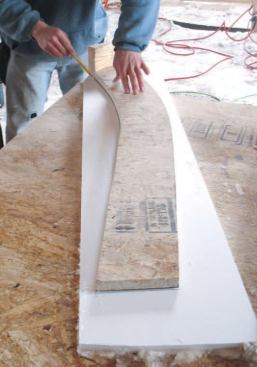
Curved Gable: To create the flared eaves, we used the curved-gab…
Curved Gable: To create the flared eaves, we used the curved-gable sheathing as a pattern. We scribed the gable according to the architect's plans, then cut it out.
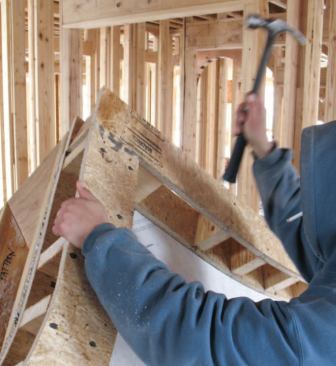
Curved Gable: The gable is nailed up.
Squaring Up
We added a bottom plate, then squared up the assembly and toenailed it to the deck to keep it from shifting around as we worked on it.
Front Wall
We laid out the front wall sheathing, pulling the radius for the arch-top window with a measuring tape and cutting out the opening with a circular saw. We held the sheathing back 3/4 inch at the top to allow the gable sheathing to lap the plate. We then filled in the rest of the front wall framing, doubling up the corner studs and installing trimmers and a sill.
Rafters
Though the construction drawings showed curved rafter tails cut out of full-dimension 2x12s, I decided that framing the roof with straight rafters and building up the curved profile with horizontal blocking would be easier and provide better nailing for the bent sheathing. We made a rafter pattern out of 2×6 stock and cut the first pair of rafters, installing them flush with the gable end and their plumb cuts flush with the outside edges of the sidewalls.
Curved Gable
To create the flared eaves, we used the curved-gable sheathing as a pattern. We scribed the gable according to the architect’s plans, then cut it out and nailed it up.
1
of 8
Ridge: Next we laid out the ridge board and secured it between a…
Ridge: Next we laid out the ridge board and secured it between a second pair of rafters at the back of the dormer.
Ridge: We placed a straightedge across the front face of the dor…
Ridge: We placed a straightedge across the front face of the dormer to make sure there was no deflection in the hinge joint at the top plate.
Ridge: We spiked the ridge to the floor at its back end, so that…
Ridge: We spiked the ridge to the floor at its back end, so that the whole dormer assembly was stiffly braced.
Subfascia: After filling in the rest of the rafters, we ran 2×4 …
Subfascia: After filling in the rest of the rafters, we ran 2×4 ceiling joists across the plates, extending them a few inches to catch a 2×6 subfascia.
Subfascia: For speed we ran the subfascia long, then trimmed it …
Subfascia: For speed we ran the subfascia long, then trimmed it at the gable; we held up its angled end on a scrap of 3/4-inch sheathing, so the roofer would be able to slide his shingles into the gap.
Scribing the Valleys: We now had a pattern in place — the gabl…
Scribing the Valleys: We now had a pattern in place — the gable sheathing — from which we could accurately project the curve of the roof from front to back. The top of the 2×6 subfascia defined the bottom edge; the flare would smoothly transition into the straight 2×6 rafters at its top. The first step in the process was to cut plates for the valleys out of 2×12 stock and position these between the subfascia and the ridge.
Scribing the Valleys: These plates provided a target for project…
Scribing the Valleys: These plates provided a target for projecting the flare from the gable, which we did by using various pieces of framing lumber, depending on the thickness and angle required.
Scribing the Valleys: With the curving valley thus scribed on th…
Scribing the Valleys: With the curving valley thus scribed on the 2×12 plates, we pulled them out, cut the curved profile, then reinstalled the plates permanently at the ends of the jack rafters and blocking.
Ridge
Next we laid out the ridge board and secured it between a second pair of rafters at the back of the dormer. We placed a straightedge across the front face of the dormer to make sure there was no deflection in the hinge joint at the top plate, then spiked the ridge to the floor at its back end, so that the whole dormer assembly was stiffly braced.
Subfascia
After filling in the rest of the rafters, we ran 2×4 ceiling joists across the plates, extending them a few inches to catch a 2×6 subfascia. For speed we ran the subfascia long, then trimmed it at the gable; we held up its angled end on a scrap of 3/4-inch sheathing, so the roofer would be able to slide his shingles into the gap.
Scribing the Valleys
We now had a pattern in place – the gable sheathing – from which we could accurately project the curve of the roof from front to back. The top of the 2×6 subfascia defined the bottom edge; the flare would smoothly transition into the straight 2×6 rafters at its top. The first step in the process was to cut plates for the valleys out of 2×12 stock and position these between the subfascia and the ridge. These plates provided a target for projecting the flare from the gable, which we did by using various pieces of framing lumber, depending on the thickness and angle required. With the curving valley thus scribed on the 2×12 plates, we pulled them out, cut the curved profile, then reinstalled the plates permanently at the ends of the jack rafters and blocking.
1
of 8
Rake Overhang: It's easier to cut curves in OSB than in 2-by lum…
Rake Overhang: It's easier to cut curves in OSB than in 2-by lumber, so we made the radiused barge rafters out of 3/4-inch AdvanTech sheathing, using the gable end as a pattern. Before installing the rake ladder, we traced the profile onto a piece of Azek 1×12 PVC trim that we would install later.
Rake Overhang: We made the ladder with 2×6 blocks, and installed…
Rake Overhang: We made the ladder with 2×6 blocks, and installed it so that there's a butt joint rather than a miter at the ridge, which would give better nailing for the PVC trim and help prevent it from opening up.
Countdown: While the dormer was still inside, we trimmed out the…
Countdown: While the dormer was still inside, we trimmed out the gables and eaves with Azek, then sheathed the roof with 3/ 8-inch CDX plywood. We first hand-nailed to get the sheathing to conform to the curve, then finished up with staples. To make it easier to nail the valley plates to the roof deck, we left a couple of small sections of the sheathing tacked.
Countdown: Next we cut out the roof opening and placed some fram…
Countdown: Next we cut out the roof opening and placed some framing members around the edge to help us accurately position the dormer. We were ready for liftoff.
Installation: We slid the dormer out through a large ground-floo…
Installation: We slid the dormer out through a large ground-floor opening, attached it with straps to the lift, and hoisted it up.
Installation: It took a single carpenter only a few minutes to f…
Installation: It took a single carpenter only a few minutes to fasten the dormer.
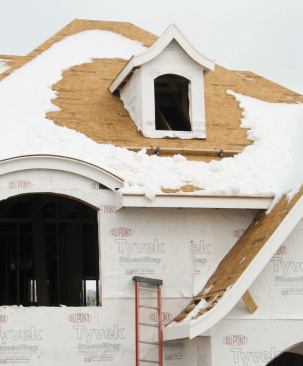
Installation: The carpenter filled in the sheathing.
Installation: The finished dormer in place.
Rake Overhang
It’s easier to cut curves in OSB than in 2-by lumber, so we made the radiused barge rafters out of 3/4-inch AdvanTech sheathing, using the gable end as a pattern. Before installing the rake ladder, we traced the profile onto a piece of Azek 1×12 PVC trim that we would install later. We made the ladder with 2×6 blocks, and installed it so that there’s a butt joint rather than a miter at the ridge, which would give better nailing for the PVC trim and help prevent it from opening up.
Countdown
While the dormer was still inside, we trimmed out the gables and eaves with Azek, then sheathed the roof with 3/8-inch CDX plywood. We first hand-nailed to get the sheathing to conform to the curve, then finished up with staples. To make it easier to nail the valley plates to the roof deck, we left a couple of small sections of the sheathing tacked. Next we cut out the roof opening and placed some framing members around the edge to help us accurately position the dormer. We were ready for liftoff.
Installation
We slid the dormer out through a large ground-floor opening, attached it with straps to the lift, and hoisted it up. It took a single carpenter only a few minutes to fasten the dormer and fill in the sheathing.
Tim McNamara is a framing contractor and remodeler in Rochester, N.Y.