As a firm specializing in structural repairs, we are sometimes called on to make emergency repairs to buildings. One common situation is a “vehicle strike”—when a driver slams into part of a building, creating a structural problem that needs immediate attention.
On a recent job, someone entering a townhouse garage hit the side of the garage door opening, significantly weakening the wall section supporting the garage door header and second-story floor and roof loads and damaging an area of the brick cladding. The damage should have been addressed immediately, but it was several months before an engineer engaged by the homeowner’s association brought us in.
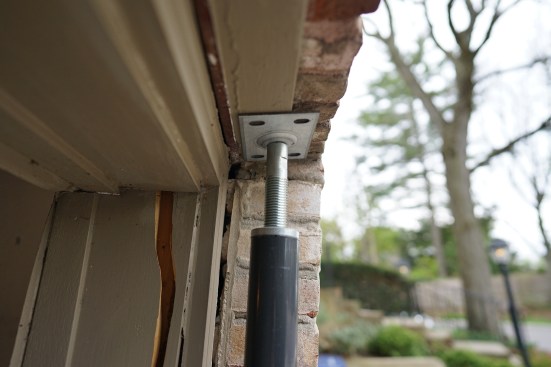
In the interim, an unknown “shoring contractor” had been hired to erect “emergency shoring.” However, that turned out to be two temporary adjustable columns, like those sold at most big box stores, which he placed directly under the existing masonry lintels on both sides of the failed wall section. This only helped support (a little) the lintel supporting the brick but didn’t address the garage door header or the floor loads and part of the roof load bearing on the exterior wall.
Complete Shoring
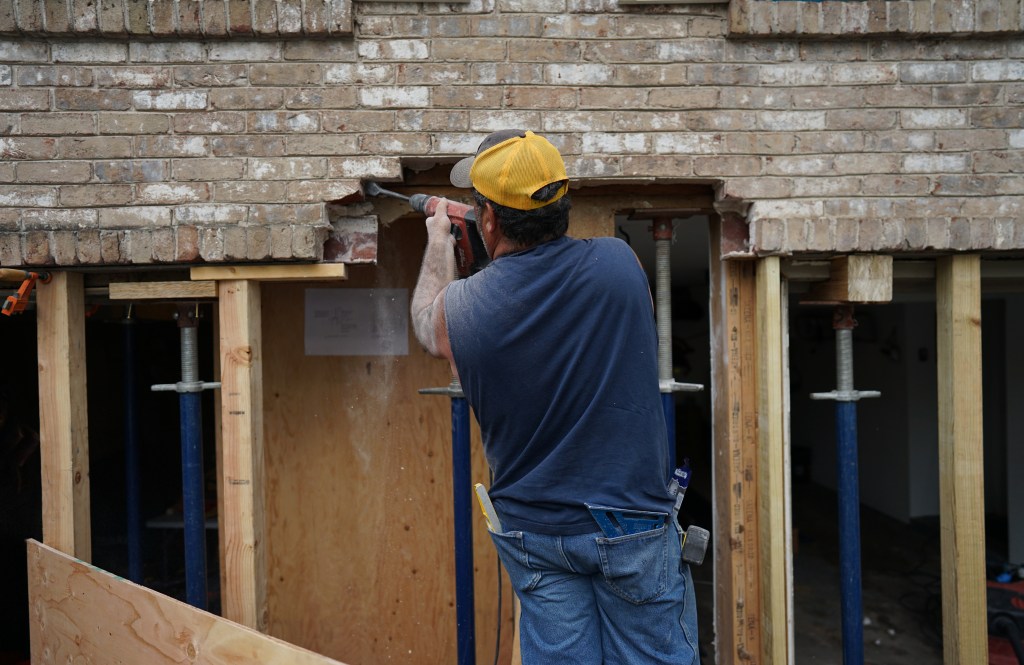
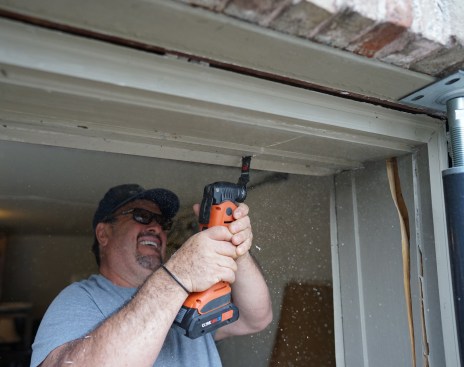
We started by implementing a more comprehensive shoring design, which was developed by the structural engineer who called us in. Our first step was to remove all the finishes in the garage—the garage door, the opening trim and jambs, and the interior drywall on the wall sections near the opening and on the ceiling along the opening end of the garage. We then installed solid blocking between the floor joists that ran parallel to the garage door header. The structural engineer specified this blocking to transfer the loads from the shoring we would need to install on the second and third levels onto the shoring in the garage.
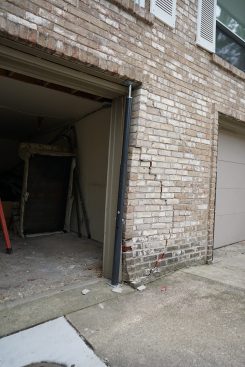
The impact from a vehicle strike stove in the exterior brick.
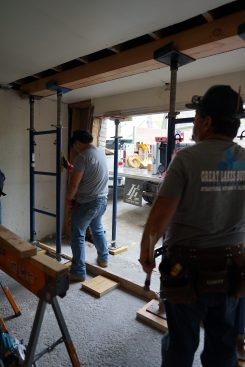
With the blocking installed, we were able to set the shoring in the garage on LVL blocks to spread the load over the slab. At the top of these shoring frames, we placed a set of 4×6 timbers on edge directly below the joist blocking. We added a 2×4 on edge to the outside edge of the LVL blocks to provide nailing for the plywood we used to build a temporary security wall.
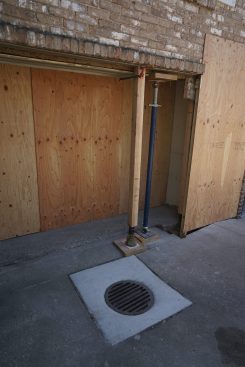
Next, we provided shoring on the second and third floors (which we were asked not to photograph). We were able to stack this shoring directly above the shoring in the garage, providing solid support for the roof system all the way down to the garage slab.
Finally, in accordance with the engineer’s shoring plan, we erected additional shoring posts in the garage door opening to support both the garage door header and the steel lintels supporting the brick façade.
Surgical Demolition
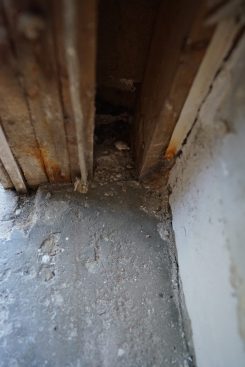
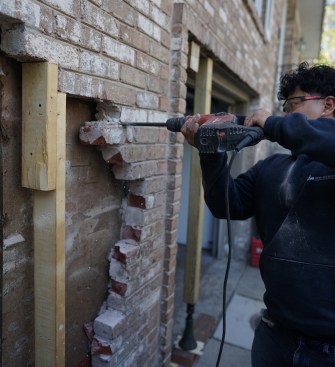
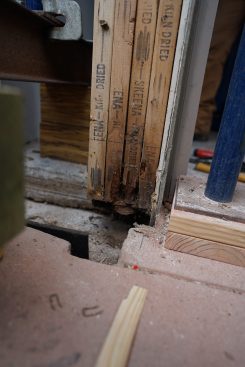
Once our shoring was in place, we started to remove the damaged areas of the brick façade, along with the damaged ⁷⁄₁₆-inch fiberboard sheathing. As we pulled this apart, we encountered water-damaged framing and rot at the base of the wall. The wall had been built on a footing that was below the driveway, with non-treated framing partially encased in concrete. Fixing this properly broadened the scope of the job and required getting a new structural detail from the engineer for a concrete curb, which would also require a prepour inspection from the city.
With the loads supported, the crew disassembled the damaged wall…
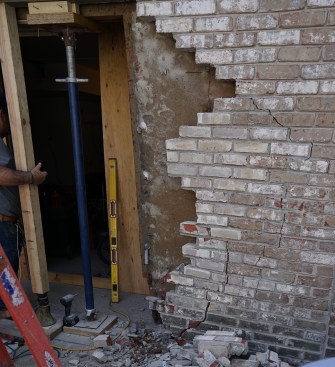
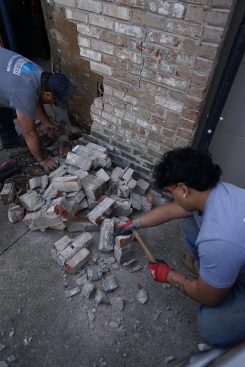
We carefully removed the brick in small vertical sections so we could fit temporary post shoring in place as we went, working toward the middle of the damaged wall section.
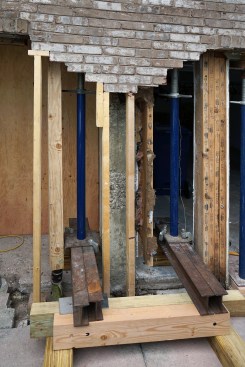
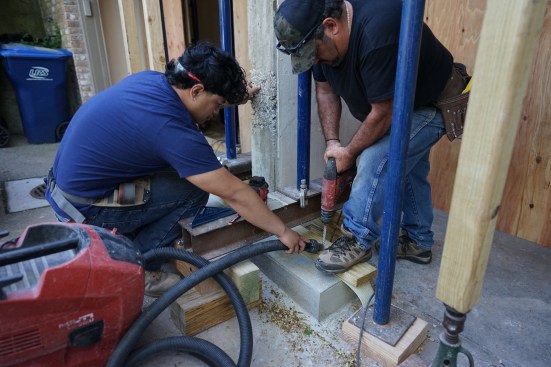
Once enough brick was out of the way, we set steel needle beams perpendicular to the wall extending from the driveway into the garage. We elevated this steel on blocks so it would form a bridge over the foundation, allowing us to form and pour the concrete curb. The steel needle beams also provided a stable base on which to erect shoring posts that extended up to the wall’s double top plate. After we put these posts in place, we were able to safely remove the remainder of the framing that had been damaged in the vehicle strike.
Revised Design
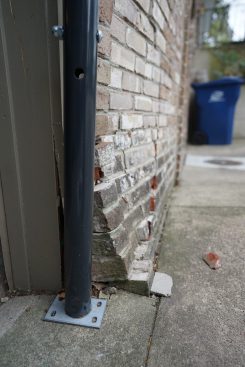
Following the revised structural design, we built a concrete curb to elevate the bottom plate of the new wall above the driveway. This entailed excavating a shallow trench down through the slab to the existing foundation and then epoxy-anchoring rebar into that existing concrete to tie it to the new curb.
The revised structural plan also called for using PSL columns to support the garage door headers, instead of simply replacing the existing 2×6 framing, as specified previously. After forming and pouring the curb, we added a capillary break between the new curb and a new pressure-treated sill plate, then framed the wall with the specified PSL cripples and 2×6 studs with solid blocking at the mid-span. We finished the frame off by insulating with mineral wool and replacing the fiberboard with ⁷⁄₁₆-inch Zip System sheathing.
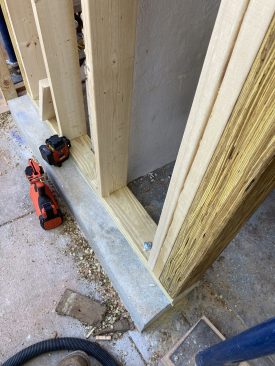
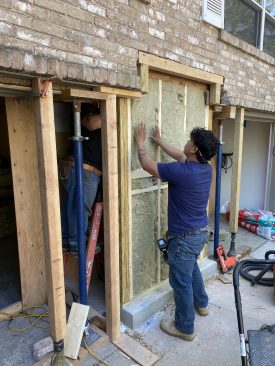

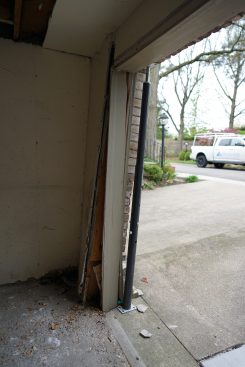
The crew attached the sill plate to a new concrete curb they pou…
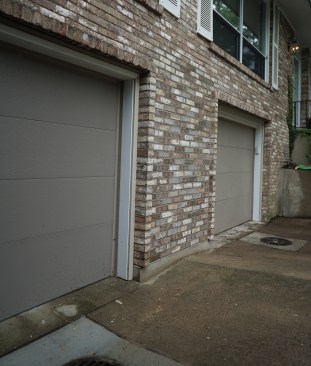
With the new framing complete, we could safely remove the shoring supporting the wall loads. We kept the post shoring that supported the existing steel lintels holding up the brick in place until we had attached our brick ties and reset the brick veneer with a stainless-steel drip edge around the base. Once the job was completed with new jambs and a garage door, all evidence of the vehicle strike was gone. Except for the small portion of the concrete curb showing, no one would ever know what happened.