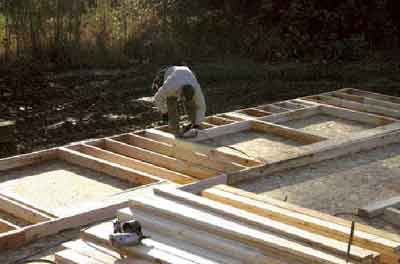
Assembling Exterior Walls
We work together when assembling the walls. One carpenter nails framing together while the other two haul material, position door and window parts, and scatter and crown studs.
Though the traditional way to join walls is to lap the top plate over perpendicular walls, we no longer do that. Instead, we use galvanized steel tie plates, which are permitted under the IRC (section R602.3.2). The plates must be at least 3 inches by 6 inches by .036 inch thick (20 gauge) and nailed on either side of the joint with six 8-penny nails. We use Simpson TP37 tie plates and, with our engineer’s approval, eight 1 1/2-inch metal connector nails per side.
This approach allows us to cut and install both top plates and nail the sheathing to them while the wall is on the deck. We still occasionally lap top plates in some locations — for example, where a metal tie plate would make it hard to fasten a beam or framing connector.
Check with your building inspector and engineer before switching to tie plates. Some inspectors aren’t familiar with them, and when they’re covered by framing they’re hard to inspect. We address this by installing the tie plates at the edge of the top plate so the inspector can see them from the ground.
Sheathing and Standing Walls
When we sheathe walls, two framers pack material and one does the nailing. The material packers place sheathing on the wall, tack it down, snap lines at the studs, and cut out openings with a router.
Because our area is seismically active, we’re required to block all edges of sheathing panels. To reduce the amount of blocking needed, we run panels vertically and use material long enough to span from the top plate to the rim joist and mudsill below — or, if it’s a second story, long enough to tie into the wall below. We use 9-foot panels for 8-foot walls, and 10-foot panels for 9-foot walls.
On long walls in two-story buildings, we align the sheathing with a line snapped 3/4 inch down from the top of the double top plate. This keeps the top edge of the panels perfectly square to the studs; otherwise, small errors in placing the panels can accumulate and push a panel edge off a stud.
If the wall is short enough, we stand it with manpower alone. For walls too heavy to lift by hand, we use either a forklift or, if we can’t reach with a forklift, pump-style wall jacks.
Interior Wall Framing
While the crew finishes exterior walls, I lay out plates for interior walls. Around here, no one distinguishes between bearing and nonbearing interior walls — both get double top plates. While this method uses more material, it takes less labor because we can use the same precut studs in all the interior walls. And since we don’t overlap the top plates, I can use the Big Foot saw to cut all three 2×4 plates on edge at the same time.
As I cut plates and do layout, the other carpenters frame behind me — one nailing and the other packing material. Once the walls are up, we plumb and align them (see “Plumbing and Straightening Walls,” 8/07), then move on to the floor or roof above.
Tim Uhler is a lead framer for Pioneer Builders in Port Orchard, Wash., and a JLC contributing editor.