Installing Residential Elevators
Building the Hoistway
The walls of the hoistway can be concrete, masonry, or standard framing material. Extra blocking is required in the side where the guide rails are installed. I recommend sheathing that wall with 1/2-inch plywood nailed every couple of inches. It’s not required, but it stiffens the wall and prevents it from creaking.
Most installation specs say that the walls in the hoistway should be within 1/8 inch of plumb. They should also be square. If they’re not, there will be an uneven gap between the building and the open side of the car. It looks bad, and if the gap is too large, it poses a safety problem.
Building codes require you to finish the inside of the hoistway with fire-resistant materials. Concrete and masonry can remain exposed, but framing should get at least one layer of 5/8-inch drywall. Talk to the building inspector before you lay out the opening, because some will ask for two layers.
The hoistway extends below the bottom floor and forms a pit. This allows the cab to descend far enough for its floor to be flush with the bottom floor of the house. The pit is 8 to 12 inches deep and is part of the ground-floor slab. If there is any concern about subsurface water, the pit should include a drain or sump.
Small elevators take up about as much floor space as a closet. Most of the elevators I install are slightly larger: They require a hoistway that’s 50×56 inches inside.
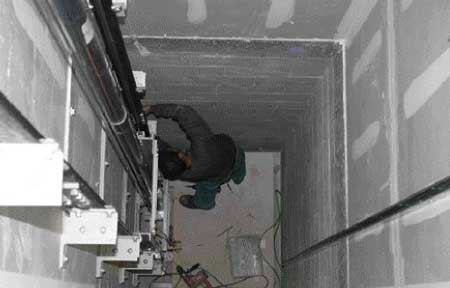
Guide rails. The cab is connected to a pair of T-shaped guide rails on one side of the shaft. The rails come in sections and should be installed straight, plumb, and parallel to each other. If they’re not, the ride will be rough and will wear out the brackets that connect the cab to the rails. It’s possible to adjust the rails, but we can go only so far before the cab starts to scrape the wall on the other side of the shaft.
Cabs. An elevator cab is basically a plywood box attached to a moving platform. A small cab might be 36×48 inches inside; one large enough for someone in a wheelchair plus an attendant would be around 36×60 inches.
It’s not hard to build the cab so that it can be entered from one side at one floor and from another side at the floor above. This makes it easier to design floor plans because you’re not locked into a single entry point. It’s also possible to fabricate custom shapes. I recently installed a five-sided elevator. The corner was clipped so it would fit into an irregular space.
Codes
Every elevator must comply with a set of standards called ASME 17.1. The standards were developed by the American Society of Mechanical Engineers (ASME) and have more to do with how the elevator is constructed than with how it’s installed. In some states, the building code specifically refers to residential elevators. In other states, they’re not mentioned in the code and may not be subject to inspection.
Authorities in some jurisdictions have amended the code to include specific requirements for residential elevators. The added rules typically have to do with safety and cover things like smoke detectors, ventilation, and fire sprinklers. A friend of mine who installs elevators in Los Angeles County has to comply with a stricter set of rules than I do in other parts of the state. A similar situation may exist in your area, so talk to a local installer before designing anything related to an elevator.
Installation
Our equipment is installed late in the job. By the time we arrive, the hoistway and any machine room should be framed and drywalled, the elevator doors should be hung and trimmed, and the electrical circuits and phone wire should run to where the lifting equipment and control panel will be. This work is performed by other trades; it’s the GC’s job to make sure it’s done correctly.
In an existing building, the hardest thing about installing an elevator is finding space for it. Installation is obviously a lot easier in additions and new construction.
Planning for future installation. Homeowners sometimes make provisions for installation of an elevator in the future. Perhaps they can’t afford the equipment when the house is built, or they may want to use the space for something else but be able to convert it easily should the need arise. We tell them to build a pair of stacked closets that are sized to fit an elevator. The closet floors should be framed so they can be removed without making structural repairs necessary. A hoistway can be created later by gutting the closets and removing the floors.
Equipment Location
If you’re installing a winding-drum unit, the lifting equipment has to be close by, so the cable can travel between the drum and the sheave at the top of the shaft. If the equipment goes in the shaft, you’ll have to provide extra headroom and a large access door for the installers and repair people. In some cases, the equipment can be installed in the attic, but it’s usually better to put it in the basement if there is one, because the noise is less intrusive there. That location also makes it easier for rescuers to access the controls for manually lowering the cab.
Because the power unit for a roped hydraulic system can be installed away from the hoistway, I frequently install pumps in garages or in utility rooms with the furnace and electrical panels.
Machine room. All manufacturers recommend building a dedicated machine room to house the lifting equipment, control panel, and electrical disconnects. In some places, this is required by code; in others, it’s optional. I prefer a dedicated machine room to prevent unauthorized people, especially children, from getting to the equipment (particularly the exposed moving parts of a winding-drum unit).
A machine room should have interior lighting, a door that locks, and sufficient access to maintain and repair the equipment.
Controls & Power
The elevator is controlled by call stations, wall-mounted buttons used to summon the car, and a pair of control panels. The main control panel is mounted near the lifting equipment, while the car operating panel is in the cab. The panels are connected to each other by a flexible traveling cable that hangs down the hoistway wall. The cable contains control wires, 110-volt power, and a phone line. The car operating panel contains buttons for each floor, a digital position indicator, an emergency stop switch, and an alarm button.
The alarm button activates a ringer at the top of the hoistway. In an emergency, the occupant can use it to alert other people in the house. It’s not much help if the occupant is home alone, however. Many elevators have built-in phones so the occupant can summon outside help. I refuse to install an elevator without one.
The electrician should provide a dedicated 30-amp 220-volt circuit for the hoist and a 15-amp 110-volt circuit for the cab. Both lines should run to disconnects near the machinery. The elevator installer makes the final hookup. You may have to upgrade the electrical service if the elevator is going in an older home.
Every cab is equipped with ceiling lights or wall-mounted fixtures. Most elevators have self-charging backup batteries to run the lights and machinery during outages. If the power fails, the backup light comes on and the cab is automatically lowered to the bottom floor. The cab can only descend; the battery does not have the power to lift it. Once the car is down, the occupant can open the door and exit.
Cab Finishes
An elevator cab is like an automobile: You can get it stripped down or loaded. A basic model might have plain melamine walls and simple trims. The next level might have a plastic laminate or veneer plywood interior. A top-of-the-line car includes raised-panel woodwork and upgraded trims. Cabs are frequently supplied unfinished, so the GC can install custom millwork or trim them to match adjacent rooms.
The floor of the elevator is usually finished in the field by another trade. It can be carpet, hardwood, tile, or stone, but we need to know how thick the finish will be before we order the elevator. Cabs are normally installed flush to the subfloor. It’s easy to adjust the stopping position at upper floors, but there’s a limit to how far you can drop into the pit. If the finish floor in the cab is unexpectedly thick, there might not be enough room to bring it flush with the bottom floor of the building.
Safety Equipment
Every elevator has some kind of automatic brake or slack cable mechanism to lock the car onto the rails in the unlikely event that the cable fails.
Doors. Residential elevators are accessed through 36-inch solid-core passage doors and entered through a gate into the cab. The passage doors are often the same as those used in the rest of the house, with the same hinges and passage sets. But in some jurisdictions you have to use one-hour fire doors or two-hour doors with metal jambs. Check with the inspector before installing anything. There is at least one passage door for each floor the elevator goes to.
Elevators are designed so that only one passage door opens at a time, and no door will open unless the cab is right in front of it. This prevents people from opening a door and falling down the shaft because the car isn’t there.
A door zone switch is wired to an interlock at each floor. One side of the interlock is bolted to the face of the passage door, and the other is screwed to the jamb. The interlocks automatically engage to prevent doors from opening when the cab is moving. When the cab arrives, the interlock at that floor lets go.
The control panel is connected to the interlocks and won’t allow the cab to move unless all the doors are closed. Many contractors put spring-loaded hinges on the doors to prevent people from being stranded when someone exits on another floor and forgets to close the door.
Gates. Most cabs are equipped with gates to prevent occupants from reaching or leaning into the hoistway. Gates are not required in every jurisdiction, but I would not install an elevator without one. I prefer accordion gates because they’re solid; children can reach through a scissor-style gate.
A switch prevents the elevator from operating unless the gate is closed. I recommend upgrading to an automatic gate because it prevents anyone from accidentally disabling the elevator by leaving the gate ajar.
Cost
The installed cost for a roped hydraulic elevator is around $20,000, but you can easily spend twice that amount. Winding-drum elevators run 15% to 20% less. The price depends on the type of equipment, lifting capacity, and number of stops, and it goes up for custom sizes, fancy trim, and options such as automatic doors and gates. Having to make room for an elevator in an existing building will obviously add considerable expense.
Greg Cookis a second-generation elevator installer and the owner of Shasta Elevator in Fresno, Calif.
| Manufacturers of Residential Elevators | |
Access Industries Grandview, Mo. 800/829-9760 www.accessind.comCemcoLift Hatfield, Pa. 800/962-3626 www.cemcolift.comConcord Elevator, Inc. Brampton, Ont. 800/661-5112 www.concordelevator.comInclinator Company of America Harrisburg, Pa. 800/343-9007 www.inclinator.com | National Wheel-O-Vator Roanoke, Ill. 800/551-9095 Otis Residential Elevator 800/441-6847 Savaria Corporation Quebec, Canada 800/931-5655 Waupaca Elevator Company, Inc. Appleton, Wis. 800/238-8739 |