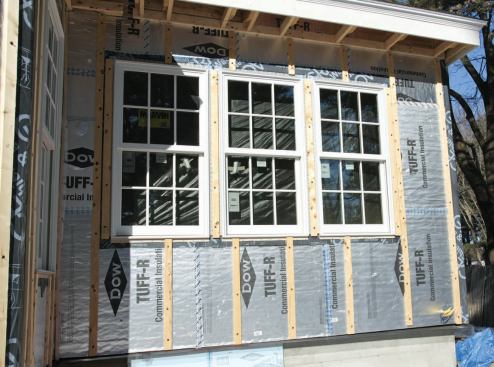

The sheathing is strapped on 2-foot centers, directly over the w…
Air-Sealing and Insulation
To insulate the walls, ceilings, and roof, we used a combination of foam board, spray-foam, and cellulose. Our general goal was to achieve R-values of 45 for the walls and 65 for the level and sloped ceiling areas. In the basement, which would be finished, we insulated the walls to R-25 and installed 2-inch R-10 XPS foam under the slab.
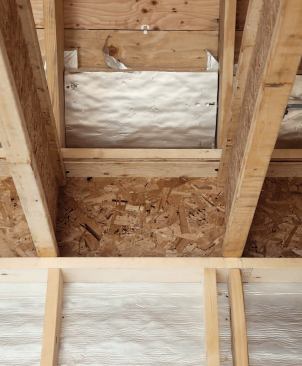
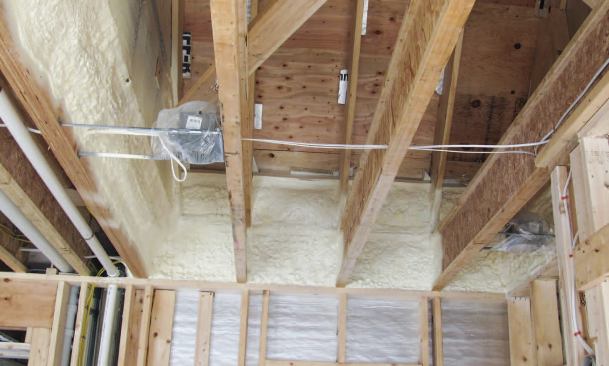
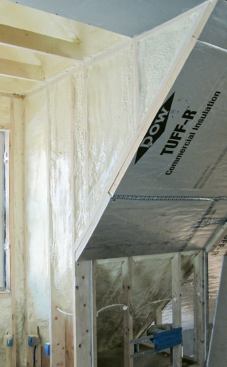
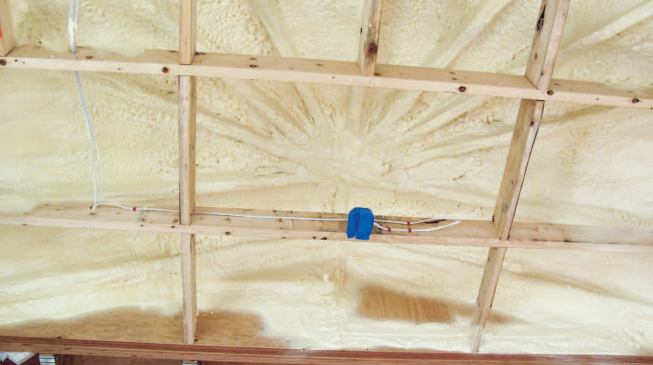
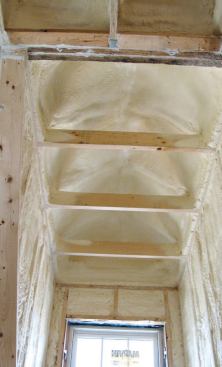
The asphalt-shingled roof is conventionally vented at the ridge, the Cobra vent balanced with aluminum strip vent in the soffits. For vent baffles at the eaves and in sloped ceiling areas, we used 2-inch R-13 foam board, spaced down from the underside of the roof sheathing with 2-inch foam spacers. We glued the spacers to the sheathing and tacked the board over them, running it to a point about 1 foot higher than the 16 inches of cellulose to be placed in the attic. The eaves baffles are air-sealed against the 2×12 rafters and top plate with a 3-inch layer of spray foam. Over the baffles in the sloped ceiling areas, we sprayed 7 inches of closed-cell foam with a nominal value of R-45; we then installed 2-inch foam board over the rafters. The combined values of the board and spray foam results in a total R-value of around 70.
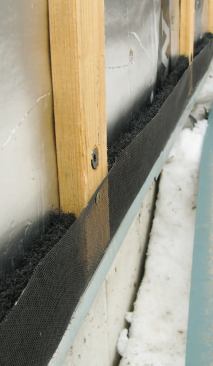
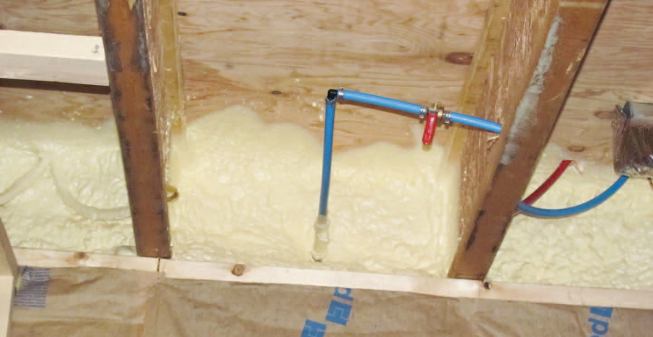
We also used closed-cell foam to insulate and seal all rim joists, the sloped ceiling areas, and the two doghouse dormers. A 3-inch layer of foam at the rims has an R-value of about 18 and provides additional air-sealing at this typically leaky junction.
Basement walls. In the basement we installed 2-inch XPS foam on the foundation walls, overlapping it at the top with the closed-cell foam insulating the rims. We framed 2×4 walls in front of the foam and insulated them with fiberglass batts instead of cellulose. We did this because basement flooding is common in the area; if a flood overwhelms the subslab drainage and sump pump, the insulation will drain and dry to the interior without settling. In fact, in an effort to keep things dry, we installed the foundation with its top about 3 feet above finished grade, placing the slab a few inches above the average water table.
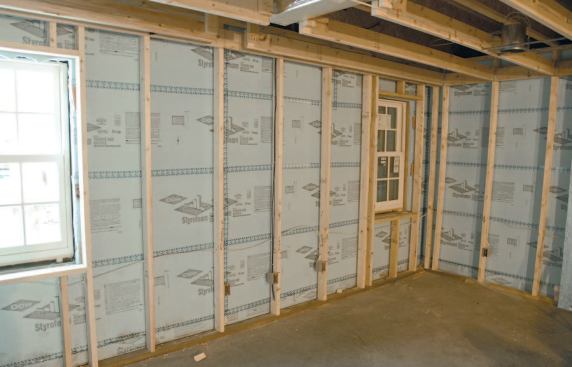
Even though the foam sheathing was taped at every seam in both layers and sealed to the framing with adhesive caulk, we still didn’t consider it a fully effective air seal. Before blowing in the cellulose, we worked on sealing the framing from the interior, caulking every seam that might constitute an air leak in the shell. This proved to be an extensive and expensive undertaking. We used acrylic latex caulk on every joint between double framing members in the exterior walls. We’d put a generous bead of subfloor adhesive under the bottom plates before standing the walls, but you can’t visually check for voids or gaps, so we went ahead and caulked all seams between the bottom plate and subfloor. In the basement, we caulked where the 2-inch XPS foam on the foundation walls met the slab, and we sealed the seams with WeatherMate tape (866/583-2583, building.dow.com). We spent about $800 on caulk and more than $8,000 in labor over two weeks, during which time someone from Building Science Corp. periodically came out and identified still more areas that could be caulked.
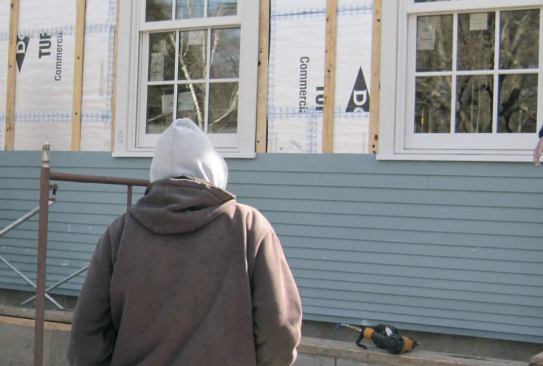
The air-sealing effort also included a labor-intensive treatment around all the windows and doors. We avoided using expanding foam around the jambs, not because it doesn’t seal well, but because it too thoroughly fills the gap. If water were to get past the jamb, it could remain trapped and lead to rot. Instead, we inserted foam backer rod around the jambs, pressing it just beyond the interior edge, then capped it with caulk. This way, any water that gets in still has a chance to dry to the outside, where the underside of the sill is caulk-free and can drain. We caulked around the metal tie-straps, too, and along the edges of the self-adhering membrane protecting the rough openings.
Insulation
The 2×6 wall bays were insulated with dense-pack cellulose, blown in behind a permeable plastic membrane. To support the cellulose in the attic spaces, we had to hang those ceilings first, using stiffer, 5/8-inch drywall to avoid a “quilting” effect over the 24-inch framing centers. After hanging the board, we checked from above for light leakage through seams and fixtures, and caulked them all tight. We also caulked the perimeter of the drywall to the top plates, from below.
Against the architect’s recommendation, the homeowners insisted on having recessed lighting in the ceilings. Despite their ICF housings, the fixtures weren’t airtight, so we covered them from above with expanding foam. Hopefully, the homeowners will use compact fluorescent bulbs to help prevent the cans from overheating and tripping the thermal breaker.
We performed a blower-door and smoke test before installing the cellulose. Even at this intermediate stage, the result — 1.37 air changes per hour at a pressure of 50 pascals (ACH50) — easily met the 1.5 ACH50 we’d targeted as our goal for the finished home. We identified a few leaks along the top plate where air found its way between the sheathing and the framing, and applied more caulking to seal these areas.
In retrospect, I believe that rather than putting all that time and caulk into air-sealing, it would have been more economical to have had every wall bay “picture-framed” between the sheathing and the framing with closed-cell spray foam. Our insulation contractor estimates that this would have added $1,500 to the job cost, but it would have significantly reduced our labor.