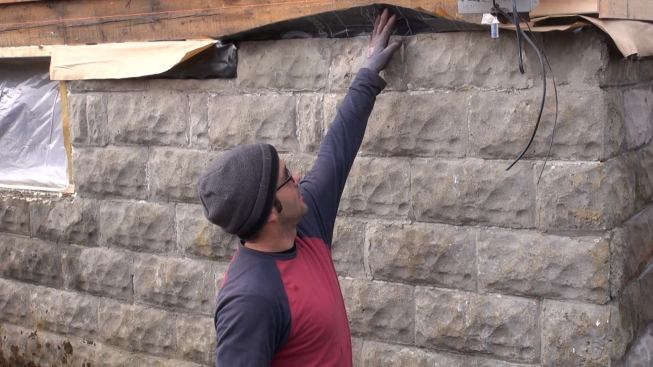
Project manager Mark Pollard points out where his crew has place…
Project manager Mark Pollard points out where his crew has placed a Grace membrane capillary break between the old home’s existing block foundation and its existing sill beam in this photo from December, before severe weather struck New England. The crew is now tying this membrane into an air barrier membrane for the home’s walls as part of detailing the building’s new airtight and insulated exterior weather barrier.
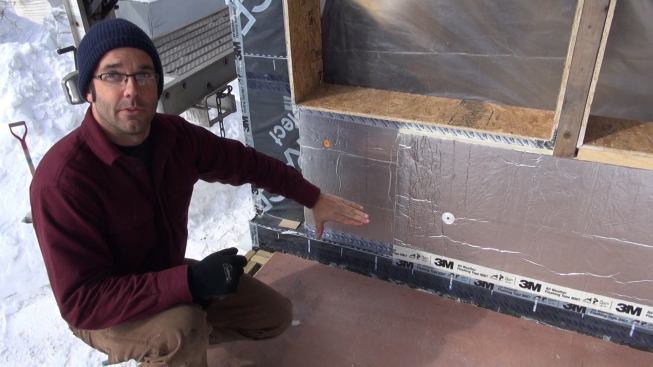
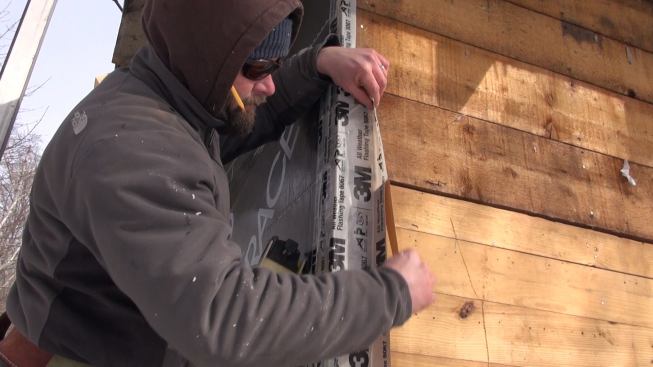
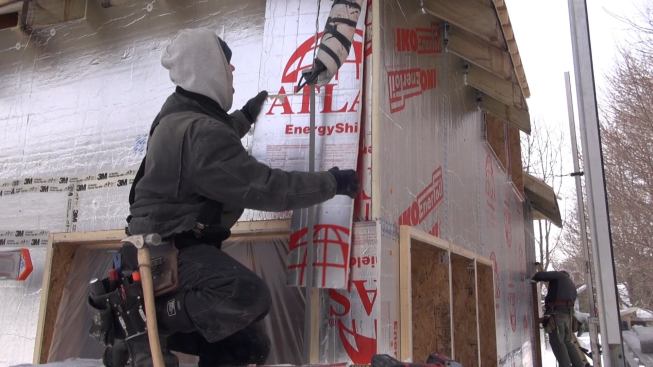
Pollard explains the exterior air barrier and insulation assembl…
Pollard explains the exterior air barrier and insulation assembly on a freezing cold day in February after a succession of blizzard snowstorms. Visible here are OSB bucks used to extend the window openings; Grace polyethylene and bitumen membrane applied as an air and vapor barrier to the existing board wall sheathing, and integrated into the Grace membrane inserted earlier as a capillary break at the joint between the foundation and the floor frame; a 1.5-inch layer of foil-faced polyiso insulation appied over the air barrier membrane, attached with cap nails (joints sealed with Dow Weathermate tape); and a top layer of 1.5-inch foil-faced polyiso attached with four-inch screws and washers (joints sealed with 3M 8067 flashing tape). Not yet installed here are beveled clapboards in the window sill openings to create sloped drainage, which will be topped with more membrane integrated into the drainage plane formed by the foil-faced foam. “We’re not doing that yet because we don’t want it to get beat up before we put the windows in,” said Pollard.
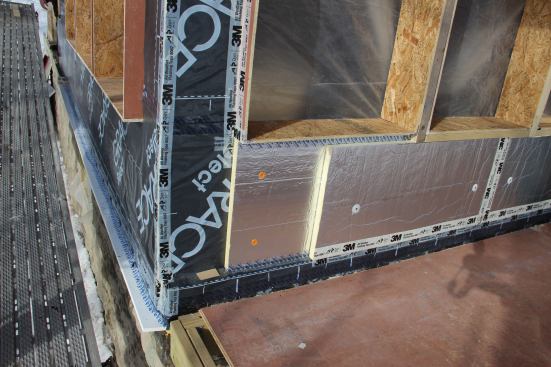
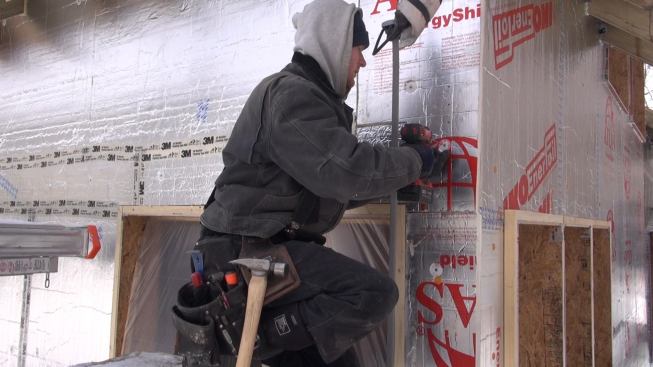
Another cutaway view of the air barrier, insulation, and window …
Another cutaway view of the air barrier, insulation, and window buck detail. 3M 8067 tape has been used to seal the building corner joint in the air barrier membrane, and to seal the air barrier to the window bucks. “The window bucks are part of the air barrier,” explains Pollard. Around the corner on the wall at left, window bucks have just been set and the foam installation has not yet started in this photo.
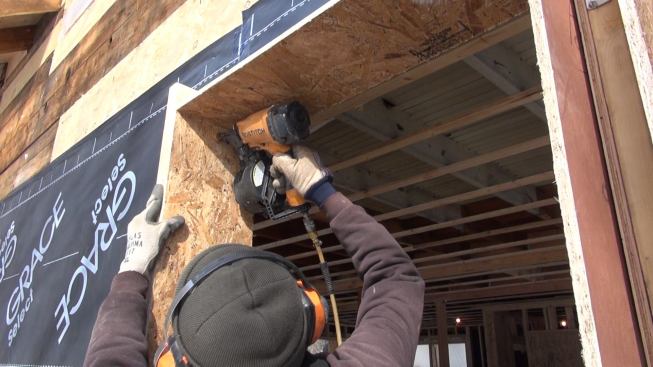
Using a 3-inch rip of 2×4 as a depth gauge, carpenter Ed Muennic…
Using a 3-inch rip of 2×4 as a depth gauge, carpenter Ed Muennich nails an OSB extension window buck into the existing wall framing.
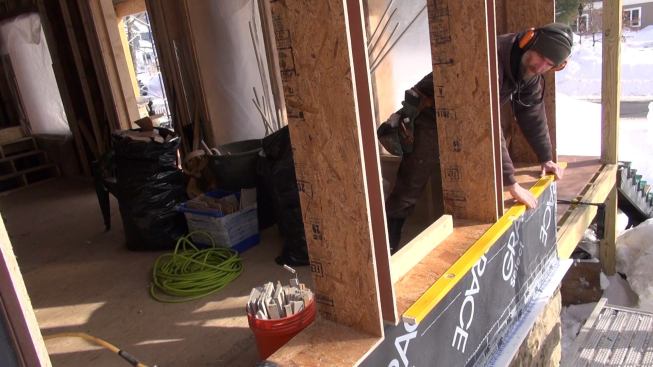
Muennich uses a 6-foot level to check the alignment of three sid…
Muennich uses a 6-foot level to check the alignment of three side-by-side window bucks as the crew builds out the wall.
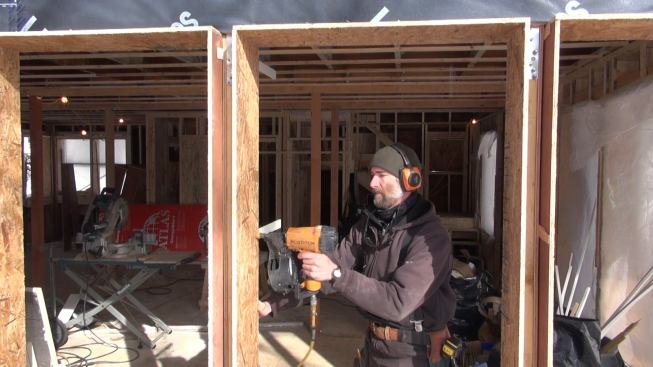
Muennich nails off an OSB window buck.
Carpenter Shane Fenton applies 3M 8067 flashing tape to the Grac…
Carpenter Shane Fenton applies 3M 8067 flashing tape to the Grace membrane on a wall and wraps the tape around the corner to complete the seal. The 3M tape stays flexible and sticky at surprisingly cold temperatures, but the crew needs to work without gloves when applying tape, in spite of the bitter cold weather.
Creating the airtight barrier under the insulation on the house …
Creating the airtight barrier under the insulation on the house wall requires meticulous hand labor and attention to detail.
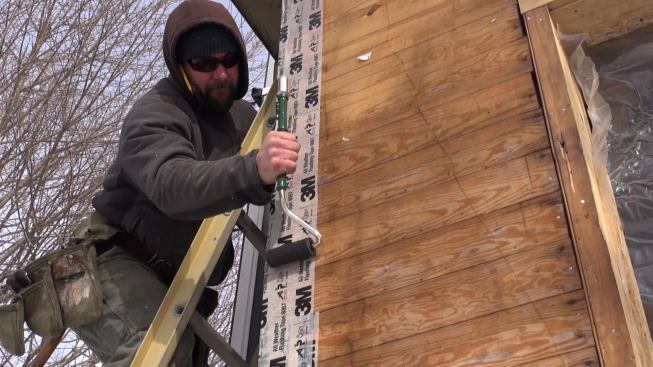
Shane Fenton rolls the 3M tape with a hand roller to help establ…
Shane Fenton rolls the 3M tape with a hand roller to help establish good adhesion. The tape grips tenaciously even in cold weather.
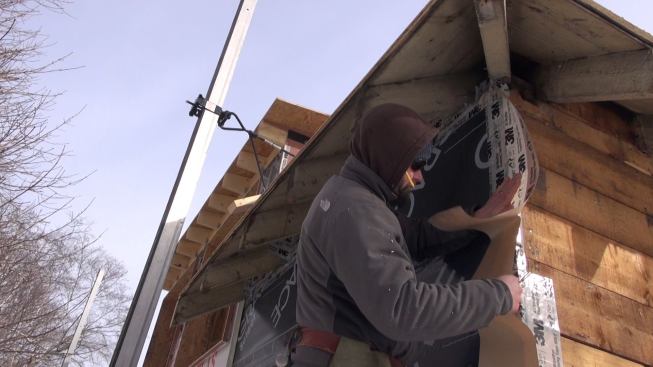
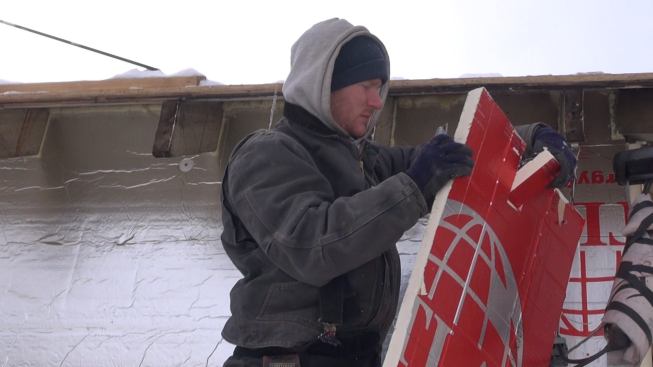
Carpenter Chris Mitchell cuts a notch in a sheet of foil-faced p…
Carpenter Chris Mitchell cuts a notch in a sheet of foil-faced polyiso foam in order to fit the foam neatly around a roof rafter tail. Thompson Johnson has opted to fit the insulation and air seal around the existing rafter tails for this job, rather than cut the tails off and run the air barrier continuously up the walls onto the roof.
Mitchell trims the edge of the insulation sheet with a knife. Co…
Mitchell trims the edge of the insulation sheet with a knife. Corners and eaves create challenging and laborious detail work on this project.
Mitchell places the last piece of foam at the top corner of one …
Mitchell places the last piece of foam at the top corner of one wall.
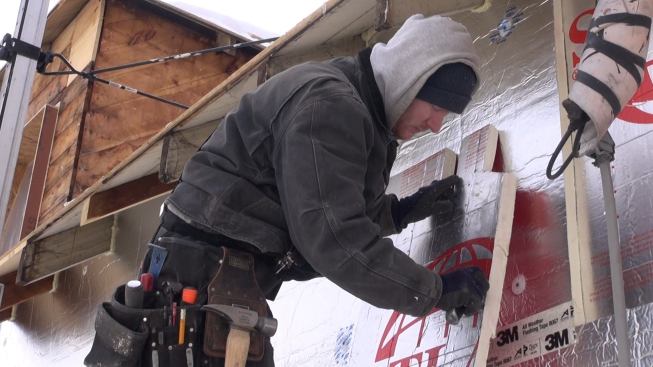
Mitchell attaches the sheet of foam with a long screw and washer…
Mitchell attaches the sheet of foam with a long screw and washer.
Mitchell shaves the corner of the foam skin before sealing the j…
Mitchell shaves the corner of the foam skin before sealing the joint with tape.
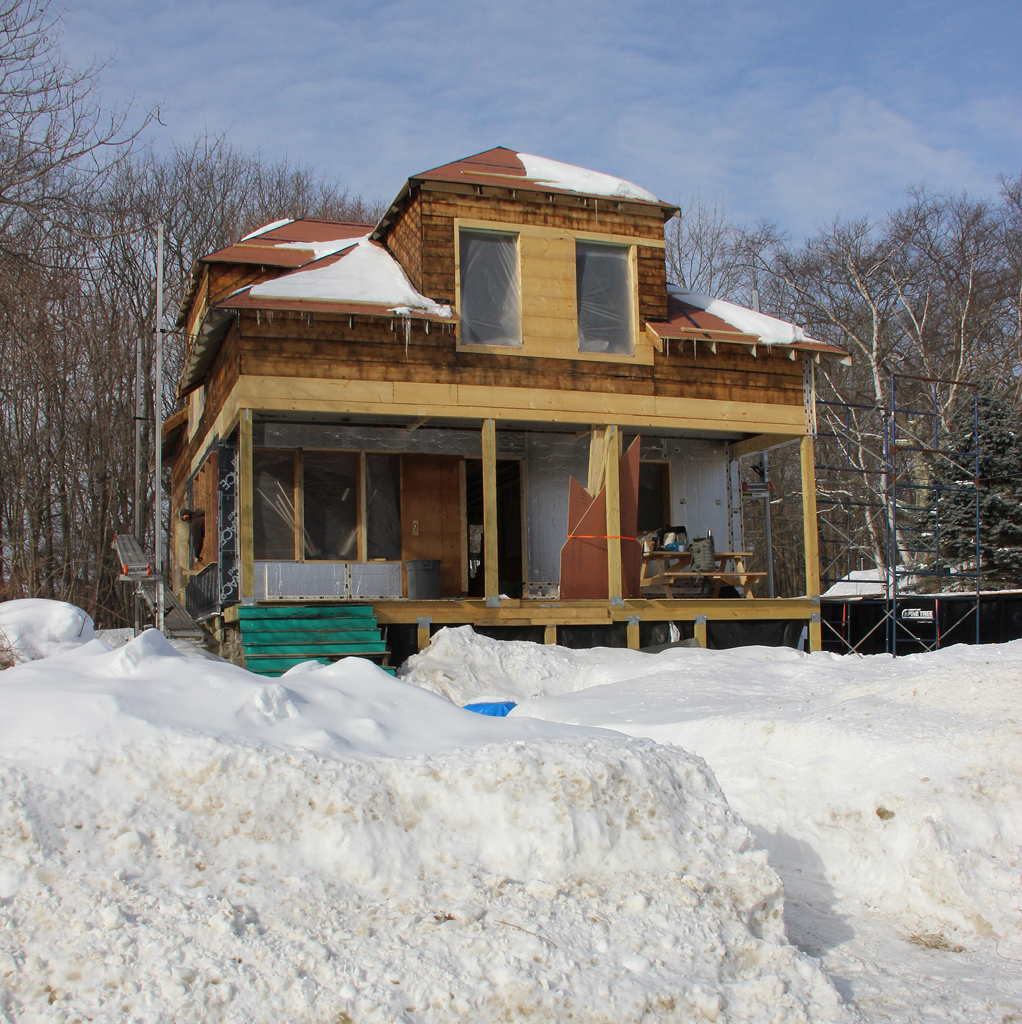
Winter has hammered Portland, Maine in recent weeks, and that includes Peaks Island, a 20-minute ferry ride from downtown in the Casco Bay. The weather has presented challenges, but it hasn’t stopped work on the project Coastal Connection has been following there: the foundation-to-ridge structural reinforcement and deep energy retrofit of a hundred-year-old island cottage (see Slideshow).
When we visited the island in mid-February, Thompson Johnson Woodworking’s project manager, Mark Pollard, wasn’t wearing his tool belt. “I’m on light duty,” he said. “I hurt my back shoveling snow.” Added Pollard: “We’re subbing out the snow removal now.”
But carpenters Shane Fenton, Ed Muennich, and Chris Mitchell had their tool belts on (over coveralls and parkas), and they were hard at work, applying an air barrier of Grace Ice and Water Shield and an insulating skin of foil-faced rigid polyiso foam to the home’s walls. Inside, the home’s dormers and interior partitions were all framed up, said Pollard, ready for plumbing and wiring. “We’re out of inside work for our crew,” he said. “If the weather gets rough again, we either have to deal with it or take the day off.”
Working in narrow paths shoveled between shoulder-high snowbanks reminiscent of World War One trenches, the crew worked its way around the building applying the air barrier membrane and piecing the two layers of foam sheathing into place around the window bucks and rafter tails. They sealed joints between the foam sheets using Dow Weathermate housewrap tape on the inner layer, and high-performance 3M 8067 all-weather flashing tape on the very outer foil skin. “The outer foil is the drainage plane,” explained Pollard, “so it has to be as perfect as we can make it.”
On the coldest days this month, Pollard said, the Weathermate tape was too cold to use. “We tried heating it up in front of the salamander heater,” he says, “but that melted it.” Finally, he said, he bought a plug-in therapeutic heating pad from the drugstore, and placed the heating pad with the rolls of tape inside an insulated foil “cold bag” from the grocery store. “That turned out to be perfect,” he says. The crew couldn’t wear gloves while handling the sticky tape, says Pollard. But he says, “We would keep our gloves in the heated bag, and when our hands got too cold we would stick them in there and warm up.”
Working around the existing rafter tails at the top of the walls was tricky and labor-intensive. “We considered cutting off the rafter tails and wrapping the wall membrane up onto the roof sheathing,” said Pollard. “But then we’d have to rebuild the rafter tails. And these ones are already here, and they’re in good shape.”
After the exterior skin is done and spray foam insulation is applied to the underside of the roof sheathing, but before the house is drywalled, Thompson Johnson plans to blower-door test the house for air-tightness, while they still have access to the walls and roof from the inside for spot air sealing. “We’re hoping to hit 1.5 ACH50,” said Pollard.