Recently I designed a kitchen remodel for a client who happens to be my son, Jon. During the planning stages for the complete remodel, we decided to make modifications that would improve the circulation patterns and expand the kitchen in the home, built almost 100 years ago. The existing path from the kitchen to the living room was rather circuitous, with access via a narrow hallway next to the stairs. By removing an existing half-bath and a brick chimney, we created much more open and direct access to the living room and dining room.
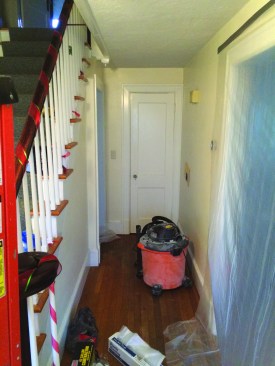
A kitchen renovation made this hallway unnecessary for access, so it became the ideal place for a new bathroom.
With careful planning and space-saving fixtures, along with some creative framing and inventive plumbing, the unused hallway was converted into a functional bath with a shower.
At that point, the narrow hall next to the stairway was no longer needed. The hall was only 45 inches wide—common for a half-bath—but with the clever use of the right products, we were able to fit in a shower as well, creating a very functional, albeit small, full bath.
Start with a tiny toilet
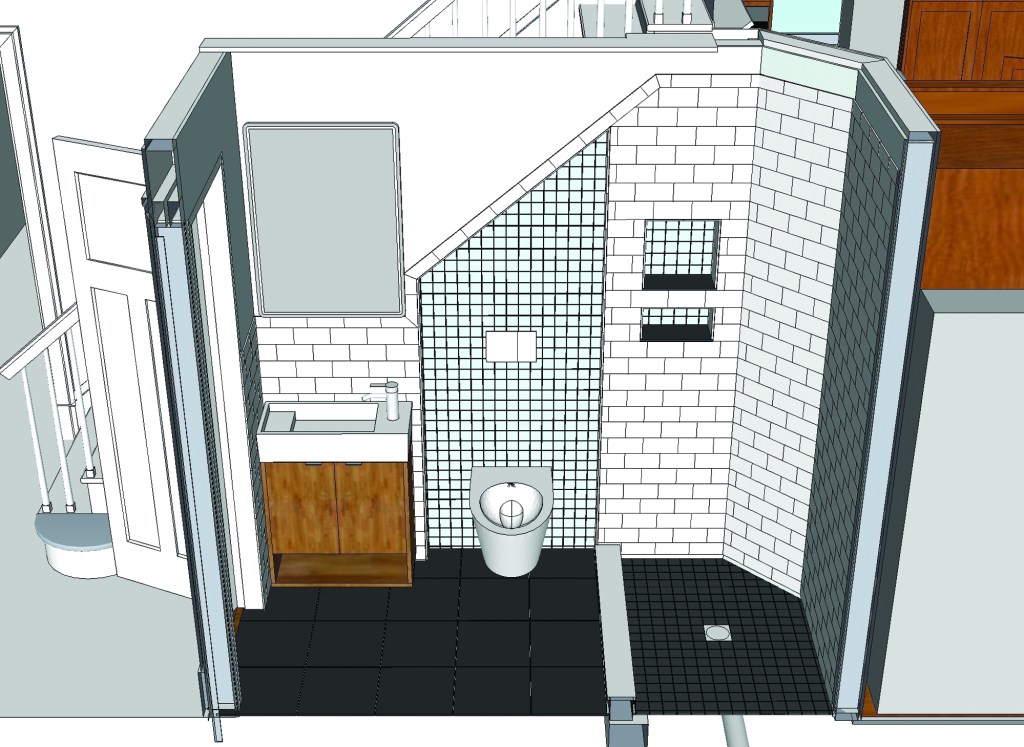
The placement of walls and fixtures in the bathroom needed to be planned within a fraction of an inch, and Jon worked out the entire design—including framing, plumbing, and tile details—in SketchUp before demolition began. Working out all the details up front and envisioning potential pitfalls saved us a lot of time and frustration down the road during construction.

Using SketchUp, author Dan Lewis created a precise plan for the tiny bathroom that allowed him to size and place the fixtures accurately in the space.
The first challenge was finding a toilet that fit. Building codes typically require 24 inches between the front edge of a toilet and any obstruction, and most standard-size toilets are 25 to 29 inches long. These require more than 4 feet of total space—too wide for our 45-inch-wide ex-hallway. Plus we needed room for the plumbing and a path to the drain line below.
The solution was a wall-hung toilet. I’d used them in commercial applications. Commercial models typically require a sizable wall cavity and use flush valves rather than conventional tanks. But in my research, I found a modern residential wall-hung toilet from Toto with a tank that fits within a standard 2×6 or 2×4 stud wall. Plus, this wall-hung commode projected only 21 inches from the wall, but for it to pass code, we still needed to come up with some creative framing and wall finish.
Framing small
To maximize floor space, we had to minimize the thickness of our walls. A staircase opened into the existing hallway, and all but the bottom few steps would be closed off by the new bathroom. Before framing the wall, we sawed the tread returns flush with the original skirt board below the treads. We then fabricated a new skirt board with a 2-inch-wide horizontal cap to maintain the 1 1/2-inch minimum clearance between the finished wall and the railing. The modified skirt attached along the outside of the staircase. In the area behind the sink, 2×4 studs on the flat extended to the ceiling and attached to the cap of the skirt board.
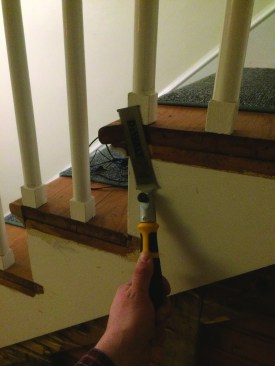
The first step was cutting off the stair treads flush with the skirt board where they hung out into the hallway.
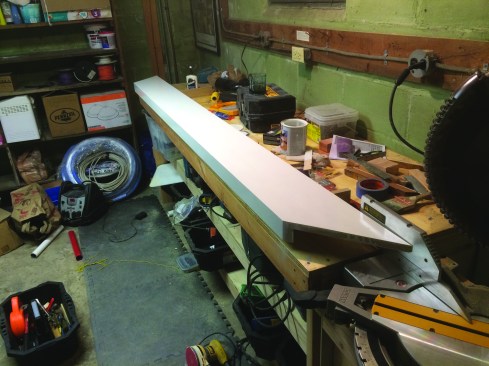
To maintain code-required clearance for the handrail on the stairway, a skirtboard was fabricated with a 2-inch horizontal cap.
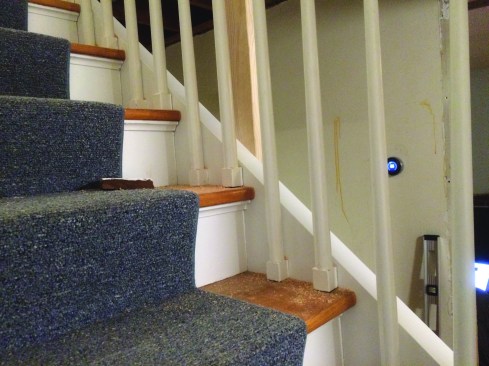
The photo shows the modified skirt board attached to the stairs. The framing for the bathroom wall would attach to the horizontal cap on the skirt.
Despite these efforts, the room was still not wide enough for proper clearance in front of the toilet, so we created a slight recess for the toilet tank in the wall framing below the slope of the stairs. The toilet mounted to the wall with a steel frame that attached to 2×4 studs on either side. By pushing those studs back flush against the back of the wall finish of the basement stairs, we gained an additional 4 inches of space in front of the toilet, which gave the toilet the clearance that we needed for code.

To maximize space in the bathroom, 2×4 framing was attached to the skirt board on the flat.
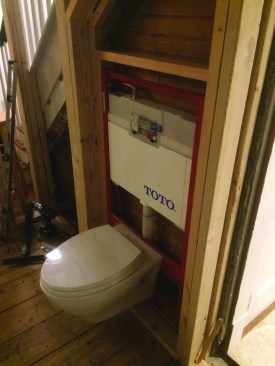
Even with the framing on the flat, extra space was needed for code-required clearance for the wall-hung toilet. The framing was recessed as far as possible below the stairway. Here the tank is installed and the toilet hung in place temporarily.
Sink and Shower
Although there are small pedestal sinks on the market, we decided that a vanity cabinet would be helpful—even if it was small. The solution for the sink actually came from Ikea. That company specializes in small spaces and carries a sink that projects only 10 5/8 inches from the wall. Even better, the sink is equipped with a side-mounted faucet.
Because the toilet was wall-mounted and did not touch the floor, it seemed only right that the vanity cabinet should be wall-mounted as well. A custom cabinet—essentially a modified kitchen-wall cabinet—fit the bill.
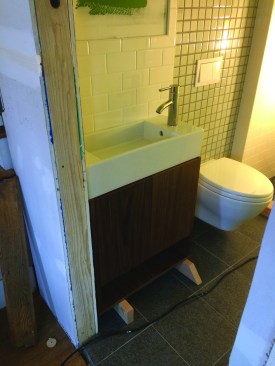
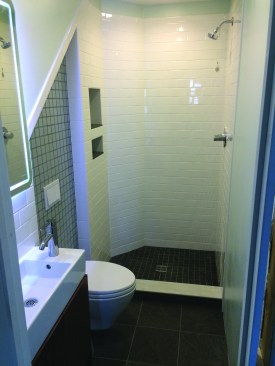
In keeping with the wall-hung toilet, the vanity—made from a kitchen wall cabinet—was mounted on the wall. Here the bathroom is tiled and vanity rests on blocks before being secured in place.
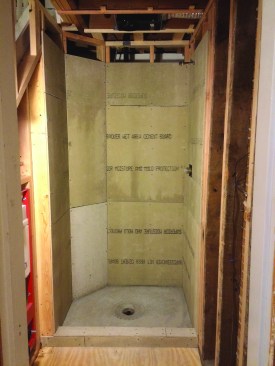
To maximize the size of the shower, tile backerboard was attached directly to the wall framing. The angled corner gave the kitchen island a little more clearance on the other side of the wall.
The odd layout of the bathroom meant that our only option for the shower was to custom-build it. To maximize the shower’s depth and width, we applied the tile backerboard directly to the wall studs, angling one corner of the shower to gain extra clearance around the new kitchen island on the other side of the wall. The tile installer built two nooks into the wall of the shower to eliminate the need for shelving or organizers that might take up valuable space in the shower. We installed a combination bathroom vent/light above the shower for general lighting.
Because of the diminutive size and location of this bathroom, we did not tie the room into the home’s heating system. Instead, all the warmth needed will be provided by a heated tile floor. We went with Ditra Heat from Schluter. With the toilet and the vanity mounted on the wall, the layout for the heat mat was a simple rectangle.
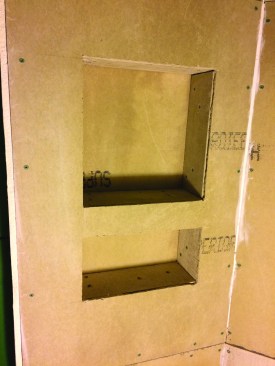
Shelves can take up space in the shower, so the tile installer created recessed nooks in the shower wall instead.
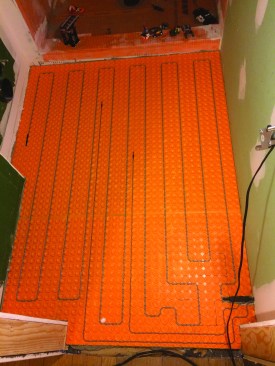
With the bathroom in the middle of the house, there was no need to tie it into the home's heating system. Instead the tile floor is warmed with a heat mat. The wall-hung fixtures meant a simple rectangular layout for the mat.
To minimize the potential for moisture damage—especially given the proximity of the fixtures to the walls—we carried the tile from the shower to behind the toilet and around the sink. Because the sink had no vanity top, we caulked the sink rim directly to the tile backsplash, which allowed any splash water to flow back into the basin.
Plumbing challenges
Placing the new bathroom in the old hallway may have suited the revised layout of the home’s floor plan nicely, but the location presented serious challenges for plumbing the fixtures. The bathroom was situated in the middle of the house away from any existing drains or vents, and the new wall where the fixtures were mounted was narrow and offset from the second-floor wall above. Plus, the existing framing in the floor and the ceiling was obstructive in every way imaginable.
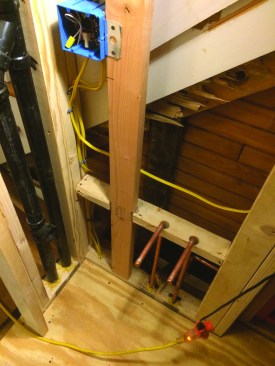
The bathroom was situated away from any existing plumbing, so the toilet vent was installed in the narrow wall next to the sink (pipe on the right). The drain and vent for the sink (pipe on the left) fits into the same wall, with the vent joining the toilet vent above.
We spoke with the plumbing inspector and our plumbing contractor, Paul Gilbert,from DF Plumbing in Belchertown, Mass., and came up with a routing scheme. First, Paul installed a new waste arm to the toilet across the basement from the home’s main line. The toilet vent comes off the waste arm and runs up the wall at the short end of the sink. The sink drain exits the same side of the vanity, and a vent for the sink extends up and joins the toilet vent, with the drain running under the floor and back to the waste arm.
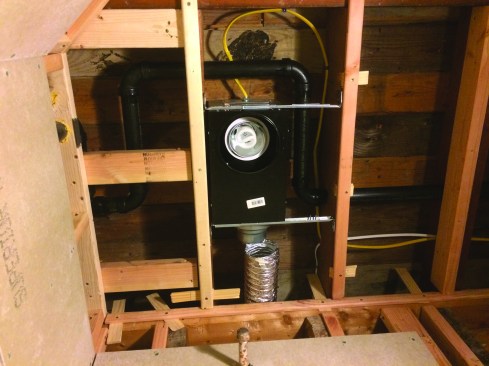
After some creative routing around the light fixture, the vent line makes its way through the ceiling framing and joins the shower vent.
After some creative routing around the light fixture, the vent line makes its way through the ceiling framing and joins the shower vent. The vent finally ties into an existing vent in the first- floor ceiling near the bathroom. In our case, wet venting was not an option because the Massachusetts plumbing code requires 2-inch piping for wet vents, and our existing vents were only 1 1/2 inches.
All photos by Jon Lewis