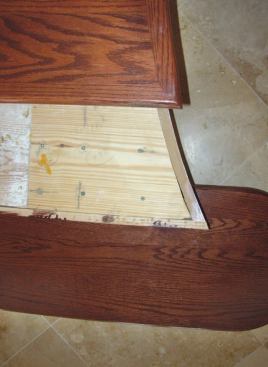
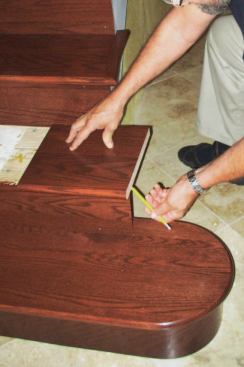
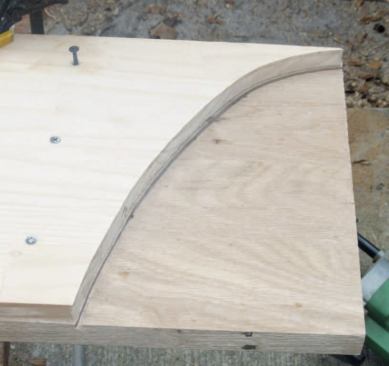
Trace the Skirt: This stair has one curved tread return that I f…
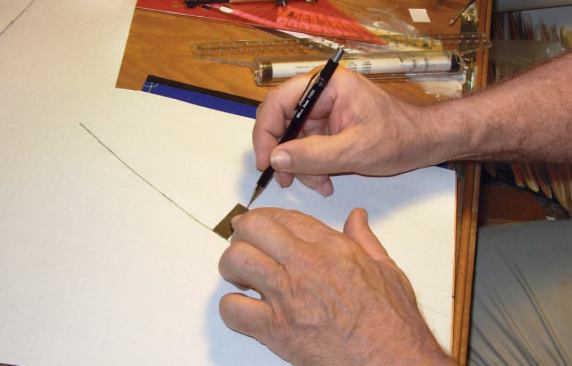
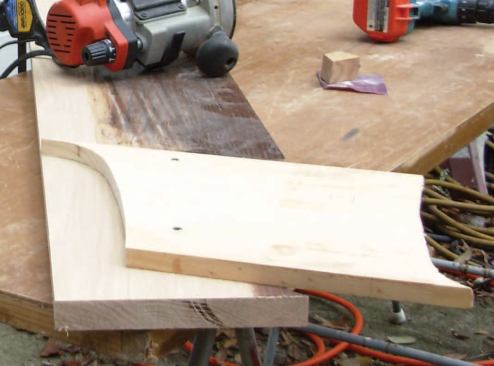
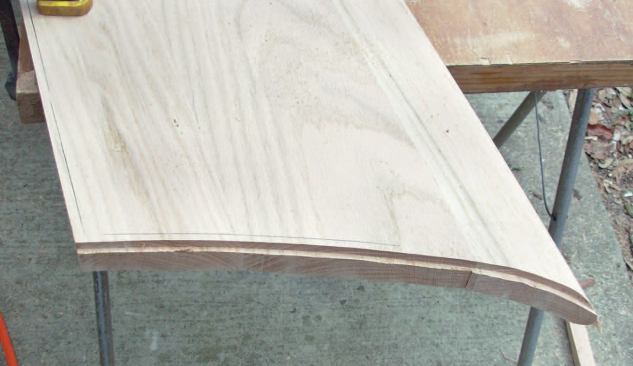
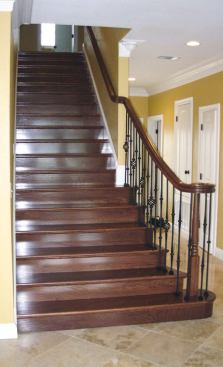
Trace the Skirt: This stair has one curved tread return that I fabricated on site.
Trace the Skirt: I start by tracing the outline of the skirtboar…
Trace the Skirt: I start by tracing the outline of the skirtboard and its intersection with the riser on a piece of scrap tread stock (B).
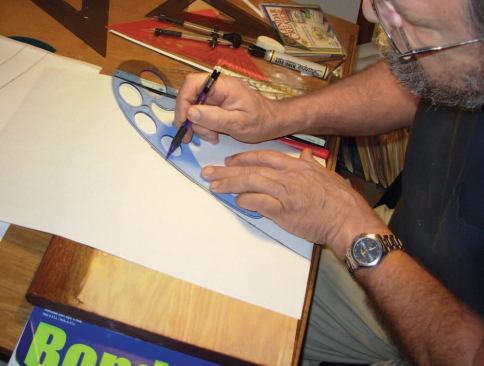
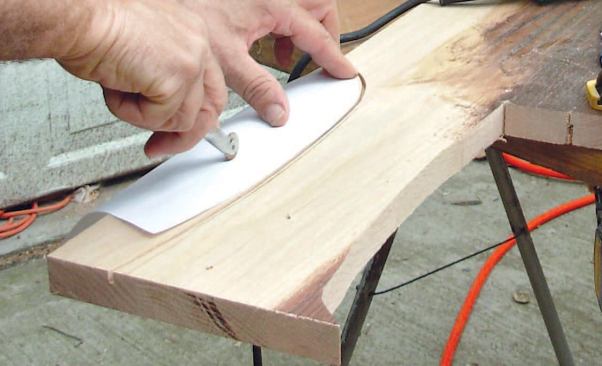
Make a Paper Pattern: I copy the outline on tracing paper
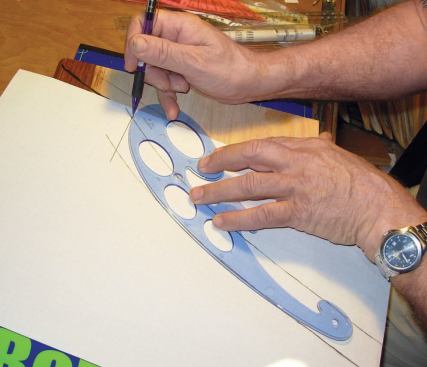
Make a Paper Pattern: Fairing the shape with a French curve.
Make a Paper Pattern: To draw the parallel line representing the…
Make a Paper Pattern: To draw the parallel line representing the outside edge of the return, I use a paper gauge to make a series of points 13/ 8 inches away from the original line, then connect the points with the French curve. (The 1 3/ 8-inch width gives me room for a 5/8-inch cove or scotia molding, without impinging on the bullnose.)
Make a Paper Pattern: I extend the riser line from the original …
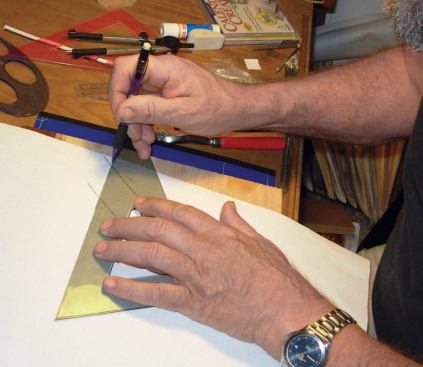
Make a Paper Pattern: I extend the riser line from the original scrap wood pattern to define the outside corner of the tread.
Make a Paper Pattern: I bisect the angle with the French curve. …
Make a Paper Pattern: I bisect the angle with the French curve. From this drawing I make the wood template I need to rout the tread and return.
As a full-time stairbuilder, I’ve learned that I can’t always rely on premilled parts, especially when staircases get complicated. For example, I constantly use factory-made treads with pre-installed returns. This works great on a straight staircase with one open and one closed stringer: I just trim the closed end so that I get the correct overhang on the open side. But on a staircase with both sides open – which requires treads with returns on both ends – things get trickier. That’s because the treads have to be ordered a couple of weeks before installation – before the exact measurement from finish stringer to finish stringer is available.
I developed the technique shown here on just such a staircase. It had eight treads open on each side, so I ordered eight extra-long single-returned treads and eight tread returns. Once the drywall and skirtboards were in place, I was able to mark each tread and then fit the returns using a pattern like the one shown. That staircase happened to have straight treads, but the method works great for curved treads as well, as this article demonstrates.
As a side note, there are two basic kinds of tread returns – straight-mitered (where the return meets the nosing at a sharp angle) and coped (where the joint has a slight radius from the milling process). Some may prefer the traditional mitered look, but I like coped returns because they can be produced quickly with a router. Plus, all my tread suppliers use coped returns, so I want my field returns to match.
Trace the Skirt
This stair has one curved tread return that I fabricated on site. I start by tracing the outline of the skirtboard and its intersection with the riser on a piece of scrap tread stock.
1
of 11
Make the Wood Router Template: It’s important to do this step …
Make the Wood Router Template: It’s important to do this step carefully: The smoother the template, the better the fit. First I use a spiked tracing wheel (typically used to transfer patterns to fabric) to transfer the drawing from the paper to my template material — a scrap piece of pine in this case.
Make the Wood Router Template: I smooth the lines with the Frenc…
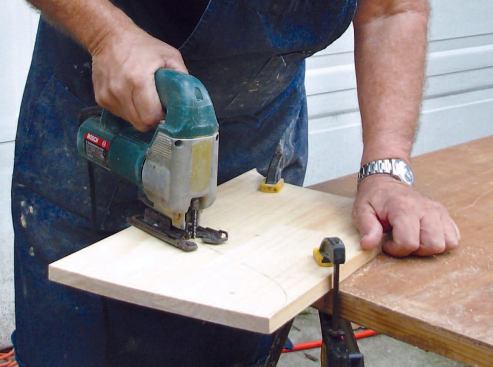
Make the Wood Router Template: I smooth the lines with the French curve before carefully cutting the pattern out with a saber saw.
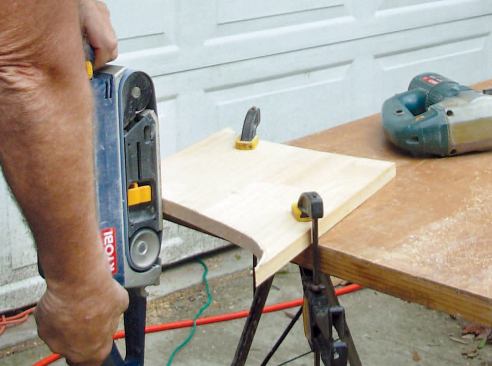
Make the Wood Router Template: I leave just a little bit of the …
Make the Wood Router Template: I leave just a little bit of the line, then sand the cut smooth to the line with a belt sander.
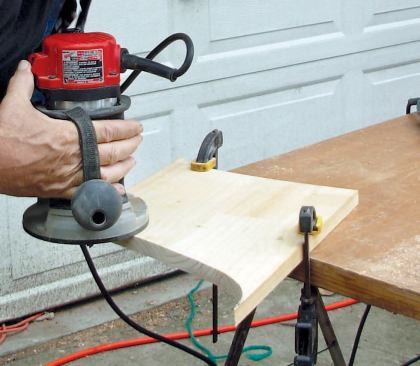
Make the Wood Router Template: At this point the top edge of the…
Make the Wood Router Template: At this point the top edge of the pattern perfectly matches the line, so I use a top-bearing pattern cutter to remove inconsistencies.
Make the Wood Router Template: I leave the edge of the pattern f…
Make the Wood Router Template: I leave the edge of the pattern flat and perpendicular to the top. I now have a single pattern that I will use to make both the return and the tread. Ordinarily, if I were making several matching treads, I would use the router's template guide to make two patterns from this template — one for treads and one for returns — then use these patterns to make the parts with a flush-trim bearing bit. In this case, however, I had only one tread to make, so I used the pine template to make both the tread and the return.
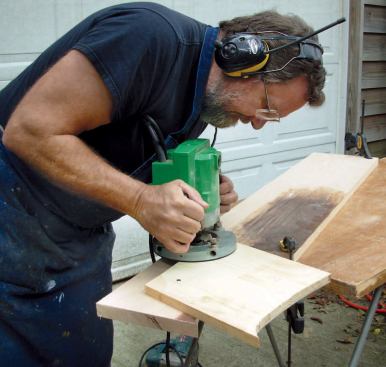
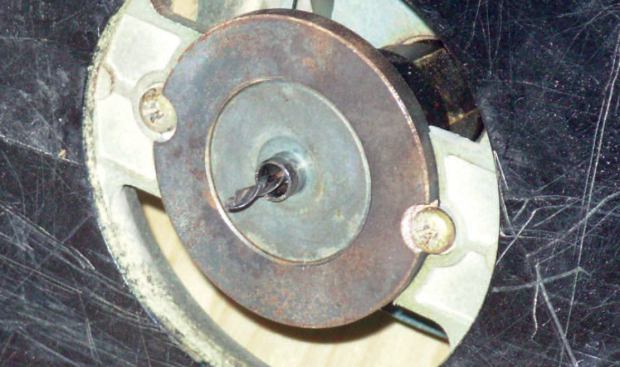
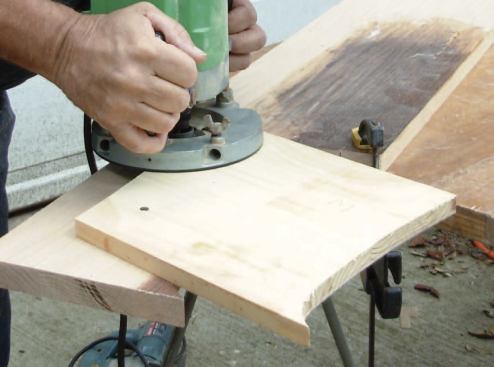
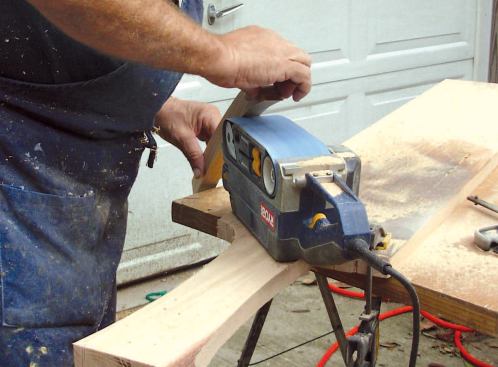
Rout the Return: The trick here was to set up my router with the…
Rout the Return: The trick here was to set up my router with the smallest bit I have — a 1/ 8-inch spiral bit — so as to remove as little wood as possible between the mating parts. The 1/4-inch template guide would keep the offset distance from the template to a minimum. I usually make my returns out of tread stock — you can get a lot of returns out of one tread!
Rout the Return: I orient my pattern parallel with the grain and…
Rout the Return: I orient my pattern parallel with the grain and attach it with two screws.
Rout the Return: I rout the front part of the joint line between…
Rout the Return: I rout the front part of the joint line between the return and the tread interface.
Rout the Return: Since the return extends beyond the tread, I ha…
Rout the Return: Since the return extends beyond the tread, I have to reposition the pattern — which is only as wide as a tread — to cut the tail end of the return.
Rout the Return: I slide the pattern along the pencil mark so th…
Rout the Return: I slide the pattern along the pencil mark so that it makes a smooth transition, reattach it with the screws, and finish the cut.
Rout the Return: Before cutting out the return, I transfer the o…
Rout the Return: Before cutting out the return, I transfer the outline of its outside edge with the tracing wheel.
Make a Paper Pattern
I then copy the outline on tracing paper, fairing the shape with a French curve. To draw the parallel line representing the outside edge of the return, I use a paper gauge to make a series of points 1 3/8 inches away from the original line, then connect the points with the French curve. (The 1 3/8-inch width gives me room for a 5/8-inch cove or scotia molding, without impinging on the bullnose.)
Next I extend the riser line from the original scrap wood pattern to define the outside corner of the tread, then bisect the angle with the French curve. From this drawing I make the wood template I need to rout the tread and return.
Make the Wood Router Template
It’s important to do this step carefully: The smoother the template, the better the fit. First I use a spiked tracing wheel (typically used to transfer patterns to fabric) to transfer the drawing from the paper to my template material – a scrap piece of pine in this case ; then I smooth the lines with the French curve before carefully cutting the pattern out with a saber saw. I leave just a little bit of the line, then sand the cut smooth to the line with a belt sander. At this point the top edge of the pattern perfectly matches the line, so I use a top-bearing pattern cutter (D) to remove inconsistencies, leaving the edge of the pattern flat and perpendicular to the top.
I now have a single pattern that I will use to make both the return and the tread. Ordinarily, if I were making several matching treads, I would use the router’s template guide to make two patterns from this template – one for treads and one for returns – then use these patterns to make the parts with a flush-trim bearing bit. In this case, however, I had only one tread to make, so I used the pine template to make both the tread and the return.
1
of 12
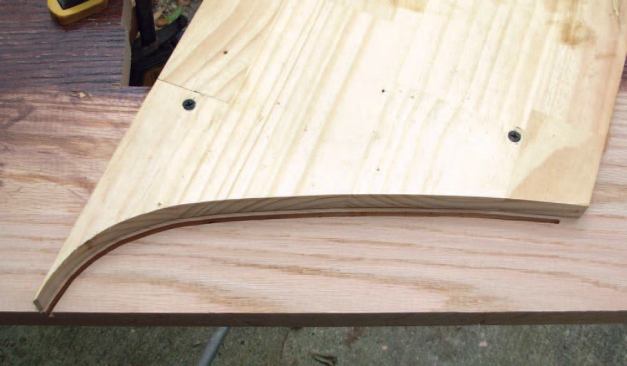
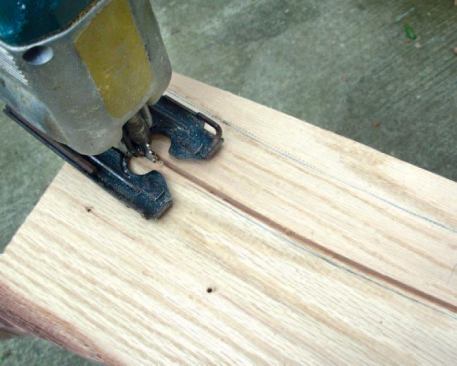
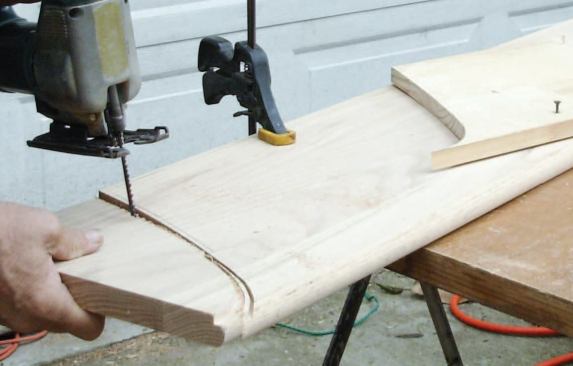
Pattern-Rout the Edge: Next, I cut out the return with a jigsaw,…
Pattern-Rout the Edge: Next, I cut out the return with a jigsaw, cutting to the outside of the routed 1/8-inch-wide channel.
Pattern-Rout the Edge: This leaves a smooth edge for the bearing…
Pattern-Rout the Edge: This leaves a smooth edge for the bearing on my pattern bit to follow.
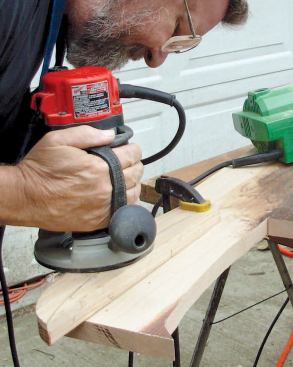
Pattern-Rout the Edge: I clean up the jigsaw cut with the router…
Pattern-Rout the Edge: I clean up the jigsaw cut with the router.
Pattern-Rout the Edge: Removing the excess beneath the original …
Pattern-Rout the Edge: Removing the excess beneath the original 1/8-inch channel.
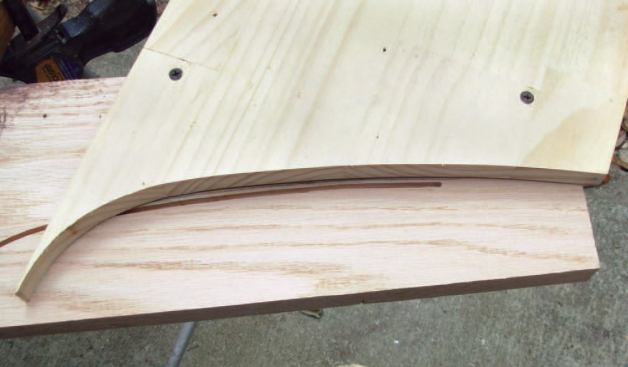
Pattern-Rout the Edge: At this point I go ahead and cut out the …
Pattern-Rout the Edge: At this point I go ahead and cut out the outside edge of the return, carefully following the line with the jigsaw, then fine-tuning the edge with a belt sander.
Pattern-Rout the Edge: I want this edge to be as smooth, flat, a…
Pattern-Rout the Edge: I want this edge to be as smooth, flat, and perpendicular as possible, since it will guide the 1/2-inch-radius round over bit I use to bullnose the edge of the return. For now I set the return aside to work on the tread.
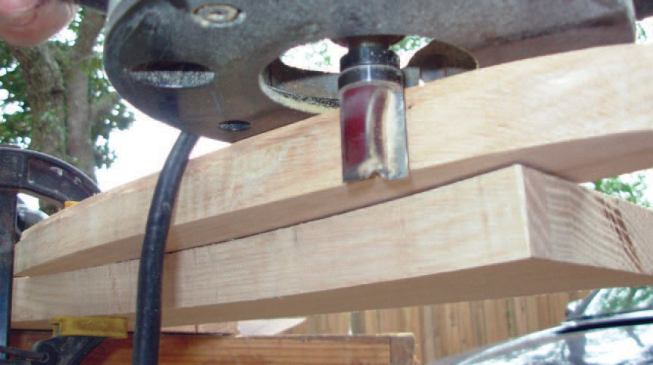
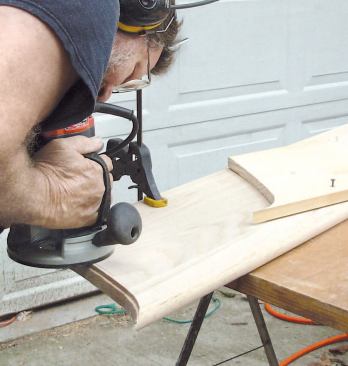
Repeat for Treads: I follow the same sequence for the tread as …
Repeat for Treads: I follow the same sequence for the tread as for the return, first routing a groove with the 1/8-inch bit.
Repeat for Treads: Cutting away the waste.
Repeat for Treads: A smooth arc remains for the top-bearing patt…
Repeat for Treads: A smooth arc remains for the top-bearing pattern bit to follow.
Repeat for Treads: I flush-trim the excess.
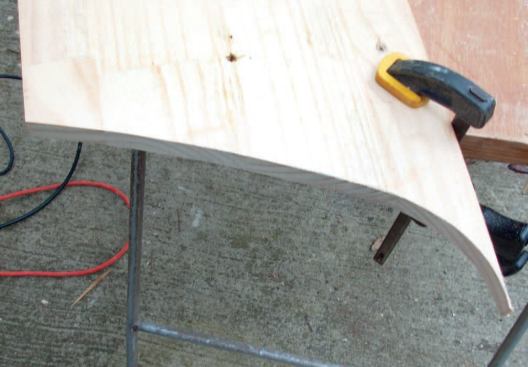
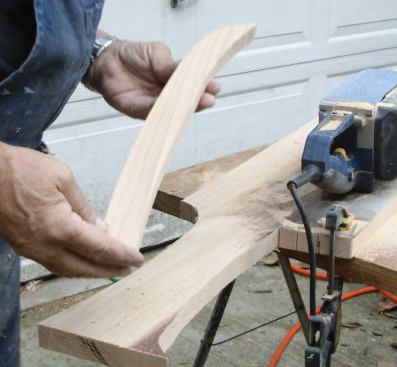
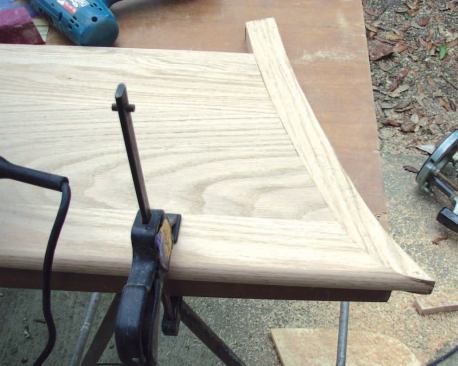
Repeat for Treads: Testing the fit: Though made with a single t…
Repeat for Treads: Testing the fit: Though made with a single template, the joint is better than that on some of the factory treads I’ve seen. Some minor sanding is all it needs.
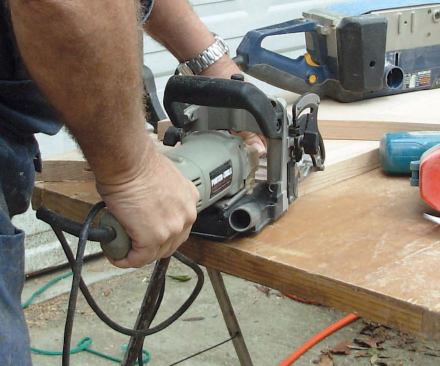
Repeat for Treads: In preparation for glue-up, I cut three biscu…
Repeat for Treads: In preparation for glue-up, I cut three biscuit slots toward the back of the tread where the curve is flatter.
Rout the Return
The trick here was to set up my router with the smallest bit I have – a 1/8-inch spiral bit – so as to remove as little wood as possible between the mating parts. The 1/4-inch template guide would keep the offset distance from the template to a minimum.
I usually make my returns out of tread stock – you can get a lot of returns out of one tread! I orient my pattern parallel with the grain, attach it with two screws, and rout the front part of the joint line between the return and the tread interface. Since the return extends beyond the tread, I have to reposition the pattern – which is only as wide as a tread – to cut the tail end of the return. I slide the pattern along the pencil mark so that it makes a smooth transition, reattach it with the screws, and finish the cut. Before cutting out the return, I transfer the outline of its outside edge with the tracing wheel.
Pattern-Rout the Edge
Next, I cut out the return with a jigsaw, cutting to the outside of the routed 1/8-inch-wide channel. This leaves a smooth edge for the bearing on my pattern bit to follow. I clean up the jigsaw cut with the router, removing the excess left beneath the original 1/8-inch channel.
At this point I go ahead and cut out the outside edge of the return, carefully following the line with the jigsaw, then fine-tuning the edge with a belt sander. I want this edge to be as smooth, flat, and perpendicular as possible, since it will guide the 1/2-inch-radius roundover bit I use to bullnose the edge of the return. For now I set the return aside to work on the tread.
Repeat for Treads
I follow the same sequence for the tread as for the return, first routing a groove with the 1/8-inch bit and cutting away the waste to leave a smooth arc for the top-bearing pattern bit to follow. I flush-trim the excess, then test the fit: Though made with a single template, the joint is better than that on some of the factory treads I’ve seen. Some minor sanding is all it needs.
Next, in preparation for glue-up, I cut three biscuit slots toward the back of the tread where the curve is flatter.
1
of 5
Glue on the Return, Install: To accommodate the expansion and c…
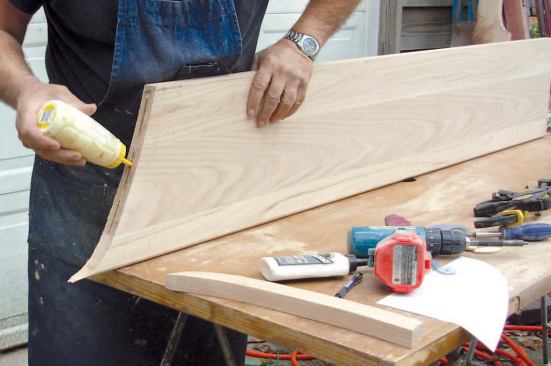
Glue on the Return, Install: To accommodate the expansion and contraction of the 111/4-inch-wide tread, I glue only the front 3 inches of the return and attach the rest of it with biscuits. I glue the biscuits in place in the tread only, and am careful to keep glue off the edge.
Glue on the Return, Install: After checking the fit, I apply glu…
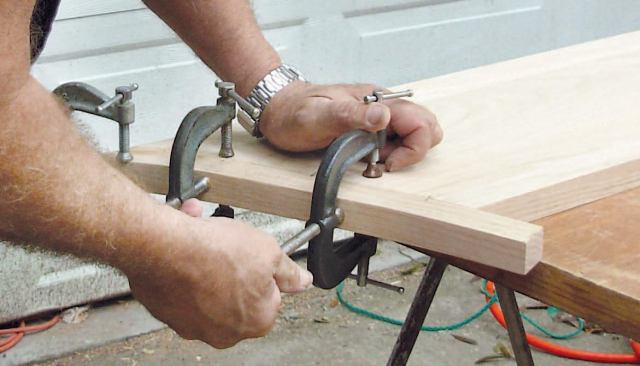
Glue on the Return, Install: After checking the fit, I apply glue to the first 3 inches of both the tread and the return, then clamp the joint together.
Glue on the Return, Install: I cut off the tail of the return 1 …
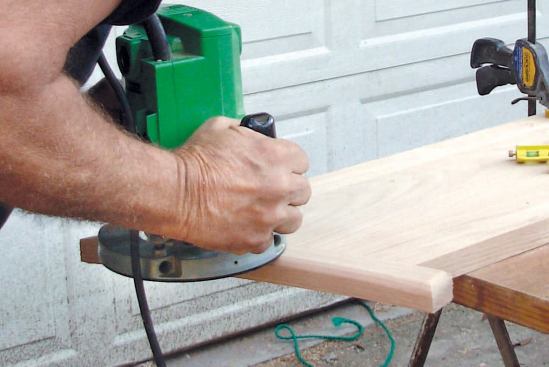
Glue on the Return, Install: I cut off the tail of the return 1 3/8 inches from the back edge of the tread, making the cut 90 degrees to the skirtboard, then bullnose the return.
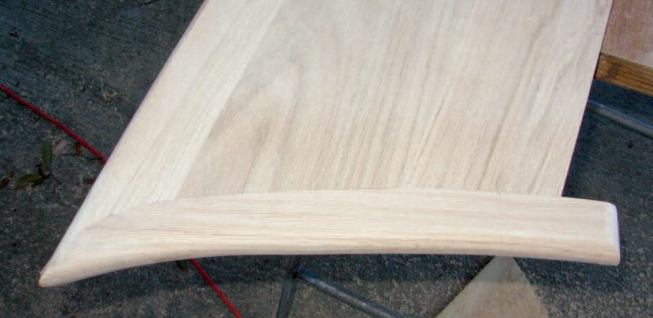
Glue on the Return, Install: I sand the assembly smooth.
Glue on the Return, Install: The completed tread is stained, fin…
Glue on the Return, Install: The completed tread is stained, finished, and installed.
Glue on the Return, Install
To accommodate the expansion and contraction of the 11 1/4-inch-wide tread, I glue only the front 3 inches of the return and attach the rest of it with biscuits. I glue the biscuits in place in the tread only, and am careful to keep glue off the edge. After checking the fit, I apply glue to the first 3 inches of both the tread and the return, then clamp the joint together. I cut off the tail of the return 1 3/8 inches from the back edge of the tread, making the cut 90 degrees to the skirtboard, then bullnose the return, sand the assembly smooth, stain, finish, and install.
Bruce Abernathy is a stairbuilder in Niceville, Fla.