Gary Striegler
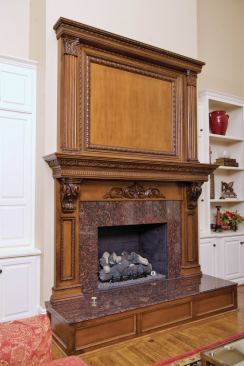
All the parts for this ornate mantel were fabricated and install…
When I began working as a carpenter in 1972, a fireplace was a luxury for a home, and homeowners had to decide if their budget had room for this extravagance. Now, for most homes I build, the question is, how many fireplaces can we afford? A fireplace in any room creates strong emotional responses and serves as a focal point.
The woodwork, or mantel, around a fireplace is a great place for craftspeople to show off their skills. I do my best to make the fireplace and mantel fit the style of the home as well as the scale of the room. In the home shown here, the fireplace was located in the great room, with high ceilings and tall cabinetry on both sides. The client chose a style that featured a single overmantel panel—to hold a large painting—framed by upper pilasters with a pediment on top. The clients also wanted a raised granite hearth and granite around the fireplace opening. All in all, the mantel would be more than 12 feet high.
Before I start planning a mantel, I find out the minimum clearance to combustibles that is allowed for the jurisdiction where I’m working. This figure varies from town to town, so I make sure that the fireplace will pass inspection. In my experience, 8-inch side clearance to the firebox opening and 10-inch clearance below the frieze is standard in most jurisdictions.
As I sketch the mantel, I keep in mind how the parts will go together. When determining the width, height, and depth of each piece, I visualize how they fit with everything else. I try to offset the decorative layers of the mantel by at least 3/4inch—a purposeful step looks better than a gap. I also leave ample room for trim pieces that run from one piece onto the next. For example, the field behind a pilaster must be wide enough for the base trim to wrap around the pilaster and die onto a flat space.
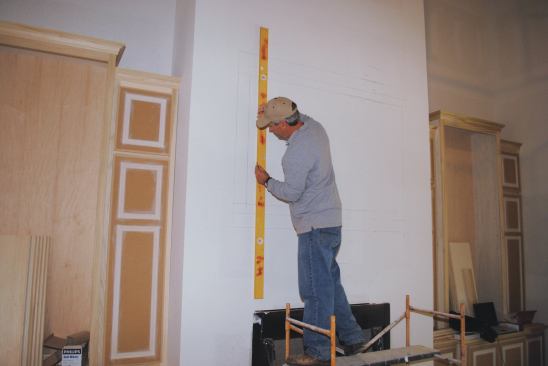
Once I’ve decided on the mantel’s details and dimensions, I make a story pole to lay out the actual dimensions of the sections, putting the horizontal layout on one side and the vertical layout on the other. I then use the story pole to lay out the mantel on the wall and to make a cut list of the parts. After marking out the various points on the wall, I connect them using a straightedge.
Overmantel panel
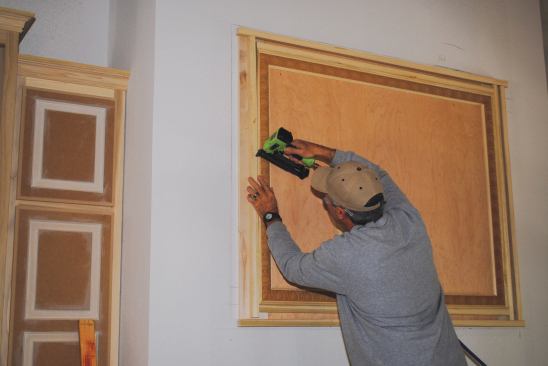
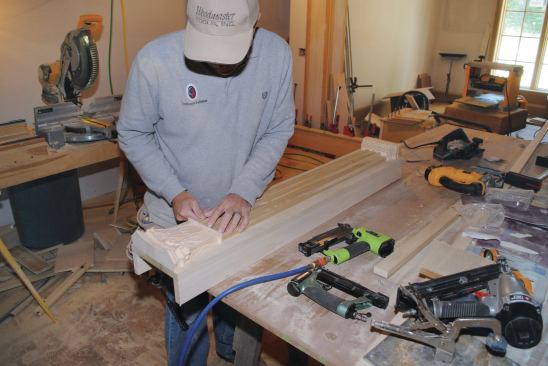
I worked with a partner on this project and while he fabricated the lower pilasters, I got to work on the overmantel field. This mantel was to be stained, so I cut and installed a large sheet of 3/4-inch stain-grade plywood for the face of the overmantel panel. I added strips of 1-by on the sides of the panel and framed the panel with egg-and-dart panel molding from White River Hardwoods, whiteriver.com. I installed a wide decorative casing around the panel molding to add visual depth to the panel.
With the overmantel panel finished, I turned my attention to the lower pilasters. I pocket-screwed their faces to the side returns to conceal the fasteners. Then, to dress up each pilaster, I created a recessed panel—by leaving a large opening and attaching stain-grade plywood to the back side of the face—and added egg-and-dart molding around it. I glued corbels to the tops of the pilasters and screwed them in from behind.
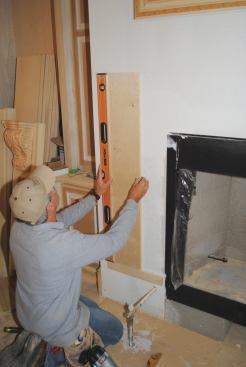
To position the pilasters, I first set the height for the top of the stone hearth that they would rest on. I attached a 1-by cleat to one side; then leveled over, marked the second side, and installed a cleat there as well. Measuring over from the firebox, I glued vertical 3/4-inch plywood cleats that fit between the returns of the pilasters. I measured down from the overmantel panel for the exact height of the pilasters and nailed them in place over their cleats.
Mantel shelf
The mantel shelf for this fireplace was created in three tiers.
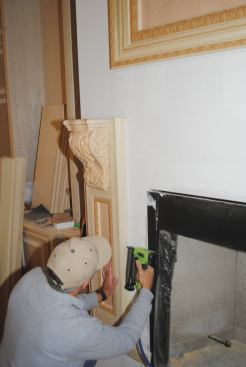
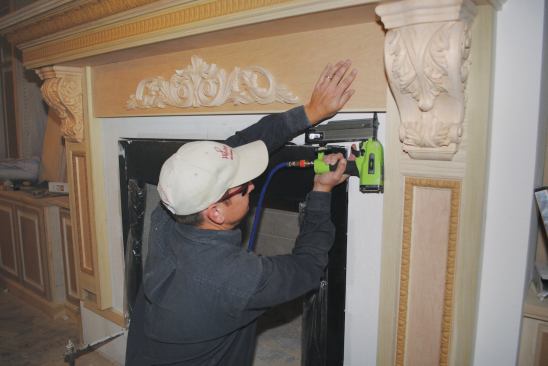
The bottom tier was a fluted frieze molding from White River. With both pilasters in place, I made sure that the two sides were at the same level and nailed a strip of plywood on top of the corbels, and glued and nailed the fluted molding to the plywood. Directly behind the molding and flush with its top, I glued and screwed a 1-by on edge to the plywood to help the molding support the upper two tiers of the mantel shelf.
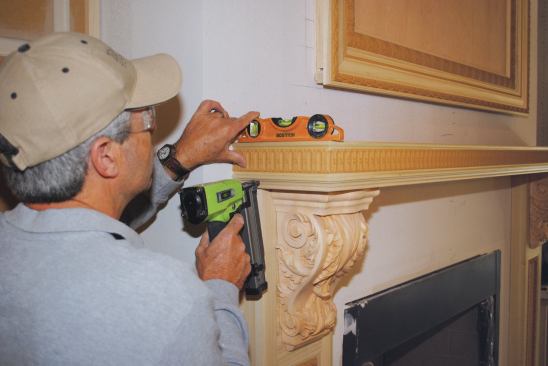
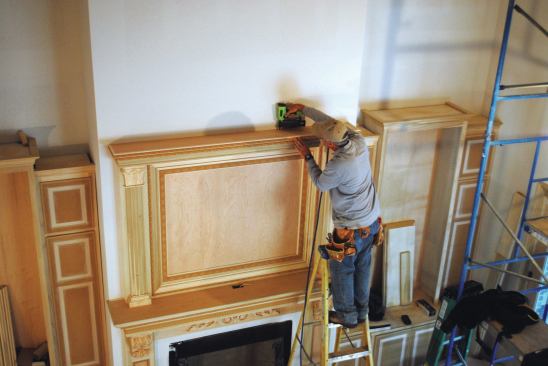
We added another strip of plywood on top of the first tier for attaching the second tier. I tacked the strip in place, and then checked the overhang of the plywood on all sides to make sure the reveals were even.
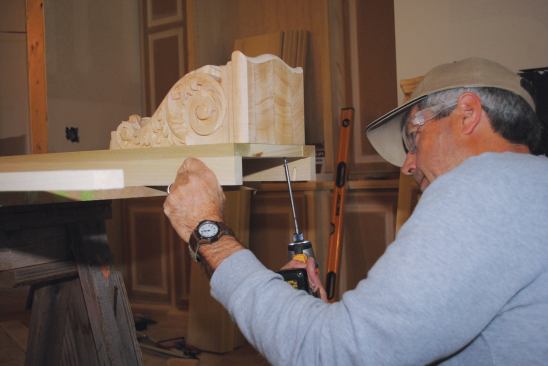
The second tier of the mantel shelf was crown molding that sprang from and attached to the second plywood strip. I made sure the corner joints and returns in the crown were perfect, but did not want to depend on the cantilevered edge of the crown to hold the top tier of the shelf. So as we did behind the molding on the first tier, we added a vertical 1-by on edge behind the crown, glued and screwed to the plywood strip below, to support the next tier of the mantel.
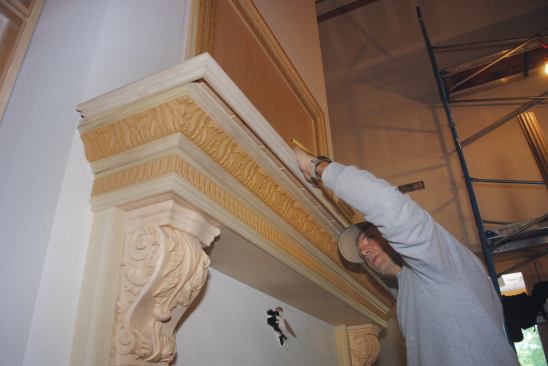
The top and final tier was a piece of stain-grade plywood with a bead of molding wrapped around its edges. It slid into place perfectly and we glued and nailed it to the 1-by cleats. As a word of caution, if the mantel has an electrical outlet (as this one did), don’t forget to cut the hole before you install the shelf.
Top Pilasters & pediment
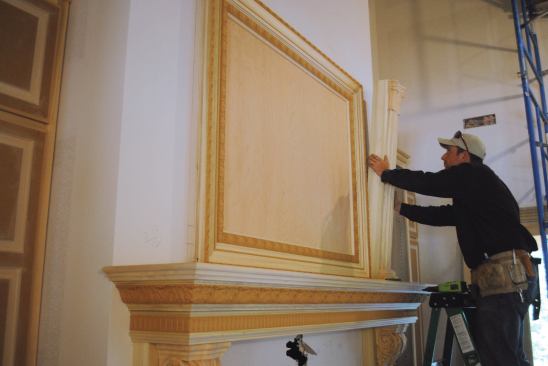
The design called for upper pilasters to flank the overmantel panel. We fabricated them on the workbench much like we did the lower pilasters. Those were topped with corbels, however, to give support to the heavy mantel shelf; the upper pilasters would support a much simpler pediment on top of the mantel, so we made them to look more like columns.
The upper pilasters started out the same as the lowers, with flat boards and returns. But then we also attached fluted molding with an ornate capital and base to the front face. The pilasters sat directly on top of the mantel shelf, and the inside edges covered the exposed edges of the overmantel.
The pediment was simply a long, skinny box that we again fabricated on the bench. We used plywood for the bottom and back and then made the sides and front from the same wide casing stock we’d used around the overmantel panel. The bottom of the box rested on top of the upper pilasters and attached to the wall. To complete the overmantel, we nailed on the top of the box.
The frieze board below the shelf was next. We made it from stain-grade plywood with a White River onlay applied. Last were the bases for the lower pilasters, which we had made earlier, but didn’t install permanently until the granite hearth went in.
Gary Striegler is president of Craftsman Builders in Fayetteville, Ark.craftsmanbuildersnwa.com