Plastered kitchen range hoods have become increasingly popular on our projects. The first time we tackled one of these was probably 10 years ago and, since then, we have honed our process for building them.
On past projects, we framed the structure of the hood ourselves, but it proved time-consuming, and it was often hard to cut an accurate curve across multiple members. For this reason, on a recent project, we worked with Archways and Ceilings, a company that produces custom CNC parts for arches, ceilings, and hoods, and pretty much anything you can think of that has a radius (archwaysandceilings.com). You tell the company what you want, and it comes back in kit form with labeled parts and a set of plans.
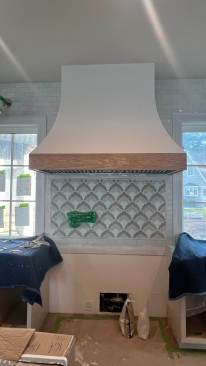
The hood in this project (for a new home in Virginia Beach) needed to fit between the 10-foot-high ceiling and a tile backsplash accent. The design called for a traditional “Tuscan” shape with a band of white oak around the bottom. Our in-house lead designer created an initial shop drawing that we submitted to Archways and Ceilings. When filling out the order form, we specified the hood-liner model (a 60‑inch Trade-Wind) that the client selected. After a few days lead time, the company sent us final shop drawings for approval. Once we signed off on them, the project moved into production.
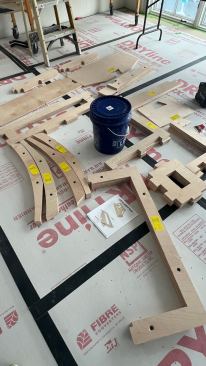
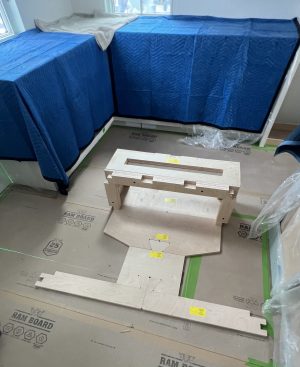
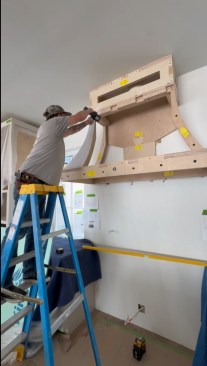
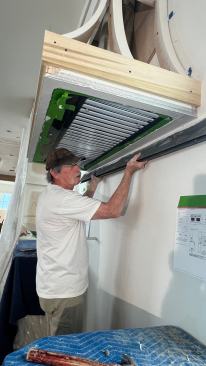
The pieces of the Archways and Ceilings Tuscan hood kit.
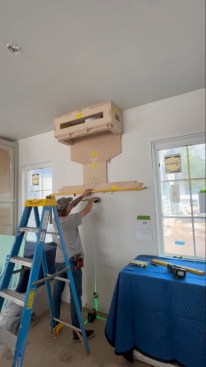
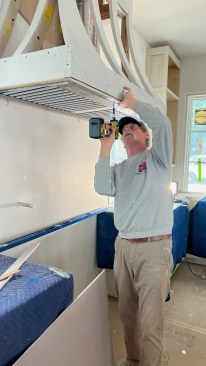
Assembling the kit proved extremely easy. It was almost like building one of those old-school Balsa-wood plane kits. Once it was screwed into studs on the wall, we installed the hood liner (in this case, we chose to install an in-line blower in the attic to cut down on noise at the range but the same basic steps apply for any hood liner). Then our HVAC contractor connected the duct work and the electrician hardwired the unit.
Prep Work
Next, we called in the plaster crew.
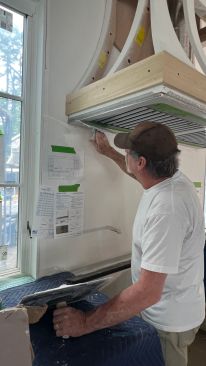
Primer. The plasterers prepped the framing by priming the wood. The primer protects the framework and helps prevent it from absorbing moisture that might cause swelling and crack the plaster.

With the lower face complete and the boards to simulate the fini…
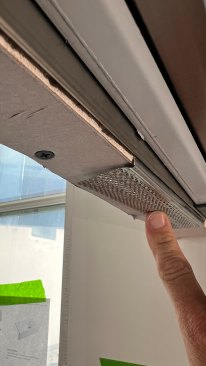
Critical separation. The plasterwork began with the underside of the hood. Though that area is the least glamorous, it still needs close attention. Here, the plaster crew installed a metal stop bead against the hood liner and corner bead on the outside edges of the hood base, using a strip of hardboard and drywall to pack out the bottom of the frame and bring the beads to the right level in relation to the hood liner. They needed to create a separation between the metal hood liner and the narrow plaster band. This would provide a clean visual break between the two dissimilar materials and prevent any hairline cracks that might otherwise occur if we installed plaster directly to the hood liner. Keeping a small but consistent break line is quite tedious, because the narrow strip of plaster that spans from the outside edge (corner bead) to the inside edge (stop bead) needs to plane out with the edge of the hood liner. But once this detail was complete, the rest of the plaster work went quickly and efficiently.
Simulator. Before the guys started “running mud,” we needed to nail down the transition from the base of the plastered curve to the band of white oak that would be installed after the plaster was complete. For a clean transition, we would have to back bevel the top edge of the white oak to mesh with the plaster at an obtuse angle. A corner bead of some type at this junction would then allow us to stop the plaster on an acute angle. In the past, we’ve used a Schluter transition piece, which leaves a nice, 1/8-inch-wide metal accent, but it wouldn’t work at the steep angle we had here. Instead, we used a sacrificial piece of poplar to simulate the white oak. The plasterers could plaster to this, leaving an acute angle once the poplar was removed.
We’ve found this method, which we call using a “simulator,” extremely helpful on many projects, especially when the process is messy, and we don’t want to spoil the finish piece.
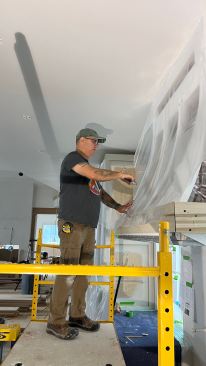
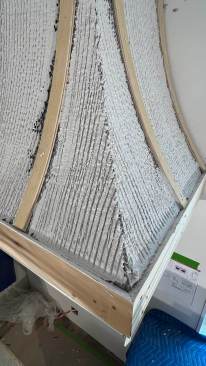
Poly and lath. Metal lath would cover the framing, but first the crew covered the frame with poly sheeting. This sheeting serves double duty: It provides protection from the moisture in the plaster, and it prevents any clumps or crumbs of plaster from falling into the hood.
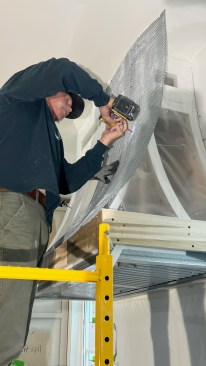
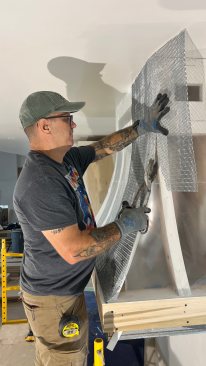
With the poly in place, the crew fastened the wire lath to the framing. If you’ve ever worked with this material, you know it is sharp along the edges; using gloves is highly recommended.
Our plasterers typically use lath screws or drywall screws to affix the lath. A lath screw looks similar to a gutter screw with a Phillips head, but its flat head is wide and thin to hold the lath securely without creating a bump when plaster is troweled over it. Drywall screws also work, but you have to drive them in the corners of the diamond spaces in the lath and set the head carefully—too proud, and they’ll create a bump; too deep, and the bugle head can drive past the metal and won’t hold the lath down.
Grounds and rod. Next up were the “grounds,” which is a traditional term for the strips installed over the lath to act as guides for screeding off excess plaster. These take away a lot of the error that can occur by freehand-troweling the plaster over the form. Of course, it helps to have a good frame to screw the grounds onto; otherwise, every error in the frame would telegraph onto the surface. The screeding is performed with a “rod”—a straight, flat piece of metal long enough to project past the corners so the plaster is smoothed across each surface plane.
Plastering the Hood
Over metal lath, plastering needs to be a three-coat process.
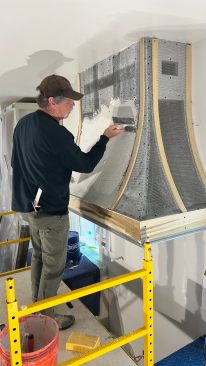
Scratch coat. The scratch coat has a high sand content. This layer is troweled on heavy enough to cover the lath, and it can be freehand-troweled to sit down slightly below the grounds.
Once the scratch coat starts to set up and becomes stiff, the plasterers rake grooves in the surface (hence the name “scratch coat”). These grooves allow the next layer of plaster to mechanically bond to the scratch coat, preventing any possible separation in the future.
Brown coat, aka base coat. The brown coat is also a heavy-duty, high-sand plaster mix that the plasterers apply with a trowel. Once enough plaster is in place, they rod it off. This is my favorite part of the process; whenever I get a chance to catch this step in action, I have to stop and watch. The plasterers make numerous passes with the rod across the grounds until they get a consistently smooth, flat surface, filling in any voids or imperfections as needed.
Once the brown coat has cured enough to be stiff, the plasterers remove the grounds and fill in the spaces left by the grounds to the level of the surrounding base coat. The brown coat is then left to cure for a full day, allowing the plaster to dry and the moisture to dissipate.
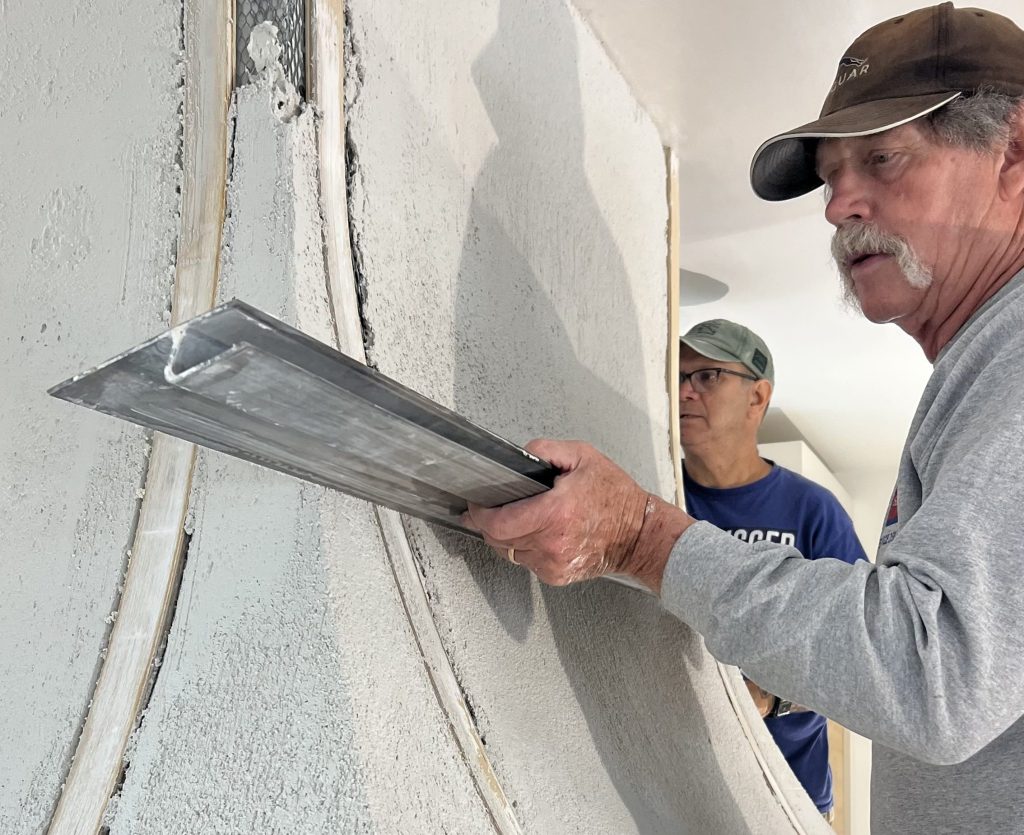
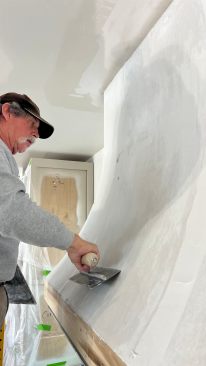
White coat, aka final coat. The final coat is a smooth, sand-free mix with a small amount of lime for workability. Our plaster crew likes to use USG’s Diamond product for this.
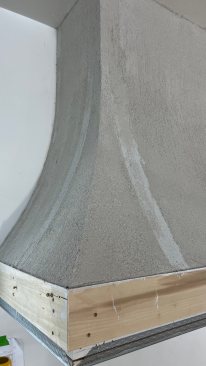
At this point, the process is basically the same as plastering over any wall surface or substrate. The white coat is applied and troweled until smooth. The crew still had to carefully work both sides of the “hip” on the hood to create a crisp transition.
In my opinion, this step, working the plaster smooth and flat, takes the most skill. When the plaster is done, we all like to say it’s “slick as glass.” It almost has a marble look to it. I feel like it’s a shame to paint it, considering its raw beauty and the fact that it is one of the oldest building crafts in the world.
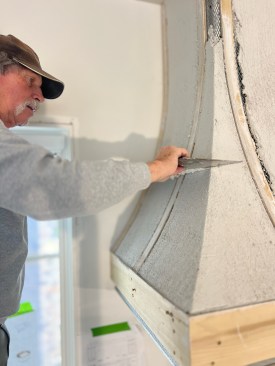
The plasterer trowels on the brown coat and then screeds it flus…
Finishing Touch
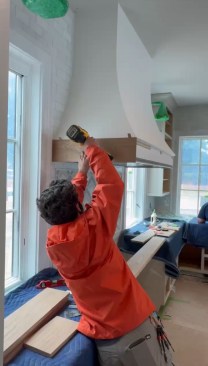
The final step was to wrap the perimeter of the base with the band of white oak. We replicated the back bevel from the simulator boards on the top of the three oak boards that form the band. One detail that added a particularly elegant flare, while also giving us tolerance for slight imperfections, was a small, 1/8-inch shadow line separating the top of the white oak and the base of the plaster curve. We also held the oak down about ¼ inch on the lower edge, again giving us a little flexibility to overcome any slight ups and downs in the corner bead. The client opted to finish the white oak with an ultra-matte clear finish, resulting in a clean, organic look that tied in with several white-oak beams and columns in the surrounding spaces.