
Linda Ferguson
The author typically floats butt joints between joists and studs…
There’s one myth about drywall that I hear all the time: “The taper will fix it.” It’s used time and again to justify poor cutting and hanging. A lot of guys believe that mud is the answer to making everything look good after they botch hanging the drywall. But the reverse is true: When you’re hanging drywall, you should be making it as easy as possible for the taper by keeping the number of seams to a minimum and locating the butt joints in easy-to-hide locations. This also means using the right number of fasteners, which is far fewer than most people think, and installing them correctly. Doing these things—along with being precise with cut-outs and with fitting panels—not only makes the taper’s life easier, but will help create a better end result.
Hanging is just the first step toward a long lasting, high-quality interior finish. Once complete, the job is handed over to the taper, who in turn hands it over to the painters. No trade wants to fix the previous work; they all just want to concentrate on doing their best work.
In this article, I’ll cover some basic techniques for cutting and hanging boards and a few tips for working efficiently without sacrificing quality. The basis for this article is the “High-Performance Drywall” demonstration that I do at JLC Live and other trade shows.
Use the Right Material
If there’s one concept I try to get across, it’s plan ahead. Many times, contractors call me a couple of days in advance, finally ready for drywall and thinking I’ll be able to drop everything and come to their site. I often have to say no, which I don’t like to do, but I can’t be in two places at once.
If it’s a big job, I usually pull in a crew to hang it, and I’ll do the taping. Most of the jobs I hang are small jobs, such as additions or kitchen and bath rehabs. The small jobs are the most demanding. The number of nail pops and cracked seams allowed is zero—it’s that demanding. On a whole house, you can get away with one or two pops or a few cracks without trashing your reputation. But customers have super-high expectations on the little jobs, where they can scrutinize every inch of wall. Hanging the boards correctly is imperative. If your fasteners miss studs, or you try to fill in overcut electrical boxes, or you haven’t minimized and hidden butt joints, you’re going to have visible seams that could even ridge or crack or screws that pop.
One of the most important reasons to plan ahead is so you can get the right material. Drywall isn’t just 4×8 sheets. These days, drywall comes in a wide range of types: regular; lightweight, fire-resistant (Type X or Type C); water-resistant; abuse-, mold-, and impact-resistant; sound-absorbing; formaldehyde-absorbing; paperless; and foil-backed. And most of these come in 24-, 48-, and 54-inch-wide panels in 8-, 9-, 10-, 12-, 14-, and 16-foot lengths. If you’re buying at the right place—a contractor yard that specializes in materials for the drywall and commercial interior trades—all these sizes will be in stock. Yes, some of these boards are more expensive, but if you’ve taken the time to familiarize yourself with what’s available and matched the material to customer expectations, you’ll deliver a better job. (Just like when calling me to do the drywall work with little notice, don’t do that to your drywall yard. Make sure materials are in stock well in advance. Schedule a tentative delivery date because smaller drywall deliveries can be difficult to schedule on short notice, as well.)
When I’m selecting the size, one of my main goals is to have as few seams as possible. Take this simple example: a wall that’s 14 feet long by 9 feet tall. If you use standard 4×12 sheets, you’ll end up with 37 feet of seams to tape. But if you use 14-foot-long by 54-inch-wide “fat boards,” you will have just 14 feet of seam: one long run between tapered edges. Those bigger boards may cost $.05 more per square foot, but you would spend a lot more than that taping out all those seams. And with fewer seams, the risk of callbacks is nil.
Lightweight drywall. For ceilings, I almost always use lightweight drywall. It’s still a full 1/2 inch thick (or a full 5/8 inch if a Type X board is required by the fire code), but it’s 30% lighter. That 30% makes a big difference. I’ve often installed it on 2-foot-on-center joists and have never had a problem with sagging between the framing members. But when I fasten the panels, I am also careful that I don’t create a sag. Keep in mind that regular 1/2-inch drywall is rated for hanging on ceilings with joists spaced 24 inches on-center, but you must consider the weight of unsupported insulation, high humidity, or even heavy textures. The new lightweight drywall is more resistant to sagging than its predecessor, but you still need to use caution when conditions are not ideal.
Hiding Butt Joints
To minimize the number of butt joints, I start by using the right size material. If I can’t eliminate butt joints, I place them as inconspicuously as possible. I often think about where furniture or pictures will be, and consider where people will congregate, so I can locate seams out of sight. I also consider the lighting in the room—natural light from windows as well as wall and ceiling light fixtures. Light angles can highlight otherwise invisible butted seams.
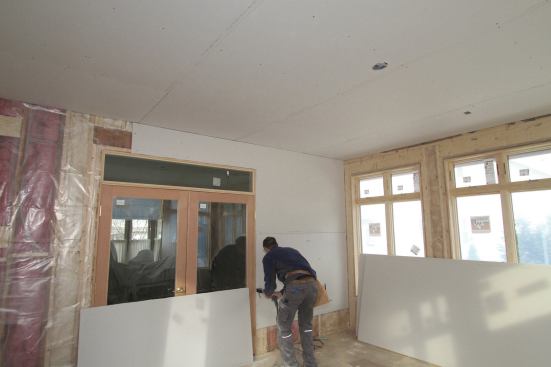
A lot of guys don’t like placing butt joints over a window or door, but I do it all the time. Of course, you shouldn’t break a sheet along a king stud, because the seam is likely to crack from structural movement or settling. Instead, I lap over the opening and notch out one corner of the panel. This results in a much shorter butt joint than if I lap the sheet over the entire opening and create a full-width (48- or 54-inch) butt joint somewhere past the opening.
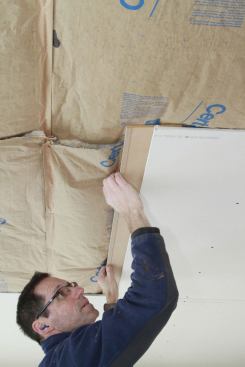
While reducing the number of butt joints is my first option, I also float all my butt joints between studs, and create a recessed joint with what are popularly called “rock splicers” (butthanger.com) or “butt boards” (trim-tex.com). These are lengths of MDF or particle board that have a wide groove routed into the face or are sawn with a shallow V in one face. With these, don’t secure the butt end of each drywall panel to the framing. Instead, let it fall in between studs or joists. As you screw the panel’s butt end to the backing, it draws the edge in slightly, creating a recessed joint. It finishes almost as well as one between tapered edges, and results in a much flatter ceiling or wall (a big advantage for kitchen cabinets and countertops, as well). These floating seams are also less likely to crack.
Framing transitions. Avoid seams at framing transitions. For example, a room with a cathedral ceiling typically has a gable end that’s framed with top wall plates about 8 feet off the floor. Don’t locate any drywall seams near those top plates. There’s too much structural movement at this transition, and usually there’s a bump in the wall that is next to impossible to hide.
The same problem exists in a stairwell. Span the framing transition with the drywall, or better yet, use an expansion joint. If you forgo an expansion joint and span the joist area with panels, don’t fasten the drywall to the wide dimension of the floor joist. Instead, fasten it only to the edge of the studs above and below the joist area. As lumber takes on humidity or dries out, it will expand or contract the greatest amount across the wide dimension. You want to isolate that dimensional change as much as possible—not put a screw into it that will move up and down at the finished surface. The same applies to flush-framed beams in floors. Avoid seams over the beam, and fasten the drywall only to the joists, not to the beam.
Fastening Panels
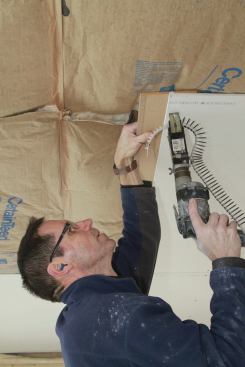
The first rule of fastening drywall: Don’t use more fasteners than you need to. With ceiling panels, put a screw at each edge and three screws in the field along each joist. With walls, two screws in the field and one at each edge is plenty. This assumes sheets run perpendicular to the framing, and you have a regular joist or stud layout at 24 or 16 inches on-center.
You don’t need to fasten the drywall to every stud or joist. Often there will be extra studs closer than the standard layout where an interior partition ties in—let these go. Most people think the more fasteners, the better. But it’s the opposite. The more fasteners you have, the more chances there are for problem. (See the video.)
A good way to reduce the number of fasteners is to use drywall adhesive. It makes for a better job: You not only use fewer fasteners, but you also add a bit of shear strength. Using adhesive, though, takes time and extra effort. So if you insist on the drywall crew using it, be prepared to pay a little more; it’s a valid cost. Customers’ expectations are very high when it comes to drywall work, and if I can do anything to eliminate screw pops, it’s worth it. (Of course, some customers with high expectations often want the low bid, too. It may take a little education to bring them around.)
Avoiding sag. Fasten across the sheet. I do this along studs and joists to flatten the panel against the framing, but it’s critical on ceilings. Don’t put one screw in one corner and then jump to the end and fasten it in the opposite corner.
Of course, when you’re hanging a ceiling, there’s a tendency to want to pin it in place and then come back and fasten along each framing member. This method can make it difficult for the drywall screw to pull the drywall tight against the framing because the screw not only has to push the drywall tight, it also has to fight against the screws on each edge. This sometimes leads to screws busting through the drywall or the screw setting below the surface even though the panel is not tight enough to the framing.
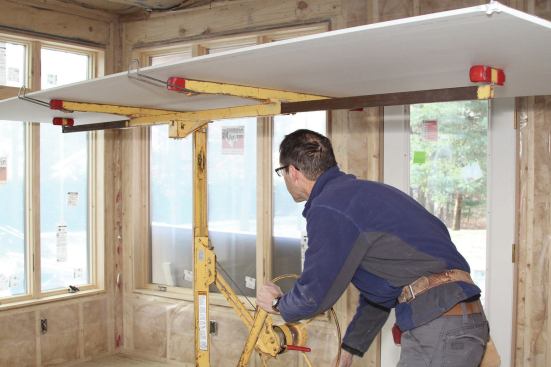
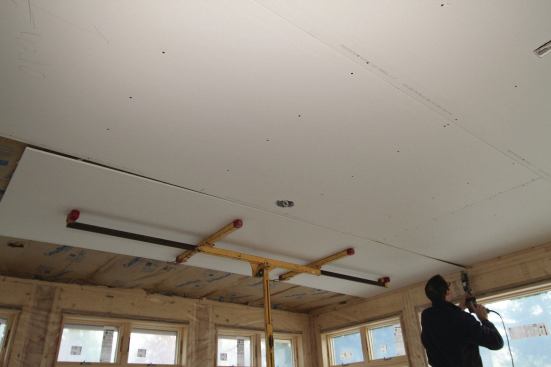
I use a drywall lift, which is an efficient way to drywall ceilings. (Lifts can be rented if you don’t own one.) With a lift, I don’t need to worry about tacking a sheet in place—the lift will support the sheet against the joists, allowing me to fasten down the line of every joist. Without a sag, there will be fewer chances for fastener pops. This particularly helps when insulation above a ceiling pushes against the drywall. (It’s worth noting that insulation can be a real problem. When I walk a jobsite to scope out the drywall, the insulation hasn’t been installed yet. I always ask how the home will be insulated because I want to use the right material. If the cavity will be blown with cellulose, or oversized batts are going to be used, I will have to use 5/8-inch material.)
Close to edges. At windows and door openings, you often have plenty of framing to fasten to. But keep the fasteners close to the opening so they will be covered by the trim. The same applies at the base of walls. If the baseboard is a short clamshell, keep the fasteners fairly close to the bottom edge so that they get covered. It helps to know what trim will be installed so you know your tolerances. Every screw that gets covered by trim is one less screw that has to be coated with compound and sanded smooth.
Floating corners. When hanging the top sheet on a wall, I usually secure the bottom edge of the sheet and then work my way up each stud, to keep the panel flat to the framing. At the top of the walls, I don’t ordinarily screw into the top plate. Instead, I hold my last screw down 6 or 7 inches and let the corner float. This will keep that edge straighter, particularly if hurricane clips are used along the top plate. These can create quite a bump if you force the edge down with screws around them. By allowing that top edge to float over the clips, they remain inconspicuous.
Tips for Hanging Drywall
Before I hang a sheet, I always bring it over to where I’m going to hang it and lean it against the studs, positioned on the floor but lined up with the studs. If there’s a light fixture on the wall, I mark it out on the sheet. I also mark the stud location right on the panel—no need to mark the ceiling. I know a lot of guys who don’t mark the ceiling or the panel because they’ve developed a good eye for following the stud. But marking doesn’t take much time compared with missing a stud—you have to stop and dig out the screw, and then you’re left with a damaged area that doesn’t fill neatly and sometimes will show through the paint. Be sure you do stop, though. Whenever you have a miss, remove it right then and there. Don’t just bury it in the drywall. This can damage the drywall, and the screw may show up after painting.
Hanging sequence. Always hang the ceiling first, before the walls, and keep ceiling panels tight to the walls. That way, wall sheets can support the ceiling edges. When hanging the walls, install the top sheet first, lifting it up and keeping it tight to the ceiling panels. Minimize the space at the top to create a good corner, but leave a space at the bottom. This bottom gap will be hidden by baseboard. If the wall is less than 8 feet, hang a full sheet at the top and put your rip along the bottom.
Applying adhesive. I apply the adhesive to the edge of each stud just before I’m ready to hang a sheet. I never apply more than I can cover with one sheet. If you get too far in front of it, the adhesive starts to cure and won’t provide good adhesion. Put a generous bead on every stud. When lifting the sheet, focus on getting one upper corner into place, keeping the sheet away from the wall so you don’t smear the adhesive across the back of the panel.
Tips for Handling & Cutting Drywall
Store drywall flat on the floor. It’s OK to have a sheet here and there against the wall, but don’t lean multiple sheets. It’s too easy for them to fall over. Someone will get hurt. I don’t put my drywall on stickers because they will cause the bottom sheets to deform.
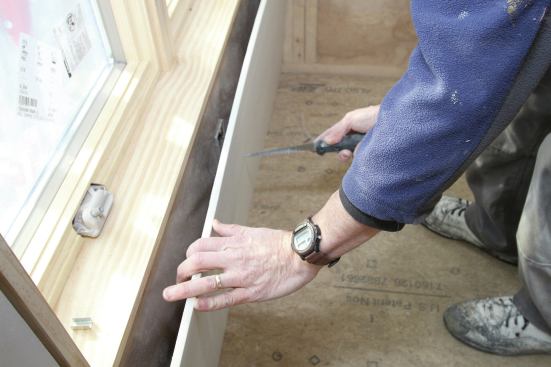
Long rips. When you’re working by yourself, the long rip on a bottom sheet of a wall can be tricky because the weight of the sheet collapses the cut before you’ve finished it, and you end up ripping the paper on the backside. To avoid this, I score the face as usual, but when cutting the paper on the backside, I start cutting an inch in from the end. The inch or so of paper will keep that piece attached until you’re ready to snap it off. One guy can manage these cuts on panels up to 12 feet. Bigger sheets, though, will require two guys. (See the video.)
Keep it short. When cutting panels to length, I tend to undercut the length by about ¼ inch. Usually there’s a bumpy edge that I knock down with the rasp edge of my drywall knife, but you need space to deal with any out-of-plumb framing. If you try to jam the piece in, it’ll bust and you’ll have a big repair to deal with. Small gaps I can fix; it’s the busted edges and gross overcuts that are difficult.
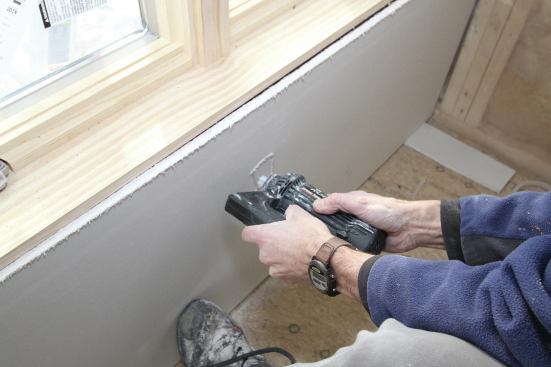
Cutouts. On a wall, most of the cutouts are going to be in the bottom sheets for outlets. Once a sheet is cut, I position it in front of the outlet. I don’t need to hold the sheet up, since I’m just marking the approximate center of the box. I simply eyeball the center and poke my hole saw through to mark the location.
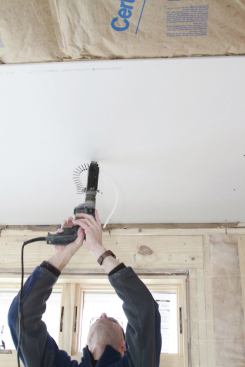
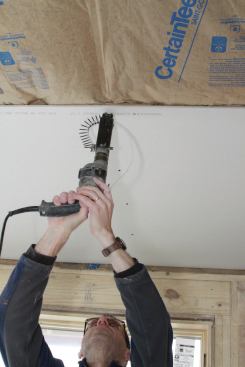
I make the actual cutout with a drywall router after I lift my sheet and install the top line of screws so that the sheet is hanging. Using the router, I plunge in at my mark, move the bit to the edge, jump over that edge, and cut out the box in a counterclockwise direction (opposite the rotation of the bit so it won’t “run” on you).
Just before I come to the end of my cut, the weight of the panel will be noticeably pushing on my cutout. To keep it from busting out before I’m done, I reach down to the bottom edge and pull the sheet out a little from the wall to relieve the pressure.
Keep in mind that the outlet cover won’t hide anything. You need to keep the cut close to the perimeter of the box. When using a router, guys have a tendency to rush. But if you take your time, you’ll save time on the job overall.
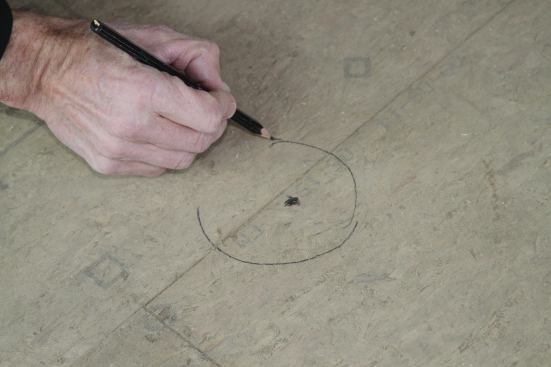
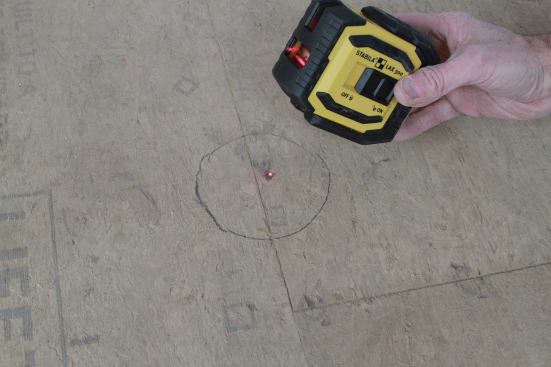
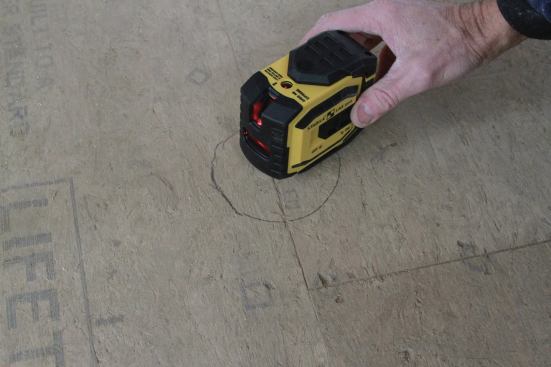
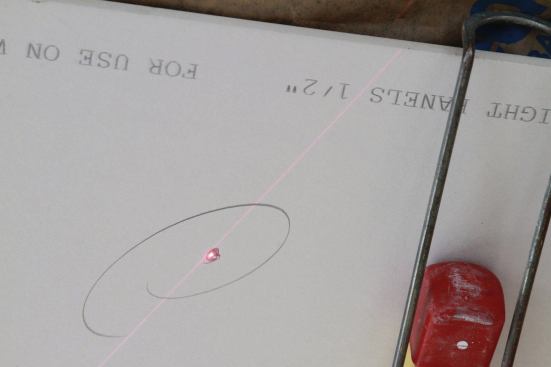
Ceiling boxes are a bit more difficult to locate because you can’t get your head above the sheet to eyeball the location. I use a small laser to project a dot on the ceiling to find the box location. Since you’re aiming for the center, you have a lot of leeway and don’t need to be precise; you just need a mark on the ceiling that will allow you to plunge the router bit somewhere in the middle of a box.