JLC contacted long-time JLC contributor and JLC Live presenter Myron Ferguson to plumb his expertise on what can go wrong with drywall and how problems can be prevented. Myron started us off with an overview, before we dove in with specific questions.
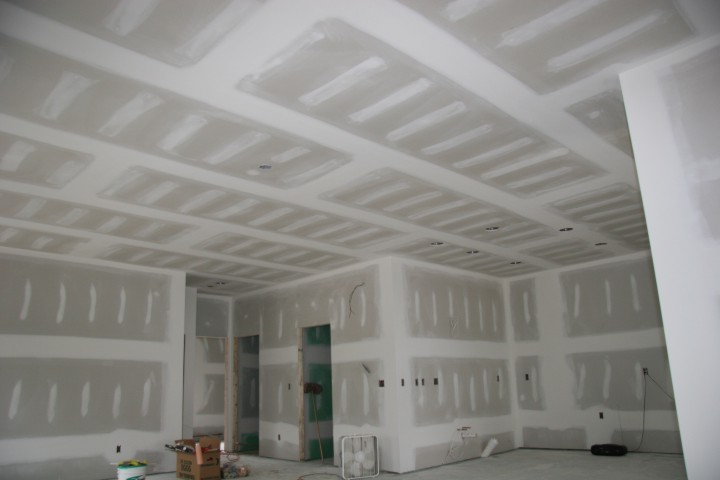
M.F.: Someone joked to me recently, saying, “It’s only drywall—anyone can screw it up!” But the truth is, it’s very easy to do a lousy job with drywall. There are a lot of good basic rules to follow, and it all starts with the quality of the hanging job: Use longer sheets to minimize butted seams, run the boards perpendicular to the framing, use screws instead of nails, use drywall adhesive on the framing in the most visible areas, don’t use too many screws, and use the proper length screws. Most importantly, don’t depend on the tapers to fix problems that were created by the hangers.
It’s not just the drywall. Expectations for completed drywall work are usually very high, at least from the homeowner’s perspective. People expect a perfectly smooth, blemish-free surface, and they expect it to look that way years after the project is completed. Part of my job is managing those expectations. I can do a Level 5 finishing job in a room, but a bad paint job can make the walls and ceiling look terrible. If a builder is investing time and money into a high-level drywall finish, they should also hire a first-rate painter.
Both drywall contractor and general contractor play a role in achieving a high-quality finish. For the drywall contractor, high-quality work requires taking the time needed. Always use the best tools and the best materials. Getting in and out as quickly as possible, scraping by with minimal tools, and low-balling the materials are not compatible with doing first-rate work.
For the general contractor, make sure you have given the drywall crew enough time on the schedule to do their best work. Create the best working conditions possible. The work site should be clean and wide open so that the drywall crew can work quickly and efficiently.
It’s not just the conditions for the crew; think about conditions for the materials, as well. Controlling the temperature, humidity, and airflow before, during, and after doing drywall work is also a huge factor and one of the best ways to ensure the lasting quality of finished drywall.
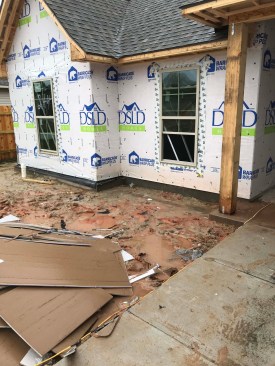
Wet, rainy conditions can lead to damp interiors. If the interior is not conditioned before installing the drywall, the chances for a lot of fastener pops and seam cracks are high.
Large construction companies always seem to be looking for ways to increase production in the drywall phase of their projects. But speeding up the process usually comes from cutting corners, and cut corners typically result in callbacks that end up adding time to the overall project. No matter the size of the project, never lose sight of the quality of the results. This quality is not just what the job looks like when you leave, but how well it endures.
JLC: Every contractor has seen a nail pop, what causes them?
M.F.: The name of the defect is a little misleading because nails are rarely used today. I recommend that screws be used exclusively for fastening drywall. Screws are much more stable fasteners than nails, but they can “pop” as well, causing the surface of the drywall to bump out over the fastener head.
Screw pop happens when the screw head pushes out from the drywall surface and the compound coating along with it. But the opposite is also possible. If not enough compound is used over the screw indentation, a slight depression will show in the drywall surface. It’s also possible for the framing or drywall to expand after taping is finished which can pull the screw in slightly and cause an indentation.

There are many things that can cause these fastener pops. One of the most common is hanging the drywall when the framing is too wet. As the wood dries, it shrinks and pulls away from the drywall. Misaligned and twisted framing can also contribute to fastener failure.
Another common cause is having a screw is set to proper depth, but without pulling the drywall tight to the framing. If the drywall ever gets pushed tight to the framing, the screw head will pop. Any fastener that misses or is not securely anchored into the framing member may work loose over time. If you miss, don’t leave the screw in place.
JLC: What’s the best way to prevent fastener pops?
M.F.: From the contractor’s standpoint, the most important thing is controlling temperature, humidity, and airflow in the rooms where the drywall is going. Wet framing is one of the biggest culprits here.
The moisture content should be tested, but it rarely is. Using common sense can go a long way here. If the building has never been heated and has never had time to dry out after framing in a wet climate, or in wet conditions, then the contractor should make sure that the framing has a chance to dry out before insulating and before installing any vapor retarders.
If I am concerned that the framing is wet, I will test and record the results so that I have the info in case future problems should arise or if I feel like the job is being rushed. I generally like to see a moisture content of 10% or less. By the time the electric, plumbing, and heating are roughed in, enough time has usually gone by to dry out most buildings unless the conditions for drying are very poor, such as high humidity, rain, or propane space heaters being used.
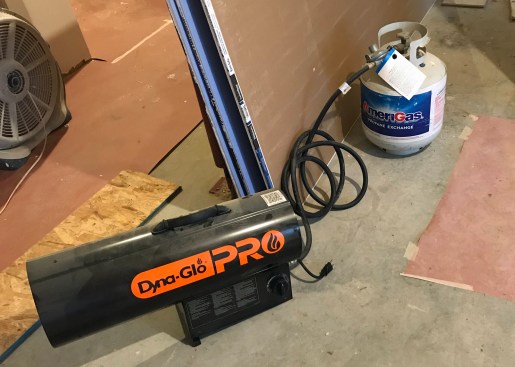
Propane heaters add moisture to the air, so salamanders are a poor choice to run when trying to dry out the shell or to speed up the drying time of joint compound.
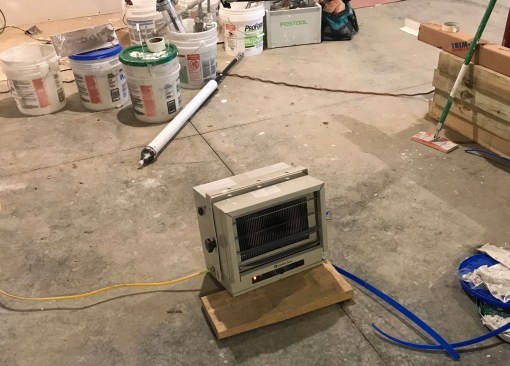
Electric heaters not only will warm the work space but also will help dry the interior.
One of the byproducts of combustion is water vapor, so running propane heaters in a dried-in space will warm it up but won’t dry it out. Use electric heaters, fans, and dehumidifiers to dry the space.
Another huge source of moisture can be the basement slab curing. In every case, it is the contractor’s responsibility to have the frame properly dried before calling in the drywall contractor.
JLC: What part does the drywall installer play in avoiding screw pops?
M.F.: To start, the drywall installer needs to fasten the drywall correctly. I make certain that the panel is tight against the framing. The nose of a screwgun helps to push the panel tight to the framing, which is another advantage of screws over nails.
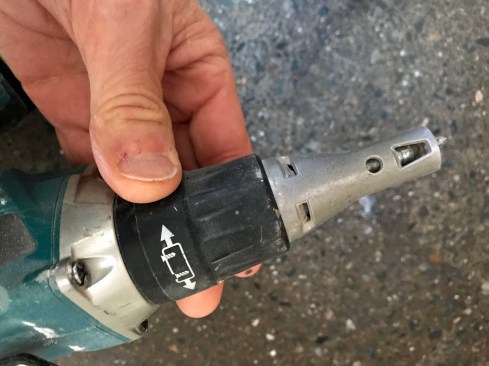
To minimize nail pops, adjust the depth of drive so the screw is set just below the face with breaking the paper (about 1mm). When driving the screw, keep the drywall tight to the framing.
Screws should penetrate into the wood framing 5/8 inch; longer is not necessarily better. (Nails, if used, need to penetrate the framing a least 7/8 inch.) I typically use 1-1/4-inch (32mm), coarse-thread screws for both 1/2-inch- and 5/8-inch-thick drywall, and 1-inch (25mm), fine-thread screws when fastening drywall to steel studs or resilient channel.
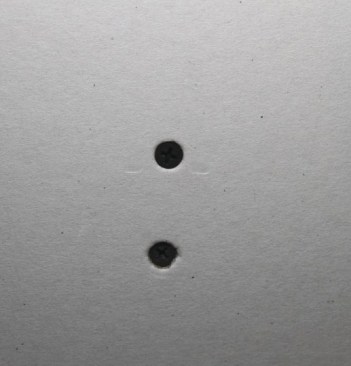
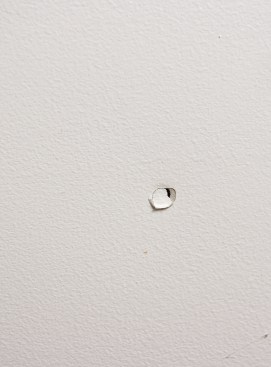
The top screw is driven properly, but the bottom screw is overdriven and has broken the paper around the screw head.
Don’t use too many screws. For walls framed 16 inches o.c., place screws every 16 inches along studs, no more; every 12 inches for 24-inch-o.c. framing. For ceilings, space fasteners every 12 inches along joists for both 16- and 24-inch-o.c. framing.
When properly set, a screw should not damage the drywall core or even tear the paper face. The screw head should be set about 1mm below the drywall face. If a screw is set too deep, the panel is more likely to pop loose.
Underdriven screws are obvious, and easy to detect. Just run the taping knife over the screw before applying compound. If you hear the knife click when it hits the screw head, then the fastener has to be set deeper. If you try to hide an underdriven screw by coating with more compound, you’ll end up with a bump of compound that will look really bad.
With an overdriven screw, the fastener breaks through the paper face of the drywall, creating a much weaker connection than an underdriven screw. Often an overdriven screw shows up right away because the panel is loose. Overdriven fasteners typically are corrected by the taper when he does his pre-taping inspection (see “Prepwork Before Taping,” Aug/19). A worse case is having this weak connection pop when subject to even minimal structural movement or expansion and contraction of the building materials.
The most important thing is adjusting the screw gun to the particular person and the particular situation you are in. A stronger, more aggressive person needs a different adjustment than someone who may not push on the gun as hard. As the driver bit gets worn, the adjustment needs to change; attaching 5/8-inch drywall (which is harder than 1/2-inch) will require changing the adjustment. It’s a fine line between driving the screws not deep enough—just right—and too deep.
I prefer to use adhesive, as well. It’s not a must but does improve the job and limits the number of problems common to fastening drywall. I also do it to reduce the number of fasteners. With adhesive on each stud or joist, the number of fasteners needed can be reduced by up to 75 percent. An added benefit is that the adhesive strengthens the structure by increasing the panel’s tensile strength by up to 100 percent, and its shear strength by up to 50 percent.
One way to cut down on the number of fasteners is to secure the drywall with an approved ASTM C557 standard drywall adhesive.
When using adhesive, apply a 3/8-inch-wide bead to each framing member to within 6 inches of the edge of the drywall. Install fasteners on 16-inch centers along the perimeter of each panel immediately after hanging it.
In some cases, adhesive is required (for an interior shear wall, for example). If this is the case, remember to let the inspector know beforehand that you’ll be using adhesive so they can schedule an inspection in progress. Otherwise, take photos to back up your assertions. Increasingly, photos are accepted by the building department.
JLC: You began by saying we can’t depend on the taper to fix what the hanger’s done. Besides fastening, what are the other mistakes that can result in drywall blemishes or callbacks?
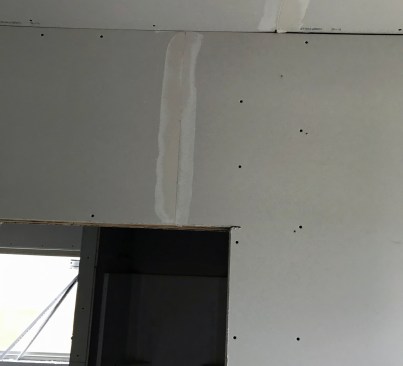
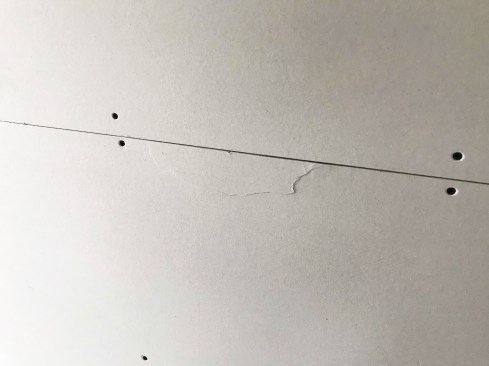
MF: One of the most common is installing panels so the butt end aligns with the edge of a window or door opening. This is a rookie mistake; it seems plausible for layout, but the butt joint will crack the tape if there is shrinkage in the header. Wood shrinks more across its width, so the wider the header, the more likely this will happen. The crack can also appear below a window, too. Butt joints are very vulnerable to cracking.
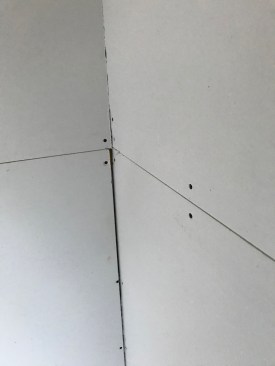
This butt joint is OK, but just barely. Note that all the butt joints have been prefilled with setting compound.
The way to prevent this is to not place seams close to the edge of opening. Place the sheet so the panel covers the corner, and the butt joint falls somewhere in the middle of the the opening, then cut out drywall in the opening. The joint can be any way in the opening, but should be no closer than 7 or 8 inches from the corner.
Butt joints anywhere on the wall are often problems because they don’t start out as a recessed seam. They basically start as a bump that needs to be blended in properly.
Linda Ferguson
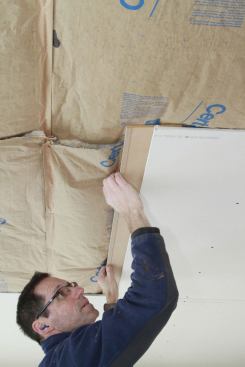
The author typically floats butt joints between joists and studs, and creates a recessed joint with a backing board.
Linda Ferguson
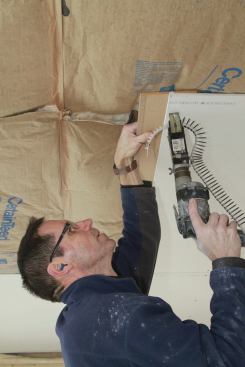
When the panel's butt end is screwed to the backing, it draws the edge in slightly, creating a recessed joint.
The best way to handle them is by “floating” butt joints between joists or studs and securing them to beveled backing boards that create a recessed seams.
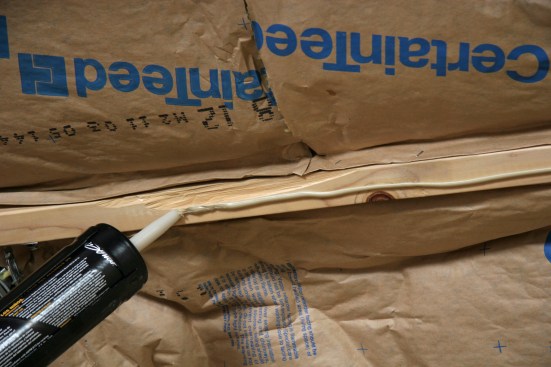
On finishing jobs, I don’t always get to hang the drywall and have to deal with butt joints that land on the studs and joists. In these cases, I will prefill butted seams, using a setting compound. Prefilling is also needed for any large gaps and for any repairs.
Any large crack (over 1/8-inch) or void needs to be filled with a setting compound. This prefill should cure before taping.

Prefilling butt joints with a setting compound prior to taping will help stablize the joint.
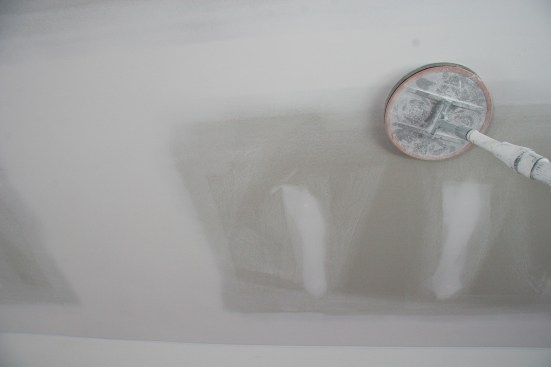
Overcuts and blowouts at electrical boxes are common problems. The cover plates really don’t cover much more than a 1/4-inch gap. The tapers will usually catch these while taping, but to help them notice, I like to circle the box and point out the area that needs to be patched.
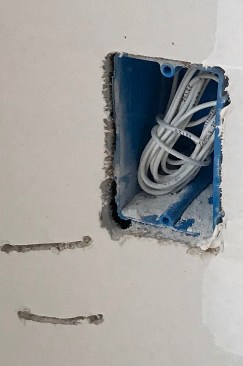
The cutout for this electrical box is overcut in the lower left corner. This and the gouges from sloppy handling of the cutout tool will need prefilling, tape and two coats of finish to fix.
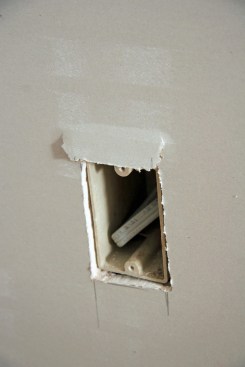
Cut-outs have to be precise. Undersizing the opening will lead to blowout like this that will have to be cut out and the large void prefilled with setting compound before tape and finish.
Fixing a blowout requires tape embedded in compound and a couple of finish coats to conceal. I always encourage people to take their time and be careful cutting out with the drywall router. A mistake will cost the finisher at least four minutes per mistake.
Broken edges need to be repaired (the broken area cut out and the void prefilled with a setting compound) before taping and finishing the seam.
JLC: What are the most common taping problems?
M.F.: There’s a lot of detail to know about taping drywall. Inexperience is often the problem. For example, rookie tapers often don’t bed the tape in enough mud. This is the kind of thing we covered in the article “Taping Drywall Seams” (Jul/2017).
But even experienced tapers run into problems. The failures I see when I am called in to consult are often climate related. When drywall seams are taped, the air, surface, and compound temperature should be at least 55°F, with 65°F to 70°F being ideal. It’s a good idea to establish the ideal temperature at least a few days before the drywall hanging starts. Once the hanging and taping are underway, maintain a constant temperature — don’t work in 80°F weather during the day, then let the temperature drop to 45°F at night. The drywall phase is an important part of the job, so don’t try to save a few dollars on heat. In addition, provide adequate ventilation and airflow to help remove excess moisture.
This joint cracked because the second coat was applied before the first coat had cured. The building was not heated, which delayed curing.
Cold and damp weather will adversely affect the taping job, delaying drying times and possibly softening the panels. Hot and dry weather can cause problems, too. Heat can affect the joint tape bond. Hot, dry weather hastens drying, which can result in poor bonding of the tape, edge cracking, and excessive shrinkage of compound. So take some precautions in hot and dry conditions. Eliminate drafts, work shorter joint lengths, use faster setting compounds, and don’t weaken the compound by adding excess water.
JLC: How about sanding? We often see ridges telegraphing through the paint where it looks like the mud wasn’t sanded enough.
M.F.: Under sanding is common over screws in the face of the drywall. Just the indentation has to be filled and then sanded flat so that there is not any buildup of compound around the screw head. There is a smear of mud between fasteners that occurs on the second and third coats, but not a build-up.
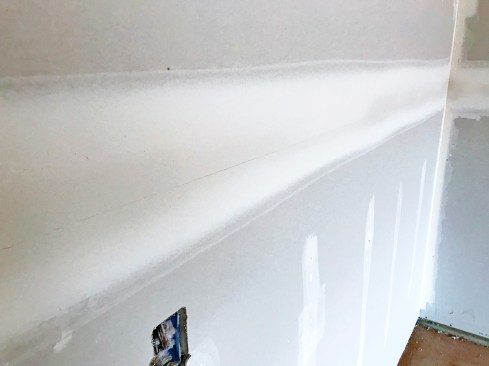
When sanding all edges of the compound should be sanded so they blend into the surrounding surface (no unfeathered edges).
Oversanding can certainly happen, too; it creates concave seams or exposes the tape, which is especially common on inside corners when not enough mud was applied in the first place. Because lightweight compounds are preferred for the finish coats nowadays (these compounds are softer than the traditional heavy-weight compounds), you should never use coarser than a 220 sandpaper grit. 220 grit will minimize scratches in the compounds and won’t rough up the paper face.
JLC: What should a contractor look for before calling the painter?
M.F.: I often ask about how different parts of a job will be painted before I even bid on a drywall job. If ceilings will be painted with anything but a flat paint I will usually recommend a level 5 finish. Even larger well-lit walls will also need a level 5 finish.
Do not allow painters to begin work before all taped joints are thoroughly dry; painting over wet joints is a major cause of joint discoloration. Differences in suction between the paper facing and the joint compound may cause the paint color to appear lighter or darker, making the joint conspicuous.
A coat of primer is necessary to help equalize the porosity and texture of the taped drywall surface. I recommend using a good-quality latex primer, such as USG’s First Coat, that’s formulated with a high solids content, and applying it undiluted. However, even a good prime coat may not be enough when decorating with glossy paint. In this situation, I recommend applying a skim-coat of compound to the entire wall surface first to equalize the surface reaction.
I know some painters actually damp sponge surfaces after sanding to remove dust and knock down any raised fibers of the paper. Brushing with a very fine broom also helps. I suggest going over the surface with a really fine sandpaper: 300 grit or finer. But I have found that sanding with a 220 grit after the primer is dry works best and is less likely to do any damage compared with sponging or brooming.
JLC: Are callbacks more common in a production environment?
M.F: When dealing with large builders who sub out the drywall work, it is a much different situation than when working with a remodeling company or custom home builder who has more hands-on control of the job and often stronger relationships with the subs working at that job. The lack of trade consistency from job to job is what I most often see that makes it hard to control quality in a production environment.
For example, I watched a taper working and noticed that he was thinning the compound down, in my opinion, way too much. By doing so, the strength and adhesion ability of the compound was diminished. I explained this to him, and noted that because thinning joint compound is difficult to control, if you are going to do it, use the strongest compound available for embedding joint tape, and also the strongest tape available. Hopefully this will reduce potential problems. But I explained this to that one person, and on the next job, there will be a completely different crew of tapers.
There are ways to speed up the taping process, but mostly this involves using setting compounds to embed the tape and possibly even for the fill coat as well. But this is not practical for finishers who use automatic taping tools and are used to a certain process. So it comes back to controlling the environment as the best way to get the job done faster and improve the quality.