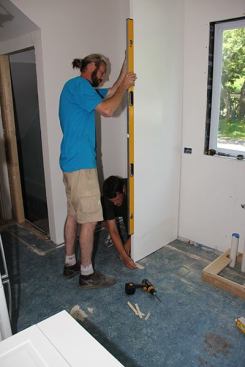
Jeff and Joe test-fit the end panel to the wall, shimming it plu…
Jeff and Joe test-fit the end panel to the wall, shimming it plumb.
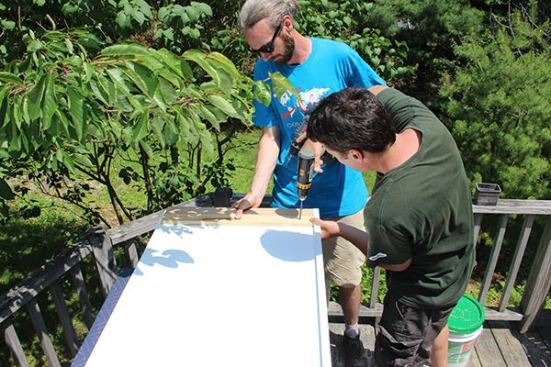
With a compass and pencil, Jeff scribes the contour of the exist…
With a compass and pencil, Jeff scribes the contour of the existing wall onto the end panel. He intentionally built the panel with more than an inch of extra width to allow for fine-tuning in the field.
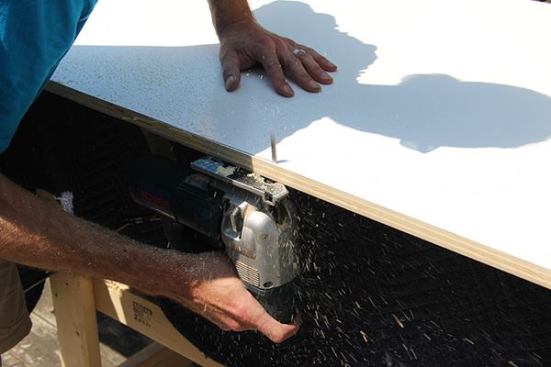
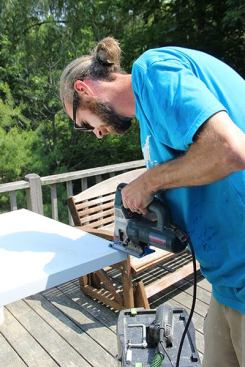
After making a preliminary cut close to the scribe line using a …
After making a preliminary cut close to the scribe line using a tracksaw, Jeff trims to the line using a jigsaw.
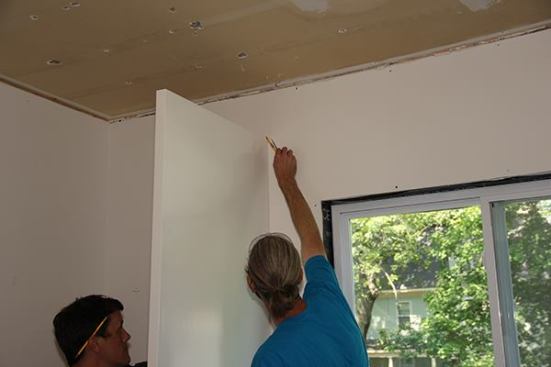
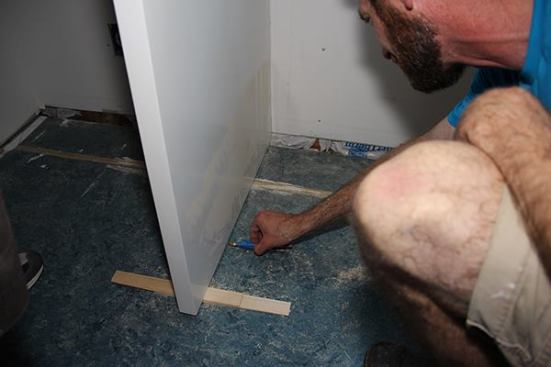
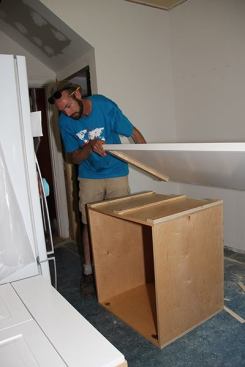
Back into the kitchen for a second, more precise scribe of the p…
Back into the kitchen for a second, more precise scribe of the panel side and base. As you can see, muscling a whole completed cabinet in and out of this kitchen door would have been difficult.
With the end panel fitted more closely to the wall, Jeff makes a…
With the end panel fitted more closely to the wall, Jeff makes an accurate scribe line where the panel meets the existing sagging kitchen floor.
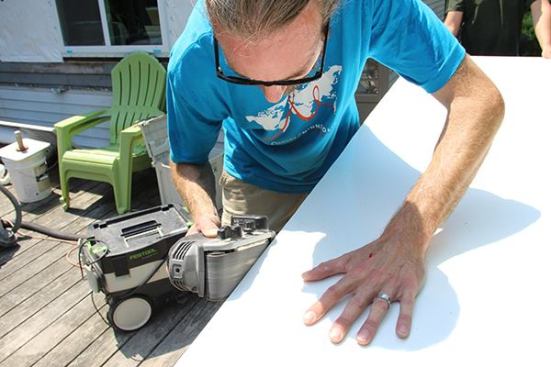
Jeff trims the base of the fridge end panel with the jigsaw …
… and fine-tunes the joint using a belt sander.
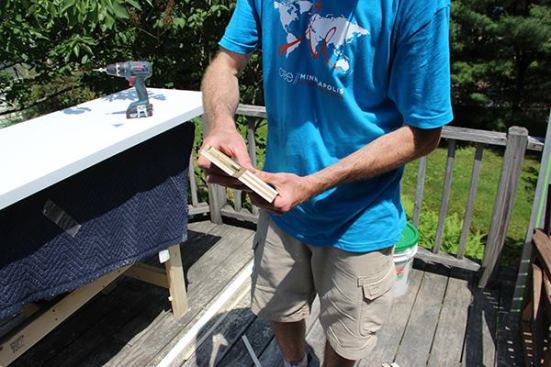
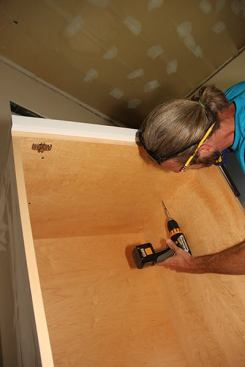
Now to attach cleats to the upper cabinet, which will allow the …
Now to attach cleats to the upper cabinet, which will allow the end panel to help support the weight of the upper cab. One cleat will attach to the cabinet, and one to the end panel. The cleats are cut at an angle so they mate tightly when the cabinet bears down on its support.
Joe and Jeff use the upper cleat as a guide, aligning it to the …
Joe and Jeff use the upper cleat as a guide, aligning it to the panel’s upper edge, and fastening the lower cleat to the panel itself. The upper cleat and two additional cleats will be attached to the cabinet, providing a way to fasten the cabinet to the end panel.
Inside the kitchen, Joe and Jeff fasten cleats to the upper cabi…
Inside the kitchen, Joe and Jeff fasten cleats to the upper cabinet.
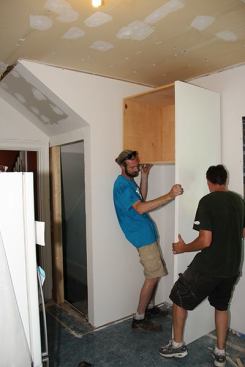
Now, the panel can be set over the cabinet. The upper set of mat…
Now, the panel can be set over the cabinet. The upper set of mating cleats serves to align the assembly. The lower two cleats will be used to screw the panel and the upper cab together.
Jeff screws through the inside of the cabinet and the cleats int…
Jeff screws through the inside of the cabinet and the cleats into the end panel, securely attaching the cabinet to the panel.
Now the cabinet can be set into place and fastened to the wall.
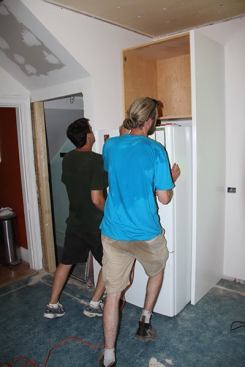
Final step: Pushing the existing kitchen refrigerator into place…
Final step: Pushing the existing kitchen refrigerator into place in the fridge enclosure.
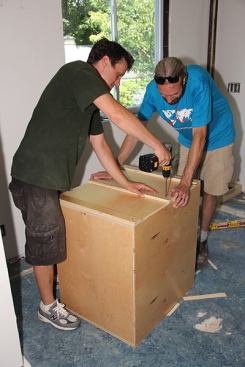
Last week, JLC’s Coastal Connection spent two days on the job with Jeff Cleveland and Joe Peters of Coastal Custom Design in Portland, Maine. The pair were installing a set of custom cabinets, built in their shop, for a small kitchen remodel in South Portland.
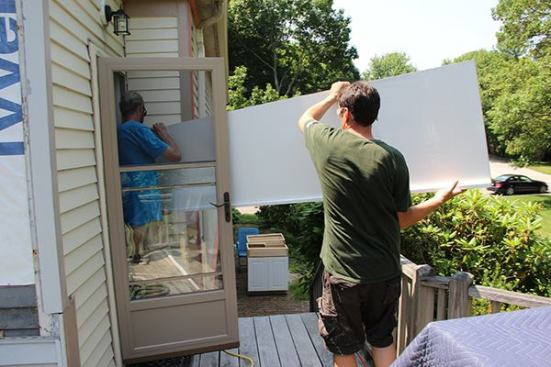
The design called for a new refrigerator cabinet to enclose the home’s existing fridge. But with space tight, building a whole fridge enclosure off site wasn’t practical—the cabinet would be too big and unwieldy to maneuver through the back door and into the kitchen. (“Refrigerator cabinets are always a problem,” says Cleveland.)
Instead, Cleveland and Peters built a custom end panel to cover the side of the refrigerator, and built a separate upper cabinet to go above the fridge. On site, they first scribed and fit the end panel to the existing wall and floor. Then, working on a bench, they attached the panel to the upper cabinet using a system of cleats. Finally, they raised the panel and cabinet into place as a unit and attached them to the wall—but without having to worry about muscling the whole assembly on and off their truck and into the building. Take a look. (To see how the toe kicks and base cabinets for this kitchen were installed, view “Installing Custom Cabinets.”