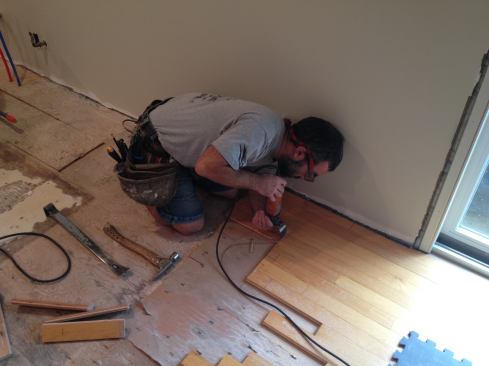
After rough cutting the boards, a few need to be removed back to an existing seam. One way is to slide the board out. Manny buries the blade of a chisel in the piece to be removed and then strikes the chisel to loosen the board and slide it out. If there are too many nails holding the board, another method has to be used.
To satisfy his client's wishes for a hardwood floor in their new…
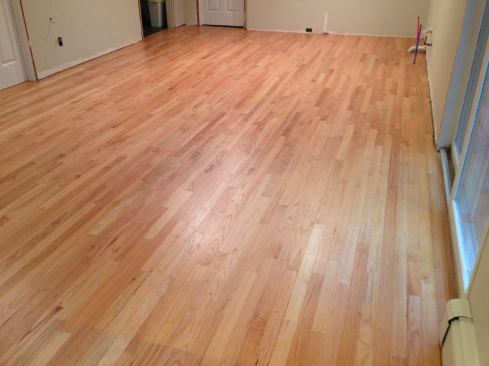
To satisfy his client's wishes for a hardwood floor in their new kitchen, contractor Manny Silva blended new oak strip flooring with the existing flooring in the adjacent room. The new floor creates an even base for the cabinets and an invisible transition between the two rooms.
John Simmons
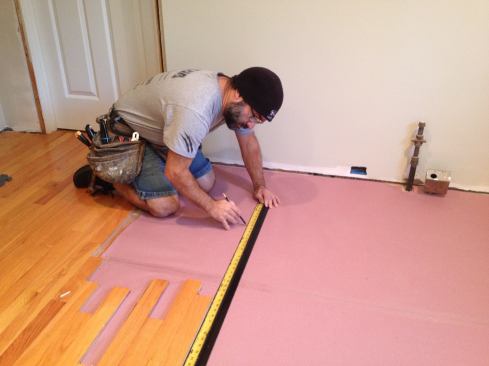
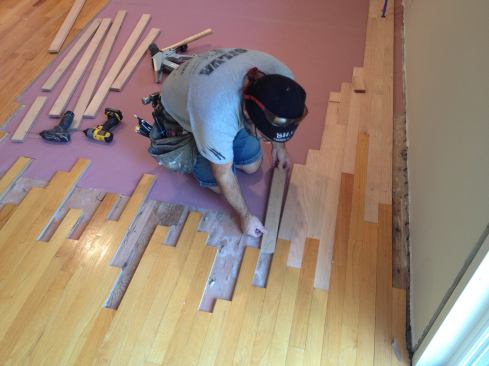
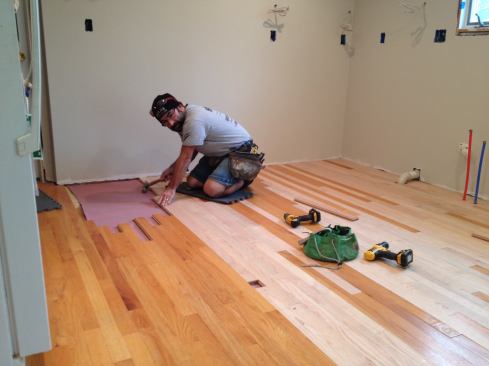
The original flooring ended in a straight line where the sheet f…
The original flooring ended in a straight line where the sheet flooring in the old kitchen began. Here Manny draws square lines across the boards so that they end in a random pattern to disguise the transition. An X on each board marks the section to be removed.
John Simmons
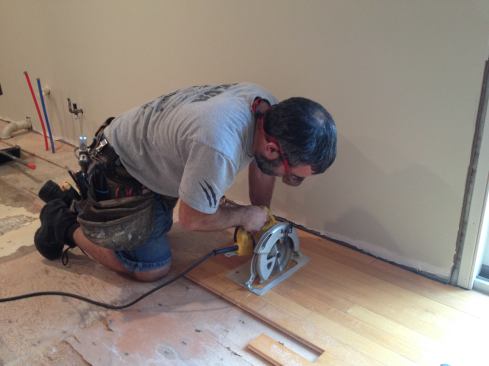
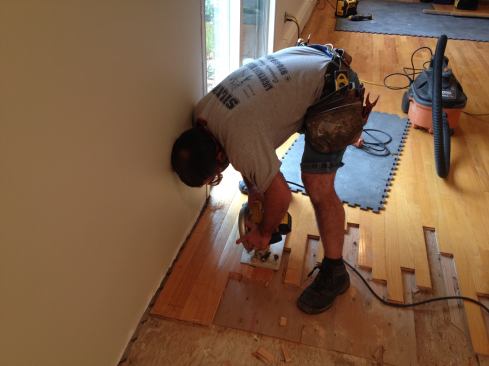
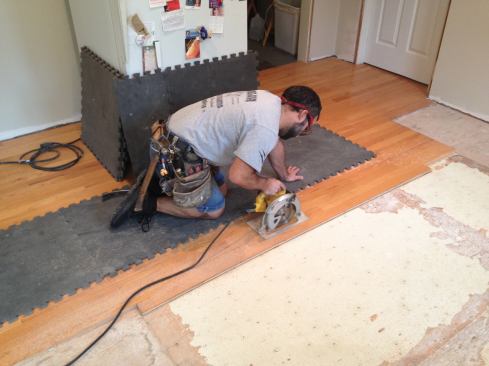
With the blade of his circular saw set at the thickness of the f…
With the blade of his circular saw set at the thickness of the flooring, Manny saws through the boards to remove material quickly. At this point he is rough cutting all but one of the boards to length.
John Simmons
After rough cutting the boards, Manny finishes the work of the c…
After rough cutting the boards, Manny finishes the work of the circular saw with an oscillating tool. Note at this point that he still has to cut two of the three boards to the length he marked out before, and needs to remove the middle board back to an existing seam.
John Simmons
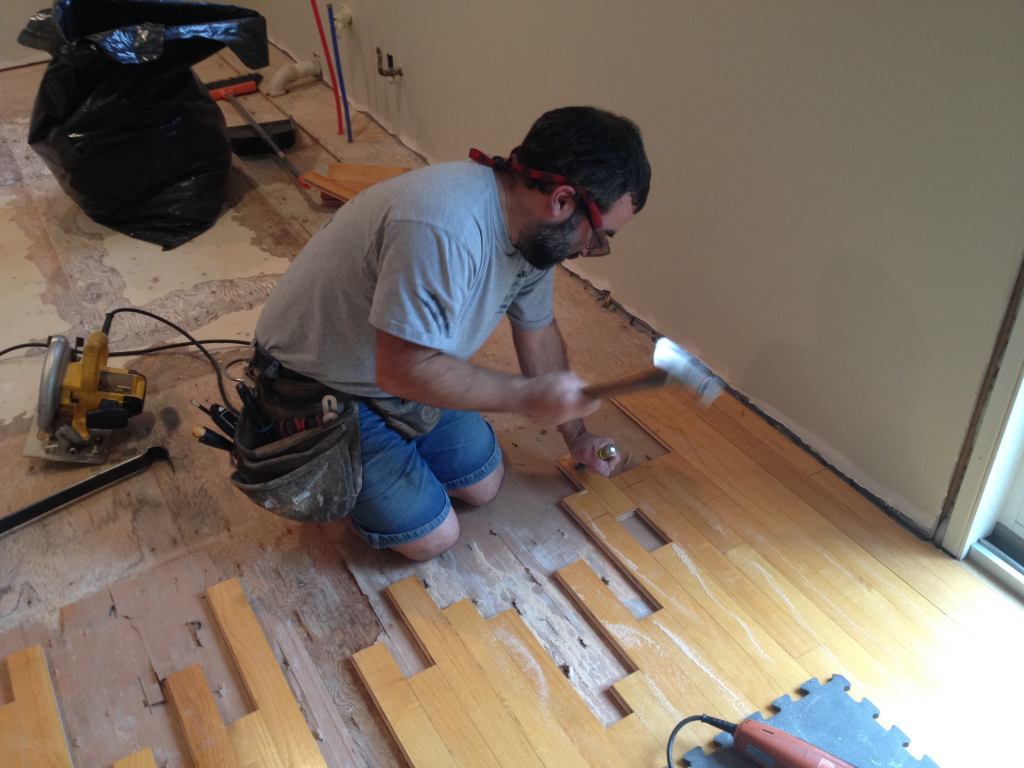
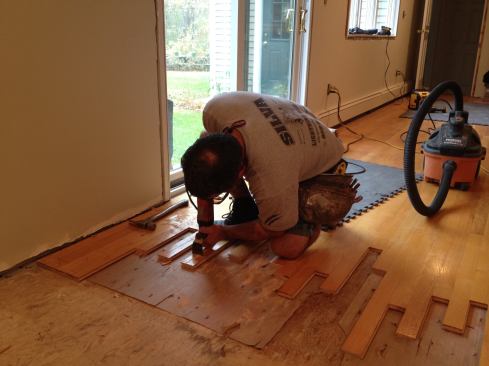
After rough cutting the boards, a few need to be removed back to…
After rough cutting the boards, a few need to be removed back to an existing seam. One way is to slide the board out. Manny buries the blade of a chisel in the piece to be removed and then strikes the chisel to loosen the board and slide it out. If there are too many nails holding the board, another method has to be used.
John Simmons
When a short length that needs to be removed won't budge using a…
When a short length that needs to be removed won't budge using a hammer and chisel, Manny sets the blade of the circular saw at a slight angle and plunge into the board parallel with the grain. When the saw table makes full contact with the board, complete the rip through the end of the board.
John Simmons
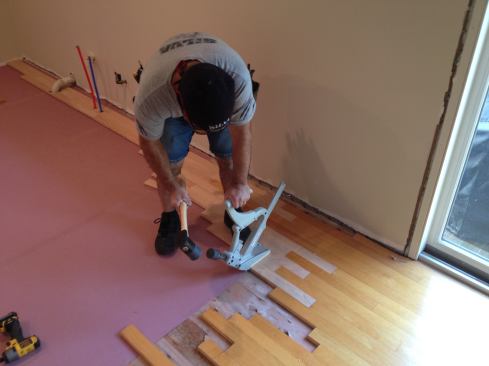
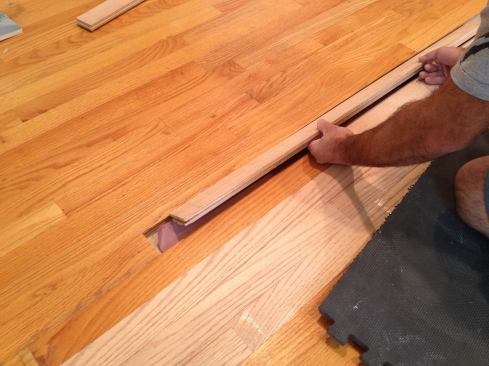
Remove the tongue section of the waste board first with a pry ba…
Remove the tongue section of the waste board first with a pry bar. The groove side should then pop out easily. When the wood is removed, be sure to remove the nails and clean out any splinters or debris that might interfere with installing the new board.
John Simmons
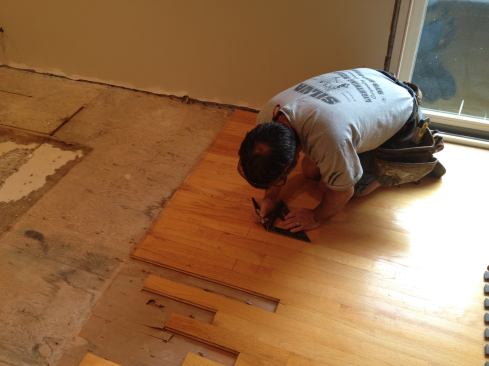
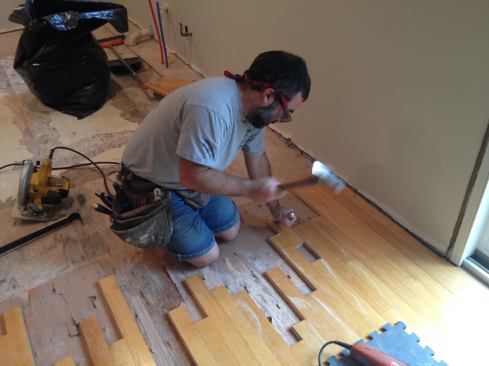
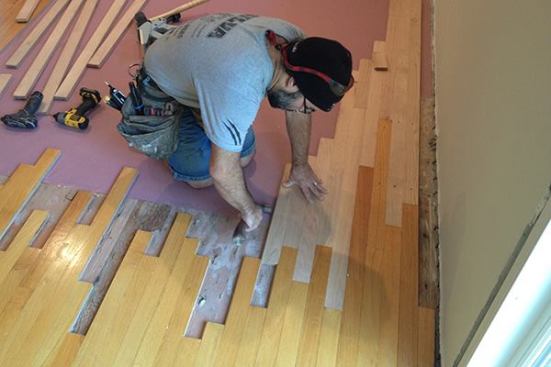
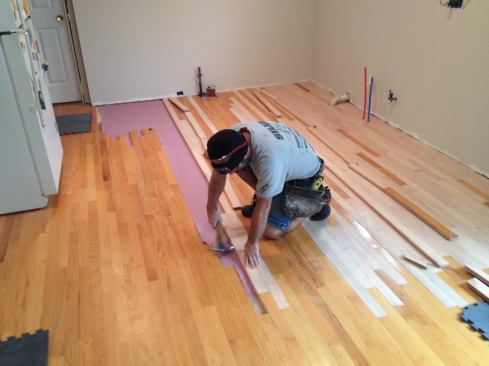
To finish staggering the ends of the boards, Manny cuts back to …
To finish staggering the ends of the boards, Manny cuts back to the lines he made earlier with an oscillatiing tool.
John Simmons
The installers had reversed direction of the hardwood floor in t…
The installers had reversed direction of the hardwood floor in the original kitchen, so the boards needed to be cut back to the blending seam along an adjacent walkway. After removing and saving most of the boards in the original kitchen, Manny rips the board adjacent to the seam so that it can be removed without damaging the walkway boards.
John Simmons
After ripping the adjacent board, Manny pries up the boards savi…
After ripping the adjacent board, Manny pries up the boards saving the complete board to be reused. Now he an run all the flooring in the same direction starting at the wall. All used pieces that are in good shape are cleaned up set aside to be reused later.
John Simmons
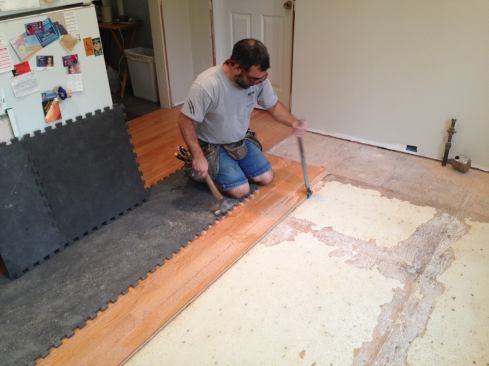
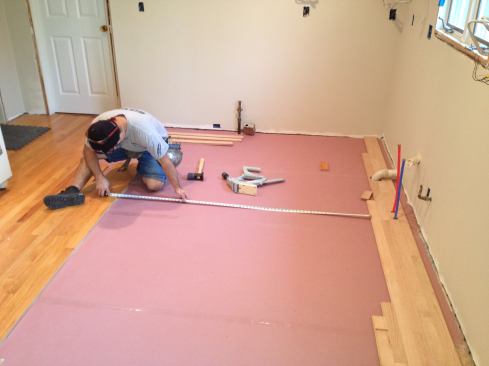
When all the pieces have been stripped and staggered back, Manny…
When all the pieces have been stripped and staggered back, Manny puts down an underlayment of red rosin paper (to help reduce the chance of squeaks between the hardwood and the subfloor). He then sets his starter strips in place temporarily measuring back to the existing floor to keep them parallel.
John Simmons
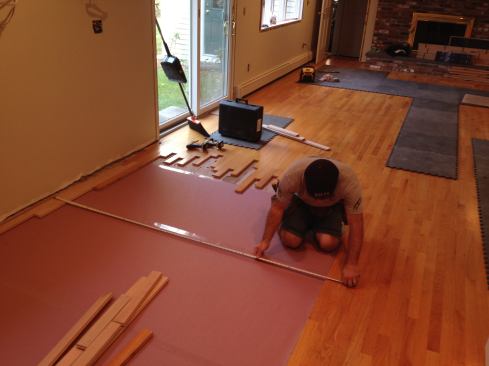
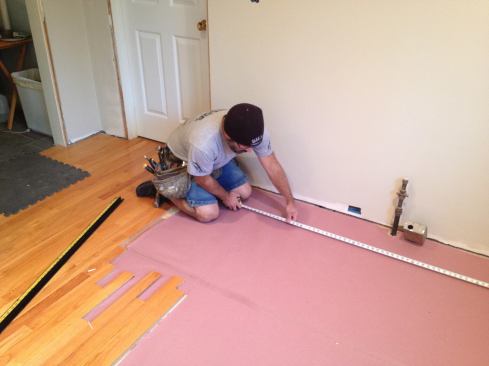
Manny uses a straightedge to extend the line of the existing flo…
Manny uses a straightedge to extend the line of the existing floor…
John Simmons
…allowing him to take a measurement for more precise positioni…
…allowing him to take a measurement for more precise positioning of the starter strip along its entire length.
John Simmons
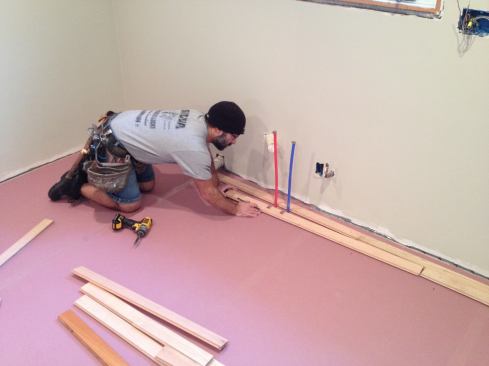
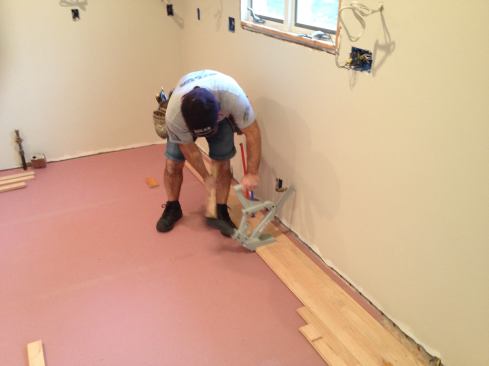
When the exact position of the starter strip has been determined…
When the exact position of the starter strip has been determined, Manny pre-drills and drives screws through the face to hold it in place. The screws anchor the starter strip more solidly than nails would to keep it from moving as subsequent courses are nailed against it. All courses must be attached by hand until there is enough space for the floor nailer to be used.
John Simmons
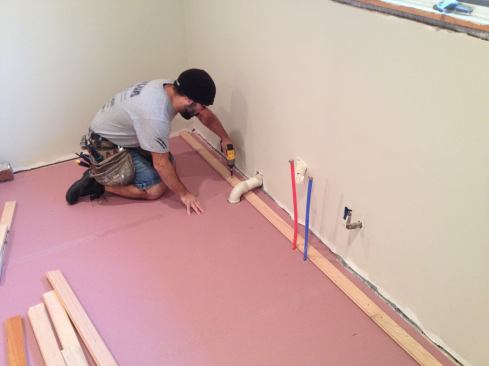
Cutouts have to be made for any through-floor obstructions such …
Cutouts have to be made for any through-floor obstructions such as the plumbing pipes. Manny cuts the pieces and makes a dry fit before nailing them into place.
John Simmons
To blend the new boards in with the old, Manny starts with a len…
To blend the new boards in with the old, Manny starts with a length that will give him an acceptable staggered seam. Then he inserts the board at a slight angle to engage the tongue and groove properly.
John Simmons
With the board started in the existing space, Manny lightly taps…
With the board started in the existing space, Manny lightly taps it over against the neighboring board. He is careful not to tap too hard, otherwise he woul damage the tongue and make it hard to get a tight fit with subsequent boards.
John Simmons
Using a block to protect the end of the board, Manny taps on the…
Using a block to protect the end of the board, Manny taps on the end of the new board until it hits home against the existing board.
John Simmons
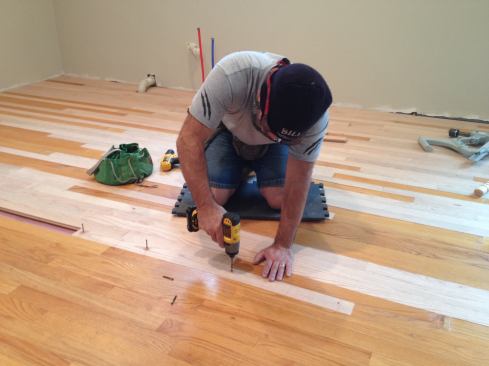
After driving the board into place, Manny uses a floor nailer to…
After driving the board into place, Manny uses a floor nailer to secure it. If too much of the board is left unattached face screws can be added.
John Simmons
For this floor, the first three courses had to be installed befo…
For this floor, the first three courses had to be installed before there was enough room to use the nailer. While not a problem with these walls that will be covered with cabinets, floor nailers are notorious for marring or damaging walls, so be careful when working close by.
John Simmons
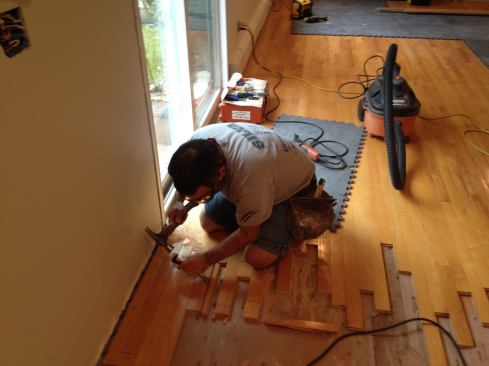
It's a good idea to measure across at several points while putti…
It's a good idea to measure across at several points while putting in the new floor to ensure that the boards are still going in straight and parallel.
John Simmons
Continue installing boards across the floor as you would for new…
Continue installing boards across the floor as you would for new construction until you meet the existing floor on the other side. Manny was able to reuse flooring that he'd taken out earlier. The key is making sure the edges are clean and that the tongues and grooves are not damaged.
John Simmons
Manny engages the new board and taps it into place as he did wit…
Manny engages the new board and taps it into place as he did with the boards earlier. He uses this method until he runs out of room to start the board and tap on the end of it.
John Simmons
In order to be able to slip the final piece into place, Manny ri…
In order to be able to slip the final piece into place, Manny rips off the bottom of the groove. He then slips the tongue of the new board into the groove of the existing floor and taps it flat. It can help to plane or rip a slight bevel on the upper part of the groove to help it slip in.
John Simmons
Because the last boards to go in are not fully engaged with the …
Because the last boards to go in are not fully engaged with the adjacent boards, Manny predrills and screws them in through their faces. The holes will be filled before the floor is sanded and finished.
John Simmons
This board is too long to engage. So after ripping the groove, M…
This board is too long to engage. So after ripping the groove, Manny taps it down flat and then taps the end until it snugs against the end of the other board. After the rest of the boards are in, the floor will be sanded and a coat of sealer applied to protect the floor while the kitchen is installed.
Oak strip flooring with its ubiquitous 2 1/4-inch width and random lengths has been a mainstay of residential flooring in this country for decades. Remodelers are often faced with the task of creating a new layout in a space where the strip flooring followed the original layout. That was precisely the challenge that Manny Silva of Silva Lightning Builders, in North Andover, Mass., faced with a recent kitchen remodel. The original kitchen had wood flooring, but no flooring had been installed under the appliances and cabinets, and the old cabinet bases were bigger than the replacements. To make matters worse, the installers had reversed the direction of the wood flooring in the kitchen. So to give the new cabinets an even starting point, and to make the oak strip flooring continue seamlessly from the adjacent dining room, Manny ripped out the old kitchen floor (saving most of the boards) and then completely reinstalled the hardwood flooring in the kitchen.
The trick was removing the old floor boards and seamlessly adding new ones with an invisible intersection between the old and new flooring. This JLC slideshow shows us exactly how he pulled this off.