
Frances Harris
Removing the intersection stud left the edges of the drywall on …
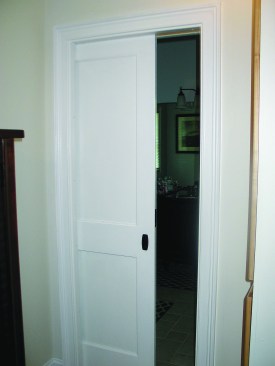
Pocket doors can be challenging on any project, but when you’re retrofitting a pocket door in a remodel—with minimal disturbance to the existing walls—the challenge is even greater. On the job shown here, the pocket door replaced a swinging door connecting a master bedroom and master bath. Inside the bathroom, there was plenty of wall space for the pocket door, but on the opposite side, a perpendicular wall between the bedroom and the kitchen ended about 5 inches inside the proposed pocket. In addition, there were base and wall cabinets on the kitchen side, and between the cabinets—in the area where the pocket was planned—was a ceramic-tile backsplash. To top things off, an electrical outlet needed to be moved.
The kitchen had been upgraded recently and was in pristine condition. Any thoughts of tearing into that side of the wall were out of the question. The pocket door would need to be installed entirely from the bathroom side. Fortunately, I had done this a couple of times before, so I was confident it was possible.
Delicate Demolition
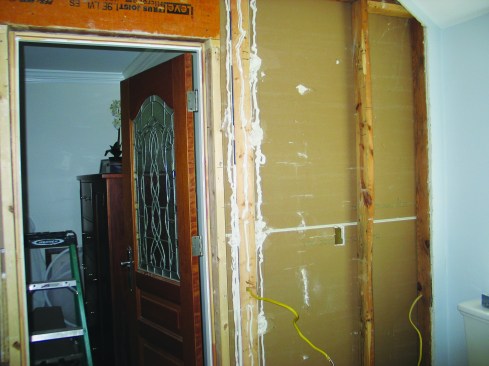
After removing the existing door, I opened up the wall on the bathroom side and was pleasantly surprised to find that the wall cavity was a full 4 inches deep. Apparently, the bathroom was located in a space that had originally been a covered porch, and the wall I was working on had once been an exterior wall.
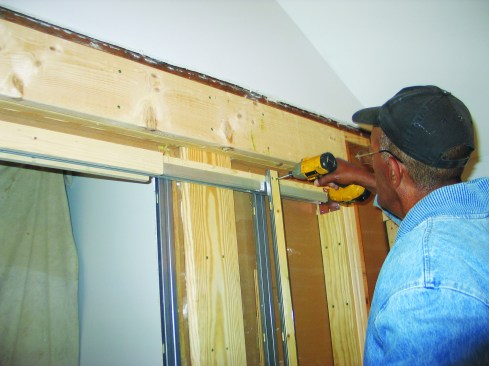
I removed the drywall an extra stud bay beyond what I’d need for the pocket, with the anticipation of relocating the kitchen outlet. Then I began the nerve-racking task of removing the framing material from the pocket cavity without damaging drywall or finishes on the kitchen side of the wall. I caught a lucky break in that the cabinets hadn’t been screwed to the frame in the pocket area, which was behind an inside-corner dead space for both the upper and lower cabinets.
On the down side, a lot of wood needed to be removed, including the jacks for the existing door and the framing that tied the perpendicular wall to the pocket-door wall. Farther down the wall was framing for a window that had been covered over when the porch was converted to a bathroom. To remove the framing without damaging the drywall on the other side, I first cut each 2-by into small pieces. I made cuts as deep as I could with a circular saw, then finished them with a Bosch oscillating multi-tool. As I pulled out the pieces of 2-by framing, the drywall screws pulled through, leaving the kitchen drywall—and more importantly, the backsplash tile on the drywall—intact. For once I was glad a drywall installer had used screws sparingly.
When I removed the original jacks, I was left with nails sticking out of the adjacent stud. I cut these off with a grinder fitted with a metal-cutting blade.
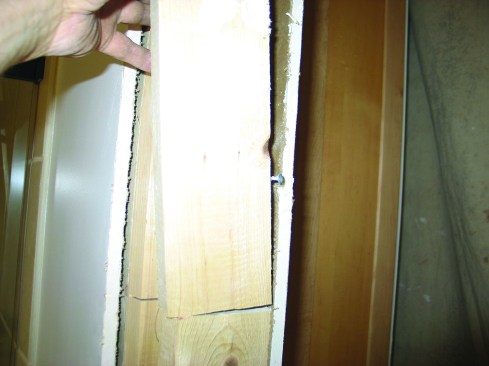
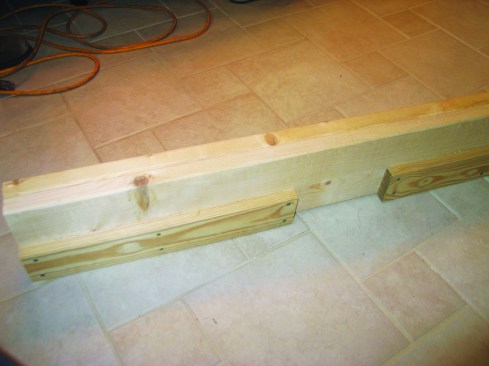
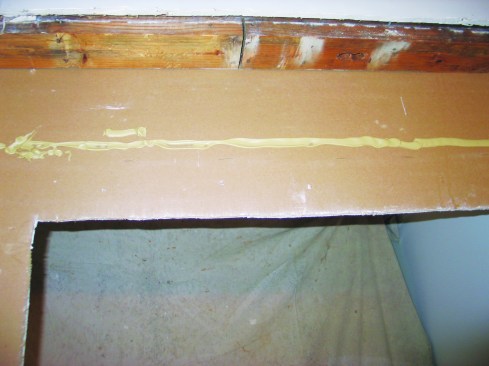
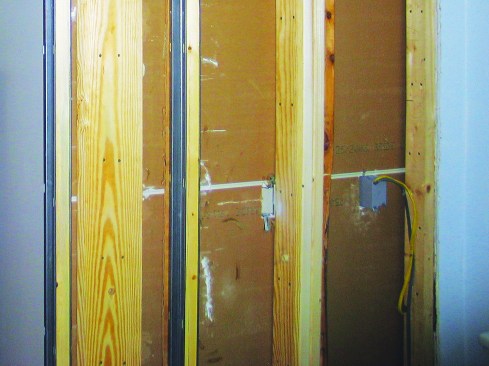
Removing the intersection stud left the edges of the drywall on both sides of the perpendicular wall unsupported, so I added a 5/4 by 6-inch backer board. I spread construction adhesive on the entire area and screwed the board to the end stud of the perpendicular wall.
Before installing the backer board, I beveled both edges so it would be less likely to interfere with the pocket door as it slid in and out of the pocket. The 4-inch-deep cavity meant we would have 1/4 inch of clearance between the door and backer board inside the pocket. I also drilled a hole in the backer for the outlet wire, which I tied into the circuit via a temporary box to keep the kitchen functioning. The electrician would come in later and reroute the supply.
Framing in a wide opening
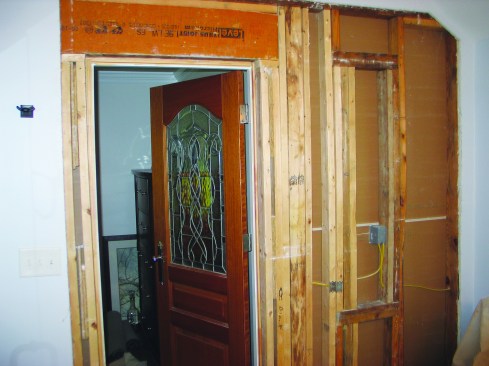
The rough-opening width for a pocket door needs to be twice the width of the door plus 1 inch. Because the door I was installing was 30 inches wide, I framed the rough-opening width at 61 inches. To prevent damage to the tile floor or threshold in the bathroom, I figured out the exact location for the finished opening and located the rough opening to accommodate that layout. This foresight paid off when I finished the trim at the end of the project, and there was no need to repair the floor.
The rough-opening height for a pocket door must be at least 84 1/2 inches above the finished floor, but I try to make the rough opening as tall as possible so that the framed header is well above the header/track for the pocket door and completely independent of it. This strategy prevents problems in the track should the header ever settle or deflect down. For this opening, I installed a double 2×8 header tight to the top plate of the wall, which made the rough opening several inches higher than the required minimum.
To fill the entire width of the 4-inch cavity, I first padded out the header with a piece of 5/4 material, leaving a gap to accommodate the vertical 5/4 backer board that I had installed earlier. (I planned to install the pocket-door kit snug to the bathroom side of the wall cavity. This would allow that critical 1/4 inch between the backer board and the door, described earlier.)
I made the header long enough for the 61-inch rough opening plus the double jack studs at both ends. Before installing the header, I put construction adhesive on the back of the drywall where the header would bear against it . I also spread adhesive on the drywall before installing the jacks. When the opening was framed, I gave the pocket-door track a dry fit.
Installing the pocket-door kit
The pocket-door kit I installed was made by Johnson. The header/track in the kit can be modified for doors of various widths. After reading the directions carefully, I made the necessary changes for a 30-inch door.
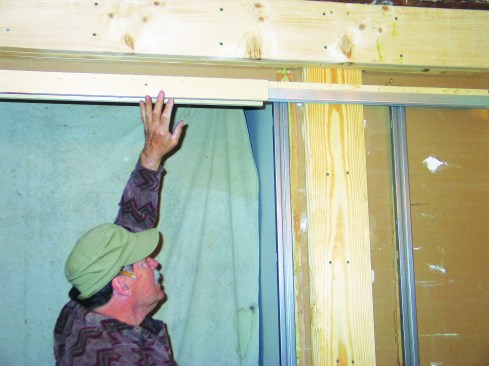
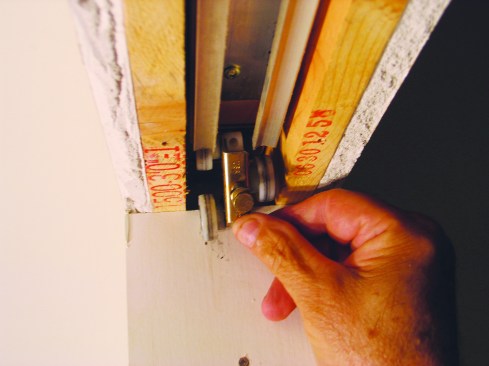
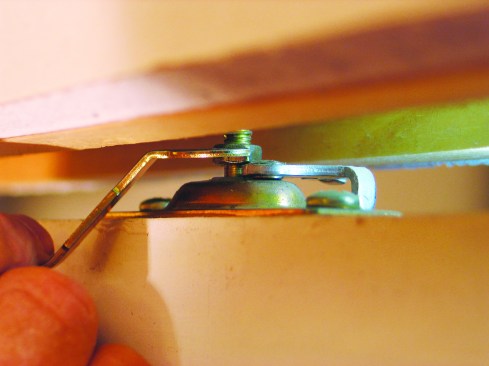
To position the track at the proper height, I drove 12d sinker nails into the jack studs at 80 3/4 inches up from the finished floor on both sides of the rough opening, and 1 3/4 inches in from the edge of the studs on the bathroom side. I left the nail heads about 1/8 inch proud of the surface. Slots in the end brackets of the header track slipped over these nails so I could set the track tight against the bathroom side of the cavity.
The header track for the pocket door is supported by special split studs—thin strips of wood lined with metal. After making sure that the header track fit properly over the nails, I laid out the positions of the two split studs, marking their positions on the header track and on the floor. Then I attached the split studs for the far side of the opening to the header track.
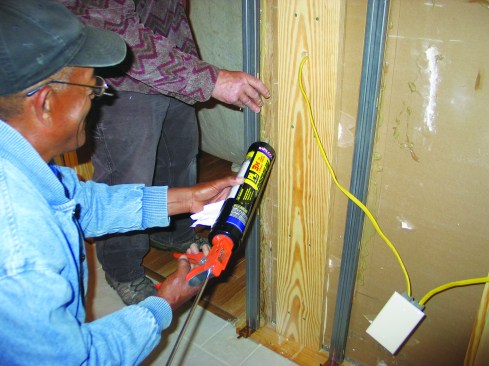
Because this wall cavity was 1/2 inch wider than the normal 3 1/2-inch cavity, we screwed strips of 1/2-inch plywood to the outer faces of the split studs. After slipping the floor-plate brackets onto the bottoms of the split studs, I held the assembly in place while my helper ran a bead of construction adhesive on the drywall behind each stud position. We lifted the whole assembly and slid the brackets down over the positioning nails in the jack studs. When we were satisfied with the placement of the track and the split studs, we drove several pan-head screws through other holes in the end brackets to permanently attach the assembly in the pocket.
We then screwed the floor brackets into place. Finally, to install the other halves of the two split studs that faced the bathroom side of the pocket, we slipped the studs into the floor brackets, positioned them against the header, and drove two screws through each stud to anchor them in place.
Finishing the install
With the pocket-door frame installed, the electrician rerouted the wires through the floor. We moved the outlet box to the bay next to the pocket. With the new electrical box going through the tiled backsplash, I carefully cut the hole with a tiny diamond blade mounted on a Dremel tool, not trusting this delicate task to anyone else. We covered the hole left by the old outlet box with a blank plate screwed into a special bracket.
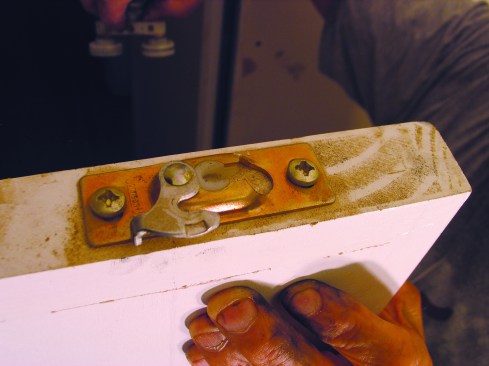
I was just about ready to hang drywall in the bathroom, but one very quick yet very important task remained—something I had regretted overlooking in the past: installing the small rubber bumper at the end of the pocket. This bumper keeps the door from banging into the end of the pocket, but more importantly, makes the door open flush with the finished door jamb. I screwed the bumper to the jack stud about 36 inches above the floor.
Then I hung the drywall on the bathroom side, attaching it to the split studs with 1-inch screws to make sure no sharp points penetrated into the door cavity and interfered with the smooth operation of the door, or worse, damaged the finish of the door. Because of my careful demolition work, I didn’t need to touch the walls on the kitchen side of the pocket. I finished the new drywall in the bathroom in the normal manner and was now ready for the actual door.
Before hanging the door, I painted all four edges and the first few inches of both faces along the top and the side that would go into the pocket. These areas would be hard to reach after the door was trimmed out.
When the paint was dry, I hung the door. I mounted the two supplied door plates on the top of the door, 2 inches from each end. Then I set the wheeled hangers in the track. These hangers have two wheels on one side and one wheel on the other, and you need to alternate the wheel positions as you slide them onto the track. To hang the door, I just snapped the hangers into the plates. Suspended on the track, the door rolled smoothly into and out of the pocket. Final adjustment would happen when I installed part of the trim around the door opening.
Trimming around the door
The trim around a pocket door is a bit different from that around a standard door. The vertical jambs are installed first and extend up to the header/track. I started with the full-width jamb on the latch side of the door, which I made sure was absolutely plumb. Then, using a special wrench supplied with the hardware kit, I raised or lowered the hangers until the edge of the door fit perfectly against the jamb.
The vertical jamb on the pocket side of the opening is split into two pieces, as is the horizontal jamb along the header. Because I had mounted the door off-center, one side of the split jamb was 1 3/4 inches wide, while the other (the bathroom side) was 1 1/4 inches wide.
As I had on the latch side, I cut and fit the split jambs next to the opening, letting them extend all the way up to the header/track. Then I screwed in the horizontal split-jamb pieces between the vertical jambs. This trim configuration allows the head pieces to drop down easily if the door needs to be adjusted or removed in the future.
The directions recommend using screws just for attaching the horizontal jamb pieces, but I use them for the vertical split jambs as well. I leave these screws exposed so that the jambs can be removed in the future to access the door. The next person who has to remove that door will thank me.
Final Steps
Casing the door opening, installing the baseboards, and installing door pulls were the final steps. To avoid penetrating the pocket, I installed the casing and baseboards with 18-gauge 1 1/2-inch finish nails. These nails went through the trim and the drywall and bit into the split studs, with 1/4 inch to spare. I didn’t nail the casing to the split jambs, to make the jambs easy to remove.
This door kit came with two types of pulls: finger pulls for the faces of the door and an edge pull. The edge pull required a 2-inch-deep mortise, so I made sure to keep it away from the finger pulls.