Recently, our most common floor installations have consisted of large tile that looks a lot like wood planks. More than once, we’ve gotten funny looks from people who were sure that they were looking at a wood floor. At almost 3 feet long and close to 6 inches wide, these tiles have the same basic shape as a board. But this shape brings with it the challenges of installing large-format tile. The Tile Council of North America defines large format as having any edge 15 inches or longer. Because of the size, the chances of lippage (uneven tile edges) or cracking after installation are much greater. For this reason, the TCNA has put out guidelines specific to installing large-format tile.
A Flat Subfloor Is A Must
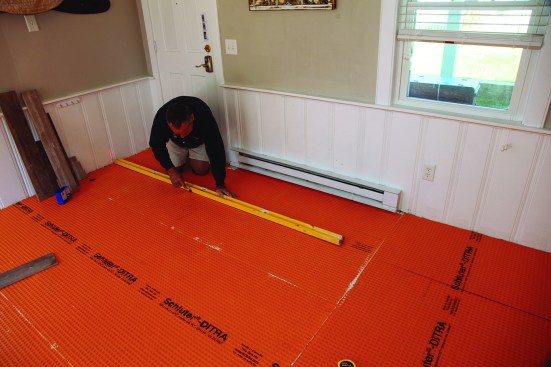
For a successful installation of large-format floor tile, the most important factor is the flatness of the subfloor. In addition to its strict rules about deflection, the TCNA recommends that the subfloor have no more than 1/8-inch variation in 10 feet—tight tolerances for any subfloor. For this project, I made sure the plywood subfloor was within the TCNA tolerances before I installed a Ditra Mat uncoupling membrane over it.
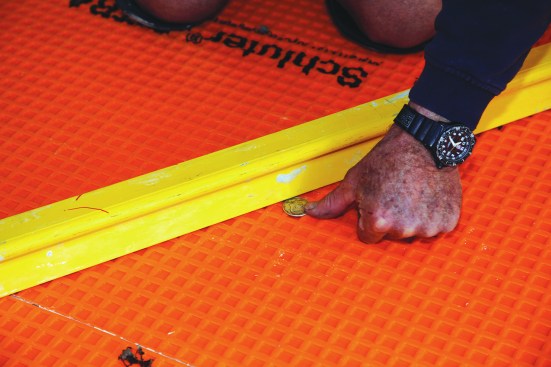
Installing large-format tile requires a subfloor that is almost perfectly flat. The author checks the floor by trying to insert a silver dollar (or other 1/8-inch-thick spacer) under an 8-foot straightedge.
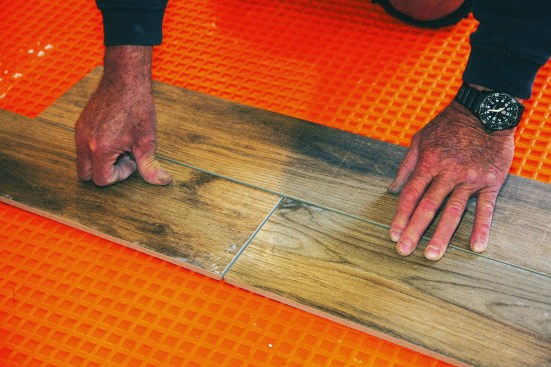
Slight warpage is inevitable with large tile and can cause excessive lippage where the edge of a tile sticks up above an adjacent one.
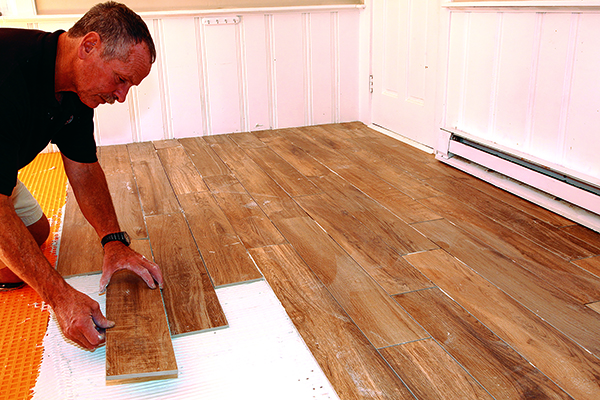
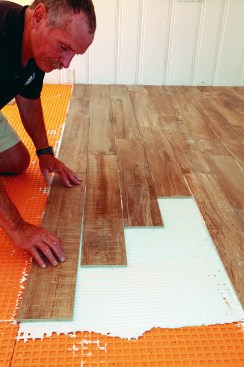
For this project and this type of tile, the author installed four courses at a time. To lay out each section, he set four tiles in place and measured across them.
That measurement then guided his layout line for installing each four-course section across the floor.
If the surface of the subfloor had varied by more than 1/8 inch, I would have considered using a poured floor leveler on the worst areas—or on the entire floor—before installing the uncoupling membrane. The only area of this subfloor that was slightly out of level was in a hallway off the main floor. Because the hallway was relatively small (less than 10 square feet), I opted to use a mechanical “leveling” system there, which I describe later in the article. After installing the membrane, I rechecked the floor for flatness by trying to slide a silver dollar (which is just under 1/8 inch thick) under an 8-foot straightedge.
A flat subfloor is crucial because large-format tiles are seldom perfectly flat. During firing and glazing of a long, narrow strip of clay, some minor distortion can be expected. If two tiles with a 1/16‑inch bend are installed side by side, the middle of one tile can be 1/8 inch higher than the end of the other—the lippage that was mentioned earlier. An out-of-level floor will compound the problem. As I unpack the boxes, I randomly check the tiles for any major discrepancies, setting aside the worst tiles to be cut for shorter pieces.
1
of 19
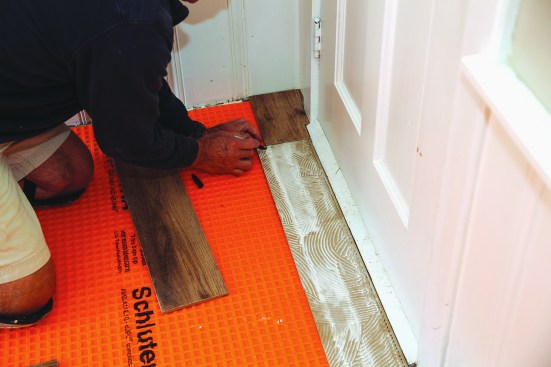
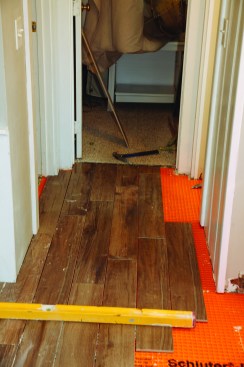
Tiles for the first course had to be scribed around the threshol…
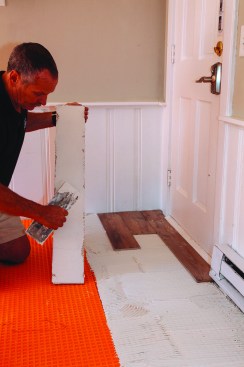
Tiles for the first course had to be scribed around the threshold of the door.
Starting the first course with a quarter-size tile in the corner…
Starting the first course with a quarter-size tile in the corner, the author put a full tile over the most trafficked area of the threshold, which helped to minimize the chance for cracking. Avoiding a grout line in the doorway also looked much better. The author marked the end scribe on the full tile and then flipped the tile over to mark the strip he needed to remove along one edge.
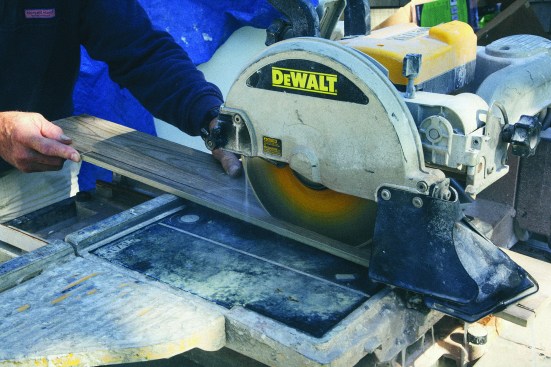
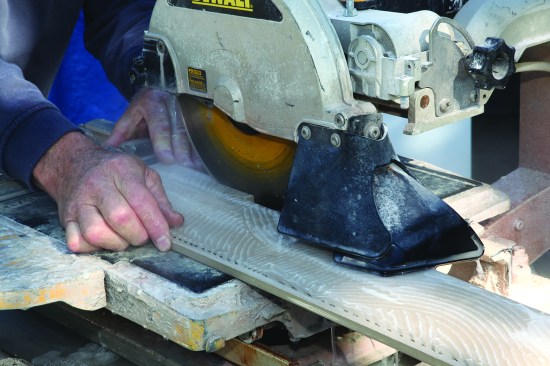
Next, he carefully cut the strip lengthwise in a tile saw.
He flips the tile over, and finished the cuts from the back.
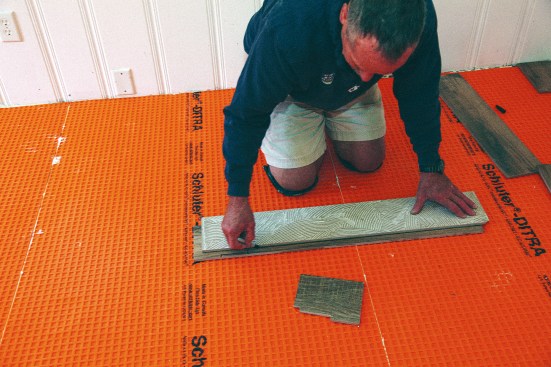
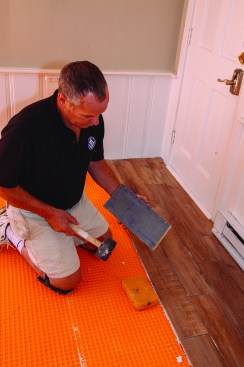
Installation of tile over this uncoupling membrane required two …
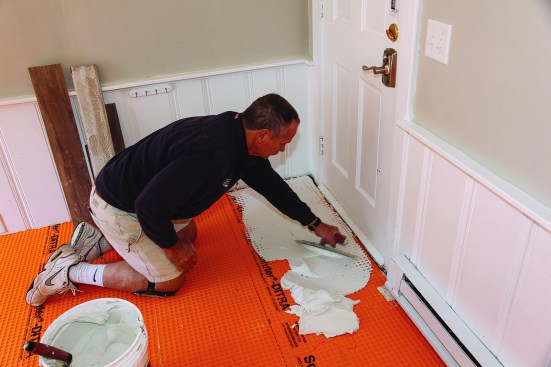
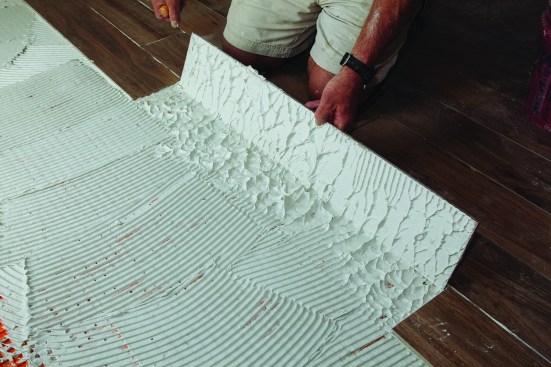
Installation of tile over this uncoupling membrane required two passes of dry-set mortar—thinset that needs to be used over the membrane. The first pass with the flat edge of the trowel forced thinset into the cavities of the membrane.
The second pass with a 3/8-inch-by-3/8-inch square-notched trowe…
The second pass with a 3/8-inch-by-3/8-inch square-notched trowel combed the thinset perpendicular to the long edge of the tile.
The author applied a skim coat of thinset to each tile.
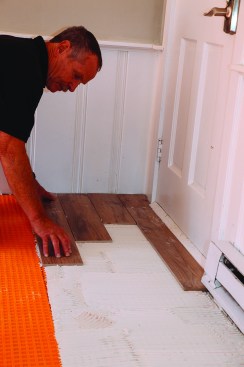
Before pressing them into place
As the author pressed each tile into place, he pushed it side to…
As the author pressed each tile into place, he pushed it side to side about 1/2 inch.
The perpendicular direction of the trowel lines allows air to es…
The perpendicular direction of the trowel lines allows air to escape along the long side of the tile as it beds into the thinset. Every few courses, it’s a good idea to lift up a tile and check the coverage of the thinset. For large-format tile, the coverage should be at least 85% for interior applications and 90% for exterior ones.
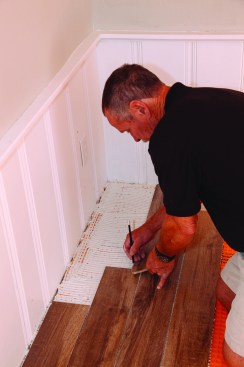
To finish each four-course section, the author marked the length…
To finish each four-course section, the author marked the lengths of the last tiles in place before cutting and installing them, making sure to leave a 1/4-inch expansion space near the wall.
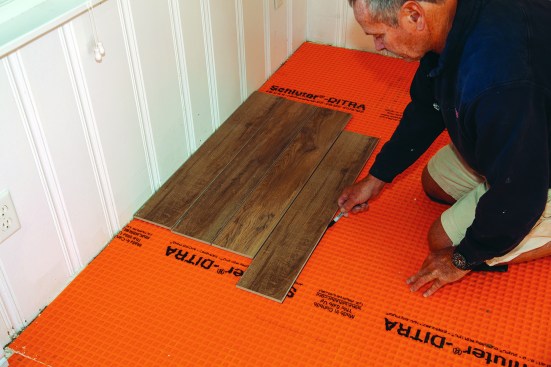
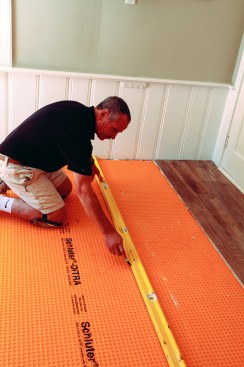
The second four-course section was laid out like the first, with…
The second four-course section was laid out like the first, with a wall-to-wall guideline using the measurement from the initial dry layout
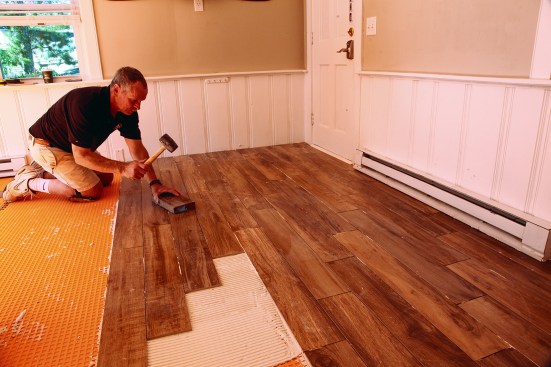
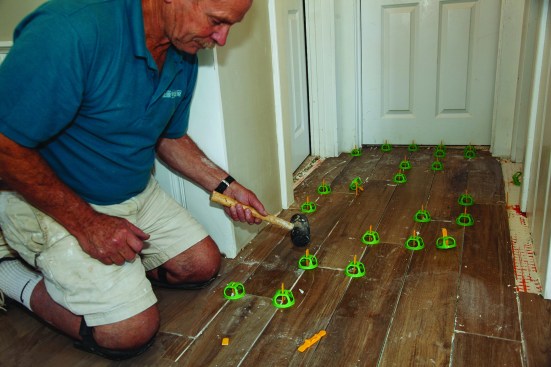
After completing each section, the author tapped down the ends o…
After completing each section, the author tapped down the ends of the tiles to minimize lippage. A short length of 2×6 with a scrap of flexible shower-pan membrane glued to it served as a beating block.
He tapped the ends of all the tiles with the block and a rubber …
He tapped the ends of all the tiles with the block and a rubber mallet until their edges were even.
The floor of an adjacent hallway was slightly out of level, and …
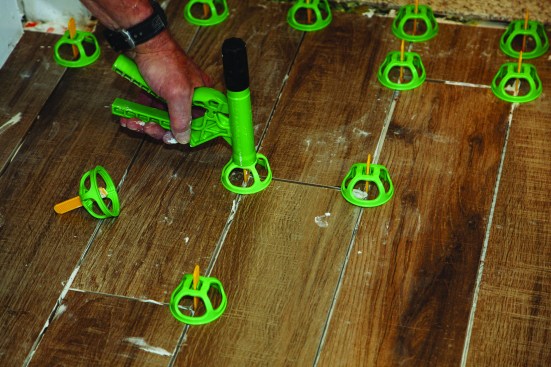
The floor of an adjacent hallway was slightly out of level, and for this small area, the author opted to use a mechanical “Lippage Tuning” system from Miracle Sealants. First, he cut and dry-fit all the tile for the hallway space.
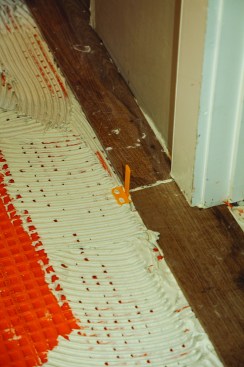
Then, as he bedded each tile into the thinset, he inserted a fla…
Then, as he bedded each tile into the thinset, he inserted a flat, 1/8-inch spacer at each grout-line intersection.
After all the tiles were in place, he pushed plastic caps down o…
After all the tiles were in place, he pushed plastic caps down over the protruding tabs.
Then he used a proprietary tool to “ratchet” the caps onto t…
Then he used a proprietary tool to “ratchet” the caps onto the tabs, aligning the intersecting tile surfaces.
Each spacer has a breakaway point; once the thinset had cured, a…
Each spacer has a breakaway point; once the thinset had cured, a gentle tap with a mallet broke off the tab below the grout line.
1
of 6
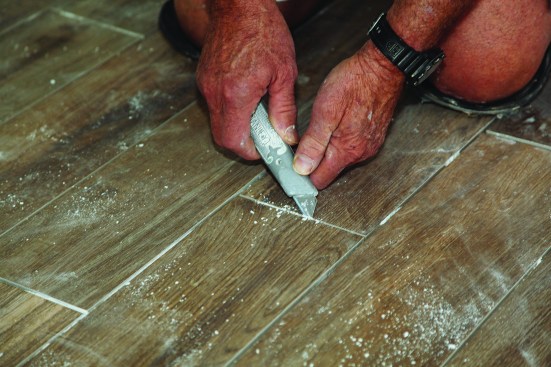
Before grouting the floor, the author cleaned and prepped the ti…
Before grouting the floor, the author cleaned and prepped the tile. He used a utility knife to scrape out the excess dried thinset from the grout joints.
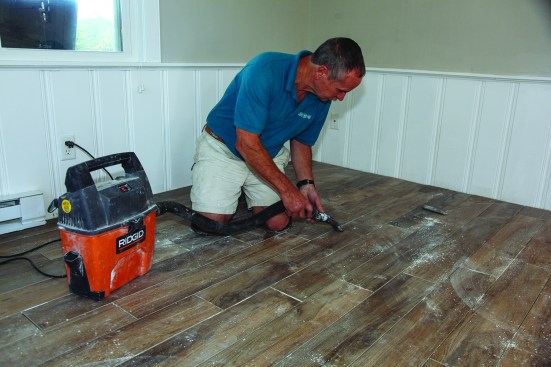
He used a vacuum to pull the loosened pieces out of the grout li…
He used a vacuum to pull the loosened pieces out of the grout lines.
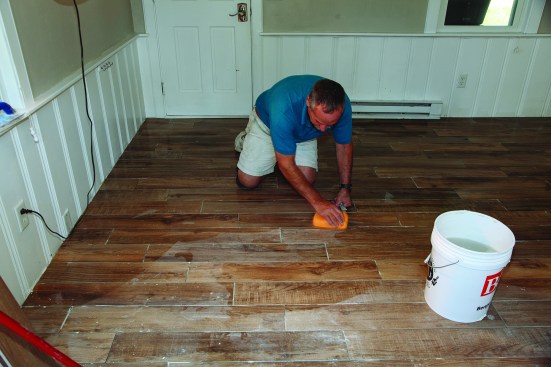
He then went over the whole floor with a wet sponge to loosen an…
He then went over the whole floor with a wet sponge to loosen and remove any dried thinset stuck on the surface of the tile. A final wipe with the sponge ensured the floor was ready for grout.
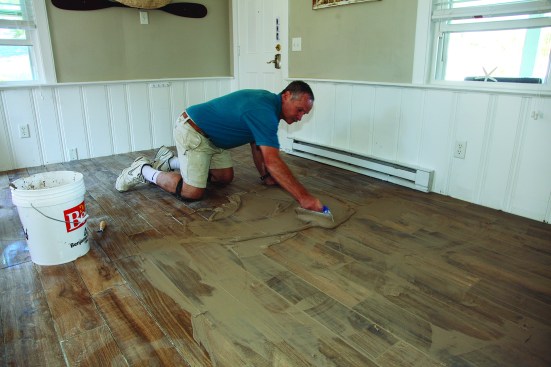
The author applied the grout initially with a rubber-edge grout …
The author applied the grout initially with a rubber-edge grout trowel in sweeping diagonal strokes.
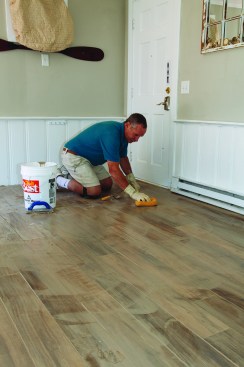
After letting the grout set up for a half hour or so, he went ov…
After letting the grout set up for a half hour or so, he went over the surface with a sponge and clean water, rinsing the sponge
frequently; this left a light haze on the surface.
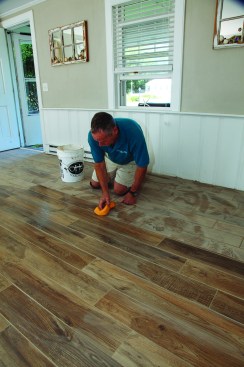
When the haze dried, he went over the tile again with a clean, d…
When the haze dried, he went over the tile again with a clean, damp sponge, this time moving only in a direction parallel to the tile planks. He made only a single pass with each side of the sponge before rinsing it in clean water. Two days later, he returned and cleaned the floor with a stone and tile cleaner.
Getting Started
Before I mix any thinset, I scan the room to determine which sides are the most visible. That’s where I’ll begin my layout. In this case, I decided to start at the front wall of the house and the wall adjacent to the front door. To keep the installation neat and easy to handle, I always put down just a few courses at a time. To minimize lippage, I stagger the ends; for this floor, I started with a quarter of a tile, then a half tile, then a three-quarter tile, and finally, a full tile. With four starter pieces, I worked four courses at a time.
To determine the layout, I set four tiles side by side, leaving 1/8‑inch gaps between them for grout lines. I measured 23 1/2 inches across the tiles; that measurement would guide my layout lines as the courses progressed across the floor.
The TCNA recommends leaving a 1/4-inch gap around the perimeter of the tile floor for expansion, so for the first section, I measured out 23 7/8 inches from the wall. Using a laser tool, I projected a straight line across the room and drew a line with a waterproof marker. Then I was ready to install the tile.