
The job called for a base coat of Loma plaster and a top coat of…
In early 2007, a customer invited me to a local one-day workshop offered by the manufacturer of American Clay Earth Plasters (americanclay.com). I attended, and I’m glad I did. I had been a residential and commercial repainting contractor since 2001 – one who used environmentally sensitive products whenever possible – and was looking for compatible ways to grow my business. I learned that the natural-clay veneer plasters are nontoxic and easier to work with than traditional cement, acrylic, and lime plasters, and that they can be applied to most substrates in a wide range of textures and colors. Waste is minimal, because leftover material can be rehydrated and used at another time.
Later that year I attended a three-day advanced applicator training class at the company’s headquarters in Albuquerque, and today I’m a registered applicator. Plastering now accounts for about a third of my finishing business. I charge about $3.50 to $6 per square foot for walls and about $6 to $8 per square foot for ceilings, depending on the condition of the substrate, the plasters and colors used, and the complexity of the finish. Especially at first, I did a lot of repair jobs in my area; these were cases where American Clay had been applied by people who skipped the training and failed to follow the application guidelines to the letter.
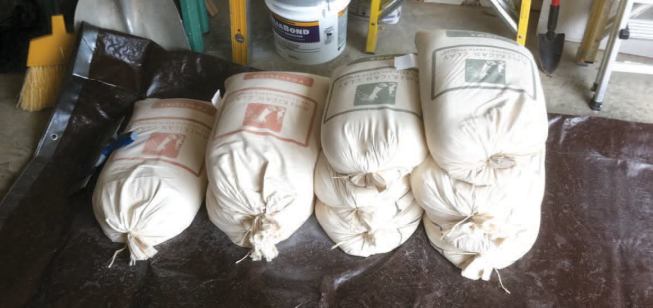
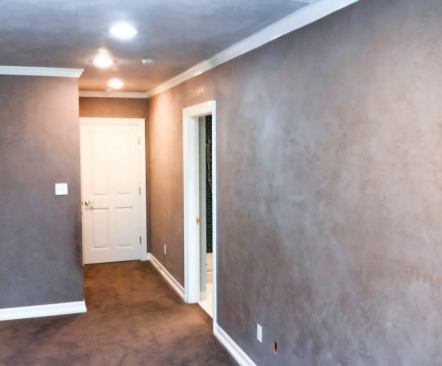
Our most recent challenge was to plaster the walls and ceiling of an existing master bedroom surfaced with a combination of old and new drywall. The old drywall was textured and painted, and the new drywall was bare panels. The job called for a base coat of Loma plaster and a top coat of Porcelina plaster, both of which come in 50-pound sacks. On the walls, we blended both coats with a color pigment called Rio Grande Pecan. The ceiling is uncolored.
Prep work. We started by covering the carpeted floor with 6-mil poly and the trim with painter’s tape. We taped the new drywall seams with fiberglass mesh, gave the new corners an unsanded Level 3 drywall finish, and used a 20-minute setting compound to patch and level the drywall. Then we added 70-grit sand to Kilz 2 Latex stain-blocking primer and applied a coat to the entire substrate so it would grip the plaster. The single outside corner in the room got a second coat.
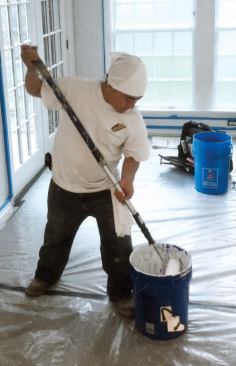
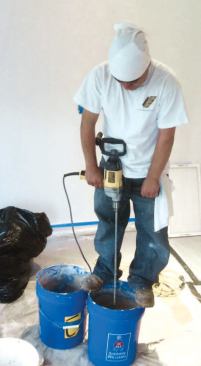
Base coat. At the end of the day, we used a paddle and two 5-gallon buckets to mix the base coat for the walls and the ceiling. The mix needs to sit for at least 30 minutes. Since we don’t use extra additives, our mixed plasters last almost indefinitely in sealed containers. We capped the buckets and left them overnight so we could start troweling first thing in the morning.
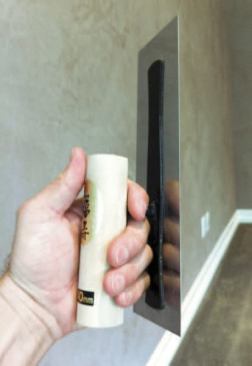
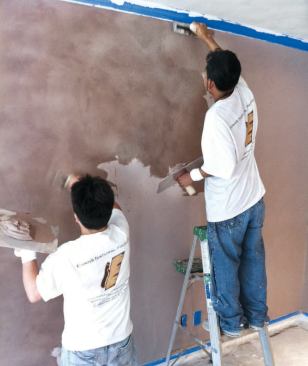
The next day, we applied the uncolored base coat to the ceiling and the colored base coat to the walls – both to about the thickness of a credit card – using 240-millimeter flexible stainless-steel rectangular trowels. I buy these Japanese tools from American Clay for $36 apiece, and they’re awesome; they have the perfect shape and flexibility for applying both the base and top coats. American Clay sells several other Japanese steel and Lexan-plastic trowels that we also can’t live without.
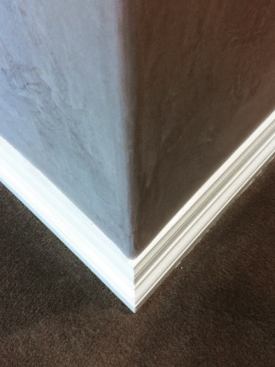
Next, using the same trowel and a damp grouting sponge, I carefully bullnosed the outside corner. When the corner became “leather hard,” I compressed it lightly with the sponge. Not everyone does this, but I like to because it makes the vulnerable corners harder.
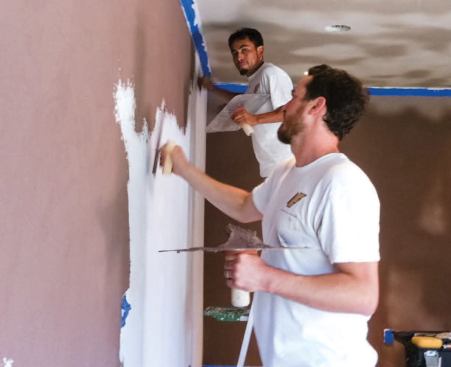
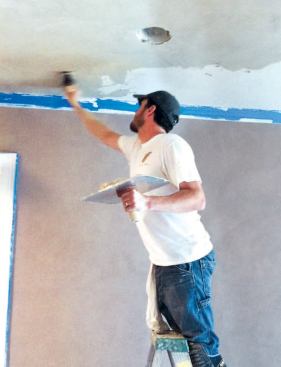
Top coat. We applied the Porcelina top coat to the ceiling the next day and to the walls two days later, again to credit-card thickness. I applied a second top coat over the outside corner, again working the plaster meticulously with trowel and sponge to maintain the bullnose. Sometimes you need to mist the base coat with water before applying the top coat to prevent premature drying, but we were working in high humidity and had to use a fan to speed the drying process.
When it was dry we had a smooth surface, with the color running all the way through to the substrate so minor bumps and scrapes wouldn’t remove it.
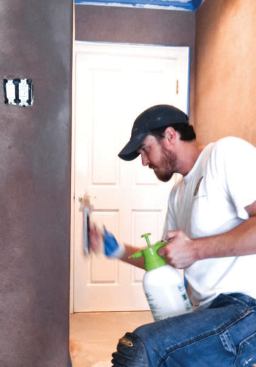
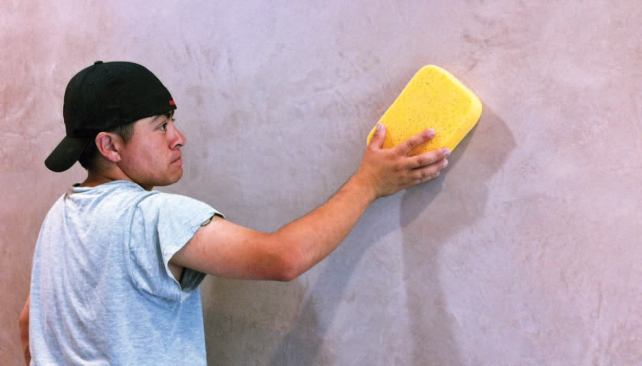
Finish. The next day was the fun part: compressing and burnishing the top coat to create a durable, beautiful finish. The proper technique varies depending on the desired results; for this job, we used spray bottles to wet the surfaces with water before working the plaster in firm, wide strokes with 300-millimeter rigid stainless-steel rectangular trowels. The process created a rippled texture and added dashes of gray to the purplish-brown walls and white ceiling. Since sweet corners are one of the hallmarks of a good applicator, I also fine-tuned the outside corner with a 240-millimeter Lexan-plastic pointed trowel and a spray bottle.
When the plaster dried, we ran a razor blade along the edges of the trim and removed the painter’s tape. Before pulling the 6-mil poly, we buffed the entire plaster surface with dry grouting sponges. You won’t find that extra step in American Clay’s instructions, but it removes any water marks left from troweling, wipes residual sand and fine dust from the surface, and brings out the sheen.
Touch-ups. The job took three of us four and a half days to complete. In the future, the homeowners will be able to remove most marks with a dry sponge. I always leave a touch-up kit, however, so I can easily come back and do repairs if necessary. If they ever want to change the color or texture, we can recoat.
Justin Evans owns Evans Natural Finishes in Dallas.