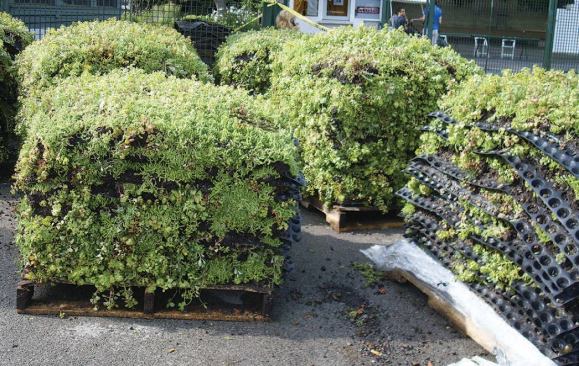
Interlocking pre-grown panels add little dead load to the roof.
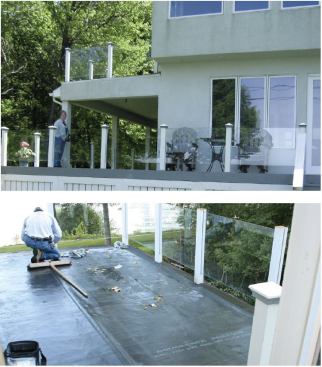
Last fall, I was in a client’s second-floor office hashing out the details of an ongoing landscaping project when I noticed a door to the outside. I asked where it led. “Nowhere, really,” my client said. After checking for myself, I understood what she meant. The door opened onto an unattractive deck that — despite a great view of Lake Ontario — was clearly unused. An EPDM membrane covered the floor, and I could imagine how hot that black surface got in the summertime.
I suggested adding a roof garden. Though my client knew about the environmental benefits of green roofs, she was surprised to learn about the lightweight planting system my company had recently been trained to install. While these vegetative panels from Green Living Technologies (800/631-8001, agreenroof.com) are primarily used for commercial construction, they’re reasonably priced and easy to work with, and they make green roofs feasible even for small residential projects, where aesthetics are more important than LEED points. The maker coordinates distribution with regional growers and uses trained, certified contractors for installation.
A Modular Approach
About Green Roofs
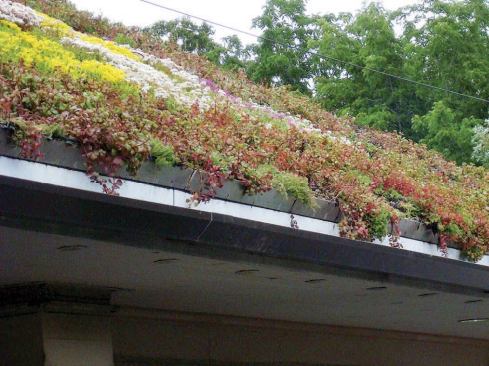
There are essentially two types of green roofs: extensive and intensive. Extensive roofs — like the one described in this story — are by far the simplest to install, and in many cases can be retrofitted onto an existing roof. Because the planting medium is only 3 to 6 inches thick, weight is typically less than 50 pounds per square foot — even when traditional layered systems are used. The trade-off for this relatively light roof load is a small plant palette that’s typically limited to shallow-rooted plants like sedums and grasses. Extensive roofs can complement sitting areas and other human-activity spaces, but are used mostly to catch and filter water. In drier parts of the country, irrigation is a necessity to keep the plants alive, since they’re living in a very thin planting medium.
Intensive roofs have a much thicker planting medium — from 8 inches to 4 feet (or even more in some cases) — which makes them costlier and more complicated to install. Because they have to support the weight of the planting medium, the plants, any structures, and water — which can approach 150 pounds per square foot — intensive roofs are installed mainly on concrete roof decks. They offer a large plant palette, including trees and large shrubs. Proper irrigation and drainage is critical so that the roof isn’t overloaded with too much retained water.
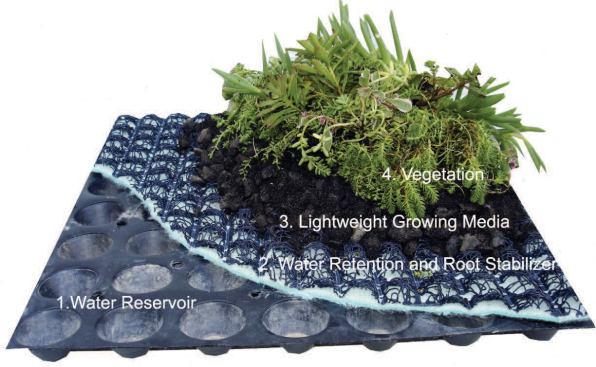
GLT’s modular panels — an alternative to the more common complex layered green-roof systems (see sidebar) — combine a thin growing medium with a root stabilizer and water reservoir. Designed so that they interlock, the 39-by-39-inch (or 10.72-square-foot) panels are about an inch thick before planting and 3 inches thick when they’re vegetated. Each can retain approximately 8 gallons of water, but even when they’re installed on the roof and fully saturated, they weigh only about 15 pounds per square foot.
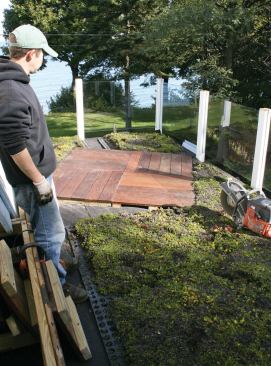
The panels we used on this project are designed for roofs with pitches up to 4/12. GLT also makes panels for roof pitches between 5/12 and 12/12 and has a bracket system that can be used to adapt the panels for pitches up to 90 degrees. In addition, the company offers self-contained trays for flat roofs. We preferred to use panels for this project, because they can be cut on site to fit irregular shapes. Our plan was to mix preplanted panels with site-built ipe deck sections to transform the 10-foot by 20-foot deck into an attractive living space.
Framing and Waterproofing
Because of their thin profile and light weight, the panels can often be installed with no major modifications to the existing structure. Here, the deck was a slightly pitched porch roof above an entryway and was conventionally framed with pressure-treated lumber supported by 6×6 PT posts. Though ugly, the single-ply 45-mil EPDM membrane covering the 3/4-inch plywood was in good shape and showed no signs of leakage. After consulting with our engineer, we decided that the deck wouldn’t require additional reinforcement to support the new loads from the roof panels, but we did want to beef up the waterproofing layer.
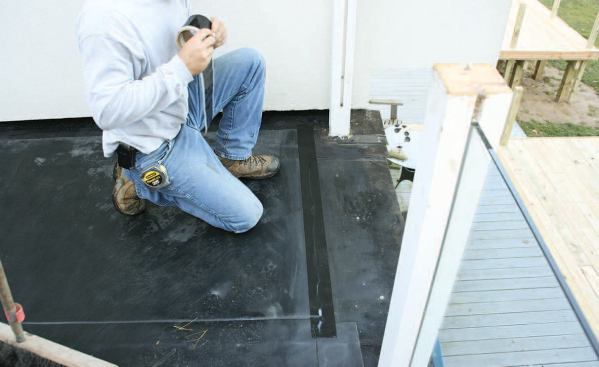
First, we thoroughly cleaned the old membrane by sweeping and vacuuming it; then we laid down another 45-mil EPDM membrane on top of it. We lapped the edges up the walls, tucking them behind the existing synthetic stucco siding as best we could, and cut in around the existing 4×4 deck posts, then primed the edges and seams before sealing them with self-adhesive EPDM seam tape. Because the roof deck framing was enclosed by the porch ceiling underneath, we used the same basic waterproofing details we would have used for a deck above living space.
Next, to protect the EPDM against punctures but still allow for drainage, we laid down a heavy-duty landscape fabric — DeWitt 20-year weed barrier (800/888-9669, dewittcompany.com), the same 4.1-ounce fabric we use for landscaping projects on the ground. Wind uplift can be a problem on rooftop gardens. On larger projects, GeoEdge (800/356-9660, permaloc.com), an L-shaped aluminum edge restraint, is normally used to prevent uplift at the eaves and at the transitions between planting areas and hardscape or drainage areas. On this small deck, however, we finished the outside edge with 5/4 ipe deck boards laid on edge and fastened to the outer face of the deck posts. A slight gap between the ipe and the landscape fabric allows water to drain into the porch roof’s gutter.