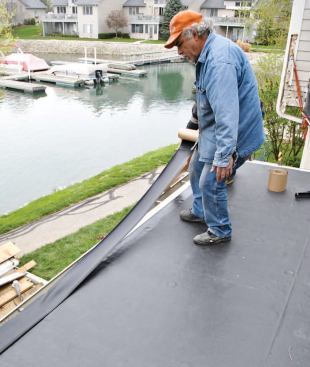

The roofers pull the EPDM tight and tack it in place, leaving it…
Detailing Edges and Penetrations
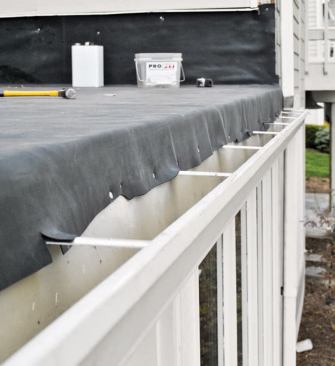
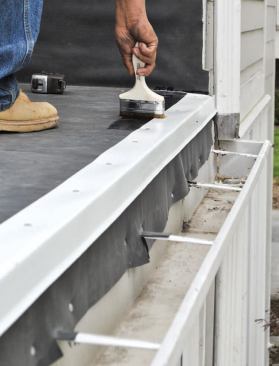
At the outer edge of the roof, we folded the membrane over, pulled it tight, and tacked it temporarily into place with roofing nails. Then we nailed down a length of gutter apron (a type of drip edge). We applied a transparent glue called Dewitt Pro Primer Activator – which is a bit thicker than paint – to the surface of the apron, then covered it with seam tape, using a hard rubber roller to press the tape into place. (The seam tape is self-adhesive, but we always add glue anyway, as an extra precaution.) We also used seam tape and glue to seal around the exhaust vent on the wall.
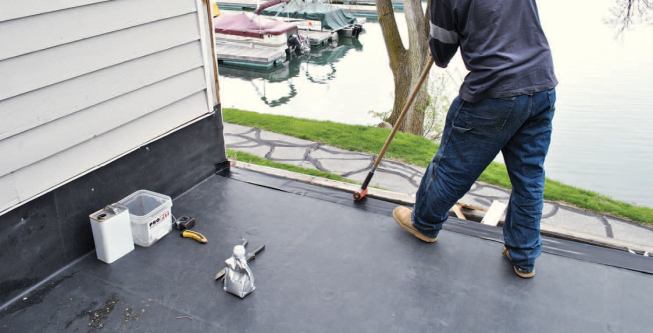
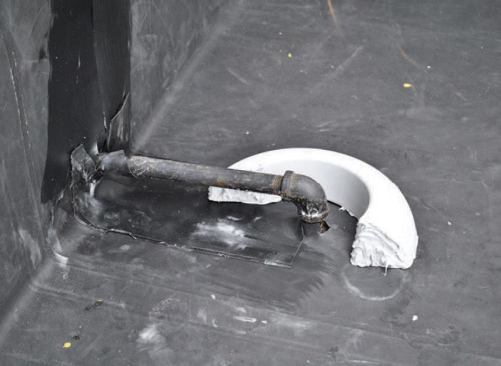
The biggest potential for a leak on this roof surface was around the gas-pipe penetration. In the past, this area would have been detailed with seam tape and roofing cement – an imperfect solution that seldom lasts the life of the roof. Today, however, there’s an easier and more effective way: a PVC donut, available from roofing suppliers. The donut is usually thought of as a commercial product, but it’s great for residential jobs, too.
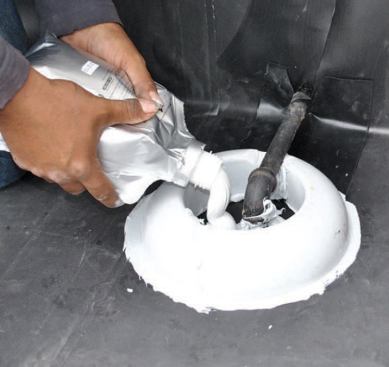
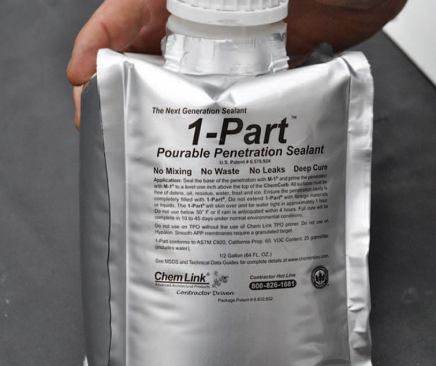
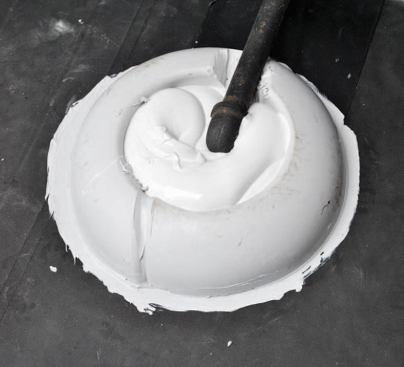
We cut the donut in half so that it would fit around the pipe, then glued the two halves to the roof and to each other with 1-Part Pourable Penetration Sealant, a caulk-like material that comes in a bag. Then we filled the donut with the sealant. A big advantage of this product is that the sealant doesn’t dry completely hard – it retains some flexibility so it can adapt to movement in the roof.
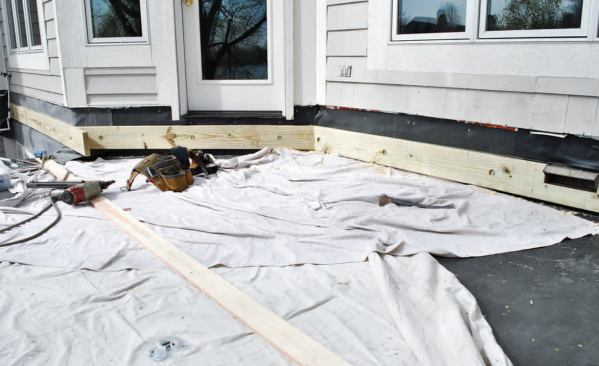

A pressure-treated deck ledger supports the inboard end of the n…
Adding the Deck
After completing the rubber roof, we turned our attention to the deck. We bolted the ledger to the house, flashing it with Grace Ice & Water Shield. We then installed a triple 2×10 girder at the outer edge of the roof, supporting it with metal hangers on the walls at each end and stiffening it in the middle with a single block. To protect the finished roof surface, we placed a piece of scrap roofing – folded over itself three or four times – between the roof and the block.
With the girder and ledger in place, we installed the 2×8 joists in hangers, then flashed the wall ledger with aluminum – a critical step, since the peel-and-stick membrane is meant to serve only as a backup watershed. We extended the metal flashing 5 inches horizontally past the face of the ledger, to help keep water off the joist hangers.
The final step was to re-install the old railing and Trex decking. Once we’d trimmed the base of the wall, there was no way to tell that decking had been replaced – except, of course, that the roof no longer leaked.
The job – including interior water-damage repairs – cost about $8,900. It took two to three workers approximately two weeks from start to finish: one day for demolition; one day to install the new roofing; three to four days for the interior carpentry and painting; and two to three days to build the outside ledger, decking, and handrail and do all the exterior painting.
Matt Wright is owner of The HomeWright LLC, a remodeling company in Carmel, Ind.