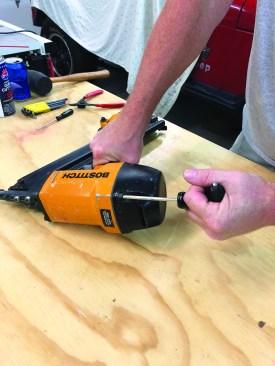
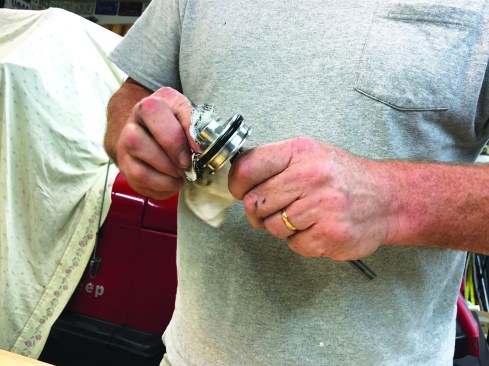
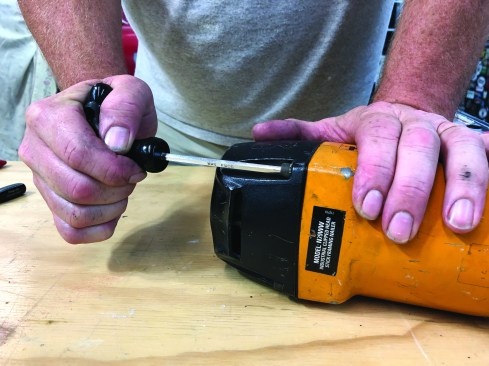
First, remove the four machine screws that secure the cylinder c…
First, remove the four machine screws that secure the cylinder cap to the main frame.
Lightly tap the cap with a rubber mallet to loosen it, if necess…
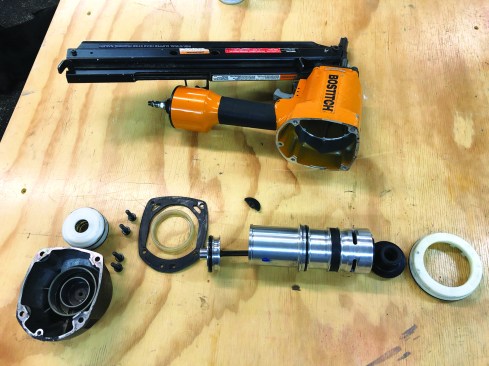
Lightly tap the cap with a rubber mallet to loosen it, if necessary. Continue to remove the parts of the nailer, and lay them out on the bench top in the order that you remove them.
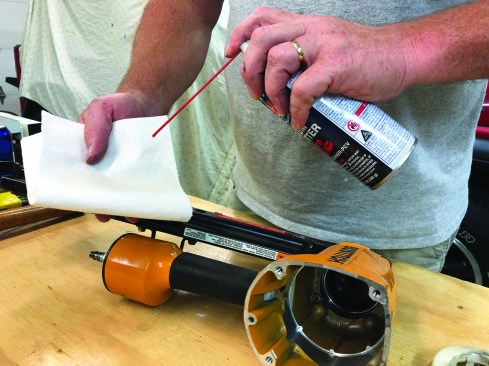
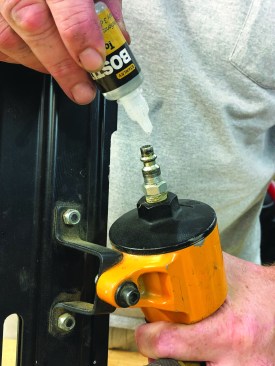
On a clean paper towel, spray a cleaner-lubricant, such as Gum C…
On a clean paper towel, spray a cleaner-lubricant, such as Gum Cutter (berkebileoil.com), that will not have an adverse effect on the internal nailer parts.
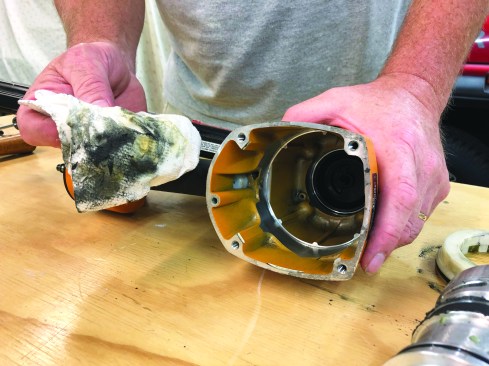
Then wipe the inside of the main nailer frame.
Using fresh towels with cleaner, wipe down the rest of the parts…
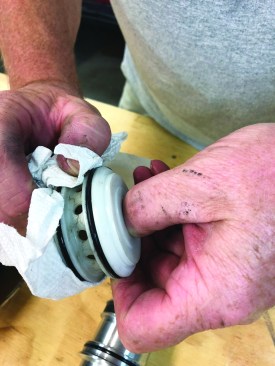
Using fresh towels with cleaner, wipe down the rest of the parts including the driver-piston assembly …
… and the piston head valve. Most rebuild kits come with a par…
… and the piston head valve. Most rebuild kits come with a parts schematic, but if none is included and you are unfamiliar with the internal parts of a pneumatic nailer, refer to a parts schematic from the nailer’s manufacturer.
1
of 14
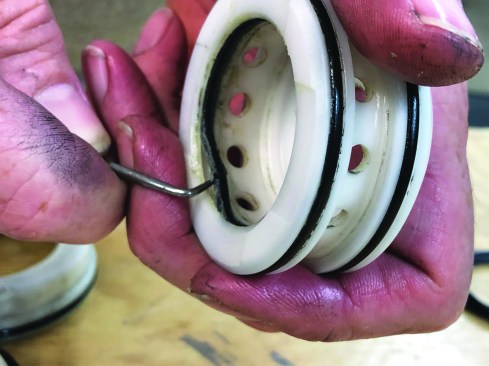
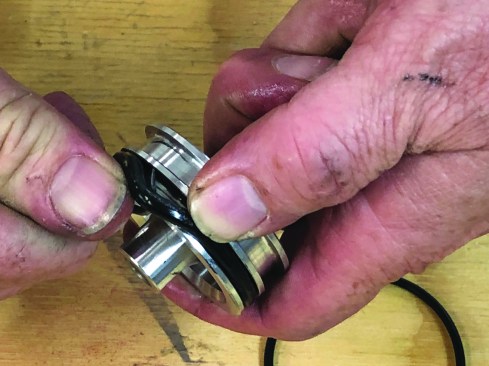
Remove the piston stop and compression spring from the piston he…
Remove the piston stop and compression spring from the piston head valve and wipe them both clean. Using a pick hook, remove the inside O-ring from the piston head valve.
Select the proper replacement O-ring from the kit and smear the …
Select the proper replacement O-ring from the kit and smear the ring with the lubricant provided in the kit.
After making sure that the new O-ring is completely coated with …
After making sure that the new O-ring is completely coated with lubricant, slip it into the groove on the head valve.
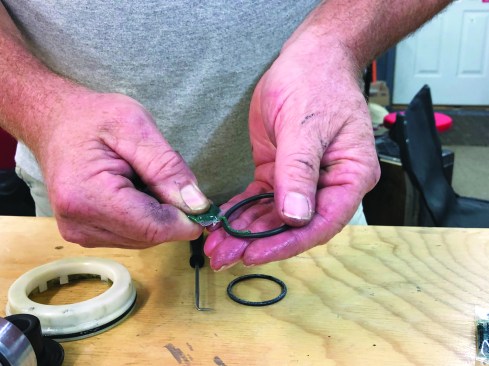
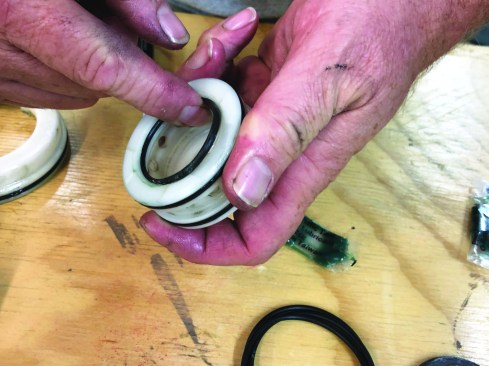
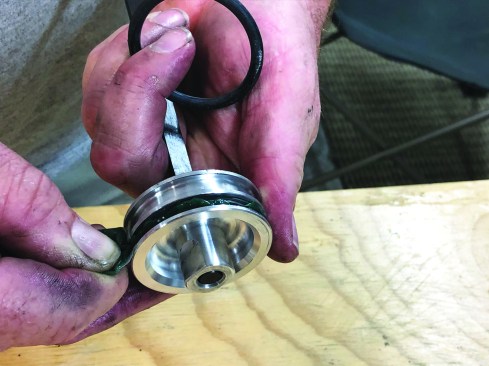
Next, remove the outer O-rings from the piston head valve.
As before, smear lubricant on the replacement rings and slip the…
As before, smear lubricant on the replacement rings and slip them into the outer grooves on the valve. Rotate the valve with your fingers on the O-rings to ensure that the lubricant is distributed evenly.
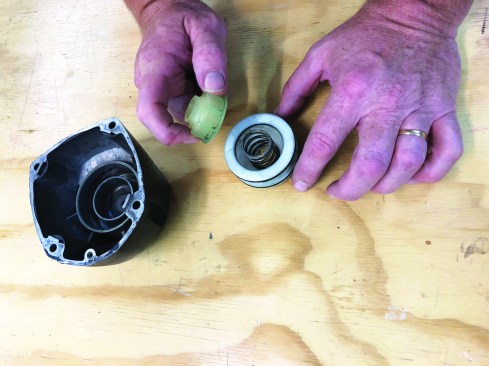
Place the compression spring and piston stop inside the piston h…
Place the compression spring and piston stop inside the piston head valve
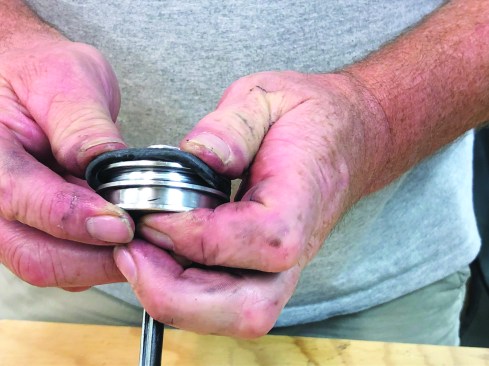
Slip the assembly into the cylinder cap, pressing gently with yo…
Slip the assembly into the cylinder cap, pressing gently with your thumbs.
The driver-piston assembly consists of the piston head attached …
The driver-piston assembly consists of the piston head attached to the driver. Remove the old O-ring.
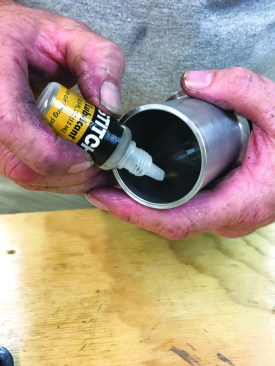
Thoroughly clean all dirt and old lubricant from the O-ring groo…
Thoroughly clean all dirt and old lubricant from the O-ring groove.
Squirt fresh lubricant into the entire perimeter of the groove
Select the proper replacement O-ring and slip it into place on t…
Select the proper replacement O-ring and slip it into place on the piston (17). While working on the driver-piston assembly, check to make sure the end of the driver shaft is not damaged or worn. If you have the measuring tools, make sure that the distance from the piston to the end of the shaft is within the manufacturer’s specs. Adjusting the shaft is best done by a service technician.
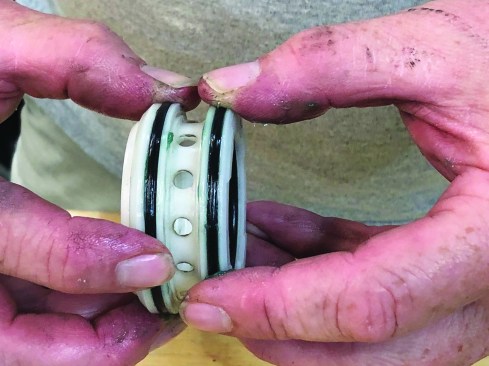
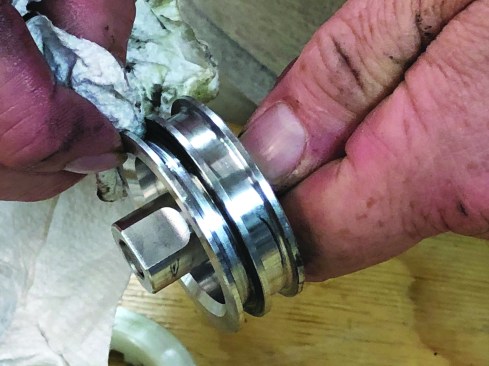
The cylinder sleeve that holds the driverpiston assembly has two…
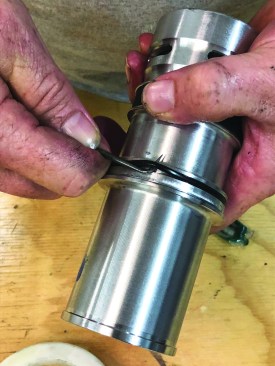
The cylinder sleeve that holds the driverpiston assembly has two O-rings to replace. Pull the smaller ring from its groove.
Rreplace it after lubricating the groove properly.
1
of 12
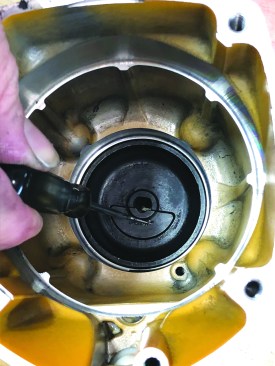
The last parts to clean are the cylinder ring, which has an O-ri…
The last parts to clean are the cylinder ring, which has an O-ring that needs to be replaced in the usual fashion, and the cylinder seal (not shown). With all the parts clean and properly lubricated and with the O-rings replaced correctly, it’s time to reassemble the nailer. The locator plate (removed earlier) is a half-round piece of metal that guides the driver shaft.
Set the plate into its slot in the nailer, taking care not to in…
Set the plate into its slot in the nailer, taking care not to install the piece upside down.
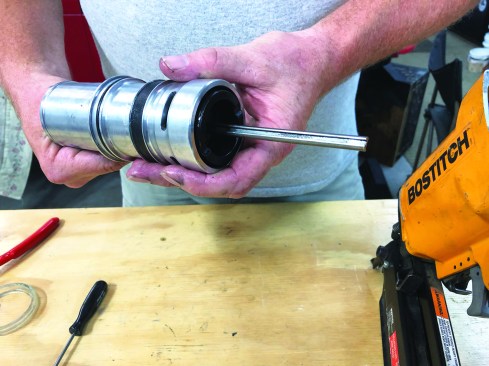
Next, slip the driver-piston assembly into the cylinder sleeve, …
Next, slip the driver-piston assembly into the cylinder sleeve, pushing it all the way through with the shaft protruding from the bottom.
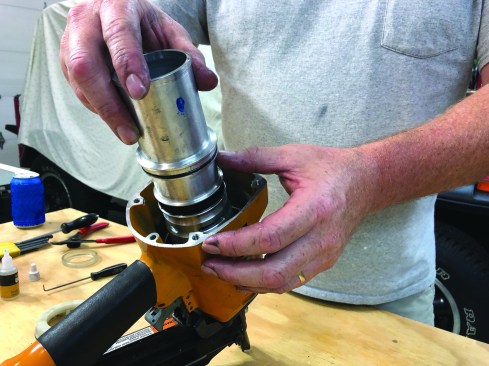
Place the bottom bumper into the frame over the locator plate to…
Place the bottom bumper into the frame over the locator plate to help guide the cylinder assembly into place. The shaft of the driver has a groove cut into one side that has to align properly with the locator plate. With the shaft and the locator plate aligned correctly, slip the cylinder assembly into the nailer frame.
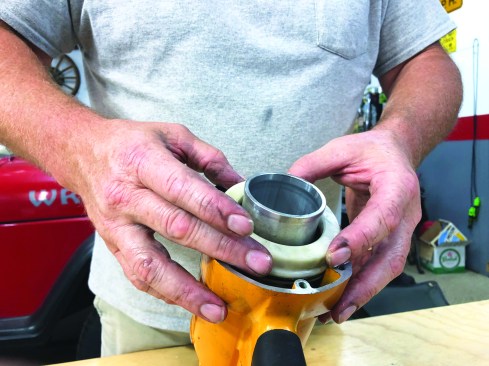
Next, slide the cylinder ring into place over the sleeve, pushin…
Next, slide the cylinder ring into place over the sleeve, pushing the ring as far down as possible. Finally, slip the cylinder seal over the top of the cylinder assembly.
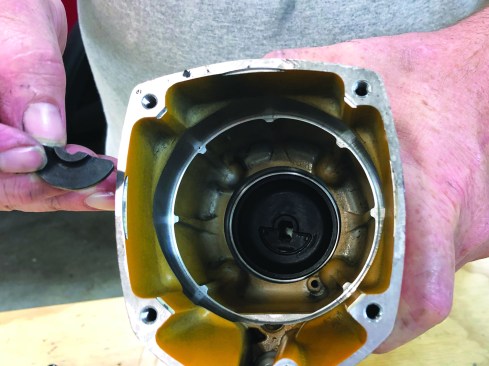
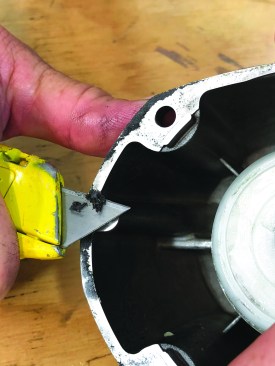
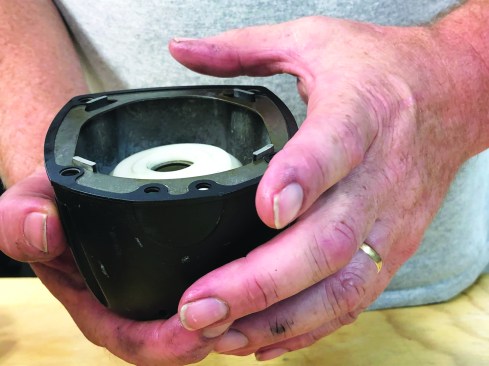
The cylinder cap installs on the nailer frame with a gasket that…
The cylinder cap installs on the nailer frame with a gasket that needs to be replaced with every rebuild. First, though, carefully scrape off any residue from the edge of the cap, using a sharp utility-knife blade.
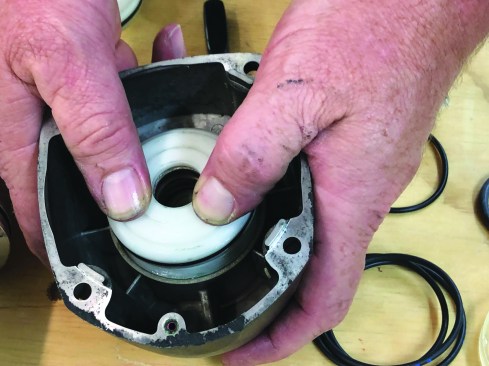
The cap for this nailer has guides that align the gasket properl…
The cap for this nailer has guides that align the gasket properly on the cap and keep it in place during reassembly.
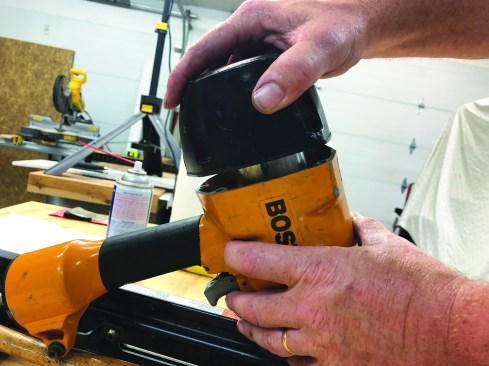
Press the cap onto the nailer frame in the proper alignment, pus…
Press the cap onto the nailer frame in the proper alignment, pushing down hard on the cap to depress the compression spring.
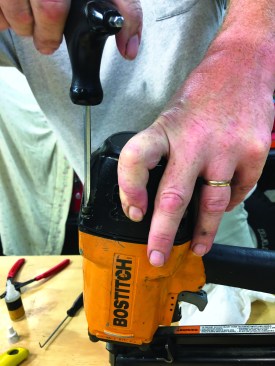
While holding the cap in place against the nailer frame, insert …
While holding the cap in place against the nailer frame, insert and start to thread all four screws into their holes. It’s important to tighten the screws evenly, so tighten them corner-to-corner, a few turns at a time.
When the cap is in contact with the frame evenly around its enti…
When the cap is in contact with the frame evenly around its entire perimeter, tighten the machine screws to a predetermined torque. For this nailer, the manufacturer recommends 25 to 40 pounds of torque.
When you have finished rebuilding the nailer, test the tool to e…
When you have finished rebuilding the nailer, test the tool to ensure that it’s working properly. As should be done with every use, add a couple of drops of air-nailer oil before connecting the air hose.
Drive a few test nails into a scrap board. If you’ve followed …
Drive a few test nails into a scrap board. If you’ve followed all the steps of the rebuild, the nailer should be ready for its next job.
OK, I admit it: I love buying tools. But I also want them to work properly and last a long time, so I always take good care of them and do routine maintenance, which saves me a lot of time and money in the long run. Pneumatic nailers—from headless pinners and finish nailers to roofing and framing nailers—are regularly part of my tool arsenal. These nailers are all similar on the inside, and periodically or when a project has given one a particularly rigorous workout, I tear them down to clean them, inspect them for wear, and replace the seals and gaskets.
While rebuilding pneumatic tools is a good idea after an extended time, I also do several things with every use to keep these tools in good working order. I always put a couple of drops of air-nailer oil in the nozzle before connecting the air hose. After every job, I blow off the tools to remove dust and debris. Water vapor in the air lines is especially hard on nailers, so I drain the air from my compressor after every use to remove moisture from the air tank. In some areas with constant high humidity, you may need to install a device to physically remove the moisture from the air lines.
In addition, I try to operate air tools at the proper cfm. Too much pressure can damage a nailer, and too little pressure can result in poorly driven fasteners. Finally, I always use fasteners with the proper angle, head type, and collation made specifically for my nailer. Using the wrong fastener can make a nailer jam, misfire, or double fire—all of which can be dangerous.
I recently rebuilt my old Bostitch framing nailer. I bought an O-ring maintenance kit online that works for several Bostitch nailers. Then I cleaned and decluttered my workbench so I could keep track of all the nailer parts. I removed and sorted the contents of the kit, separating all the parts on my workbench. I also gathered all the tools, cleaners, and lubricants that I’d need, and I was ready to start.
Barrett Sites has owned HHI (Handyman Home Improvements) for 20 years and is a remodeler and finish carpenter in Chambersburg, PA. He has been a presenter at JLC Live, Marc Adams School of woodworking in Indiana and Thaddaeus Stevens School in Lancaster Pennsylvania with Gary Striegler. He is also involved in doing his trade in Honduras, working with Mercy International and is known to many on jobsite or in the mission field as McGyver: problem solver. Follow Barret on Facebook and Instagram.