Maine has some of the oldest housing stock in the nation, and the old town of Bangor is no exception. The city boasts a collection of fine old homes built during the town’s heyday as a center of the state’s lumber industry, which boomed in the 1800s. And it has neighborhoods full of 1960s and 1970s split-level homes, raised ranches, and garrison colonials, all of them good candidates for a thorough energy upgrade. But with home prices flat or even falling in the area, an investment in a comprehensive energy upgrade can be a tough sell.
1
of 38
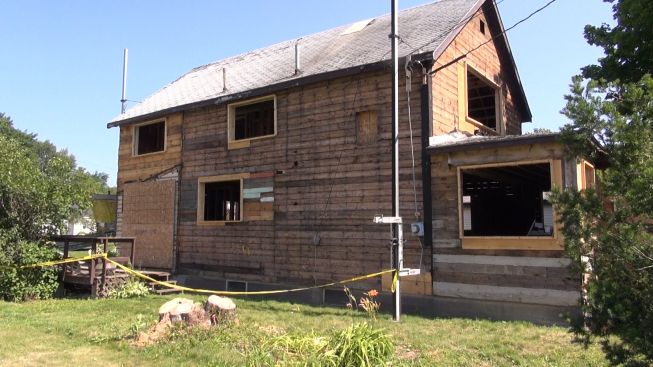
Ted Cushman/JLC
House Revivers (Bangor, Maine) completely stripped this home's e…
House Revivers (Bangor, Maine) completely stripped this home's exterior and gutted the interior, en route to a complete makeover.
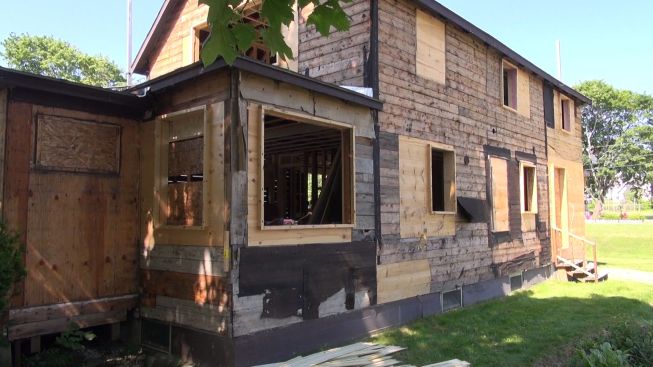
Ted Cushman/JLC
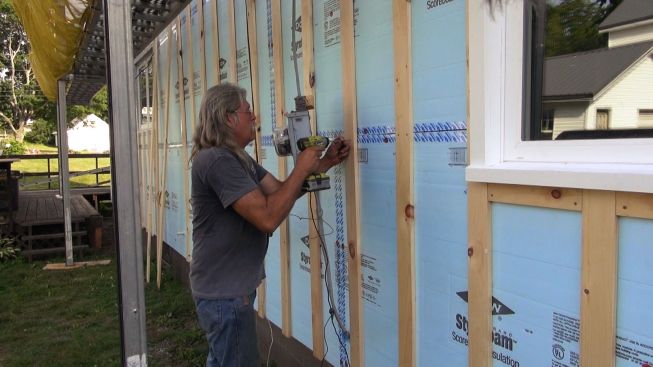
The original board sheathing remains in place, except where new …
The original board sheathing remains in place, except where new window openings have been framed. The plan is to cover the exterior with Dow Styrofoam, taped at the seams, to form a new insulated air control layer and drainage plane.
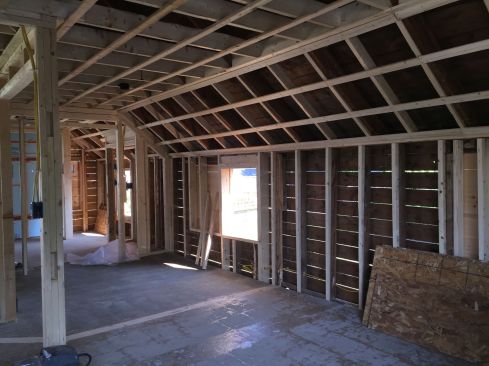
Ted Cushman/JLC
Inside the house, the second floor ceiling has been raised and t…
Inside the house, the second floor ceiling has been raised and the rafters and walls have been padded in to provide for increased insulation. The interior layout has been completey revised with new partition framing.
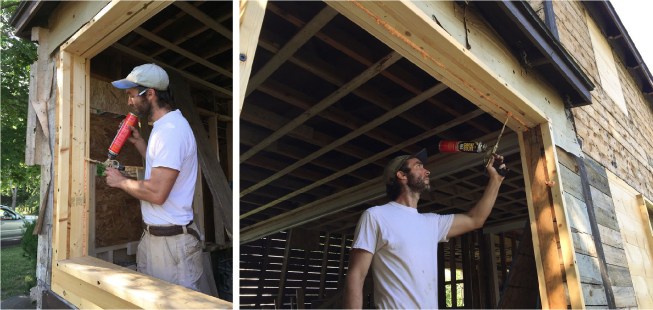
Ted Cushman/JLC
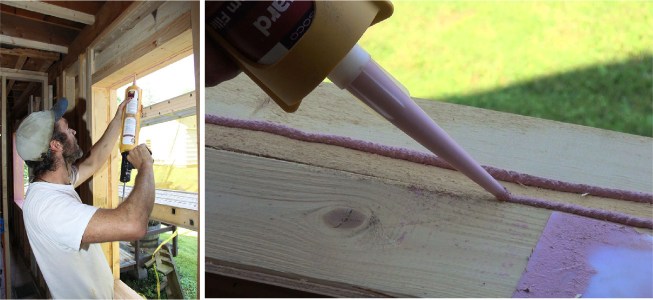
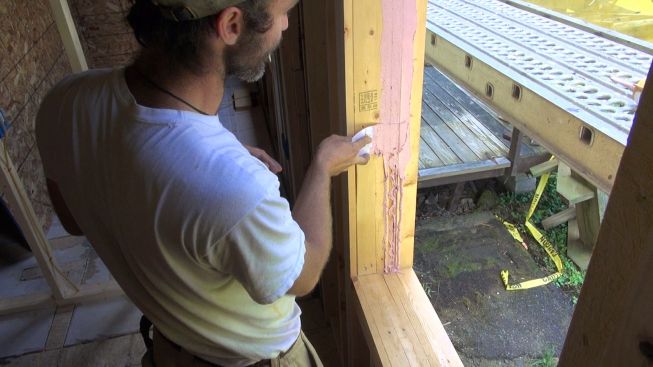
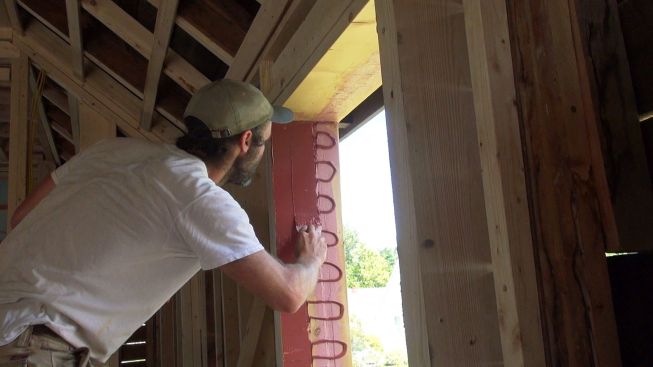
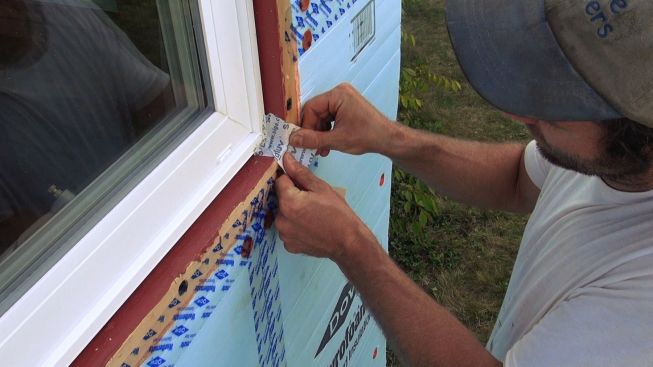
House Revivers project manager David Kelly works on air-sealing …
House Revivers project manager David Kelly works on air-sealing and moisture management details for a re-framed window opening. He starts by filling large gaps in the built-out rough opening using canned insulating foam.
Ted Cushman/JLC
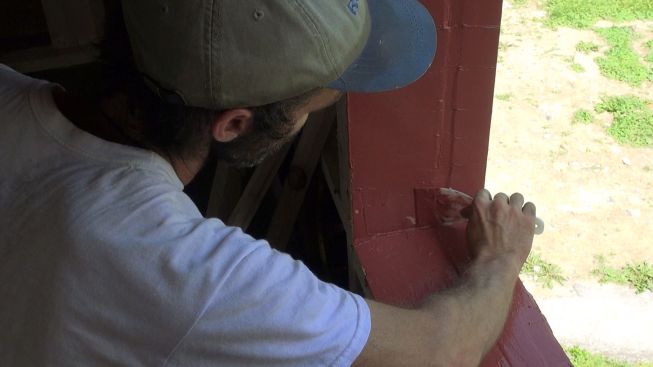
Kelly has decided to use the Prosoco R-Guard system to waterproo…
Kelly has decided to use the Prosoco R-Guard system to waterproof the window rough openings. Here, he applies Prosoco Joint and Seam Filler to fill a large gap.
Ted Cushman/JLC
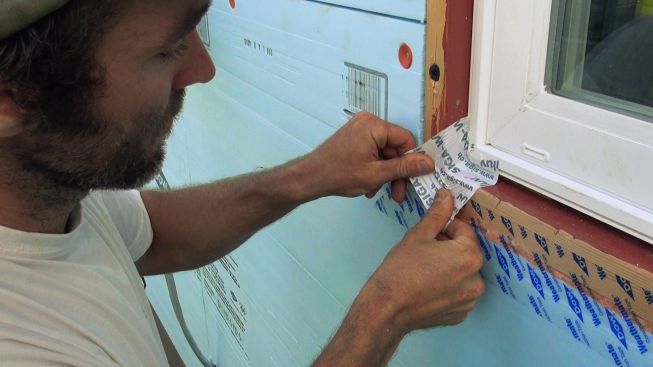
Kelly applies Prosoco Joint and Seam Filler to a rough window ja…
Kelly applies Prosoco Joint and Seam Filler to a rough window jamb.
Ted Cushman/JLC
Kelly tools the waterproof, vapor-open Joint and Seam Filler wit…
Kelly tools the waterproof, vapor-open Joint and Seam Filler with a plastic trowel. The goal is to provide a reasonably smooth base for Prosoco
Ted Cushman/JLC
Tooling Joint and Seam Filler with a plastic trowel. (By the way…
Tooling Joint and Seam Filler with a plastic trowel. (By the way, Joint and Seam Filler cleans up with soap and water, as JLC editor Ted Cushman learned when he got some on the seat of his wife's brand new Toyota Prius.)
Ted Cushman/JLC
Kelly tools the Joint and Seam Filler with a plastic trowel. The…
Kelly tools the Joint and Seam Filler with a plastic trowel. The material allows plenty of working time, Kelly says.
Ted Cushman/JLC
Tooling out the Joint and Seam Filler with a plastic trowel.
Ted Cushman/JLC
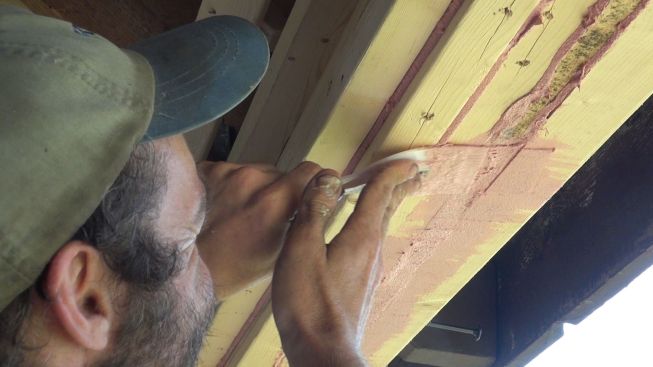
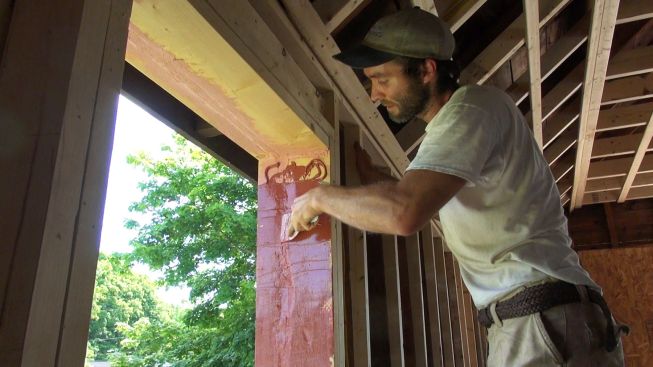
After filling rough parts of the framed opening with Joint and S…
After filling rough parts of the framed opening with Joint and Seam Filler, Kelly starts flashing the entire opening with Prosoco FastFlash.
Ted Cushman/JLC
Kelly spreads the FastFlash onto the wood with a plastic trowel.
Ted Cushman/JLC
Kelly spreads out the FastFlash to form a continuous coat over t…
Kelly spreads out the FastFlash to form a continuous coat over the rough, irregular wood framing. Kelly chose the fluid-applied material for this part of the project because he was concerned that it would be difficult to achieve full adhesion on the rough surface using a construction tape.
Ted Cushman/JLC
Kelly spreads out the FastFlash with a trowel. The waterproof, v…
Kelly spreads out the FastFlash with a trowel. The waterproof, vapor-open material creates a smooth surface suitable for later attachment of construction tapes.
Ted Cushman/JLC
Tooling out FastFlash to achieve a complete, smooth waterproof c…
Tooling out FastFlash to achieve a complete, smooth waterproof coat.
Ted Cushman/JLC
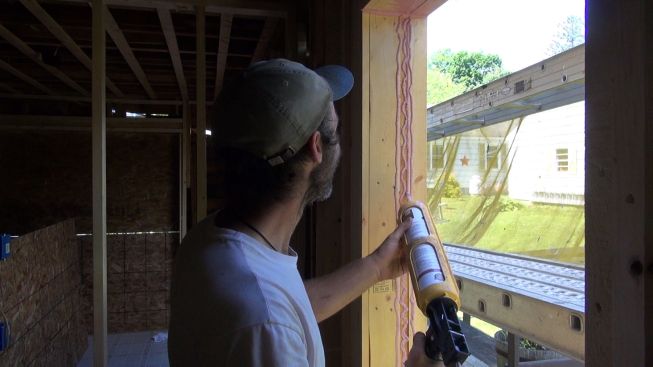
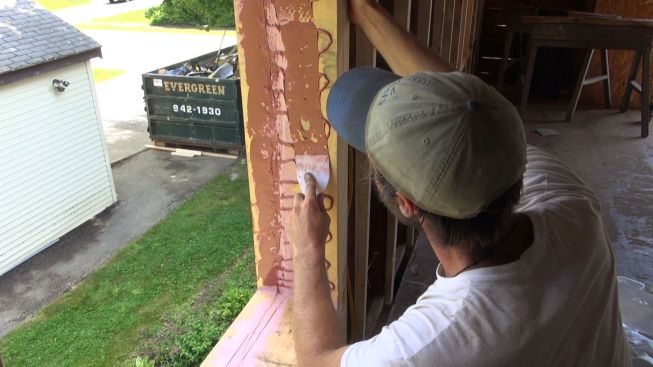
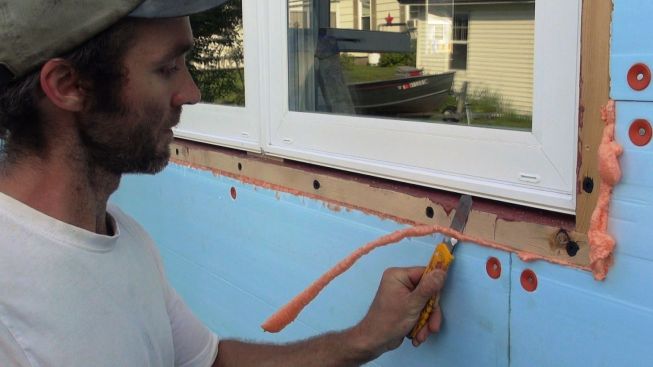
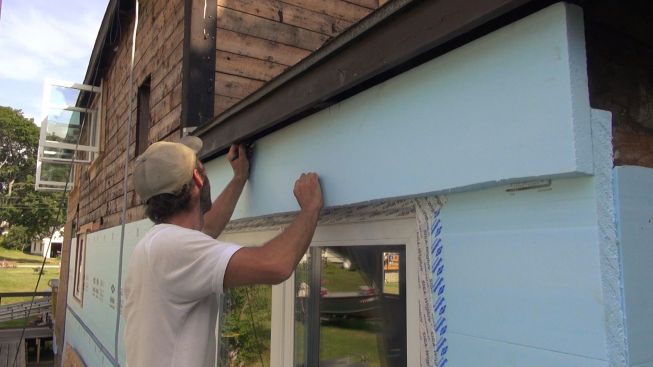
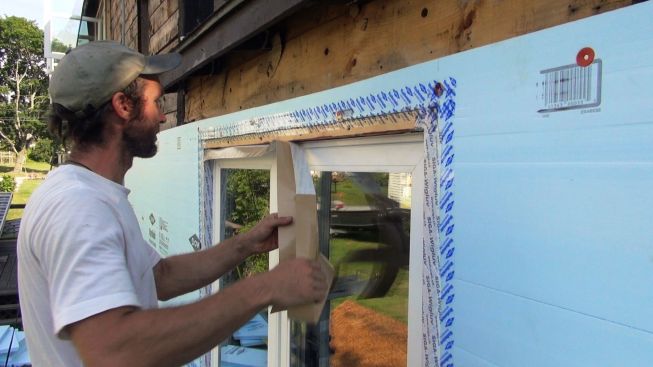
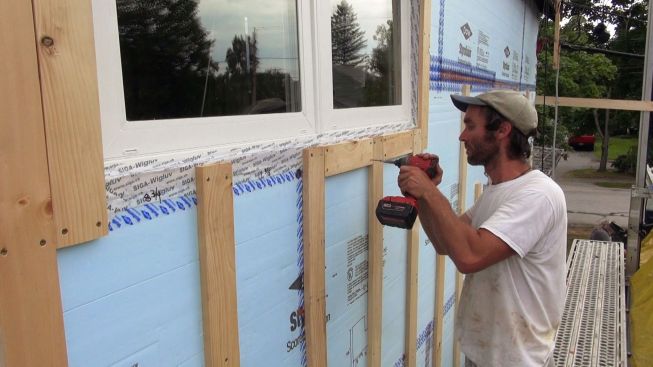
Because the existing walls were out of plumb, windows were insta…
Because the existing walls were out of plumb, windows were installed in the center of the window openings to enable crews to split the difference while plumbing the window units. Then, Dow Styrofoam insulation was applied to the wall exteriors. Here, David Kelly trims off excess injected foam used to fill and seal the gap between the XPS foam and the furred window opening.
Ted Cushman/JLC
David Kelly seals the juncture between the Dow Styrofoam insulat…
David Kelly seals the juncture between the Dow Styrofoam insulated sheathing and the wood window buck using Dow Weathermate tape. The Dow tape is one of the few tapes available that sticks well to XPS foam, Kelly says, and it's more affordable than many other tapes too.
Ted Cushman/JLC
Sealing the joint between the foam insulation and the window buc…
Sealing the joint between the foam insulation and the window buck fur-out with Dow Weathermate tape.
Ted Cushman/JLC
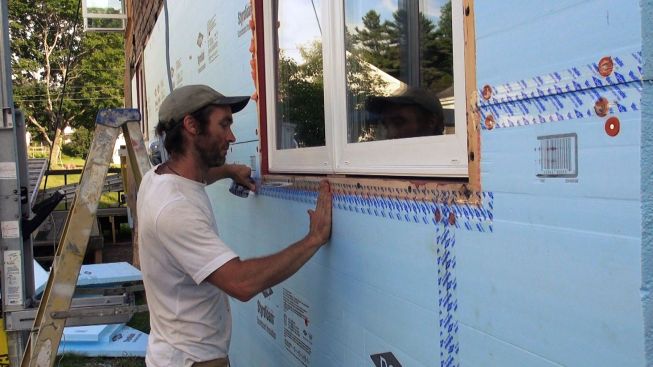
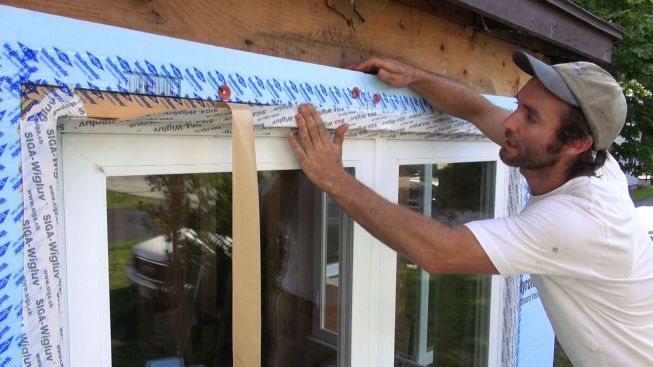
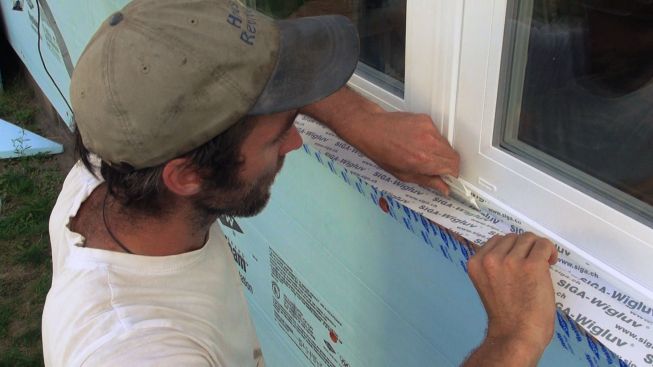
Kelly presses the Sega Wigluv tape over the Dow Weathermate tape…
Kelly presses the Sega Wigluv tape over the Dow Weathermate tape at the top of the window. Despite the reverse lap, Kelly is confident that the tape joint is watertight.
Ted Cushman/JLC
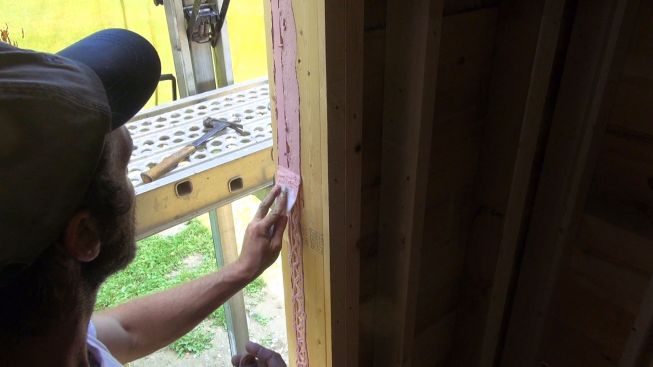
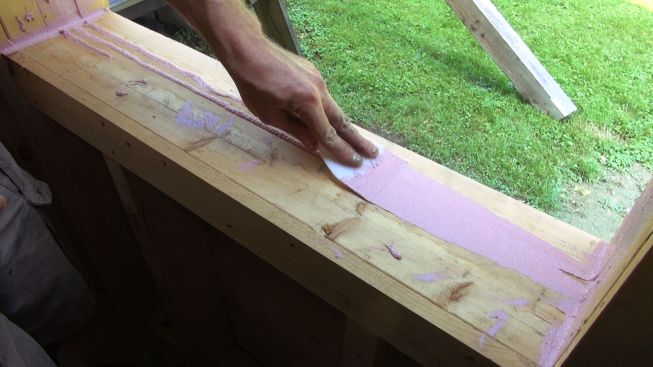
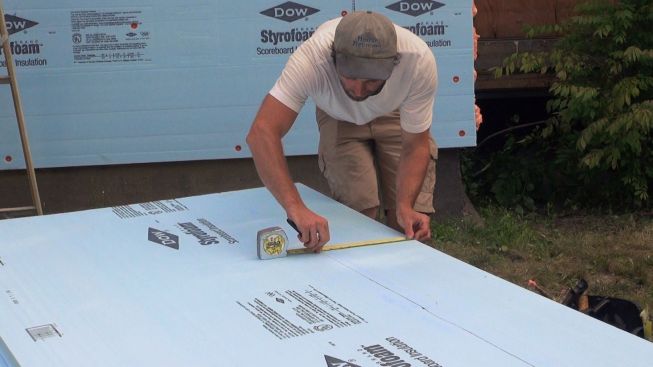
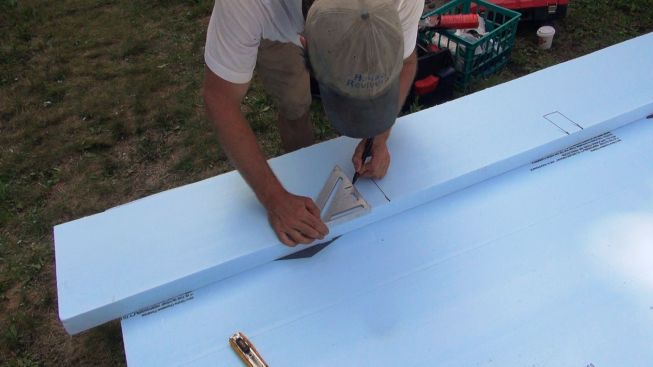
David Kelly scribes a piece of Dow Styrofoam as he pieces togeth…
David Kelly scribes a piece of Dow Styrofoam as he pieces together the XPS insulating drainage plane for the house.
Ted Cushman/JLC
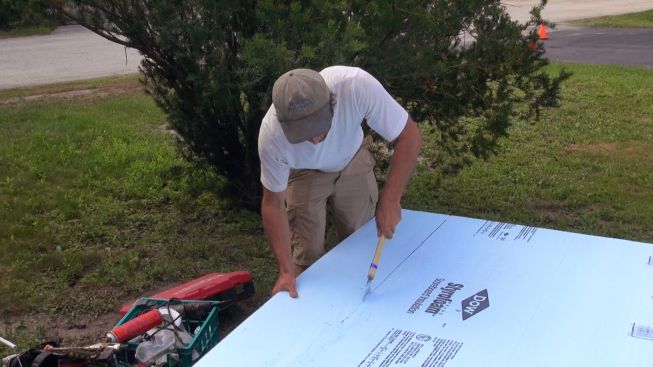
Kelly cuts a piece of Styrofoam with a pull-saw.
Ted Cushman/JLC
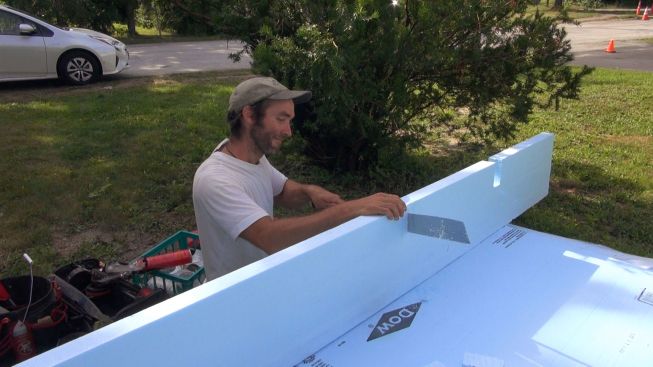
Holding the piece of XPS foam in place, Kelly marks it to lay ou…
Holding the piece of XPS foam in place, Kelly marks it to lay out cuts for fitting the piece around the existing rafter tails.
Ted Cushman/JLC
Kelly makes layout marks for cutting the piece of XPS foam.
Ted Cushman/JLC
Kelly notches out the foam as he prepares to apply it to the top…
Kelly notches out the foam as he prepares to apply it to the top of the wall.
Ted Cushman/JLC
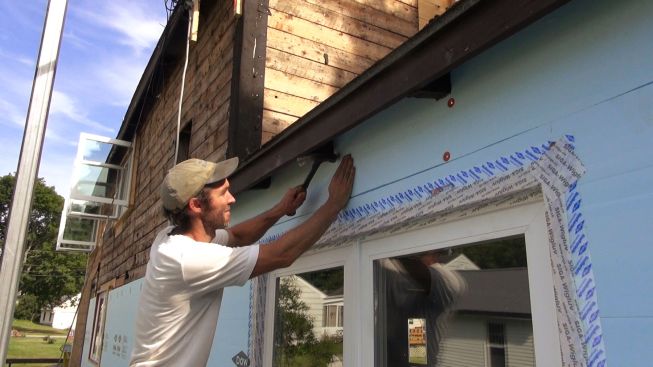
Kelly fastens the piece of foam in place with a few cap nails. T…
Kelly fastens the piece of foam in place with a few cap nails. The cap nails serve to hold the piece until strapping is applied over the foam and screwed to the house sheathing for a secure attachment.
Ted Cushman/JLC
After sealing the Dow Styrofoam to the window buck with Dow Weat…
After sealing the Dow Styrofoam to the window buck with Dow Weathermate tape, Kelly ties the window into the drainage plane. Here, he applies a small patch of Siga Wigluv tape at the window buck corner.
Ted Cushman/JLC
Applying another piece of Sega Wigluv tape at a window buck corn…
Applying another piece of Sega Wigluv tape at a window buck corner. The product is waterproof and vapor-open. It's also flexible, allowing Kelly to fit the tape to the three-dimensional corner shape.
Ted Cushman/JLC
Kelly works a piece of Siga Wigluv tape into the corner at the w…
Kelly works a piece of Siga Wigluv tape into the corner at the window bottom and presses the tape firmly against the substrate with a plastic card, supplied with the tape. The tape holds tenaciously to the window frame's vinyl face, even with just a half-inch overlap.
Ted Cushman/JLC
Kelly peels away the Sega Wigluv tape's split-paper backing, whi…
Kelly peels away the Sega Wigluv tape's split-paper backing, which allows him to precisely place the tape first against the window frame, and then against the framed opening.
Ted Cushman/JLC
Kelly applies more Sega Wigluv tape at the top of the window.
Ted Cushman/JLC
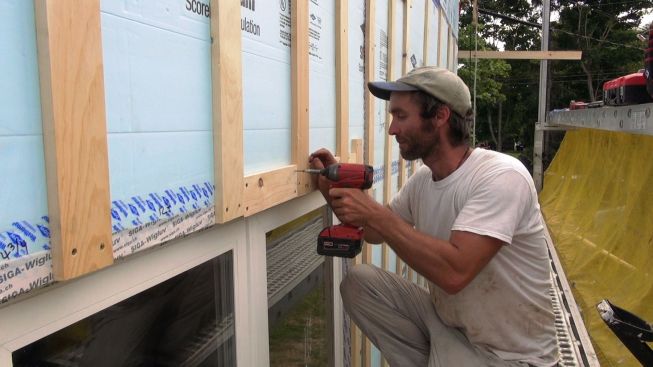
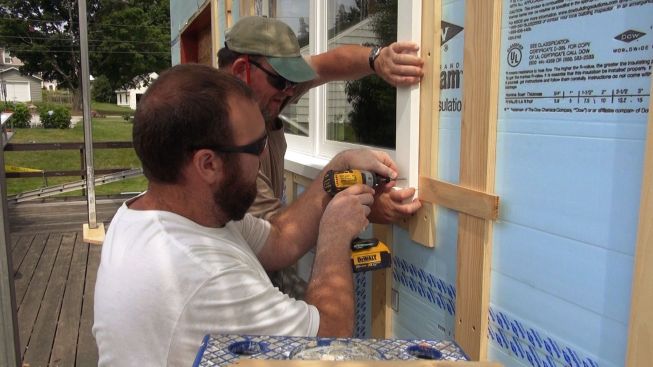
Carpenter Sonny Searles screws a piece of strapping over the foa…
Carpenter Sonny Searles screws a piece of strapping over the foam with GRK screws long enough to sink into the home's sheathing. The crew is using full-width 1×4 strapping for this job, in order to provide good nailing for the vinyl siding to be installed next.
Ted Cushman/JLC
David Kelly screws a piece of strapping underneath the window si…
David Kelly screws a piece of strapping underneath the window sill.
Ted Cushman/JLC
Kelly fills in the 1×4 wood strapping at the head of the window,…
Kelly fills in the 1×4 wood strapping at the head of the window, attaching it with long GRK screws.
Ted Cushman/JLC
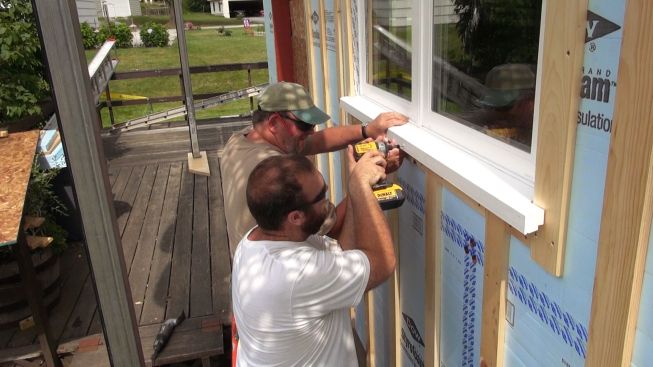
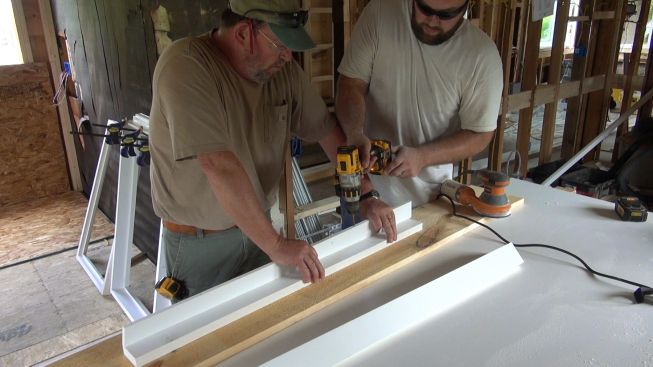
Carpenters Jay Kelleher (rear) and Rick Martin (foreground) scre…
Carpenters Jay Kelleher (rear) and Rick Martin (foreground) screw an Azek finish sill to the rough framing after tape sealing is completed.
Ted Cushman/JLC
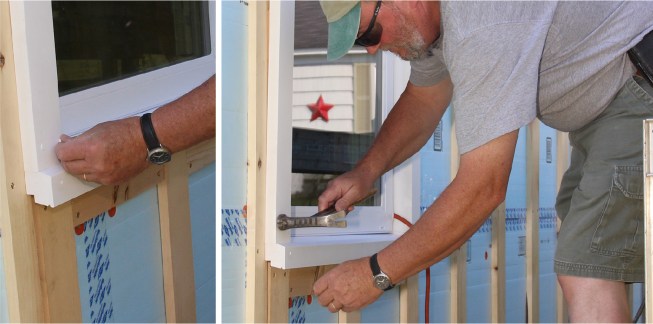
Jay Kelleher scribes a jamb extension. The original house walls …
Jay Kelleher scribes a jamb extension. The original house walls were out of plumb, but the windows were placed plumb, so the carpenters have to split the difference as they trim the windows out.
Ted Cushman/JLC
Jay Kelleher and Rick Martin screw Azek jamb extensions to windo…
Jay Kelleher and Rick Martin screw Azek jamb extensions to window casing as they trim out the home's windows.
Ted Cushman/JLC
Using shims and screws, Kelleher and Martin fit their window tri…
Using shims and screws, Kelleher and Martin fit their window trim pieces to the waterproofed opening and the strapped, insulated wall.
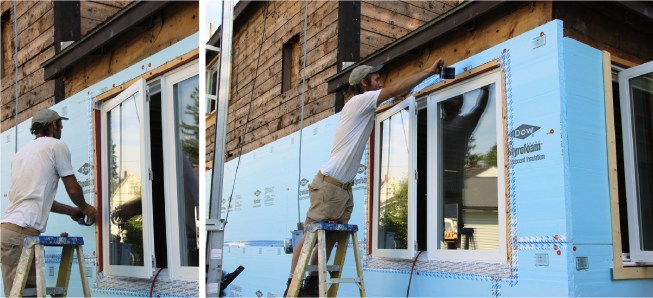
But that situation hasn’t stopped Bangor-based House Revivers from carving out a niche in the energy-upgrade market. The company has a six-home zero-energy development underway on Fern Street in Bangor (one of the city’s so-called “tree streets,” with names like Maple and Birch, where walkability and a neighborhood feel are attractions). And this month, JLC caught up with House Revivers at the job site where David Kelly, son of company founders Bob and Suzanne Kelly, is working with skilled carpenters Jay Kelleher, Sonny Searles, and Rick Martin on a complete gut-rehab of an old Bangor wood-frame house. The goal is to make the house airtight and well-insulated enough to be heated with a pair of mini-split heat pumps (one upstairs and one down), with enough solar photovoltaic panels on the roof to make as much power as the house needs every year.
JLC came along in time to see David Kelly applying Prosoco’s wet flashing system to the old home’s new window openings, and then to see Kelly and the crew installing new windows, beefing up the home’s walls with exterior-applied Dow extruded polystyrene (XPS) insulation, and tying the sheathing into the windows with builder’s tape. Take a look.