


unknown
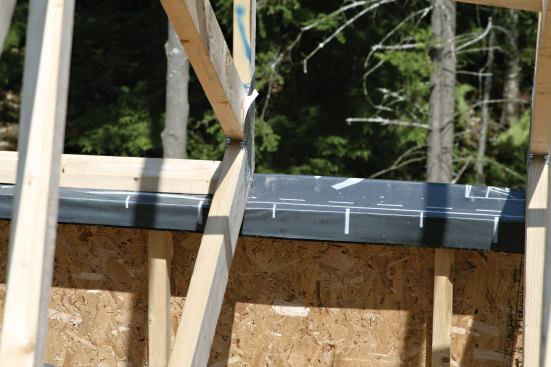
The carpenters attached an OSB gusset to the top plate of the 2x…
Lots of Insulation
Before the insulation contractor went to work, I wanted to run a preliminary blower-door test. If we passed at that point, I was home free. But if we failed, I would still have access to the leaks.
As it turned out, we cleared the 0.6-ACH50 bar on that first blower-door test. We found some minor leaks and patched them from the inside, then moved ahead with the insulation.
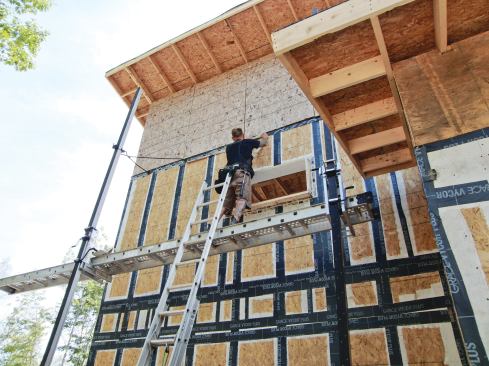
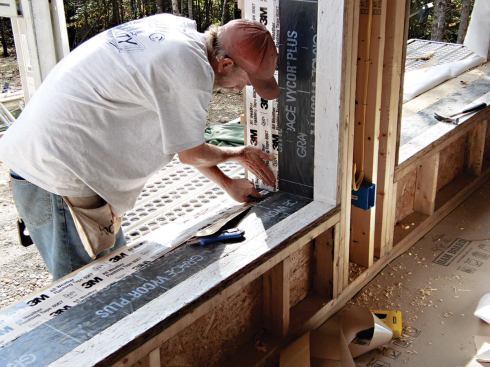
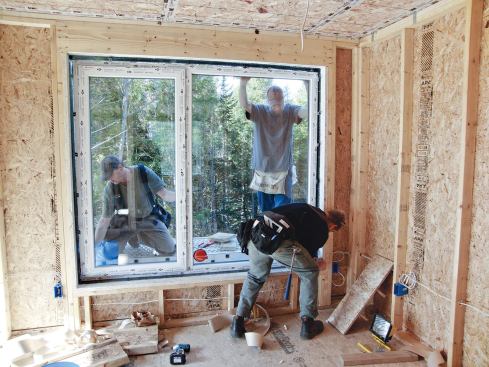
The weather forecast included a chance of rain and snow, so to avoid having the job interrupted, I decided to fill the I-joist cavities from inside the shell – even though that meant cutting holes in our OSB air barrier, which we had just meticulously sealed and tested. But I figured that it was better to go around and retape all the holes in the OSB than to have our insulation guys trying to work from outside the house on ladders and staging. The upper part of the I-joist cavities was accessible from the attic, and a lot of the wall blowing was done from up there. In areas of the walls that weren’t interrupted by windows, the insulators had a clear shot and could fill the entire cavity from eaves to foundation in one pass.
We encountered a slight glitch when we first started to blow insulation into the outer wall: Our installer had the blower cranked up to high pressure, and shortly after he started we noticed that the fiberboard sheathing was starting to bulge – far enough that it would clearly show up in the siding. Luckily we caught it early; the insulation guys reduced the pressure and the problem went away. We still had enough pressure to meet the insulation spec, but I’ll be looking at other sheathing materials for my next Passive House project.
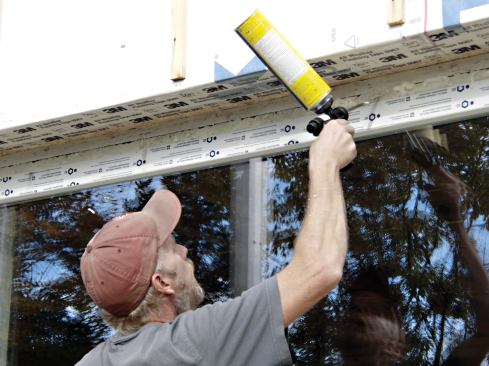
It took almost two full days to blow the walls and the attic – because we put in three or four times as much insulation as a typical house would take. When we were done and had taped up all the freshly cut holes, we set up the blower door again, this time measuring 53 cfm50 – or, relative to our volume, .287 ACH50.
Mechanicals
We followed Passive House guidelines for balanced ventilation, which call for 24 cfm of continuous exhaust from each bathroom plus 35 cfm of continuous exhaust from the kitchen, for a total of 83 cfm for the house. There’s no direct-vent range hood in a Passive House, so the kitchen range has a recirculating charcoal-filter hood.
The balanced supply air is ducted to the master bedroom (18 cfm for each occupant, or 36 cfm) and the second bedroom (18 cfm), and into the living room (the remaining 29 cfm). Passive House specs for the exhaust ventilation rates are based on German ventilation standards, but they also work out pretty close to the U.S. ASHRAE 62.2 standard of .35 ACH.
For this house, we installed a top-of-the-line energy recovery ventilator (ERV) – a ComfoAir 200 from Zehnder (zehnderamerica.com). With ERV equipment, you get what you pay for. This unit cost about $5,500, but it was a smart purchase. For one thing, the performance is astonishing: It’s 92 percent efficient and draws just 0.25 watt of power per cfm, or a little over 20 watts for the ventilation this house needs. Also, the unit comes as a complete kit that I was able to assemble myself, and my crew and I ran the ductwork as well, keeping installation costs down. Plus, we got excellent service; Zehnder’s technicians reviewed my ventilation plans and suggested a few tweaks, and a company rep came to our job to balance the system.
Heating. Given the superinsulated shell, the passive solar gain from the windows, and the high-performance ERV, the home’s heating needs are close to zero. For this project, we chose a 12,000-Btu Mitsubishi Mr. Slim mini-split heat pump (model MUZ-FE12NA), mounted on an exterior wall. I paid $1,500 for the unit at a local distributor, with installation costs on top of that. This is the kind of heater you might use for a room addition in a conventional Maine house, but it will be able to heat this entire house when it’s needed.
The heat pump is rated at 22 SEER as an air conditioner; as a heater, it has a coefficient of performance (COP) above 4 at 47°F. It maintains 92 percent of its rated capacity even at 17°F, and will heat the house until outdoor temperatures hit 13 degrees below zero. During the late phases of construction, with outdoor temps in the 20s, I measured supply-air temperatures at the heating register at 105°F. There’s only one indoor register, in the condenser unit itself, which is mounted high on an exterior wall; the small air ducts for the ERV system will serve to distribute the air around the house. I also installed 15 feet of electric baseboard in the house – 1,800 watts’ worth – but that’s strictly for emergency backup in case the heat pump needs repair.
Domestic hot water. Hot water is supplied by a Steibel Eltron on-demand electric water heater. PV will cover the load in the sunny months, and hopefully the cost will zero out during the year under the utility’s net metering program.
High Expectations
We finished the house in January of this year, so the building hasn’t been through a complete heating season yet – but we already know that it is exceeding our hopes and expectations. After the house was insulated but before it was completely drywalled and finished, we had about six weeks of inside finish work left to do. Outside temperatures were down in the teens, but the inside of the house stayed a consistent 68°F. If we turned off the heat pump when we went out for the night, the house would still be above 66°F when we came back in the morning.
I am pretty sure that the ERV outperforms its listed specs, too. I measured the supply air at the diffuser one morning when it was 7°F outside and the supply was barely two degrees cooler than the indoor set point. On most sunny winter days, I don’t think this house will need much additional heat.
Best of all, we hit our budget target. The house came in at $135 per square foot.
Christian Corson owns EcoCor Design/Build, based in Belfast, Maine.